|
Revell's 1/32 P-47D
conversion
Tandem T-Bolt
by Richard Marmo
|
 |
|
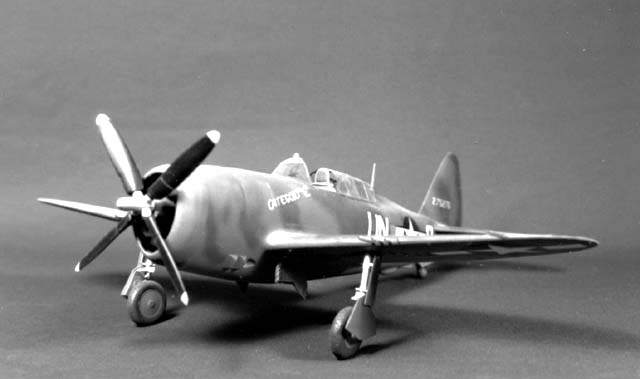
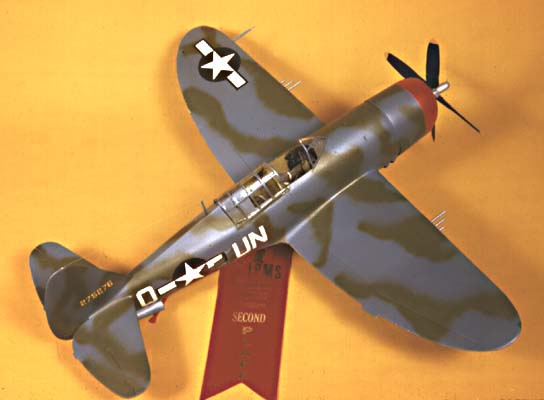
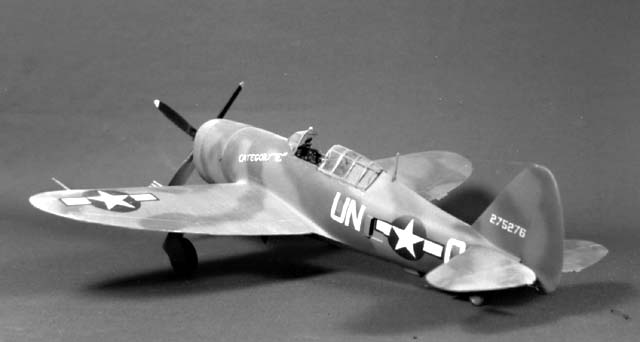
Republic P-47D
Thunderbolt "Bubbletop"
Two-Seater Conversion |

HyperScale is proudly supported by Squadron
Today's model builders (meaning those who have only been building for
the last 15 or maybe 20 years) are used to high quality kits whose parts
can literally be held together and have the seams virtually disappear.
Then there's the aftermarket where you can buy readymade castings (or
photoetch frets) of just about any detail part you care to name. Put all
of this together and the result is a gorgeous, superdetailed model that
truly is a work of art.
But is it model building?
Back in the olden days (God, I hate to use that phrase!),
manufacturers gave you kits of subjects that we all wanted and that we
thought were the epitome of quality and detail. They were expensive,
too. Some were as much as $4 or $5 or even more. If you wanted to
improve it…or superdetail it for a contest, you did it by actually
building the necessary bits and pieces. The finished model was something
we were proud of and that frequently was a prizewinner in local and even
national contests. Today, that same model would be ashamed to be seen on
the shelves alongside the modern efforts that we've all become used to.
So let's go back 30 years or so (32 in this case) and see what was
showing up in magazine articles at that time.
In November 1972, one of my articles appeared in a now-defunct magazine
(that sold for the spectacular price of $1.25 per month) describing the
conversion of the then-new 1/32nd scale Revell P-47D Thunderbolt
(Razorback version) into a field-mod two-seater. Keep in mind that the
following article was originally written in 1972 with the products and
techniques available at the time. If nothing else, it'll provide a
window into the way things used to be done. And along the way, maybe a
laugh or two…especially when you see the names of certain products that
no longer exist and you may not have even heard of.
By the way, for those of you who don't know, I'm a founding member of
the IPMS/USA (IPMS/USA #2) and make my living as a freelance writer/modelbuilder.
Anyway, here it is. I hope you enjoy this little jaunt into the past.
And if by chance you'd like to see more of these older articles, just
let me know at
tennexican@mindspring.com .
Believe me, I've got plenty of them.
Republic's P-47 Thunderbolt was, at first sight, invariably greeted
with the question "That's a fighter?". Some pilots never liked the
aircraft, while others found that she grew on them. Occasionally, entire
fighter groups (notably the famed 56th F.G.) came to love the Jug so
intensely that they ended the war flying Republic's monster.
Inevitably, field mods found their way into virtually every aircraft
type, and the Jug was no exception. Whether as a squadron hack or VIP
transport, a number of 2-seat Jugs eventually cropped up. While there
were a couple of factory built 2-seat trainers (designated TP-47G), most
were the result of field mods. About the only thing the two types had in
common was their beginning as P-47D Razorbacks. From there, they went
their separate ways.
 The
field modified version is the subject of this article, using Revell's
1/32 P-47D Razorback kit as its basis. Other materials you'll need are a
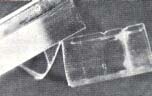
second P-47 kit for the canopy, Squadron Sheet Styrene and Green Stuff. The
field modified version is the subject of this article, using Revell's
1/32 P-47D Razorback kit as its basis. Other materials you'll need are a
second P-47 kit for the canopy, Squadron Sheet Styrene and Green Stuff.
The wings and stabilizers can be assembled per the instructions and all
the rivet detail sanded off. One of the lesser evils of the kit is an
over-abundance of fence posts that pass for rivets. Their removal is a
marked improvement.
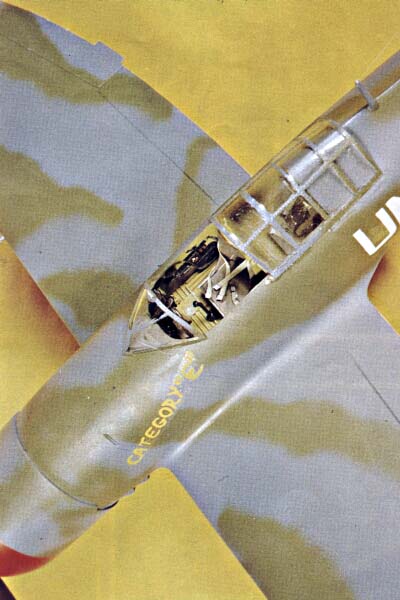
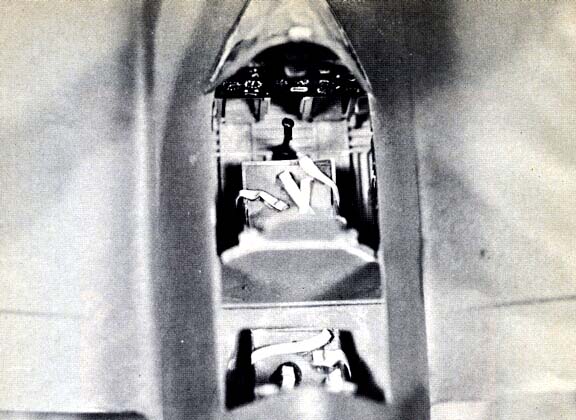
The original cockpit sub-assembly can be completed according to the
instructions. However, I would suggest covering that gaping crack in the
seat with a piece of .010 sheet styrene cut to shape, rather than try to
fill the crack with putty. Besides being more effective, it's faster.
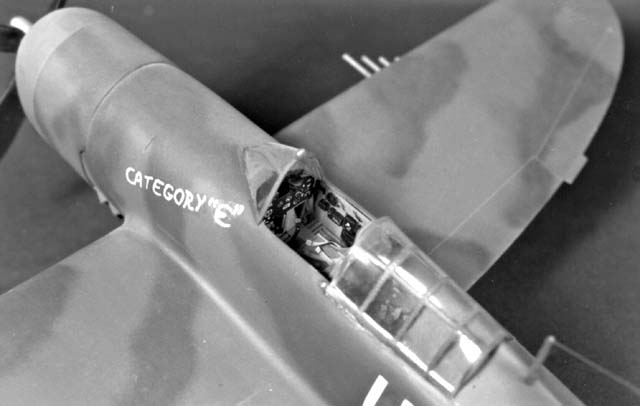
To make room for the second seat, cut the spine back to a point even
with the aft edge of the canopy trough. After removing the spine
section, spray the interior chromate green and install the kit interior.
Now you can start on the second position floor and bulkhead. Best bet
here is about .040 sheet styrene, with the time tested trial-and-error
method used to obtain a good fit. Don't forget to cut a second bulkhead
to cover the mold cavity in back of the pilot's armor plate. |
 Home
| What's New |
Features |
Gallery |
Reviews |
Reference |
Forum |
Search
Home
| What's New |
Features |
Gallery |
Reviews |
Reference |
Forum |
Search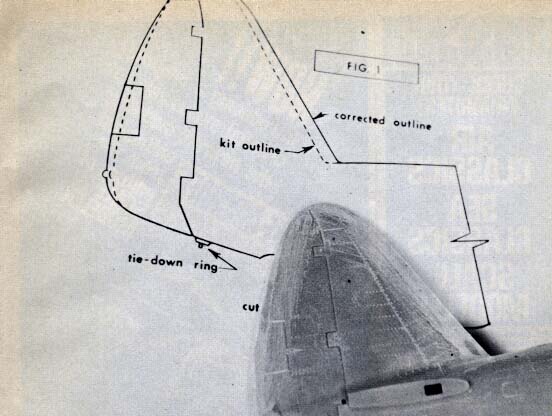
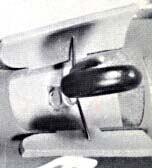
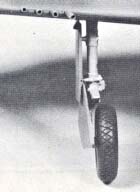
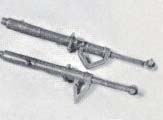 The
main gear struts must be cut down to the correct length. Revell provides
them in the fully extended configuration, not as they would appear when
the aircraft is at rest on the ground.
The
main gear struts must be cut down to the correct length. Revell provides
them in the fully extended configuration, not as they would appear when
the aircraft is at rest on the ground.