|
ProModeler's 1/48 scale
P-47N Thunderbolt
by Symon Rankine
|
 |
|
Republic P-47N
Thunderbolt |

HyperScale is proudly supported by Squadron
Just about a year ago some friends of mine and I decided on a P-47
group build.
I had just picked up an SNJ bare metal finish paint set and decided I
would use it to finally get over my natural metal finish phobia. I was
really excited to give it a try but I only had one P-47 on the shelf and
that was the Pro Modeler P-47N which seemed like a good choice at the
time seeing I had got it cheap and feared my NMF attempt might end in
disaster.
Without further delay I was cutting plastic.
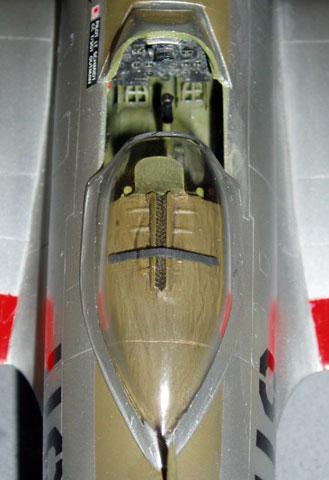
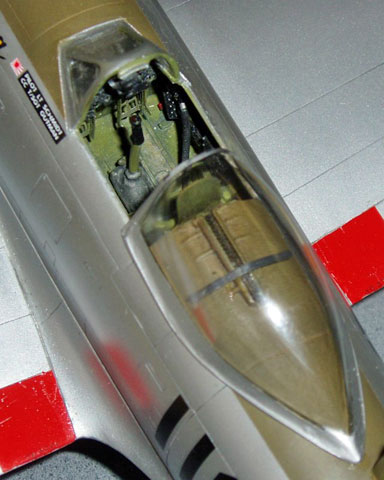
I had bought an Eduard upgrade set for the model and was surprised to
see that it replaced the entire cockpit except for the control stick but
after this was put together I could easily see why, the kit cockpit’s
detail was soft and looked under scale.
 I
used The Detail & Scale P-47 book as a reference which said that unlike
earlier models, the –N had a zinc cockpit so that is what I used. I also
added arm rests to the seat as Eduard had neglected this as well as a
scratch built oxygen hose and some other miscellaneous odds and ends. I
used The Detail & Scale P-47 book as a reference which said that unlike
earlier models, the –N had a zinc cockpit so that is what I used. I also
added arm rests to the seat as Eduard had neglected this as well as a
scratch built oxygen hose and some other miscellaneous odds and ends.
The Eduard set replaces the exhaust vents as well as the turbocharger
waste gates. The exhaust vents were very time consuming to add but well
worth it and both of these definitely improve the model.
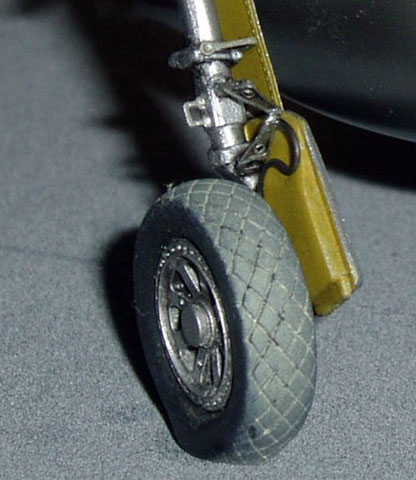
Eduard also uses brass the replace the wheel wells which is also a real
improvement but these do not fit well. The Pro Modeler kit has a really
unusual design here in which the landing gear legs are cast into one of
the parts that make up the well. If you were to build the kit as
designed you would have to add the gear at this time which I was loath
to do. Instead, I cut the gear legs off, drilled them out and placed
copper wire in the holes for future strength and alignment. I added
copper brake lines and the Eduard parts to the gear legs which improved
them a great deal as the detail on these parts was soft and required a
fair amount of cleaning up. As with the landing gear, Pro Modeler
designed the model with the antennas and gun barrels cast into parts
that must be added on at an early stage virtually insuring their
destruction so these too were cut off and their location points drilled
out so as to be added on later.
By this time the project was getting way out of hand and was in serious
danger of being set aside but as I had come this far I talked myself
into pressing on as I knew that if I didn’t keep going the kit would
never see the light of day again and I didn’t want to bail out on the
group build even if at this point I didn’t have a hope of meeting the
deadline so I pressed on.
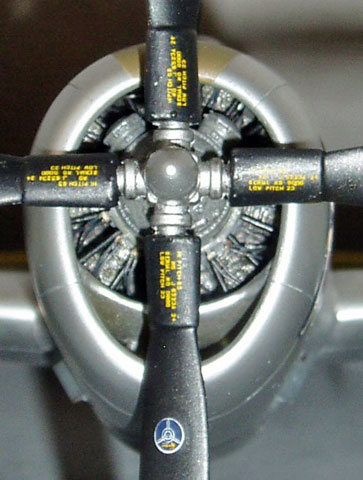
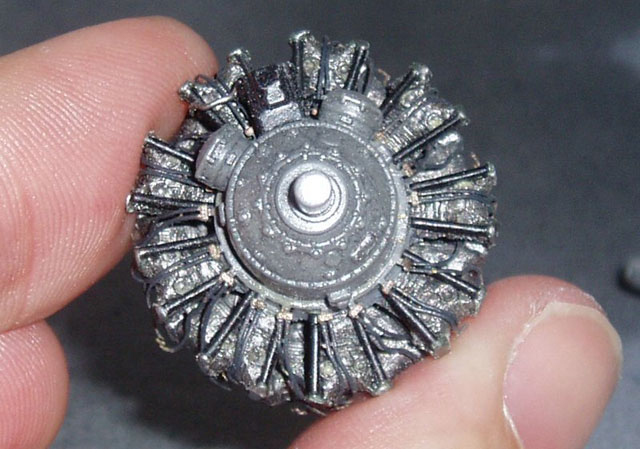
I had heard the engine on this model was not bad and while the crank
case looked O.K., I felt that the cylinders looked soft so I cut these
all off and replaced them with resin ones from an abandoned project. I
added brass pushrods and used the Eduard plug wire set that improved the
engine a lot.
The fit of the airframe was fair but the lower wing is cast in one piece
and the fit of the aft lower wing section to the fuselage was not good
and so required considerable cleaning up.
I added navigation lights I made from acrylic rod at this time and
drilled out the positions where the I.D. lights on the lower wing would
later be replaced with MV Products lenses.
Once the airframe was together it was polished with sanding pads used
for wet sanding car models that went up to 12,000 grit. This was
necessary as the skin had a rough texture to it. I used Mr. Surfacer 500
to fill in many small blemishes but still needed to fill some gaps with
a putty mixture I have been using for some time. I mix Squadron green
putty with Testers liquid cement at about a 50/50 ratio creating a putty
that may be applied with a brush but when dry requires far less sanding.
I also added the kit front canopy at this time and then sanded and
polished it in to place as it would be painted NMF as well.
Next the airframe and all the additional parts that were to be silver
were painted with the SNJ paint. This went on extremely well with very
little difficulty. I sprayed several coats of the SNJ paint as there
were still some blemishes that needed to be corrected but in all this
turned out to be one of the easiest steps I had to do on this build. The
SNJ polishing powder was used and it did help the model but was very
difficult to control and had a habit of getting everywhere. The
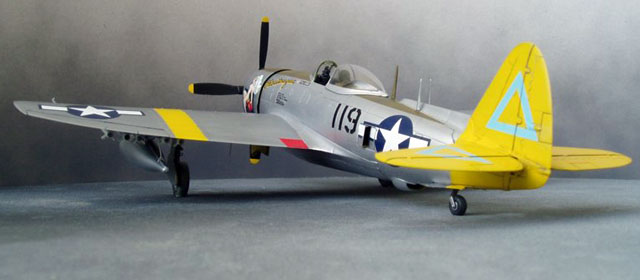
empennage was painted yellow by decanting Testers yellow spray directly
from the can into an airbrush bottle and then immediately applied with
an airbrush. The anti glare panel was masked off and painted with Polly
Scale Olive Drab and then darkened at the panel lines and edges with a
different shade of olive. I did get some damage to the silver paint from
the masking but most of this was corrected with careful application of
rub n’ buff silver paste. It wasn’t a great fix but it was all I had and
I was getting to the “just get it done” stage.
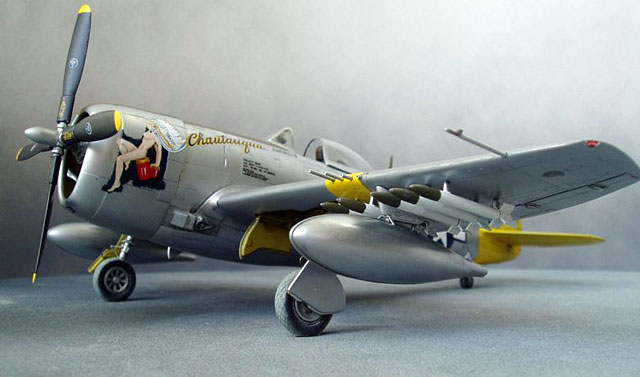
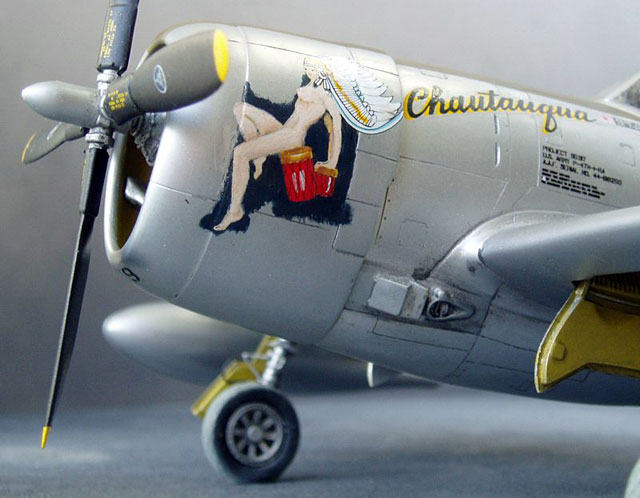
When it comes to nose art I feel that it should have look like an oil
painting and not a print but this is difficult to get with decals as
they are limited in the number of different colors they can use. I
therefore used the decal from Three Guys Replicas and hand painted the
artwork with Polly Scale paint on the dry decal. Later the nose art
decal was applied using the normal method without difficulty. The decal
sheet provides a blue background to go under “Mrs. Chautauqua” but this
turned out to not fit so the aria around the nose art was hand painted
blue once the decal had set.

All decals were trimmed closely with a fresh exacto knife to avoid
any silvering and were applied using the Micro Sol, Micro set system.
The decals settled well, were on register, and had good color but needed
several applications of setting solution to adhere well to the model.
This is when a typical modeling moment struck that made me glad I had to
go away on a business trip for a couple of weeks. The aircraft I was
building had two foot wide yellow bands on the wings that were very
close to the pylons that had already been added and I had forgot to
paint these. What I got back I began the careful masking process and
again painted these with decanted testers spray paint. This turned out
reasonably well but despite my use of low tack drafting tape there was
still some minor damage to the finish of the upper wing that I was
unable to correct. At this point the whole kit was given a “sludge wash”
of Polly Scale gray paint, water and dish soap to emphasize the panel
lines.
I was now on the final lap and could see the light at the end of the
tunnel!
The landing gear was attached and the wheels were replaces with a set
from True Details. The canopy was added but did not fit in the open
position so a Squadron vacuum-formed part was used. I could not find an
adequate supply of metal tube to replace the kit gun barrels so the
originals were carefully cleaned up, drilled out, and attached to the
model. The antennas had been either lost or found unusable so these were
replaced with odds and ends from the spares box. The pitot tube was also
replaced with a part made up of several bits from the spares box and
drilled out with a heated pin.
I really love most of the Pro Modeler releases that have come out
over the years but I am sad to say not this one. Much of the detail was
soft but correctable. What was this model’s greatest drawback was the
odd engineering in which many small detail pats were cast on to a larger
component. While this would no doubt help with alignment for a new
modeler it ended up costing me time to work around. I have not seen this
type of design on other Pro Modeler kits so I believe that the P-47N is
something of an anomaly and so I will not hesitate to buy any of their
kits in the future.
Many people tell me I was crazy to stick with this kit but in the end I
did like the challenge and I am happy to have a P-47N on my shelf.
As for my NMF phobia, it is long gone and while it does require more
time and effort it is not as tough as I had convinced myself it was. I
will not hesitate to build a metal finish model in the future so in the
end I feel this project was a success as I now have a whole stable of
silver airplanes to look forward to!
Upgrades used:
Eduard 48-236
Squadron 9503
Three Guys Replicas 48-015
True details 48-026
MV Products Lenses LS 30, 31, 32
Click the thumbnails below to view larger
images:
Modelling the P-47
Thunderbolt
Osprey Modelling 11 |
|
|
|
|
Author: Brett Green
US Price: $17.95
UK Price: £12.99
Publisher:
Osprey Publishing
Publish Date:
July 25, 2004
Details: 80 pages; ISBN: 1841767956 |
|
|
Model, Images and Text Copyright © 2005
by Symon Rankine
Page Created 10 February, 2005
Last Updated
10 February, 2005
Back to
HyperScale Main Page |
 Home
| What's New |
Features |
Gallery |
Reviews |
Reference |
Forum |
Search
Home
| What's New |
Features |
Gallery |
Reviews |
Reference |
Forum |
Search