|
Hasegawa's 1/32 scale P-51D
Mustang
"Dizzy Rebel"
by
Ian Robertson
|
 |
|
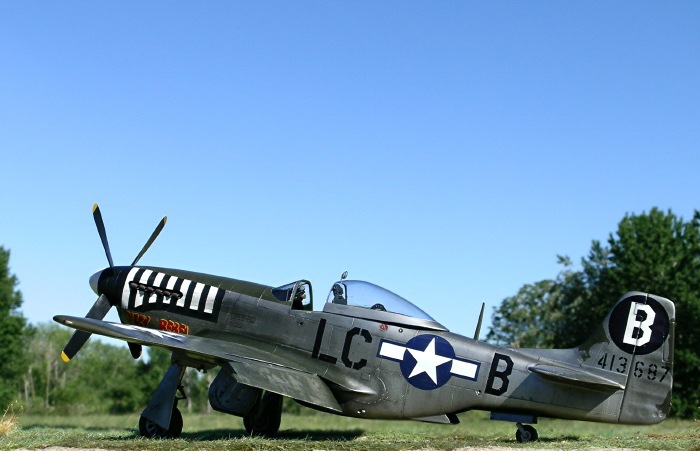
North American P-51D
Mustang
"Dizzy Rebel" |

Hasegawa's 1/32 scale P-51D Mustang is available online from Squadron.com
While searching the Little Friends website (
http://www.littlefriends.co.uk
) for modeling inspiration, I came across several photographs and a
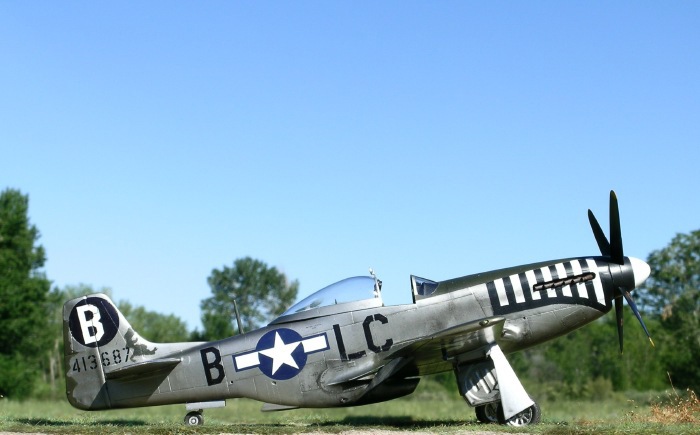
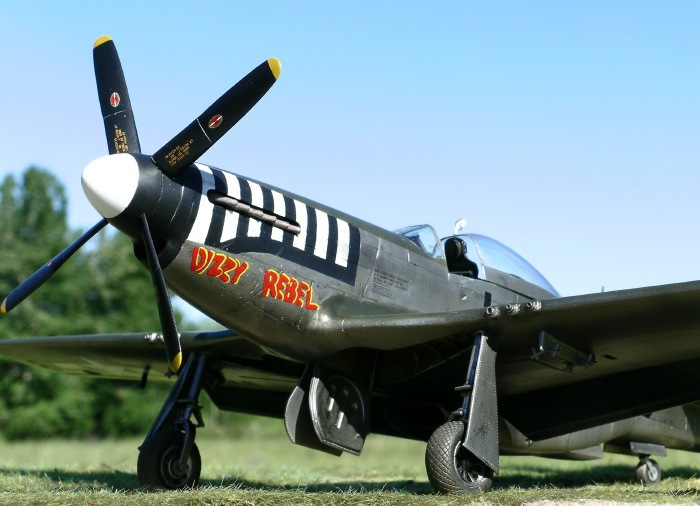
color profile of Lt. Robert H. King’s P-51D “Dizzy Rebel”. The catchy
name, distinctive black and white nose bars of the 20th FG,
and weathered paint on the wings made “Dizzy Rebel” the perfect choice
for a 1/32 scale Mustang project.
According to the Little
Friends website, the P-51D “Dizzy Rebel” (LC-B, serial 44-13687) was a
long-serving member of the 77th FS, having previously been Capt. Harold
Gjolme's “Duration Plus 6”, then Capt. James Herbert's “Paper Doll”,
before being reassigned to Lt. King. The aircraft was finally lost when
Lt. David Baldock was killed in a crash-landing at Vresse, Belgium on 23
August 1945.
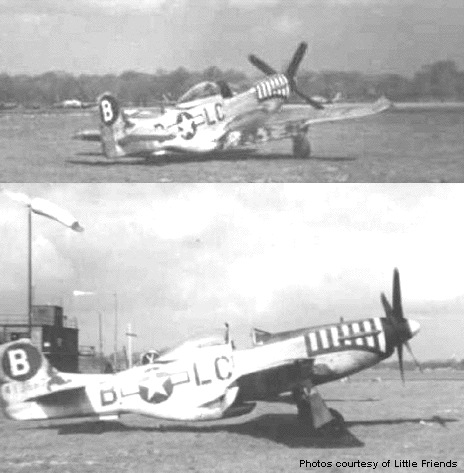
Below are photographs of
Lt. King, who hails from Wilmington, NC, and his aircraft “Dizzy
Rebel”. These images were posted with the permission of Peter Randall,
webmaster of Little Friends.
Click on the thumbnails
below to view larger images:
The Kit
Hasegawa’s 1/32 P-51D Mustang is an older
generation kit that has received considerable criticism among those
familiar with the subtleties of the Mustang’s shape and design, as well
as from those simply anxious for a newer tooling. I will not address
those issues here because overall I found the kit to be a satisfactory
platform for a larger scale Mustang, plus it was the best option
available (Note: shortly after I began construction Dragon
announced a new 1/32 P-51D tooling for release later in 2006. Time will
tell how it stacks up to the competition).
I made the following modifications and additions to
the kit:
Scratch Modifications
- Removed raised rivet, panel, and hatch details
on all surfaces. Filled trench-like panel lines on fuselage.
Scribed new panel lines on fuselage (but not on wings) and added
subtle rivet details to fuselage.
- Opened the rear of the wheel wells back to the
main wing spars
- Dropped the flaps
- Added machine guns; reshaped gun fairings
- Printed custom decals on Testors Decal paper
(all except national insignias and propeller markings). Nose art
was designed in Photoshop; fuselage codes and serial numbers were
modified and upsized from other sources. Aircraft data plate was
modified with correct serial number.
Aftermarket Additions
- Wingz resin cockpit set
- Eduard photoetch placards
- Moskit hollow metal unshrouded exhausts
- True Details resin wheels
- Squadron vacuform canopy (rear section only)
with scratch built brace
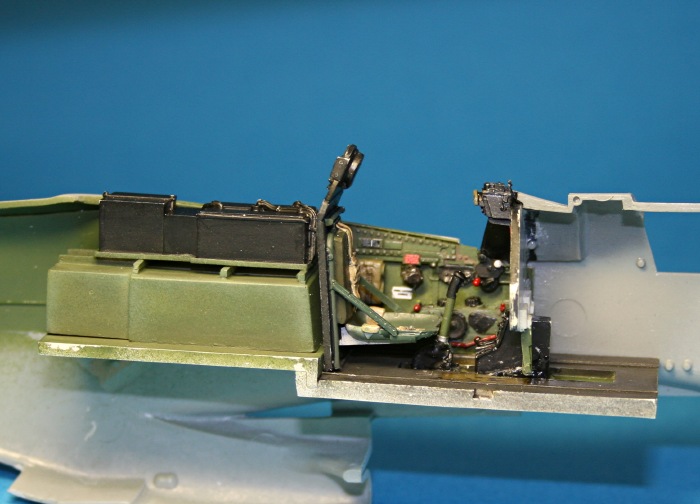
Cockpit
The Wingz resin cockpit is well detailed and fits
beautifully into the Hasegawa model. A recent review of 1/32 P-51D
cockpit sets by Craig Quattlebaum (go
to the reviews section of
http://www.largescaleplanes.com/)
identifies some inaccuracies in the Wingz set, so you may want to refer
to his article or check your references.

For me the Wingz cockpit
was perfectly adequate, plus I had already completed my model before
Craig’s article was published.
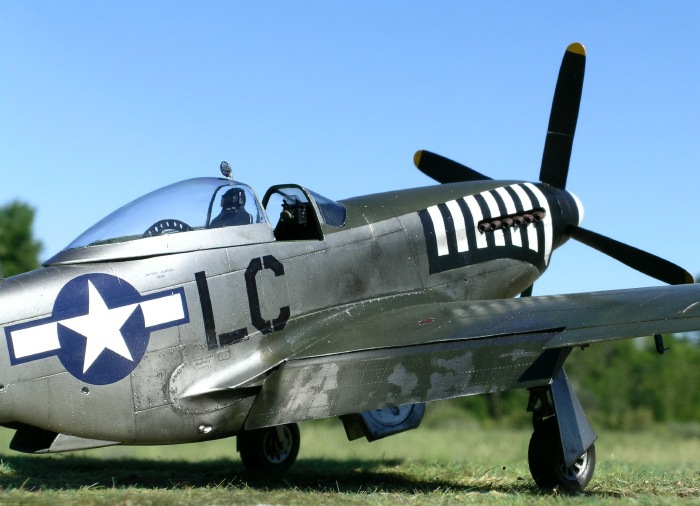
Exhausts
Hasegawa provides only shrouded exhausts in their
kit. However, the exhausts on “Dizzy Rebel” were not shrouded (see the
photo of Lt. King). Luckily, I was able to purchase Moskit’s 1/32 scale
unshrouded hollow metal exhausts for my project.
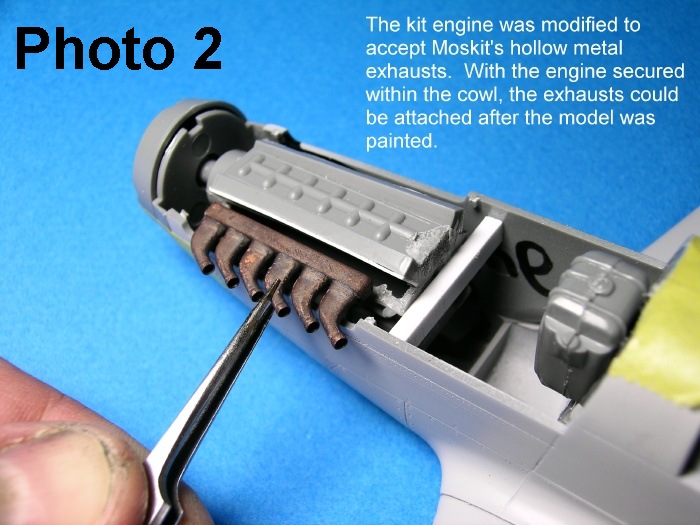
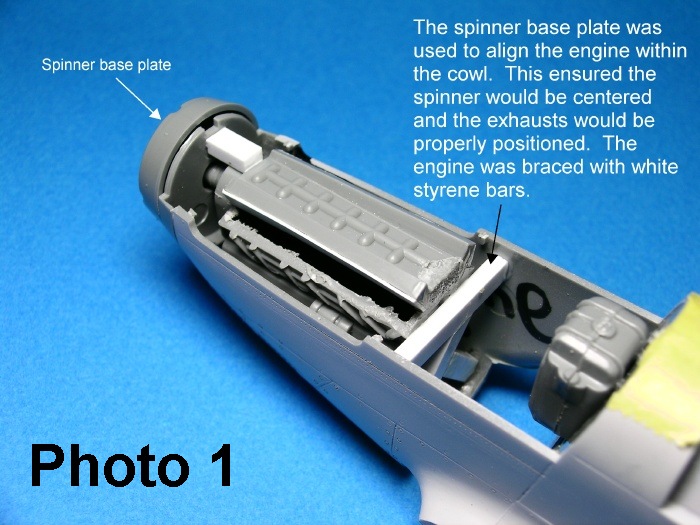
Attaching the Moskit exhausts requires careful
planning – they do not simply ‘drop in’. Because the kit’s exhausts are
designed to mount onto the engine, it seemed obvious that I should
modify the engine to accept the Moskit exhausts. However, when one
starts working with the kit’s engine, it becomes apparent that Hasegawa
provides no solution for mounting the engine within the nose of the
model! You gotta be kidding me!! This major oversight is a problem
because the engine also serves as the mount for the spinner, so if the
engine is positioned askew the spinner won’t be centered on the nose.
I approached the problem by working backwards.
First, I mounted the spinner plate to the engine while the engine was
sitting loosely within the nose. I then secured the spinner plate to
the cowl with tape, making sure that it was centered. With the spinner
in place I knew where the engine should be located within the nose. I
fixed the engine permanently into place using plastic braces (photo 1).
Using a Dremel cutting wheel to remove excess
plastic, I modified the engine to accept the Moskit exhausts at the
correct angle (photos 2 & 3). Note that in photo 3 the exhausts were
not permanently attached – this step was reserved until construction and
painting were complete.
Click on the thumbnails
below to view larger images:
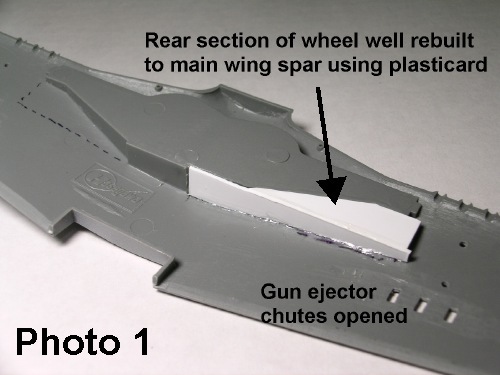
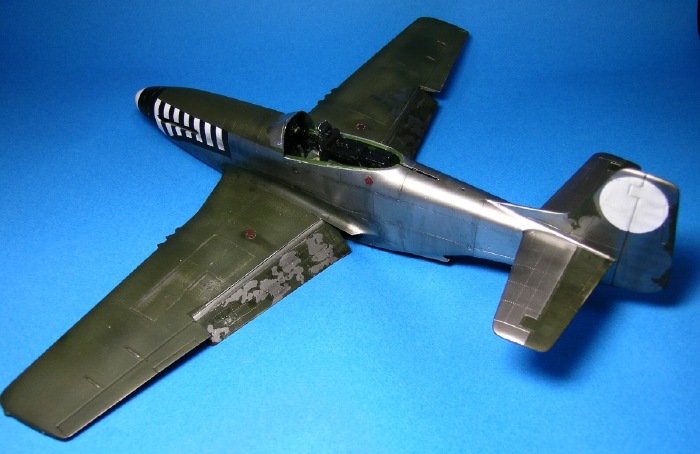
Wheel Wells
All current Mustang models incorrectly portray the
wheel wells as being defined in size by the perimeter of the gear doors
(any bets for the 1/32 Dragon release?). In reality, the rear portion
of the wheel well remains open as far back as the main wing spar.
Therefore, I removed the rear section of each wheel well and extended it
with plasticard to the main wing spar (Photo 1).
I also added internal supports made from strips of
styrene (Photo 2).
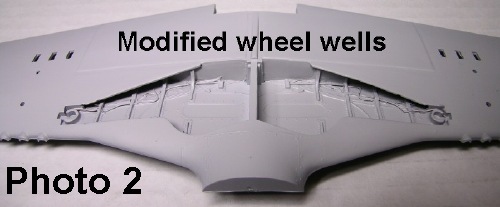
The rear spar was painted yellow chromate whereas
the remainder of the wheel well was painted interior green.
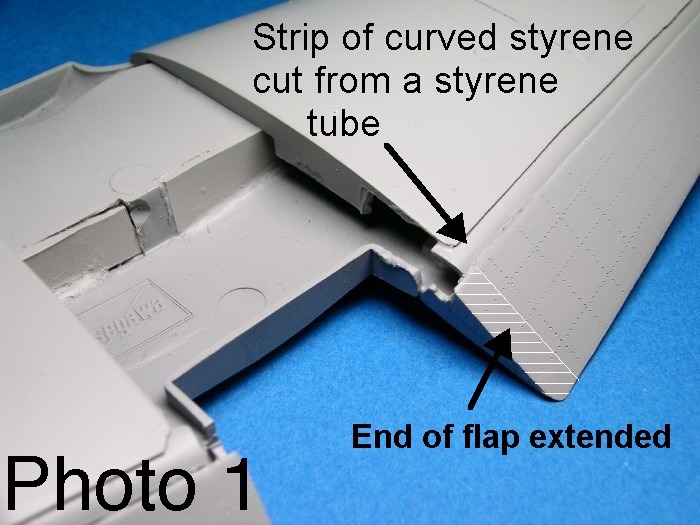
Flaps
Dropping the flaps was a straightforward
procedure. First, I removed the flaps from the wings and glued the
upper and lower pieces together. I then extended the inner end of each
flap (on raised flaps this area is hidden under the wing root fairing)
(Photo 1).
I also thinned the wing root fairing along the
trailing edge because this area was exposed with the flaps dropped
(Photo 2).

The curved inner surfaces of the flaps were created
using strips cut from styrene tube (Photo 1).
Guns
The gun details and fairings on the Hasegawa kit
are not very good. As shown in Photo 1, the fairings on the upper side
of the wing stop abruptly. I used Tamiya putty to reshape the fairings,
although in Photo 2 this is hard to discern. I also made new guns
muzzles and blast tubes from syringe tubing and styrene tubing,
respectively.
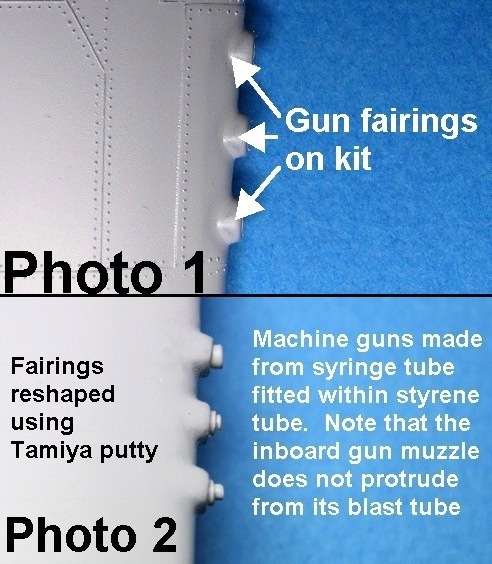
Note that the inboard gun muzzle was staggered such
that it did not protrude from the blast tube.
Landing Light…..I mean mirror
Hasegawa provides a landing light that is nowhere
close in appearance to the real thing. However, it seemed well suited
as a rear view mirror on the canopy, so that is how I used it.
The landing light is still missing from my model.
One of these days I’ll scratch build one….or not.
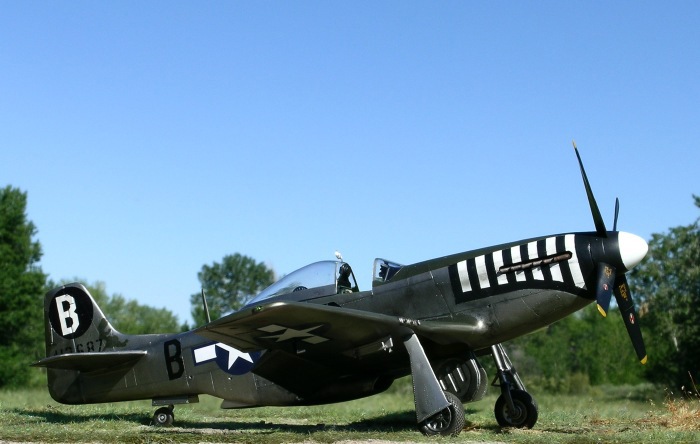
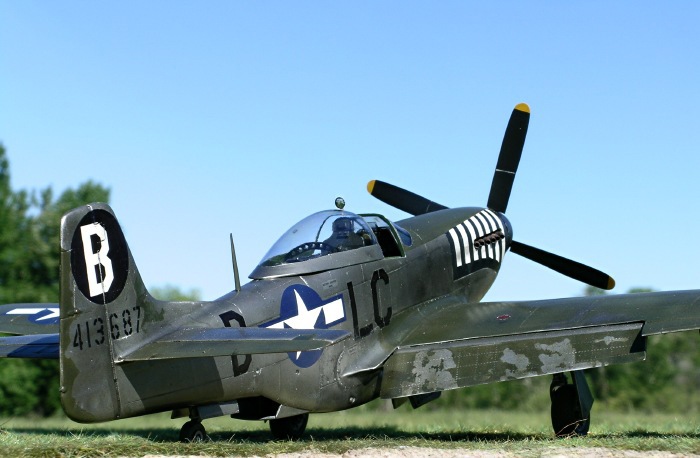
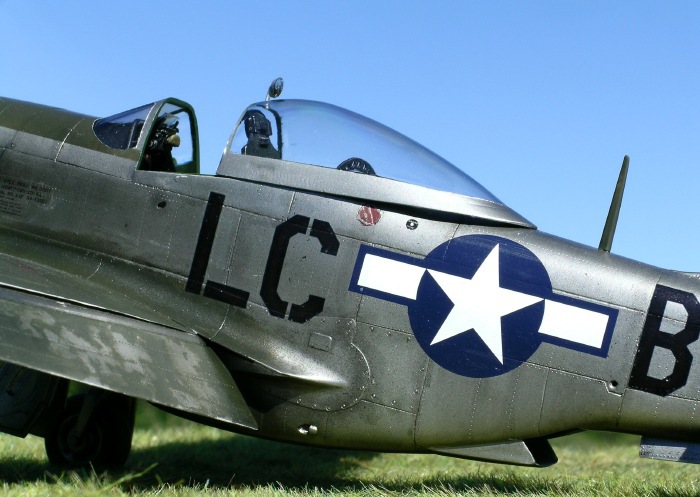
Camouflage
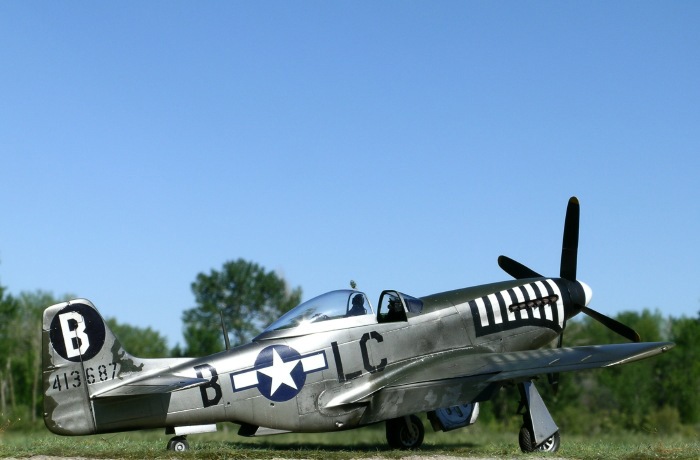
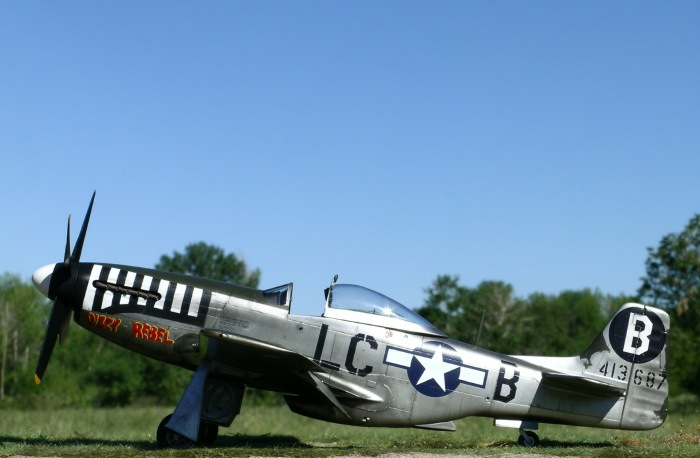
Dizzy Rebel’s fuselage was natural metal, whereas
the upper wings, elevators, and portions of the tail were olive drab (or
possibly RAF green). I chose olive drab for my model because the wings
seemed to be the same shade as the antiglare panel on the cowl. The
camouflage on the wings was heavily weathered, making this aircraft a
particularly appealing subject. There were even large sections of
chipped paint on the flaps.
Once basic construction of the model was complete,
I primed the entire model with Tamiya fine grey surface primer and
sanded the surfaces smooth with a micromesh sanding cloth. Any visible
seams or scratches were patched up with Tamiya putty, sanded, and then
primed and polished again.
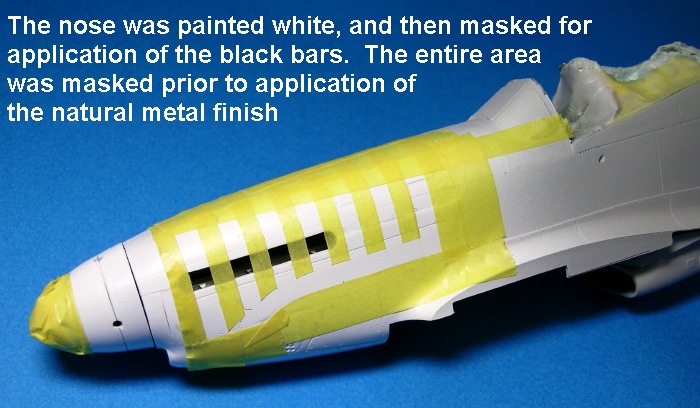
Before applying the natural metal finish, I painted
and masked the black and white bars on the nose. Some aircraft in the
20th FG group had black bars over natural metal, but photos
of LC-B clearly show there was intervening white. I also painted and
masked white circles on the tail in preparation for the “B” decals.
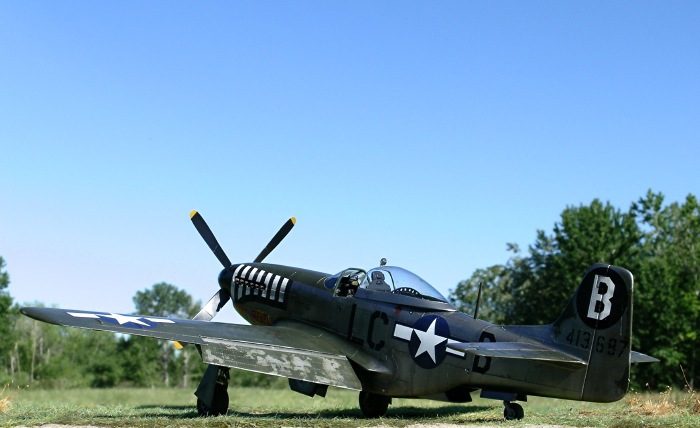
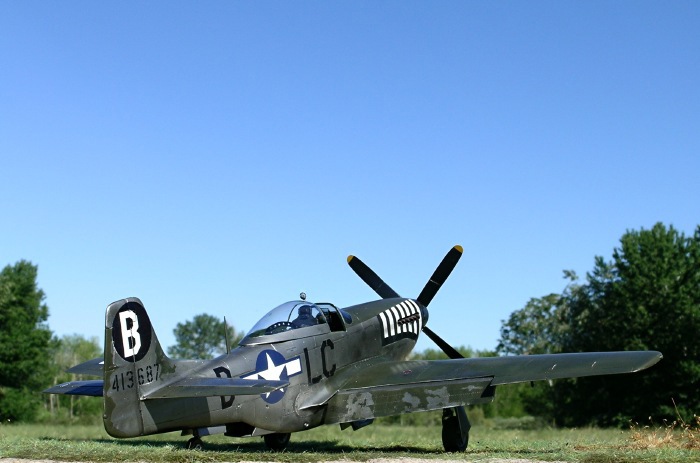
With masking in place, various shades of Alclad II
metalizer (duraluminum, semi-matte aluminum, aluminum, dark aluminum,
and polished aluminum) were applied over the entire model. To weather
the metal surfaces I brushed on sloppy washes of thinned Tamiya black
acrylic. I find this an excellent technique for bringing out a worn
metallic look over an Alclad finish. An added bonus of the wash is that
it accumulates in panel lines, rivets, and other recesses without being
overly uniform. Should unwanted pooling of the wash occur, the stains
can be sprayed over with Alclad or sanded out.
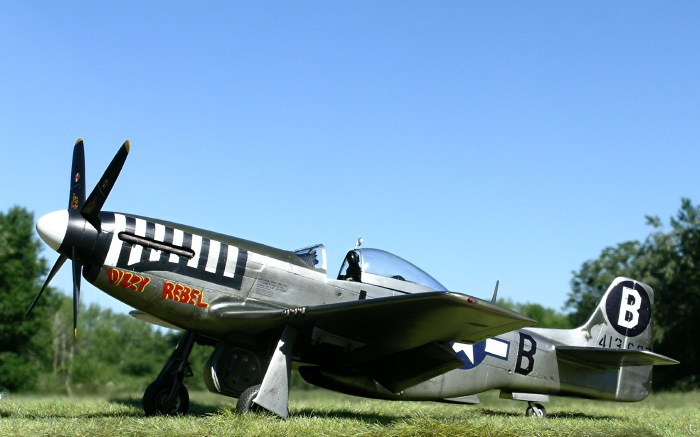
I sprayed Polly Scale USAF olive drab (with a touch
of RAF green) on the upper wings and elevators. Soon after the paint
was dry to the touch I wet sanded the wings with a micromesh sanding
cloth (3200 grit) to expose traces of the natural metal finish beneath.
I also used postshading and highlighting to further the weathered look
of the wings.
Chipping on the flaps was achieved by applying
liquid mask to the areas I wanted bare metal, and then peeling away the
mask after the olive drab had been applied. At this point the edges of
the chips were too stark, so I sprayed olive drab lightly over the flaps
and then wet sanded as described earlier.
Decals
Apart from the national insignias and propeller
markings, all decals were custom made using a Hewlett Packard Inkjet
printer and Testors clear decal paper.
I used a color profile of “Dizzy Rebel” from the
Little Friends website as the starting point for the nose art. The
artwork was then improved in Photoshop using the photo of Lt. King (with
the nose of his aircraft in the background) as a reference.

Although the artwork printed nicely on decal paper,
it was too translucent when applied to the model, even when doubled up.
Therefore, I painted over the decal by hand. I used Boyd’s sunburst
enamel for the red and Tamiya’s lemon yellow acrylic for the yellow
trim. Printing the artwork on white decal paper would have solved the
problem of translucency, but it would have been difficult to trim away
the white edges. I think my solution was preferable.
The black decals were not problematic. I scanned
and resized letters from other sources, and created my own black circle
with a clear B in the middle (hence the need for the white disk I masked
on the tail earlier). Note that the “B” on the starboard side of the
tail is not centered on the disk, as is evident in photos of the
aircraft.
While the Hasegawa kit shows its age, with a little
extra effort a nice 1/32 model can be achieved. Hopefully the upcoming
Dragon release will raise the bar considerably, and open the floodgates
for those wanting to tip the scales away from large scale Axis
aircraft.
Images were taken outdoors with a Nikon Coolpix
5400 digital camera. The “unsharp mask” tool of Adobe Photoshop was
used to restore some of the clarity and crispness lost during image
compression, and a blur tool was used to diffuse the rear edge of the
base with the background.
Click on the thumbnails
below to view larger images:
Model, Images and Text Copyright ©
2006 by Ian Robertson
Page Created 29 June, 2006
Last Updated 30 June, 2006
Back to HyperScale
Main Page
|
 Home
| What's New |
Features |
Gallery |
Reviews |
Reference |
Forum |
Search
Home
| What's New |
Features |
Gallery |
Reviews |
Reference |
Forum |
Search