|
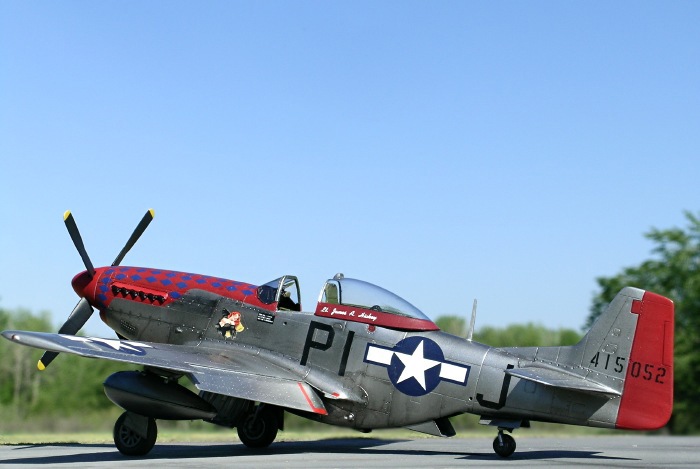
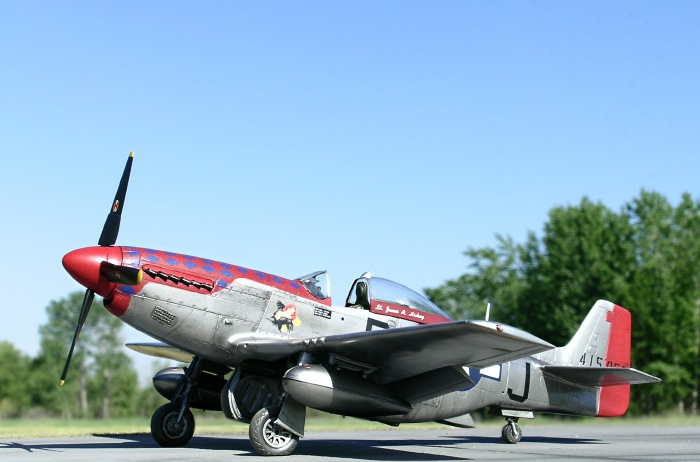
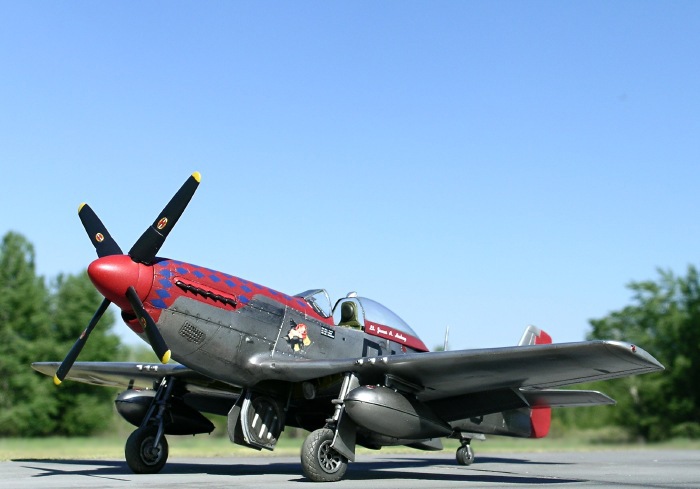
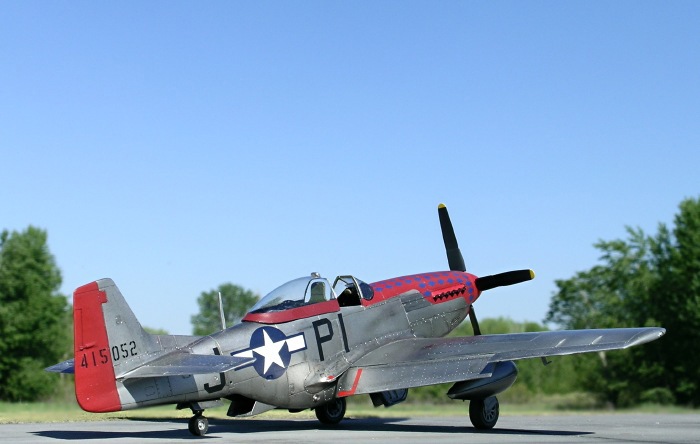
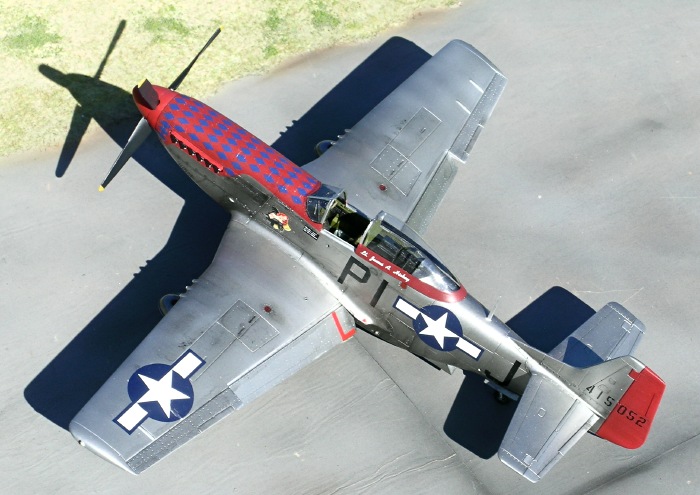
Tamiya’s 1/48 scale P-51D Mustang
“Lullaby for a Dream”
by
Ian Robertson
|
 |
|
North American P-51D
Mustang |

Tamiya's 1/48 scale P-51D Mustang is available online from Squadron.com
Decal manufacturers have had a field day producing striking and
elaborate nose art for P-51 Mustangs. New on the list of schemes
available in 1/48 scale is a series of “Blue Diamond Mustangs” from
Aeromaster (sheets 48-771 through 48-775), representing a variety of
aircraft from the 356th Field Group. I chose an unnamed aircraft from
Aeromaster #48-775 that featured a piece of artwork entitled “Lullaby
for a Dream”. The aircraft was flown by Lt. James Hickey of the 360th FS
/ 356th FG.
The Model
Tamiya’s P-51D Mustang is arguably the best bubbletop Mustang
available in 1/48 scale, although Hasegawa produces a very nice product
as well. One advantage of the Tamiya kit over the Hasegawa offering is
the option for dropped flaps. Surface detail on the kit is excellent,
and the cockpit is adequately detailed, although replacement resin
cockpits are available for those inclined.
Because numerous reviews of the Tamiya kit are available, I will
simply describe the modifications I made to my model:
1) Ultracast resin shrouded exhausts
2) Squadron vacuform canopy (rear section only) with Eduard photoetch
brace. The replacement canopy is a huge improvement over Tamiya’s
awkward two-piece rear canopy and frame. Having struggled with, and been
disappointed by, Tamiya’s canopy numerous times in the past, I will use
the vacuform replacement from now on.
3) Etched metal seatbelts from Eduard
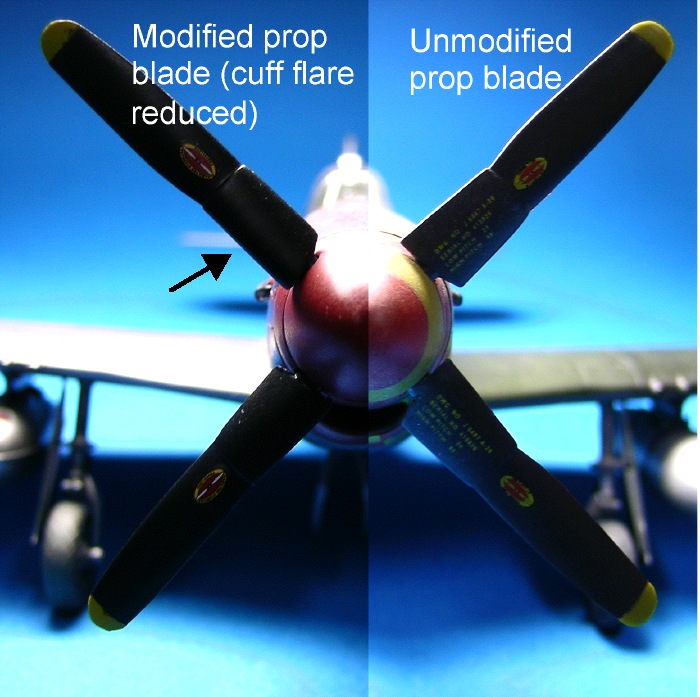
4) I modified the propeller blades by reducing the flare on the cuffs
(i.e., the base of the blades). These cuffs are exaggerated in the kit,
as can be seen in this comparison between an earlier model I built with
unmodified cuffs and the current model with modified cuffs. For those
preferring to use resin replacements, Ultracast makes a very nice set
along with an improved spinner.
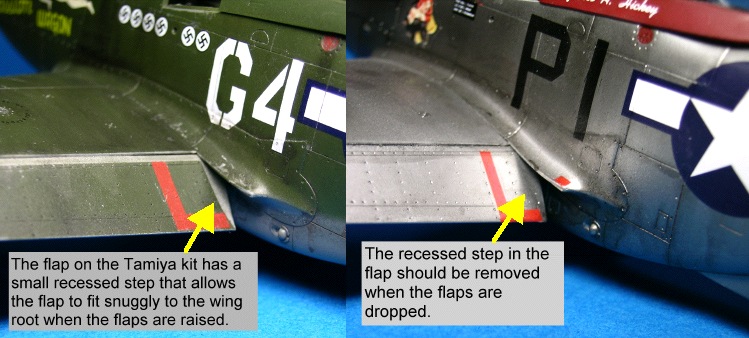
5) Tamiya offers the option for raised or dropped flaps. A small
recessed step has been molded into the interior end of each flap’s upper
surface so that the flap will fit snuggly to the wing root when
positioned up. However, if you choose to drop the flaps this recessed
step should be filled so that it is flush with the rest of the flap. A
comparison between uncorrected and corrected flaps is provided below.
6) P-51Ds had their wing panels and rivets filled with putty and
smoothed to maintain laminar flow across the wing.
Therefore, I filled the panel lines on the wings of my model,
except for the machine gun access panels.
Painting
I painted the cockpit interior green with flat black floor panels
(the floor panels of wartime P-51Ds were wood with a protective black
surface applied over top). The radio equipment behind the pilot’s seat
was painted black.
Shifting to the exterior, the model was sprayed with Tamiya fine grey
surface primer and then buffed lightly with micromesh sanding cloths. It
is essential to have a smooth primer coat for natural metal finishes
because metalizers show off any surface scratches or imperfections.
Various shades of Alclad II were used for the natural metal finish,
including duraluminum, aluminum, semi-matte aluminum, dark aluminum, and
polished aluminum. Once the Alclad finish was complete, I masked and
sprayed a mixture of red Polly Scale acrylic on the nose, spinner, and
rudder.
To tone down the shiny natural metal finish to a more realistic wartime
appearance, I applied several washes of Tamiya black acrylic,
particularly on the lower nose and around the wing roots. These washes
dulled the metal finish and darkened the panel lines to match my
reference photos. On the underside I sprayed a much heavier application
of the black wash in the direction of airflow, particularly behind the
radiator.
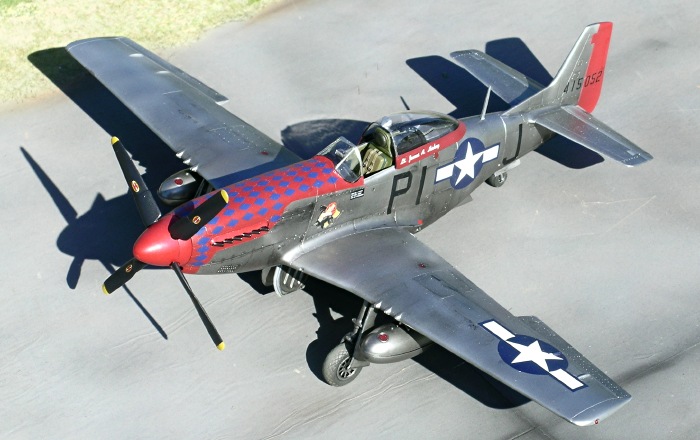
As a final step, the non-control surfaces of the wings were sprayed with
a clear dull coat. The wings of mustangs were primed and painted silver,
and thus were not as reflective as the natural metal on the fuselage.
I painted the wheel wells interior green except for the rear spar which
I painted yellow chromate.
Decals
The blue diamond decals supplied in Aeromaster sheet 48-775 come in
two pieces. Be warned that the pieces are not symmetric! One section is
three diamonds across, whereas the other is only two. This created a
problem for me because I applied the port side decal (with three
diamonds across) such that it extended just to the midline of the cowl.
In fact, the decal should have been positioned slightly beyond the
midline so that the inner diamond was centered along the midline. By the
time I realized my mistake the decal could not be repositioned without
damage, so I removed it entirely and ordered a replacement set. A less
drastic measure would have been to use the diamonds from the other
scheme on the sheet; however, the pattern is slightly different and I
did not want to accept that compromise.
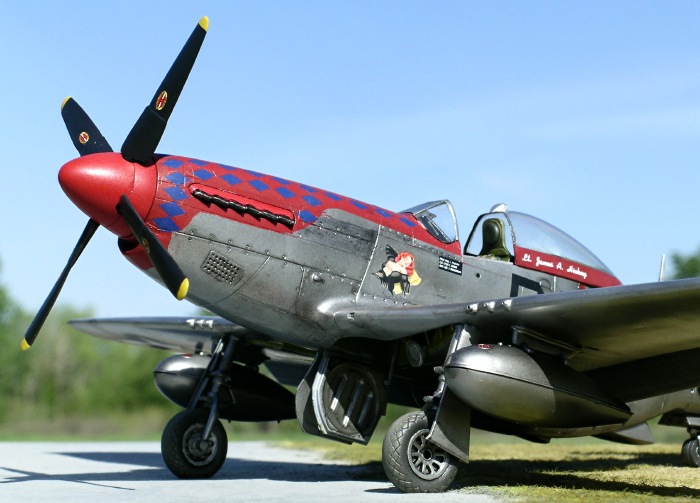
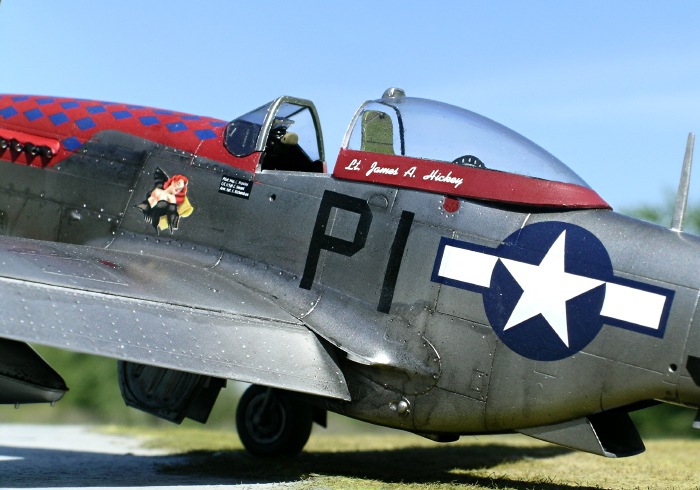
The “lullaby for a dream” artwork comes on a separate piece of decal
paper, with skin tones beautifully rendered and blended, much like the
Pyn-up nose art decals by Cutting Edge. The Aeromaster sheet is more
affordable than Pyn-up decals, unless you have to buy two sets because
of a stupid screw up. Did I mention that the two diamond decals are not
symmetric?
Images were taken outdoors with a Nikon Coolpix 5400 digital camera. The
“unsharp mask” tool of Adobe Photoshop was used to restore some of the
clarity and crispness lost during image compression, and a blur tool was
used to diffuse the rear edge of the base with the background.
Click on the thumbnails
below to view larger images:
Model, Images and Text Copyright ©
2006 by Ian Robertson
Page Created 04 July, 2006
Last Updated 21 February, 2007
Back to HyperScale
Main Page
|
 Home
| What's New |
Features |
Gallery |
Reviews |
Reference |
Forum |
Search
Home
| What's New |
Features |
Gallery |
Reviews |
Reference |
Forum |
Search