|
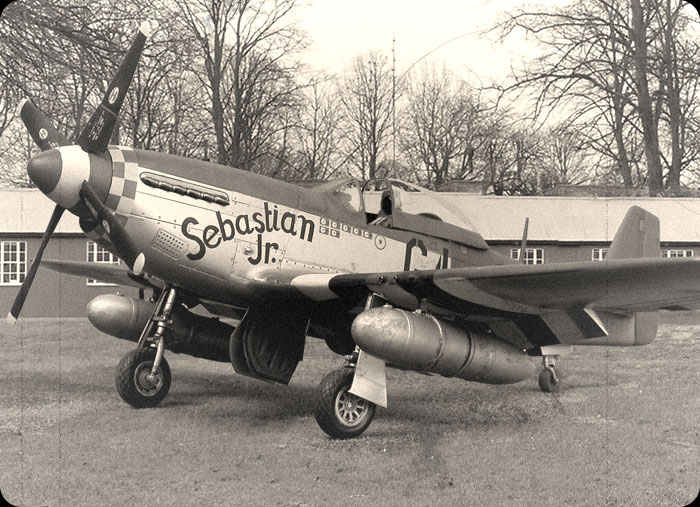
Sebastian Jr. in 1/48
scale
P-51D Mustang
by Brett Green
|
 |
|
North American P-51D Mustang |

Tamiya's
1/48 scale P-51D Mustang is available online from Squadron.com
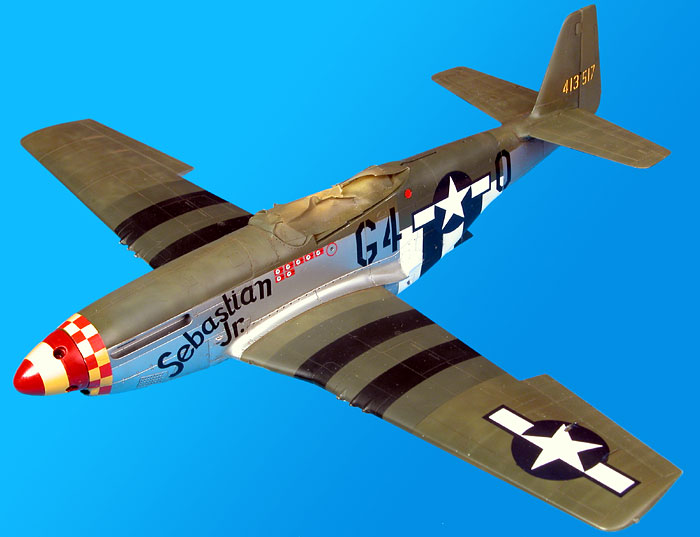
My four-year-old son's
name is Sebastian, so when I saw these markings on a recent Eagle Strike
decal release (IP4805, Part Four of 357th Fighter Group in Profile),
I knew that I would have to use them. After I showed him the decals, Sebastian asked me repeatedly - in that way that four-year-olds are
so adept - "Hey Dad, have you started Sebastian Jr. yet?"
I did not have to wait
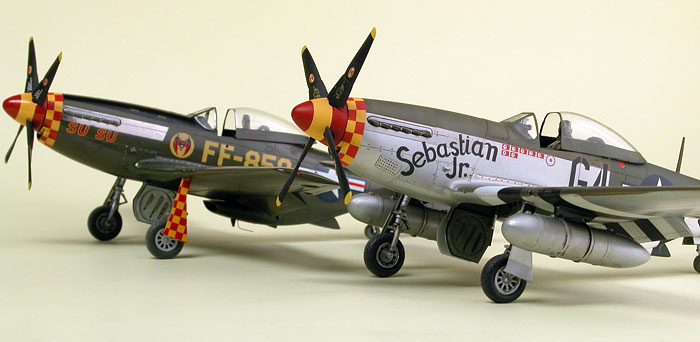
too long to find an excuse to commence the project. Bill Freeman
commissioned me to build his
immaculate P-51D warbird, "Su Su", and I thought it would be a good
opportunity to build a second 1/48 scale Tamiya Mustang in parallel. My
theory was that, while I had all the reference out for one model, and
the airbrush loaded with the right colours at various stages, it might
be quicker to built two Mustangs at the same time rather than finishing
them in sequence.
I used the most recent
boxing of Tamiya's Mustang for this project - Kit No. 61089, P-51D
8th Air Force Aces. This kit included the 108 gallon compressed
paper drop tanks seen in reference photos on this aircraft. I had also
heard that the clear parts had been improved in this version.
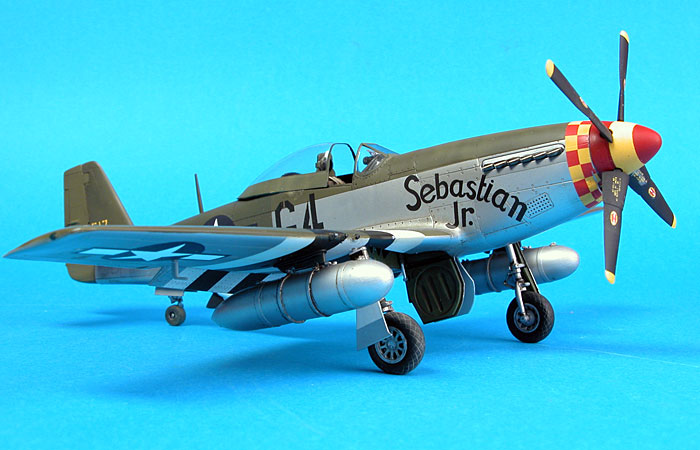
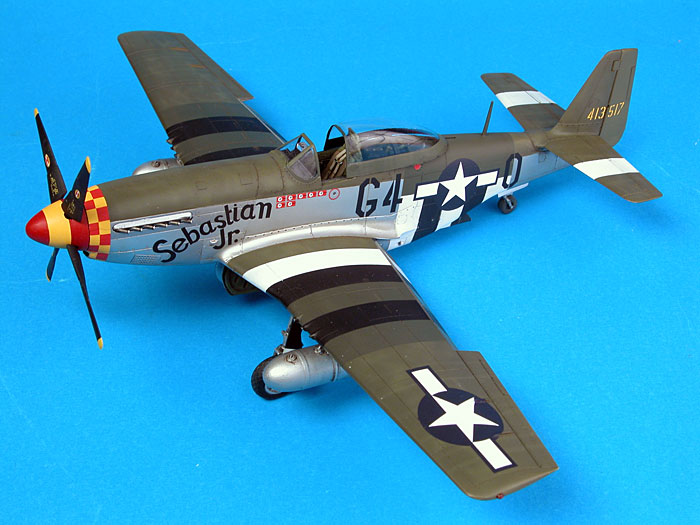
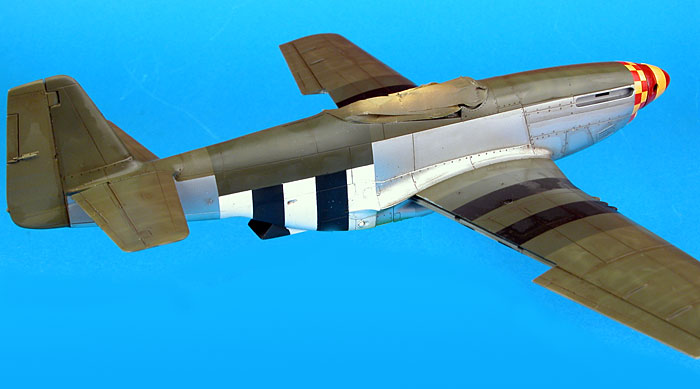
"Sebastian Jr" was a very early P-51D. The main
distinguishing feature of these early Mustangs was the absence of the
prominent fillet in front of the fin. This fin was added quite early in
production to compensate for loss of stability that resulted from the
cut-down rear fuselage.
Several options are available to covert Tamiya's kit to
the early filletless version. The first option would be to cut off the
fillet moulded to the fuselage halves, reinforce and fill the gap in the
fuselage and fin, and sand to shape. Ultracast has a simpler solution
with their resin P-51D Filletless Conversion. This conversion features
the subtly different shape of the fin tip, and is supplied almost ready
to use. A simple cut along a panel line on each fuselage is the only kit
modification required. Ultracast's conversion also includes a separate
rudder with superior fabric detail compared to the kit part.
The Best Laid Plans
As usual, I took lots of photos during construction,
with special attention to the cutting of the fuselage and the fitting of
the Ultracast resin tail; plus the detailing and painting of the
cockpit.
At the time I was building this model, the hard disk of
my computer was filling up fast. I deleted a large number of old or
redundant files, freeing up some space until I could implement a more
permanent solution. I still do not exactly know how I did it, but during
this process I deleted around 50 construction and painting photos of
both Sebastian Jr. and Su Su. I tried recovering the files, I bought
Norton Rollback, I swore profusely, but all to no avail. The photos were
gone forever.
The only silver lining was that I had sent several
emails to friends with progress photos, so it was possible to salvage
these images from my "Sent Mail" folder. These are the construction
photos that you see in tonight's article.
The moral of this story?
Back up your data, early and often!
Click the
thumbnails below to view larger images:
|
|
|
|
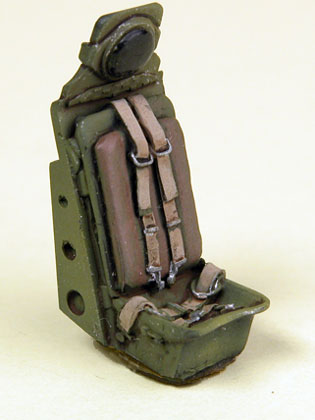
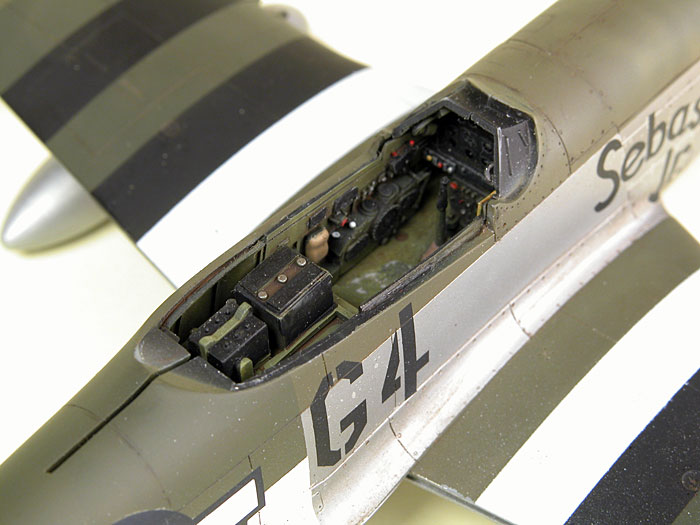
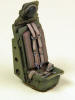
The seat included with True Details resin cockpit has the harness cast in place, It is a big improvement over the kit part
|
|
|
|
A photoetched instrument panel was used. Other additions included UV cockpit lights and a more prominent canopy release handle.
|
|
|
The first job was to cut off the rear fuselage. This
section was removed from each fuselage half using a razor saw. Test
fitting suggested that the Ultracast resin tail would be close to
perfect match for the kit fuselage.
I replaced the Tamiya cockpit with the 1/48 scale True
Details resin set. This low-price offering is considerably better
detailed than the kit parts. I especially like the seat with its cast-on
harness straps. The sidewall detail and woodgrain-textured floor are
also noteworthy.
I added ultraviolet instrument lamps, made from plastic
rod and fuse wire, to the top of each fuselage sidewall. I also made a
new canopy release handle to replace the undersized casting on the
starboard sidewall (although mine is actually too big!)
The rear of the instrument panel was also sanded off,
leaving an empty resin frame. This void was filled with a photo-etched
instrument panel from the Eduard "Zoom" set.
As is my usual practice, I glued the sidewalls to the
fuselage halves before painting the cockpit. It is important to note
that the top of the sidewalls actually protrude above the kit fuselage
sides, creating the forward canopy rails. The cockpit was then painted
and remaining components installed.
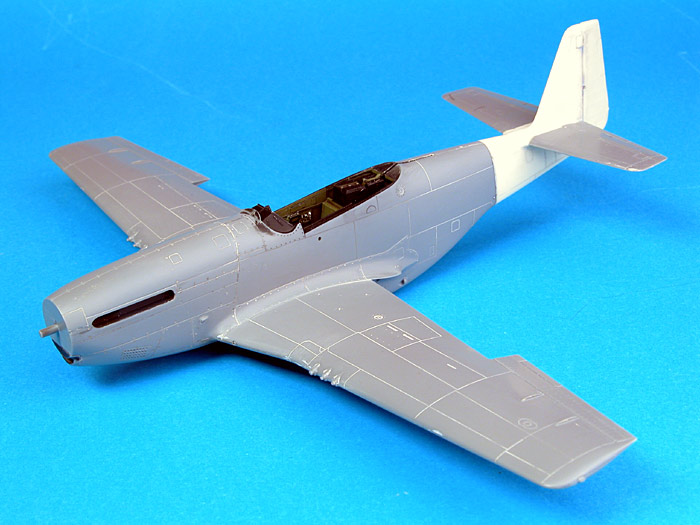
With the fuselage halves joined it was time to install
the Ultracast tail. The resin part has a lip cast at the front that will
help establish a strong bond and good alignment with the kit fuselage. I
applied a bead of superglue to the lip at the leading edge of the resin
tail, and secured the part to the rear fuselage.
No problems.
The rudder did require a little trimming and fiddling to
obtain a perfect fit. Following installation, I brushed a few coats of
Mr Surfacer 1000 between the rudder and the fin as insurance against
gaps and microscopic misalignment. I also had to trim a millimetre or
two from the front of the locating tab on the port-side horizontal
stabiliser (part no. B5) to line up exactly with the empennage.
Remaining basic construction probably took another
couple of hours, but it felt like 15 minutes. This really is a
sweet kit!
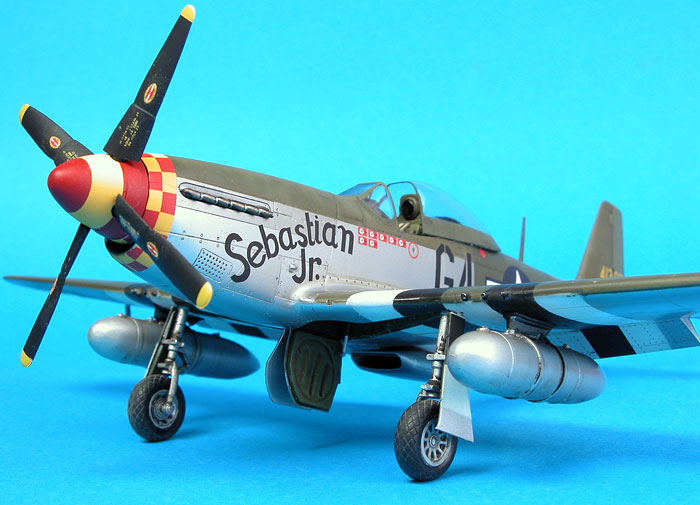
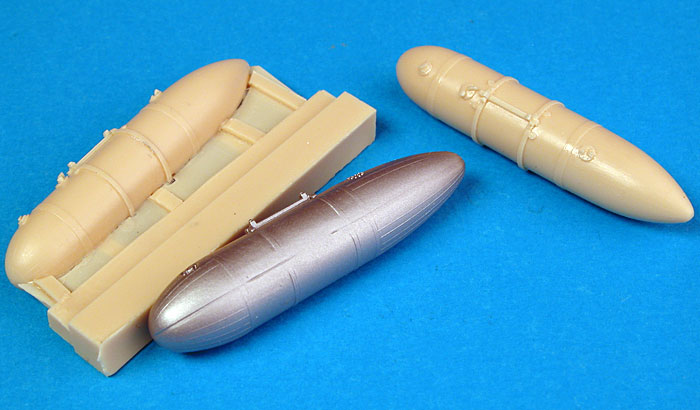
The kit supplied drop tanks were a bit of a
disappointment. Detail was adequate but both tanks displayed a deep seam
line along the port side. Removing this seam meant eliminating much of
the detail on the side of the tanks , and some of these fine features
would be difficult to restore. I therefore exchanged the kit tanks for
resin 108 gallon tanks from Teknics. In addition to avoiding the seam
line problem, these resin parts had better strap, mount and filler/vent
details.
The clear parts had, indeed, been improved in this
version of the kit, but not substantially. In earlier boxings, the sprue
connection to the windscreen and bubble canopy was attached to the side
of the clear parts, resulting in a blemish that needed to be cleaned up
when the parts were cut from the sprue. In this kit, the sprue connects
to the bottom lip of each part, reducing the risk of damaging the part
and making cleanup easier.
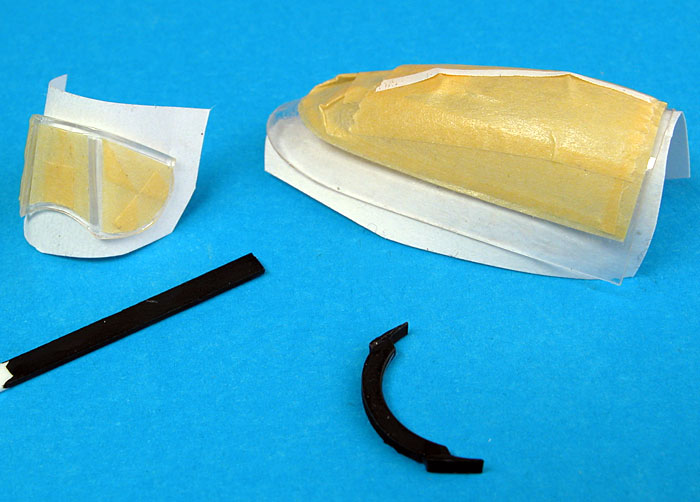
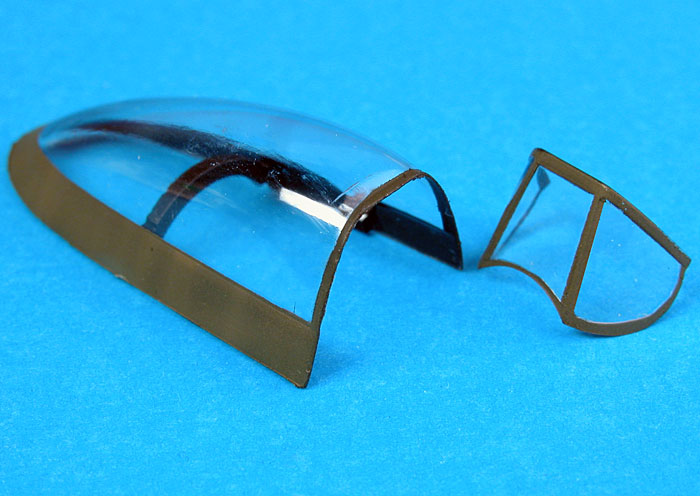
However, the improvements do not address the the
engineering of the sliding canopy section. The clear "bubble" and the
canopy base are supplied as separate parts. It is almost impossible to
join the parts without glue marks and/or an obvious seam. I replaced
this section of the canopy with a vacform part from Squadron.
The arch-shaped brace was cut from the kit canopy base using a pair of
side cutters and trimmed to fit inside the vacform canopy. This brace
was later glued to the rear cockpit deck as a mounting aid for the thin
vacform part. I also cut two small pieces of styrene strip, which were
glued to the inside of the canopy frame near the front as additional
mounting points.
After posting my article on P-51D Su Su last week, a
HyperScale regular helpfully pointed out that Mustang canopies do not
slide straight back, suspended over the rear fuselage deck; but that
they actually slide back and drop over the rear spine.
I made sure that this canopy was not suffering
from suspended animation!
Click the
thumbnails below to view larger images:
Prior to painting I cut the tailwheel doors from the discarded rear
fuselage halves and glued them to either side of the tail wheel well.
I also sanded the raised rivets moulded off the top of the
wings. These were not a feature of wartime Mustangs.
Decisions ,Decisions...
Aeromaster's instructions and most reference sources suggest that the
top surfaces of Sebastian Jr. was painted Olive Drab. It does seem that
other early P-51Ds were painted in this fashion with identical
demarcation between the painted topside and natural metal lower
surfaces, suggesting the possibility of a factory finish. However, I
thought that it was also possible that these aircraft were delivered in
overall natural metal and repainted in the field. In this case,
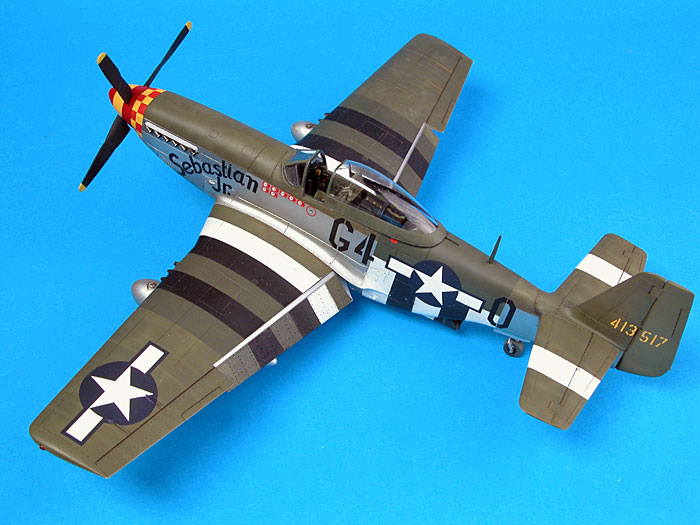
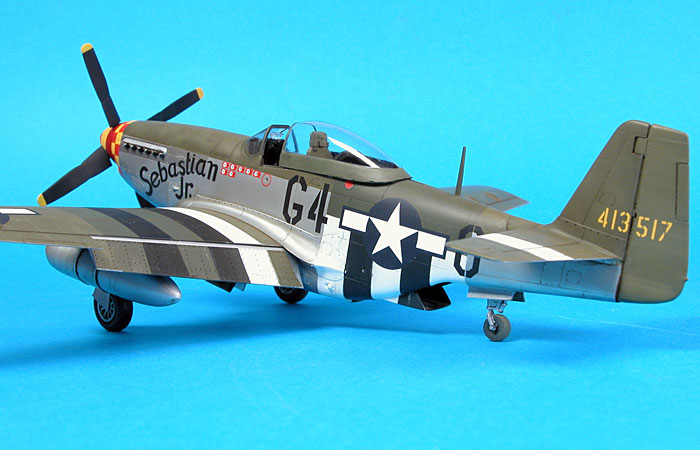
Sebastian Jr. might have worn RAF colours.
I chose this option, assuming that the upper wings, top of the
fuselage and wings were painted in RAF Dark Green.
Another interesting element of the paint job is the overpainted
invasion stripes. A noticeably darker shade covers the white invasion
stripes on the top of the wings, and all the stripes on top of the
fuselage. The photos in my references are not clear as to the exact
demarcation between the fresh overpainting and the invasion stripes on
the fuselage, so I made an educated guess.
Painting
The lower wings and entire fuselage were sprayed with Tamiya AS-12
Airframe Silver. The paint was first sprayed from the can - this colour
is only available in a spray can - into a container. To prevent
excessive vapours and to avoid losing half the paint to the atmosphere,
I always cover the top of the container with cling wrap and spray though
a small hole that I cut in the top. The pool of paint was then poured
directly into the paint cup of my Aztek A470 airbrush and applied to the
model. It is certainly possible to spray the model straight from the can
but I find that I have better control and less risk of "orange peel"
texture if I decant the paint and use it in my airbrush.
The fast-drying silver finish was masked, and the panels
surrounding the exhaust were sprayed with Testor Metalizer Aluminum
darkened with a few spots of Manganese Metallic.
 More
masking followed for the invasion stripes. While the stripes were still
covered, the main upper surface colour was applied. Polly Scale RAF Dark
Green was my choice. This base colour was sprayed first, followed by an
application of fine streaks and mottles using a lightened version of the
colour. Around 10-15% Polly Scale Middle Stone was added to the RAF Dark
Green to obtain this first weathering coat. Another 10% Middle Stone was
added to provide another random layer of streaks and mottles. This
lightest colour was also used to paint the fabric covered rudder, which
would have faded faster than the metal surfaces of the aircraft. More
masking followed for the invasion stripes. While the stripes were still
covered, the main upper surface colour was applied. Polly Scale RAF Dark
Green was my choice. This base colour was sprayed first, followed by an
application of fine streaks and mottles using a lightened version of the
colour. Around 10-15% Polly Scale Middle Stone was added to the RAF Dark
Green to obtain this first weathering coat. Another 10% Middle Stone was
added to provide another random layer of streaks and mottles. This
lightest colour was also used to paint the fabric covered rudder, which
would have faded faster than the metal surfaces of the aircraft.
When the camouflage colour dried, the masks were removed
from the invasion stripes. Now the model was masked again in preparation
for the oversprayed stripes. 100% Polly Scale RAF Dark Green was used
for this task. This colour was noticeably darker than the faded version
on the remainder of the aircraft, creating a noticeable demarcation
between the new and weathered shades.
With the paint job complete, a thin wash of raw Umber
oil paint was brushed onto the model. The stark appearance of the wet
wash settled down considerably after drying overnight.
At this late stage I checked the reference photos again and noticed
that the white wing ID stripes appeared to be present on the top of
Sebastian Jrs wing even after the invasion stripes were overpainted. I
therefore masked and sprayed the white ID stripes on top of the wings
and horizontal stabilisers; and added black stripes to the bottom of the
stabs.
Decals
The decals worked superbly, even the potentially tricky checks on the
nose and the yellow spinner stripe. I tackled these two tasks first.
First the spinner was painted a shade of red to match the checks, then
the yellow decal stripe was applied. This settled down nicely after a
couple of generous applications of Micro Sol. The nose checks were similarly
trouble free.
The other decals sat down beautifully over the silver and green
paint. Decal film almost disappeared with the application of Micro Sol,
even before a final flat coat.
The model received a final coat of Polly Scale Flat before the odds
and ends (undercarriage, drop tanks, flaps, gunsight, canopy and antenna
mast) were added to the airframe.
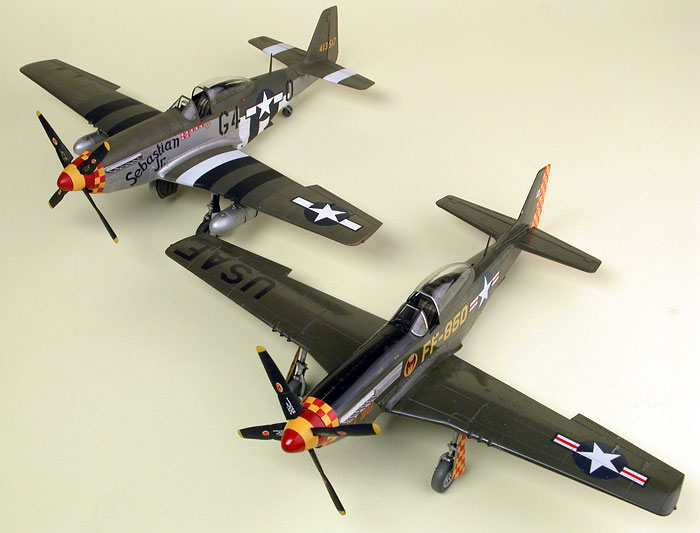
Would I build two similar models in parallel again?
Probably.
It was marginally faster to build the two kits this way, especially
as they shared some colours and markings. It was especially useful to
tackle the distinctive 357th FG nose checks and stripes as a batch job.
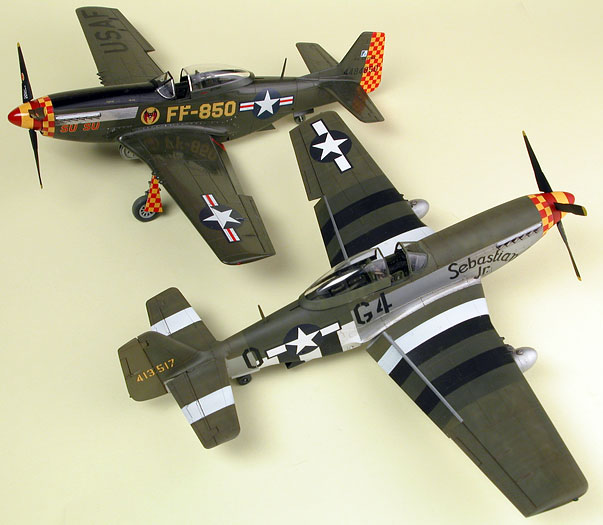
One thing is for sure though. I will be building more of Tamiya's
1/48 scale P-51 Mustang kits in the future!
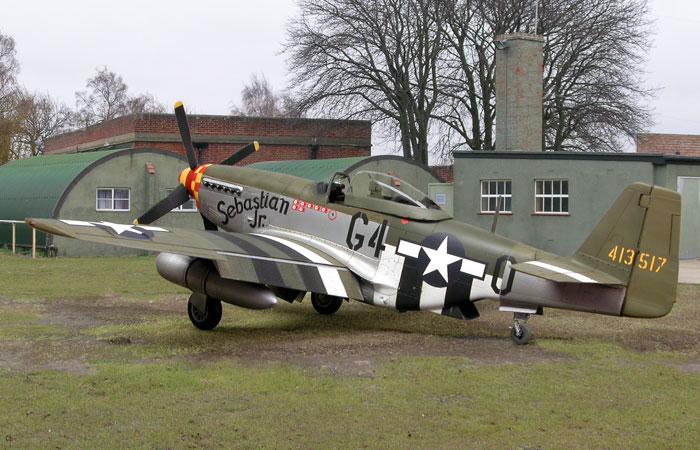
Photography
The two composite images were created in Photoshop CS using photos of
the model and of airfield buildings taken at the Imperial War Museum
Duxford in late 2003.
The model was photographed on a base of artificial grass and dirt
against a plain grey background.
The photo of the airfield was modified, removing present-day
additions such as lighting and signage, then the model and the strip of
grass were dropped into the Duxford scene.
Returning to the Mustang photo, the model and part of the grass base
were masked using the Magic Wand and Lasso tools, then cut
from the original image. The model was then pasted as a new layer onto
the modified Duxford scene. Extra work was done merging the model photo
with the background, especially around the canopy (through which the
background was visible) and around the edges of the aircraft. Where the
outline of the model was stark against the background image, the Blur
and Blur More tools were used to blend it in.
The imported grass was highlighted using the Magic Wand and
Lasso tools. The colour, hue, saturation and brightness was then
modified to match the real Duxford turf. The Clone Stamp and
Healing Brush tools were used in a few places to blend the real and
the artificial grass.
Finally, the composite images were cropped, resized to 700 pixels in
width, and saved as a .jpg file for posting on HyperScale.
The second image was further treated with a plug-in filter called
"Old Movie". This software allows dust, scratches, fat, hair and other
imperfections to be added in varying degrees, creating the impression of
an authentic old photograph. I purchased this plug-in (only available
for Windows) online for less than USD$20 from
the VanDerLee
website.
All the photos were taken with my Nikon Coolpix 5700 digital camera.
Click the
thumbnails below to view larger images:
P-51 Mustang
From the RAF to the Mighty Eighth
Special Editions (Aviation) 1 |
|
|
|
|
Author: Michael O'Leary
US Price: $10.95
UK Price: £6.99
Publisher:
Osprey Publishing
Publish Date:
September 15, 1997
Details: 128 pages; ISBN: 1855327147 |
|
|
Model,
Text & Images Copyright © 2004 by
Brett Green
Page Created 11 July, 2004
Last Updated
14 July, 2004
Back to
HyperScale Main Page |
 Home
| What's New |
Features |
Gallery |
Reviews |
Reference |
Forum |
Search
Home
| What's New |
Features |
Gallery |
Reviews |
Reference |
Forum |
Search