|
Koster's
1/48 scale
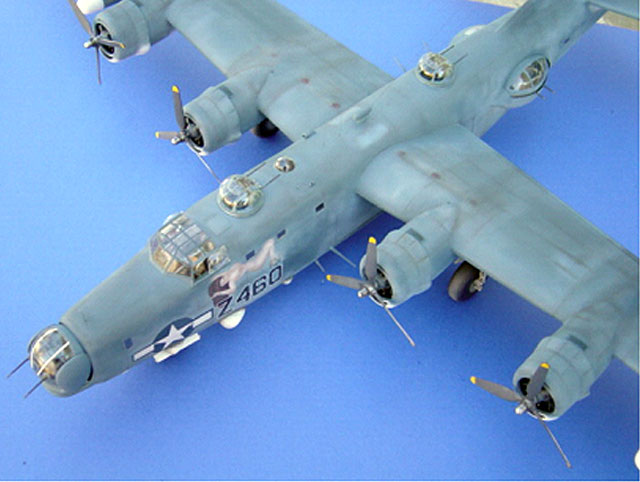
PB4Y-2 Privateer
by Mike Chorney
|
 |
|
Consolidated PB4Y-2 Privateer |

HyperScale is proudly supported by
Squadron
The PB4Y-2 Privateer is my
favorite aircraft.
Its concentrated firepower, delivered at or near the deck in the Pacific
during WWII, must have proven both daunting and lethal to those who
faced it.
I have wanted to build a
Privateer for some time, and purchased a Koster vacuform conversion
several years back after seeing a built model at Bill Koster’s table at
the Virginia Beach Nationals. The project, which in simple terms
consists of mating the Koster vac, resin, and white metal parts (about
75% of the finished model) to the Monogram B-24J wings and fuselage
midsection, began a little over two years ago and commenced with work on
the cowlings, engines and wings. I won’t go into all the minutiae of the
step-by-step build, but suffice it to say that it took a great amount of
time, care, and patience, plus loads of sandpaper, sanding sticks, and
reagents designed to fill seams. The build was a labor of love, however,
and I quickly lost count of the hours invested in this monster.
For those interested in the
aircraft, the work is certainly worth it and you end up with a very
excellent looking ‘dash 2.’ For those interested in maybe a bit less
conversion effort (I am not sure about this statement), and who are not
worried about 200 USD more, you may wish to take on the new Meteor resin
PB4Y-2 kit, instead. I have not yet seen this kit up close.
Steve Hawley has previously
itemized the kits few physical shortcomings. Of that list, I opted to
tackle the inboard exhausts’ mispositioning and to build an upper
fuselage air intake. The main engine exhausts amount to rather softly
molded blips that were sanded flat along with some CA filling. I placed
them according to references obtained from the web’s outstanding site,
Navylib.com, a must visit (thanks to Mr. Jim Augustus). The exhausts
were made from brass tubing and CA’ed into place.
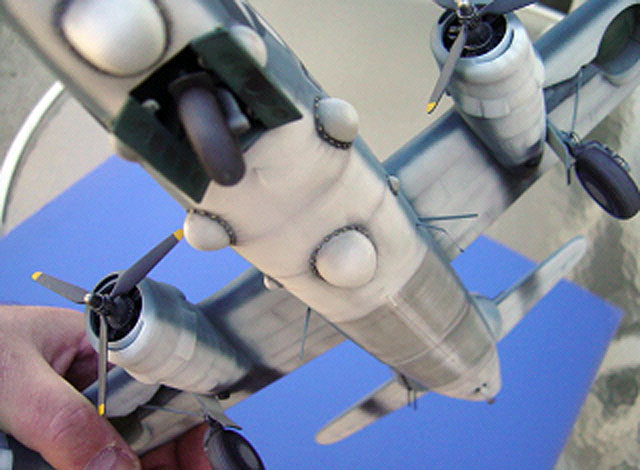
Building the engines, and aligning them into the spaces obtained
following removal of the B-24J’s powerplants, are both very tricky
processes, and each requires much care, much dry-fitting, and time. I
personally like working with vacuform, and the cowlings were whittled
down so that they fit together well; bolstering the join strength with
sprue on the interior surfaces followed by sanding down and filling the
soft vac material is quite enjoyable and relatively painless. The
hardest part of the engine assembly, for me, was applying the resin
cowling fronts to the vac engine cowlings (and, in positioning the resin
engines in the absence of any significant guides or framework). Much
cautious sanding and filling is required in order to balance the
possible complete removal of the seam with actually retaining a uniform
and aligned minor seam, corresponding to a real panel line. At a few
sites on these pieces I actually broke through the vac material with my
vigorous sanding. Moreover, after the wings were attached to the
fuselage, rigorous handling led to cracks in the thinned vac cowlings.
Recently, the wing came loose due to the sheer weight of the aircraft,
and I cannot tell the number of times I have bent the white metal gun
barrerls!
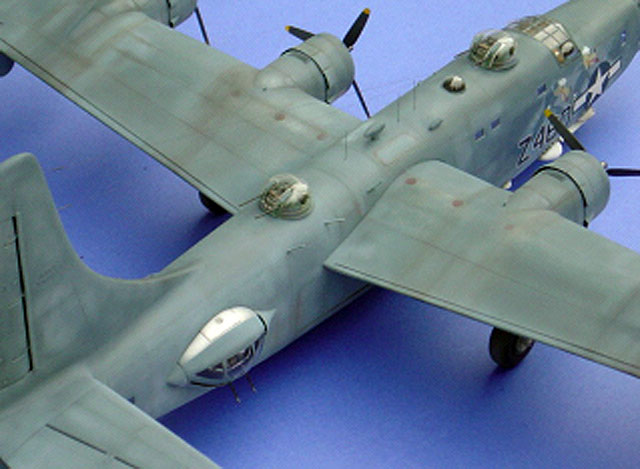
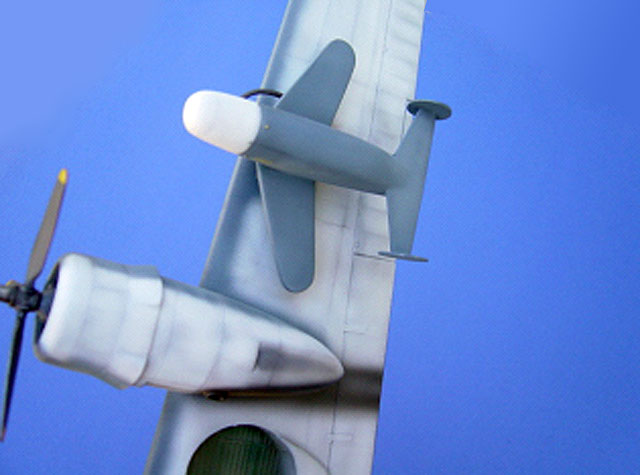
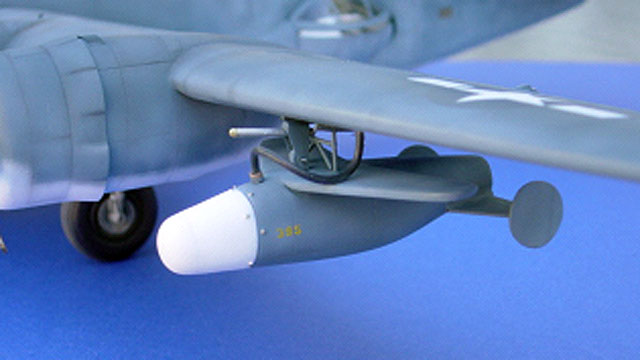
The SWOD BAT Mk.9 glide missiles were scratchbuilt from Sculpty (?) clay
(the body, heated in order to harden the material) and plastic sheet
(wings and empennage). The attachments were made from sprue; the hose
from electric wire casing, etc. The missiles turned out far better than
anticipated and added much to the finished model.
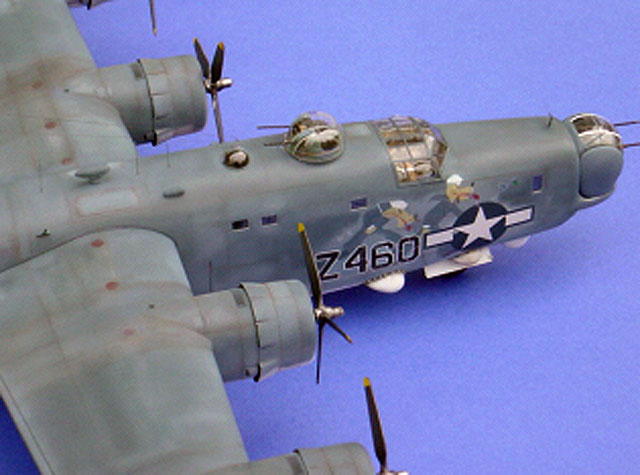
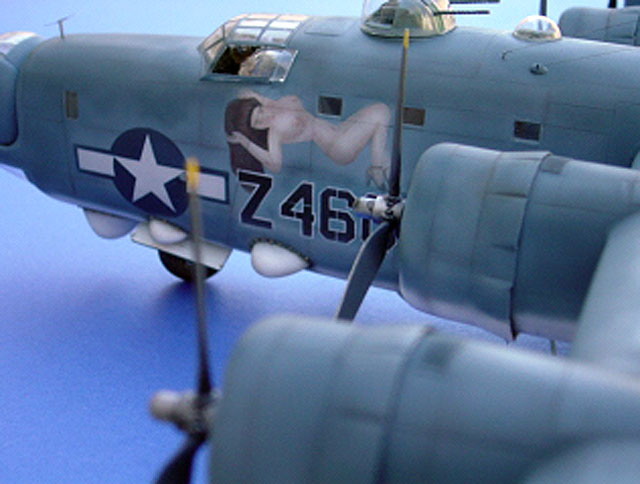
Another area of interest is the
nose art. On the port side is a nude, copied from a real aircraft,
christened ‘Els Notcho’ of VPB-108, I believe. I tried a new technique
which worked very well. I drew the figure, and cut the shape out of
frisket. I cut the mask so that one could spray the body and hair with
different enamel colors. After drying, I applied colored pencil for
shading, eyes, navel, etc. The technique was simple and proved very
convincing. Although the face was a bit off from the original, the
‘superstructure’ turned out to my liking, at which point I decided to
create navy wolfmen on the starboard sign, copied from a picture of a
PB4Y-1: a bit of artistic license here. I added some dice and a martini
glass with olive. I advise you to try pencils on noseart subjects in the
future as they work very well for shadowing and shading, and…..you need
not be a master artist to obtain reasonable results.
A lot of other minor changes and additions accompanied the build. The
rudder was removed and now slips into place. The bow and stern turrets
are removable. This was done to aid in the cleaning of the window
interiors as building neared completion (and dust accumulated), and to
add more interior detail later. Rear entryways also allow adjustment of
the Erco side turrets which after moving up and down, have a tendency to
slip out of their mounts, which are not well engineered.
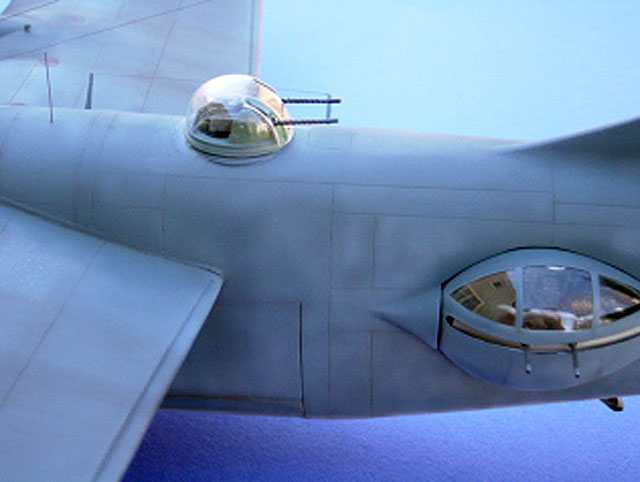
All cowling exhausts were
opened; the top aeration vent was opened as well and received a
fine-mesh screen (not sure if this was on the original, although there
appears to be a covering of some sort observable in pictures); a nav
blister was positioned aft of the turret, an antenna was built for the
top of the nose, and atop the starboard Erco turret. I positioned the
right blister in a severe downward angle, allowing the hatch to be seen
(not sure if one could have lowered the turret without actually sitting
inside! but it can be moved without too much effort). Hydraulic lines
were added to the landing gear, and all the panel lines were rescribed
after sanding (both the Monogram wing and the vac material: body and
cowlings). I also added some punch and die nuts to the radar housing and
the top turrets which add some interest (the turret nuts are way
overscale, but fine with me). Some additional masts and aerials were
added to the ventral surface of the body.
The flight deck received a bunch of details: overhead panel, throttles,
sun visors, scratched belts, and three figures. It looks busy and as if
the plane was taxiing to go. I cut out the side sliding blisters and
added back those from the spare canopy. These are held in place by
L-shaped sprue on both sides as rails so that the blisters move and can
be repositioned much like on the real plane. The rails were sanded down
to make them more akin to scale.
My one concern is the dorsal turrets. I like the detailed interiors and
the 50 cals, but I feel that the turrets are simply oversized. The
‘highhats’ look very large, not so much too high as they appear too
wide, and they are designed to sit atop the resin turret which itself
sits atop the fuselage outcropping that results from cutting out the
turret openings. The vac ledge amounts to thin vacuform material that
looks wobbly; I decided to add L-shaped sprue around the inside to
create a more engineered looking framing, which on the real aircraft
runs around the outside of the turret instead of serving as a support on
top of which the turret sits. Maybe my modeling is at fault here, and
not the engineering as I could be misinterpreting the assembly. In any
event, I didn’t’ want to re-engineer the turrets to sit further inside
the body as I was concerned that a far too large opening would result.
Another problem I faced was getting the resin turrets to simply sit
flat. I sanded both the turrets and the fuselage down and ended up
whitegluing them into place, as opposed to letting them turn freely. The
clear highhats merely sit on top, as I opted not to whiteglue them in
place since I am currently working on figures for these positions. I
also didn’t like the way the gun coverings are molded into the turret
itself. Well, at least something is provided, as opposed to a simple
opening found in most turrets. However, one needs to cut out a hole for
the gun barrel, and the whole effect looks chinzy. I added a bit of
framing on top of the cover which adds a bit of interest and breaks up
the simple lines of the indented gun covering. Some oversized bolts add
a bit of interest. On the real turret, the Perspex is bolted extensively
with very fine bolts, something I couldn’t reproduce at present.
Paint was Testor’s enamels, with
much pre- and post-shading.
Watercolor was added here and
there. Additional weathering was liberally applied with chalks. Fixing
the chalks to the finish was accomplished using very dilute paint as
opposed to flat finish. The wingtops received the salt treatment masking
technique in order to draw interest to the walkways (FSM) following the
spraying of Alclad aluminum but prior to the spraying of the several
shades of blue. Insignia were airbrushed. I also scratched the side
windows out of clear sheet styrene and then backed them with additional
clear sheeting in order to get them to lie nicely in position and nearly
flush with the body. The effect is worth the added work as the vac slide
windows are a poor fit.
I still have lots of fiddly
things to clean up (I want to fare-in the canopy a bit better as well),
but generally, I have a pretty nice lookin’ model of an aircraft whose
popularity is increasing far after the time when she served at
interdicting Japanese shipping. It took a lot of time and effort, but
there is no doubt that the few times I have recently displayed the
plane, it has drawn great attention and interest (this article is
dedicated to Robbie and the boys of Greensboro, NC, who like the big
aircraft, especially the missiles). Maybe it’s the blue bomber scheme,
or the bristling alligator look of one menacing airplane. In any event,
I am going to settle back with a brew, or two, and one of my favorite
books on WWII aircraft exploits, Forbes’ “Goodbye to Some,” which
conveys what it was like to fly the PB4Y-1’s.
While I do, I’m going peer over
at ‘Els Notcho’ in order to fantasize what it might have been like to
skirt the waves and fire on an Empire SugarDog off the Malay coast.
Cheers.
P.S. Reiterating Steve’s sentiments: thanks to Bill Koster for taking
this subject on years back - it’s one great looking model, with minor
warts and all (pun intended). Thanks to Alan Carey for his published
works which are excellent.
Click the
thumbnails below to view larger images:
Model, Images and Text Copyright © 2006
by Mike Chorney
Page Created 22 May, 2006
Last Updated
22 May, 2006
Back to
HyperScale Main Page
|
 Home
| What's New |
Features |
Gallery |
Reviews |
Reference |
Forum |
Search
Home
| What's New |
Features |
Gallery |
Reviews |
Reference |
Forum |
Search