|
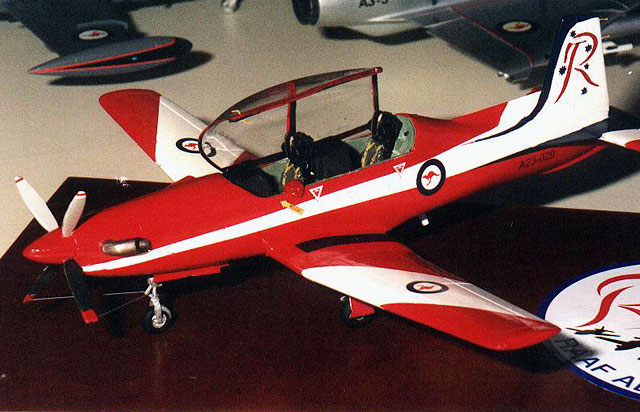
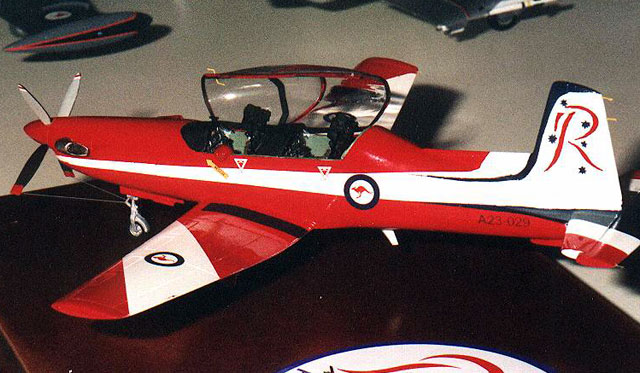
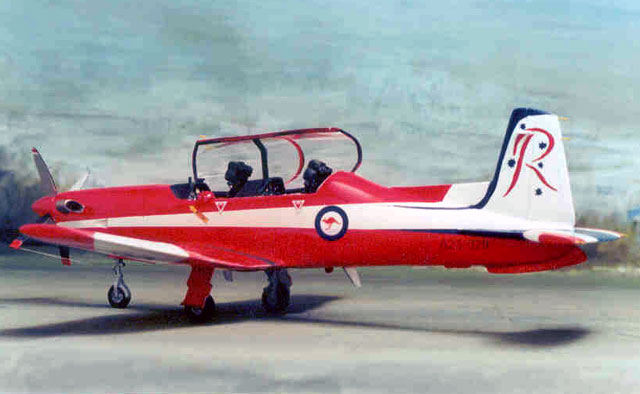
Scratchbuilt 1/48 Scale
Pilatus PC-9A “Roulettes”
by Ryan Hamilton
|
|
|
Pilatus PC-9/A
“Roulettes” |

HyperScale is proudly supported by
Squadron.com
Like a lot of modellers, a large number of my models are built based
upon a theme or era, with my interests with the aircraft of the
Australian Defence Forces (ADF). The only problem with building aircraft
from the ADF (and main other air forces) is that there are only a
certain number you can buy in kit form. After that you have to wait for
it to be released or scratch build.
Several years ago I was truly lucky to have had received some tutoring
in scratch building by Ian Wrenford from the APMA model club (check out
Ian’s Chitty Chitty Bang Bang and Mawson’s Air Sled at www.apma.org
.au). This included lamination of wings, vac forming both clear and
non-clear parts and the use of resin and fibreglass. With this knowledge
I have scratch build about a dozen 1/48 ADF aircraft, none of which are
available in kit form.
The choice to build a PC-9 was easy as it has being the major training
aircraft for the ADF for the past 15 years, both new pilots (2FTS) and
new instructors (CFS). Other roles the PC-9 fulfils include Forward Air
Control (76/77 SQN), Airborne Photo platform (ARDU), and even the
personal aircraft of the Chief of Air Staff (for a short period only).
I started with a good set of drawings. Five sets in total of the PC-9
in 1/48 (Pilatus, Hawker de Havilland, Janes, RAAF, and one other).
Incidentally no two sets of plans were the same. I was then forced to
compare my reference photos to the drawings to decide which were best.
Lucky the RAAF aerobatic team “Roulette’s”, perform with the PC-9 and
are a regular to many air shows and obtaining reference photo’s is easy
if you can get along to these events. Comparing the drawings to the
photo’s I had, I decide to go with the Pilatus drawings, as they seemed
to represent the correct nose profile.
I then started to write a set of plans on how to build the PC-9,
which included drawings, photo’s, descriptions of techniques to be used,
and a step by set process. I find that if I do not do this step, my
projects can take up to twice as long to complete. I had also decided to
build several PC-9 due to the number of different colour scheme’s
associated with some many roles. This would involve building masters,
moulding them, and producing resin copies.
I started construction with the wings, laminating 30thou plastic card
into an aerofoil roughly the same shape as the wing. Before I glue this
together I added the main wheel well with most of the detail already in
it. Once the wing was dry (48 hrs), I sanded the wing into its correct
shape, and add the dihedral to the outer wings. I was amazed at this
point how much dihedral the PC-9 wing has. The tail plane was also built
at this time using the same technique, but I deleting the tail fillets,
which would be added later.
The fuselage was built in three pieces, the nose, cockpit, and tail,
instead of the traditional left and right halves. This was built this
way to assist with moulding the parts and it would allow the nose to be
solid and the tail hollow to ensue that the PC-9 was not a tail sitter
(I made it by about 5g). The front nose section had the spinner and nose
wheel well added, and the cockpit section was built around the cockpit.
The whole airframe was scribed with detail and prepared for moulding.
All major parts were then moulded, including the cockpit detail and
undercarriage, which would be added latter. The first set of parts were
then produced, clean up with sand paper and glued together. The cockpit
was painted, and the tail fillets, undercarriage fairings, aerials, and
lights added. The airframe was then primed for painting. Painting was
fairly simple, red white, and blue. The blue cheat line and Southern
Cross were painted, but if I were to do this again I would probably use
decals.
Other items that were added:
-
Propellers – reshaped from Falcon’s white
metal Me-109C/D propellers
-
Exhausts – Shaped from a solid piece of
plastic, them hollowed out. I was not happy with the thickness of the
end result, but due to the complex curves, it had to do.
-
Canopy – Vac formed using resin master.
-
Cockpit - Aeroclub seats were added,
along with control columns.
-
The tail markings were hand painted, and
the rest of the decals were from the 1/48 Roodecal standard sheet.
Scratch building is not difficult; it just takes a little more time and
patience.
Building the PC-9 was much easier then I had initially thought. It’s
basic construction and simple lines make it a good subject to introduce
people into scratch building. The colour scheme of the Roulette’s is
very attractive and stands out in the collection.
I have a second PC-9 near completion (77 Sqn FAC) and a third
together (2FTS - Fanta Can) and later this year I will probably build
the Texan II/Harvard II and the Irish Air Corp PC-9M - but more on that
at a later date!
Model by Ryan
Hamilton
Images Copyright 2004 by Allen Yee and Pieter
Stroethoff
Page Created 22 March, 2004
Last Updated 22 March, 2004
Back to
HyperScale Main Page
|
 Home
| What's New |
Features |
Gallery |
Reviews |
Reference |
Forum |
Search
Home
| What's New |
Features |
Gallery |
Reviews |
Reference |
Forum |
Search