|
Conversion of S-Model's 1/72
resin PZL P-24G
PZL P-24B "Jastreb”
by Piotr Dmitruk
|
 |
|
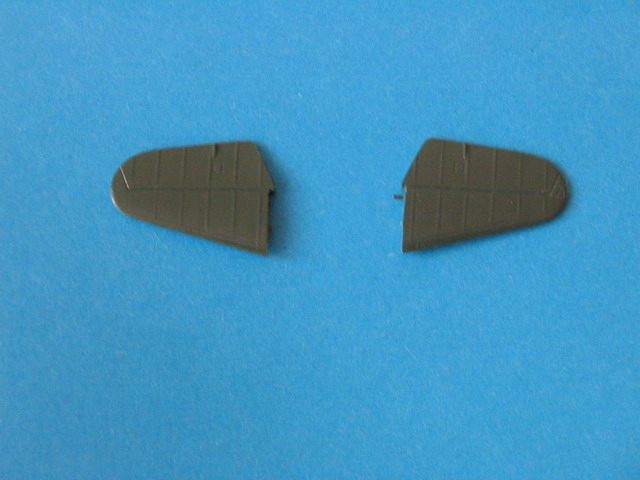
PZL P.24B |

HyperScale is proudly supported by
Squadron
PZL P-24 was the peak of
development of gull wing fighters, designed by engineer Zygmunt Puławski,
and one of the biggest export successes for the pre-war Polish aircraft
industry.
Designed in early thirties, it was one of the best fighters of its time.
It was distinguished by all metal construction, cannon armament, speed
and maneuverability. Over 140 airplanes were produced (also on licence
in Turkey and Romania), which went to four countries: Bulgaria, Turkey,
Greece and Romania. Two latter countries used them in combat during
WWII, but they never were used in Poland.
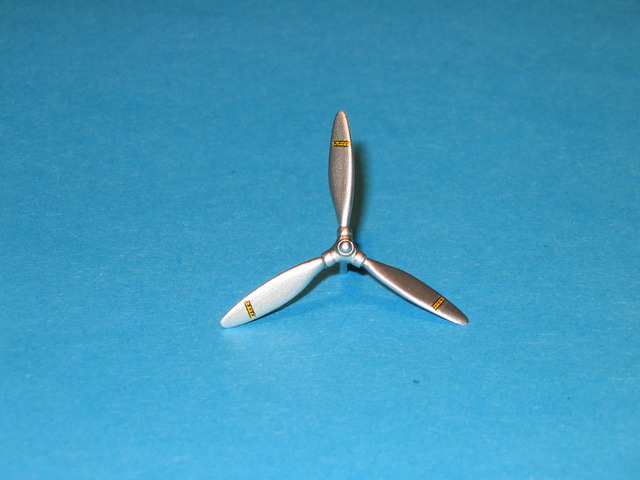
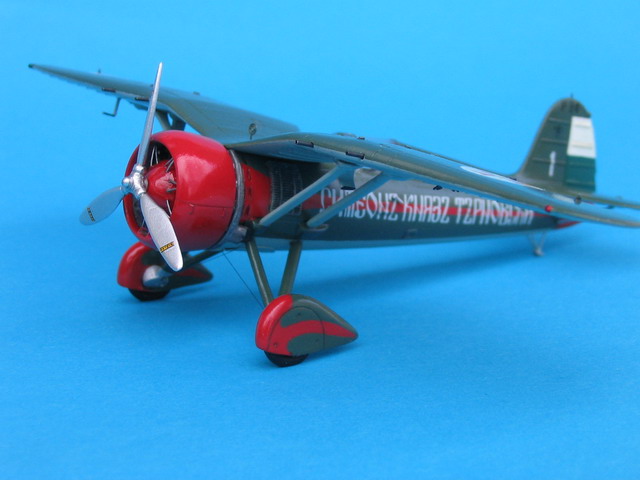
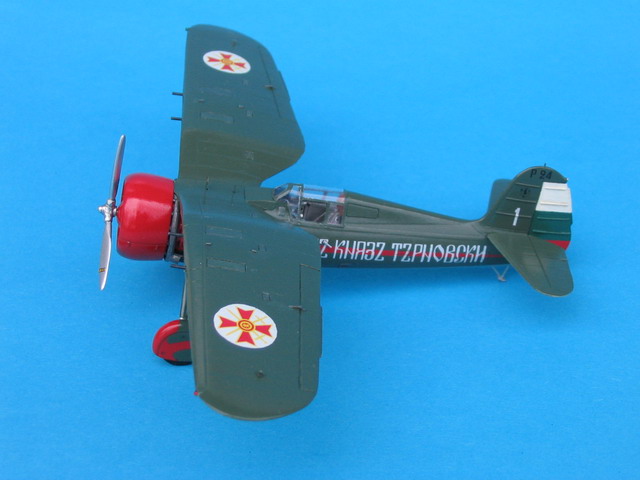
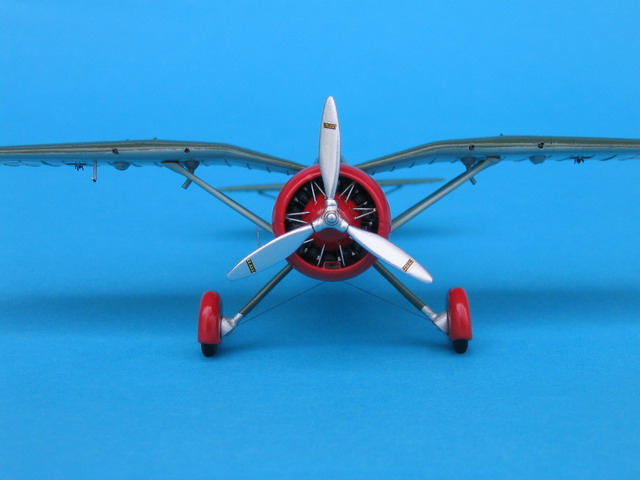
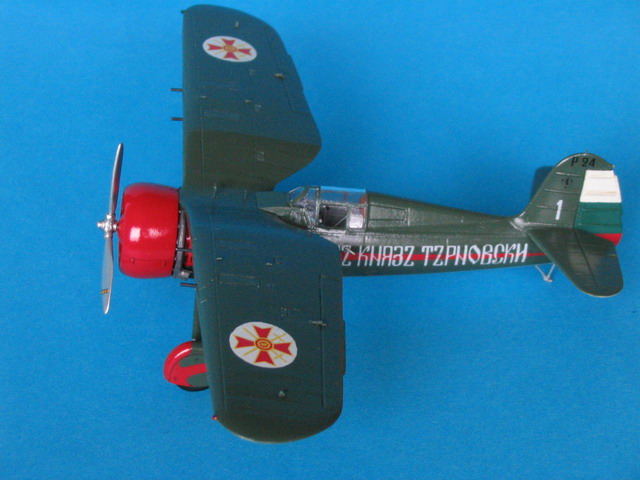
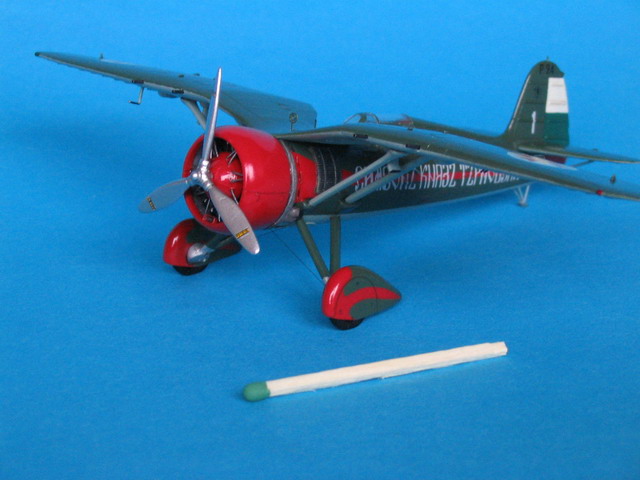
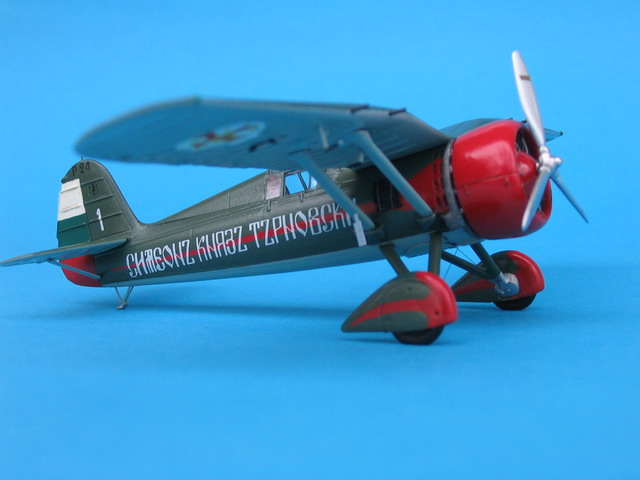
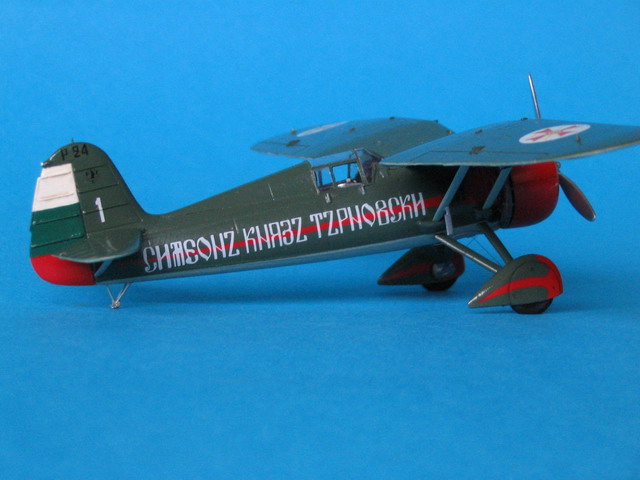
On April 9, 1936 Bulgaria ordered 12 examples of PZL P-24B. This
airplane, equipped with French Gnome - Rhone 14Kfs engine with 3-bladed
propeller of the same firm, armed with 4 7,92 mm caliber Colt- Browning
MG 40 machine guns, received name "Jastreb” (“Hawk”) in Bulgarian Air
Force.
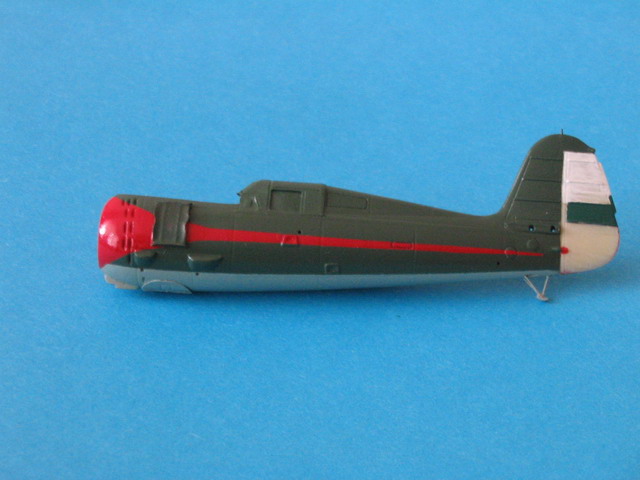
The first aircraft, painted olive green on upper surfaces, light blue on
undersurfaces, with additional light-blue accents on fuselage and wheel
fairings, was flown for the first time in October 1936. But soon, wheel
fairing failure caused it to crash, and combined with transportation
difficulties, delivery was delayed.
The first six airplanes
were assembled on Bozhurishte airfield in Sofia in spring of 1937. In
addition to their camouflage painting they received red engine cowling,
a red narrow stripe on the fuselage, and also red decorative elements on
wheel fairings. The rudder was painted in the national colours of white,
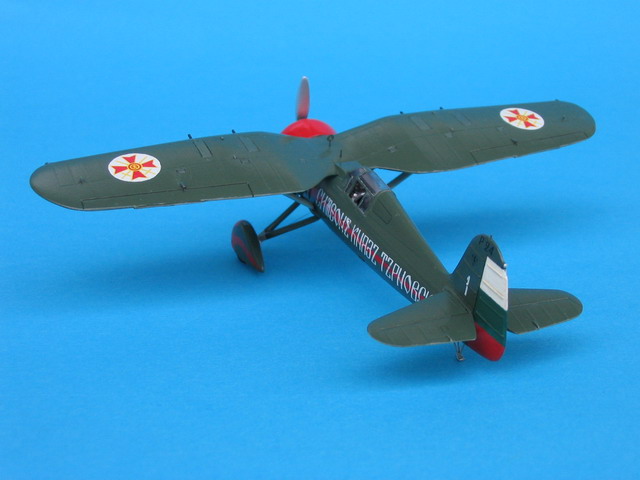
green and red. On June 28, 1937, the day of birth of throne successor -
Tzarevitch Simeon (today after many turns of history wheel, president of
Bulgaria) , airplane No. 1 received inscription: "Simeon Prince
Tyrnovski” on fuselage and was presented on parade on Sofia- Bozhurishte
airfield, in presence of Tzar Boris III, his brother Prince Kiryl and
Air Force commander Maj. Gen.. Vasil Bojdev.
Only one P-24B piloted by captain Vasil Benczev crashed because of
engine breakdown. Airplanes initially were flown without armament, in
1939 underwent modification of exhaust outlet arrangement, and often
were used without wheel fairings and cockpit canopy.
These airplanes served initially in 2. Fighter Regiment (Istrebitelen
Orliak) in Karlovo (they created one flight), and in July 1940 were
transferred to 3. Training Squadron (Jato) of the Flight Training
Regiment in Bozhurishte. In 1942 they were transferred again to 2.
Fighter Regiment on Marno-Pole airstrip near Karlovo, where the majority
were destroyed in 1944 during an American air raid.
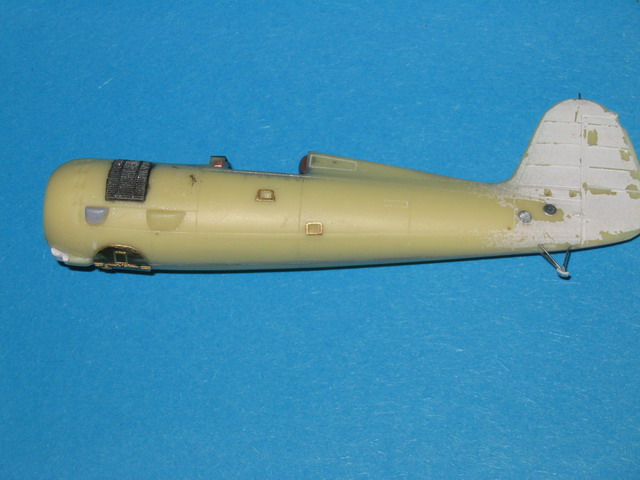
This is the best model
of this airplane in 1/72 scale. The previous offerings are two resin
kits, one Polish (distributed by Encore), second Czech from Artur Resin,
and one vacuum formed kit from Modelland. This S-Model kit was based on
the latter pattern.
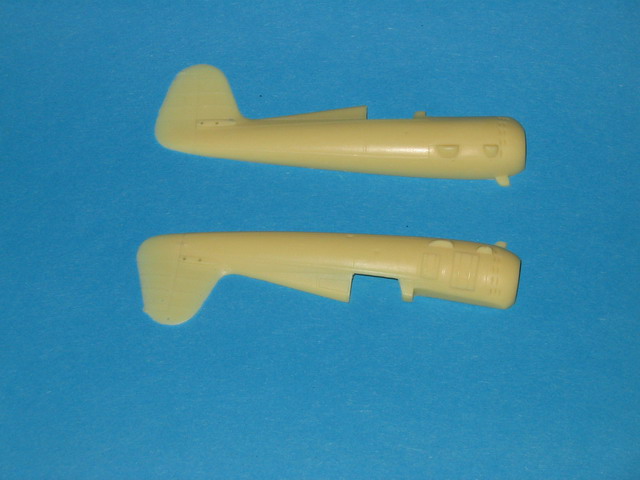
This model is very close accurate. Only the wheel fairings are
incorrect, but they are easy to improve, looking from the top. One could
exchange also the tail skid and remove unnecessary radiator on the
bottom of wing. Surface detail is very well imitated - engraved panel
lines, and prominent where metal sheets are riveted to ribs . Only
corrugated skin was not imitated, but in this scale it would be
unrealistic anyway. There are only few bubbles in moulds, mainly in
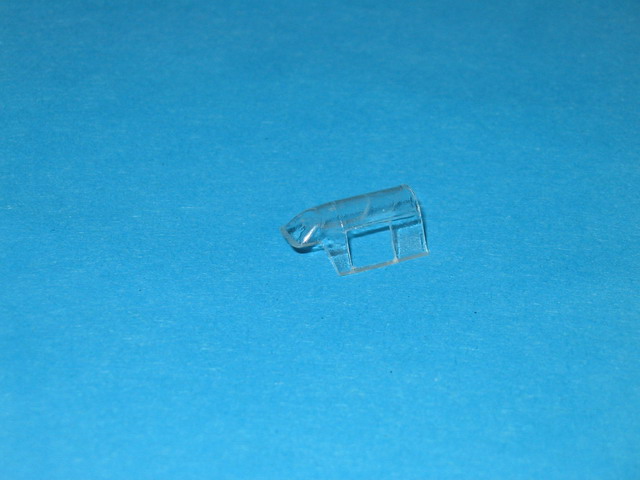
prominent lines. The canopy is vac formed, satisfactorily transparent
and fits well. W
The kit requires only minimum quantities of filler.
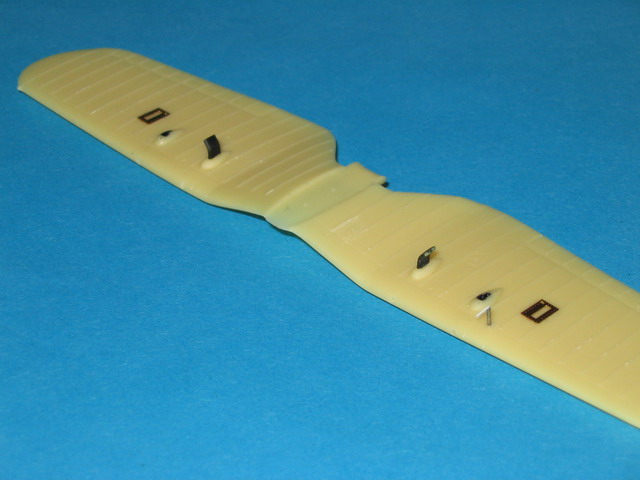
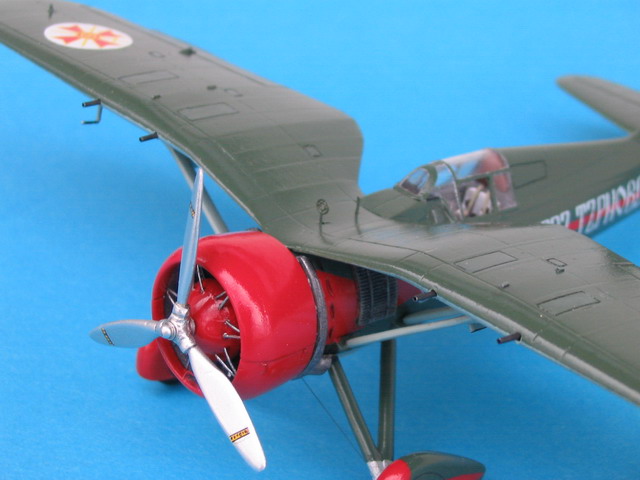
It is possible to build Greek F and G variants, but I wanted to make
Bulgarian version, which could be distinguished by the engine type,
propeller, exhaust pipes, carburettor air intake and radiator location.
Fortunately for me I found Northrop Gamma kit from Williams Bros, with
two types of engines with cowlings and propellers- one type of cowling
suited ideally for me, and I could use propeller after changing its
shape and turning direction. After long searching, I decided to use
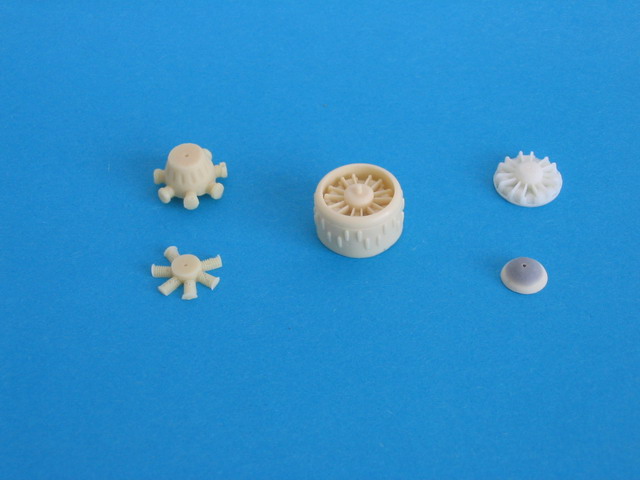
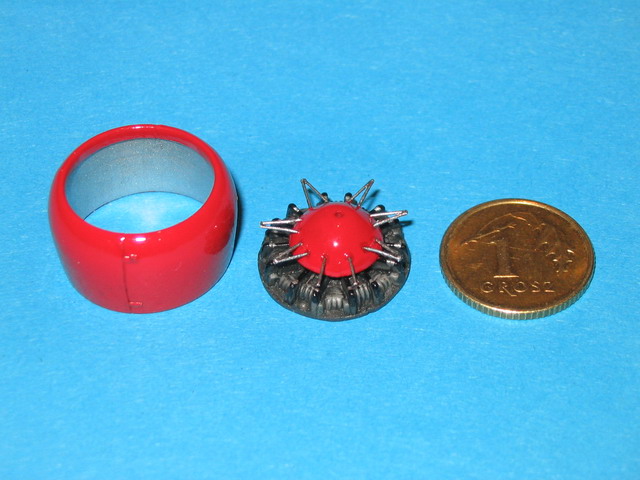
resin copy of Breda 65 engine from Azur, somewhat simplified, but
sufficient for me. I made engine crank case fairing from hemispherical
element found in my scrap yard . In this element I bored radial holes
and I inserted thin Plastruct rods imitating cowling fixing rods. The
engine was painted with Gun Metal Metalizer and dry brushed it silver. I
painted the engine cowling aluminium from the inside, Humbrol gloss red
from the outside, then added the carburettor air intake made from metal
sheet and whole engine was put aside for later installation.
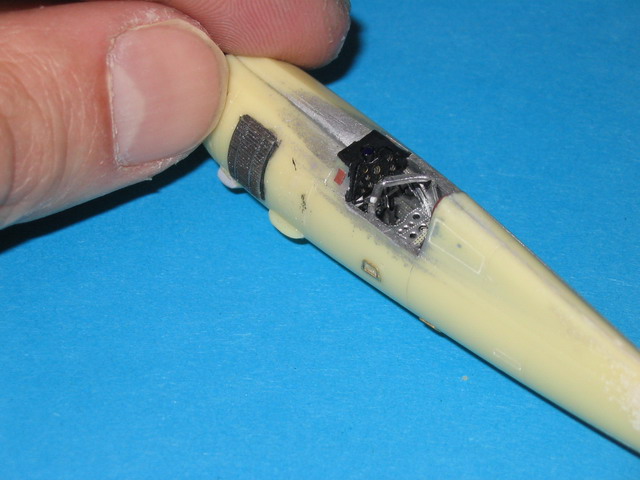
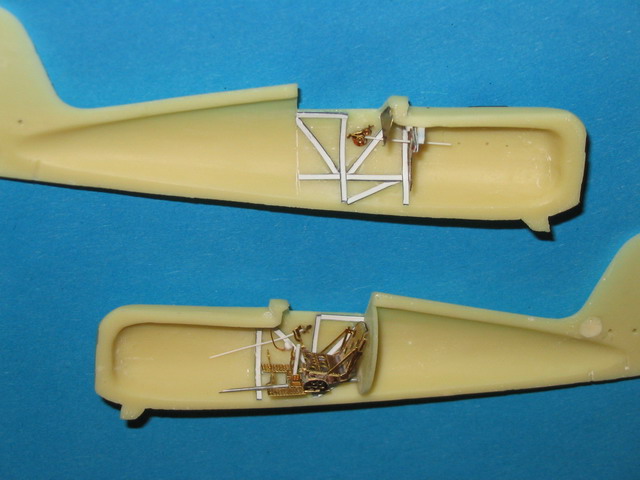
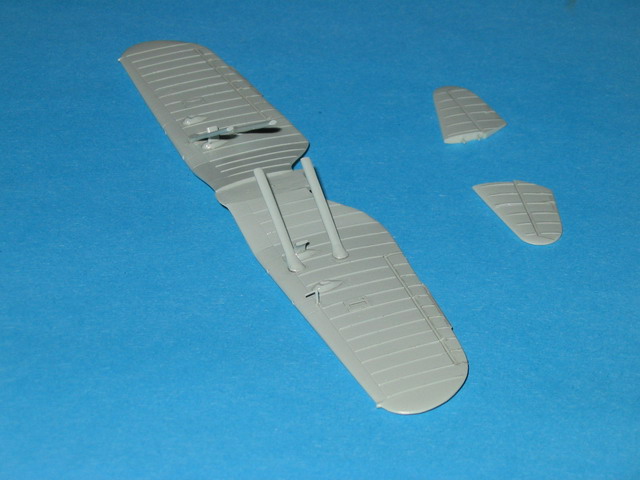
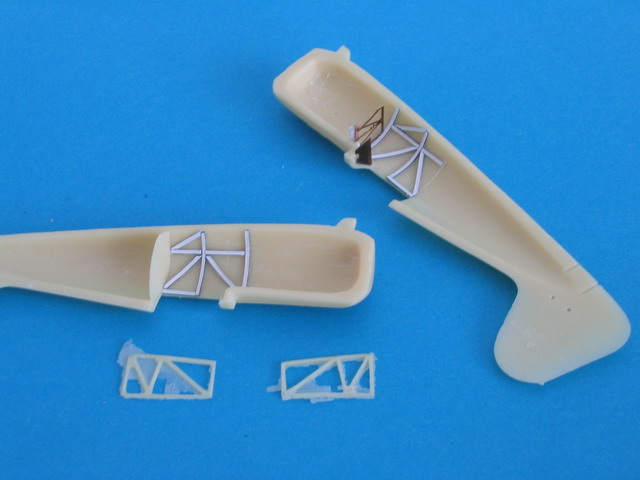
The interior of the
cockpit sidewalls have ribbing cast in place, and also fuselage truss
mould was added, but according to photos in Kagero and Ace Publication
books, I found it was incorrect. Therefore I ground off this relief and
I made ribs myself with plastic strips.
I did not consider
thinning the fuselage walls (and they are thick!), and that caused me
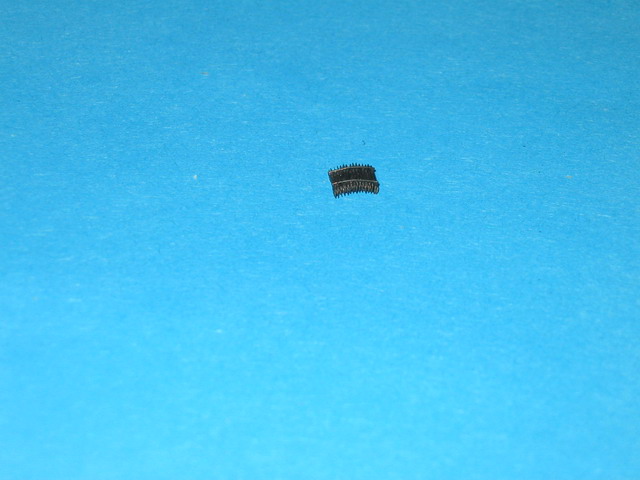
pain, when it come to inserting of photoetched elements. I used "etch”
from Part, designed to PZL P-11c, from which I used floor, pilots seat,
part of truss, instrument panel, some kind of sticks and bits, and
outside of cockpit oil radiators, imitation of fuel tank and kind of
steps and aerial brackets.
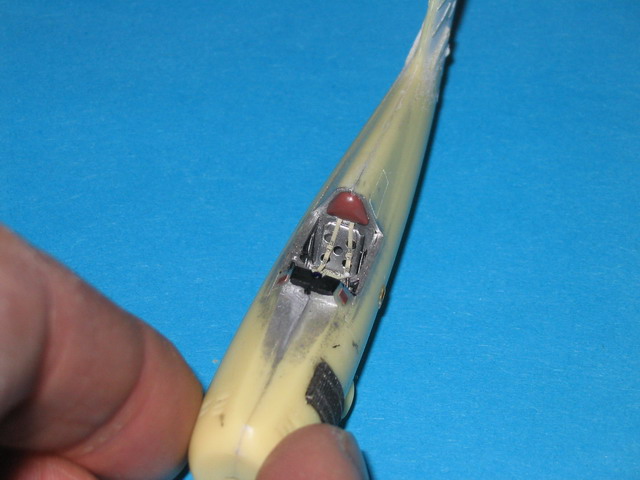
After painting the
cockpit interior silver I made the pilot's cushion and I added
pre-painted Eduard belts.

Click the thumbnails below to view larger
images:
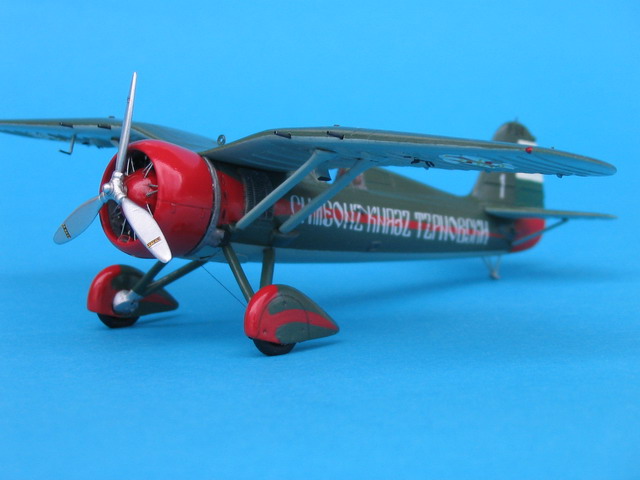
I glued both fuselage
halves and then I could made carburettor air intake on fuselages
undersurface just behind the engine, as well as new, made from thin
injection needles tail skid. I made aerial post on the fin and lacking
line of riveted metal sheets on rudder, using fishing line. Rudder was
painted white, but I used Pactra acrylic paint, which despite gentle
masking, unfortunately went away in whole slices. Because the F/G
version had two radiators on the port side of fuselage, and version B on
both sides, I ground off one radiator. This one on the starboard side I
made from above-mentioned Part set and after painting I left to glue it
on after varnishing of model. I cut out cockpit canopy, and because it
was used with removed side panes, I cut them out too. I masked holes
from inside with Tamiya tape and I glued the canopy on the spot . After
masking of the glazing I painted it with the interior colour.
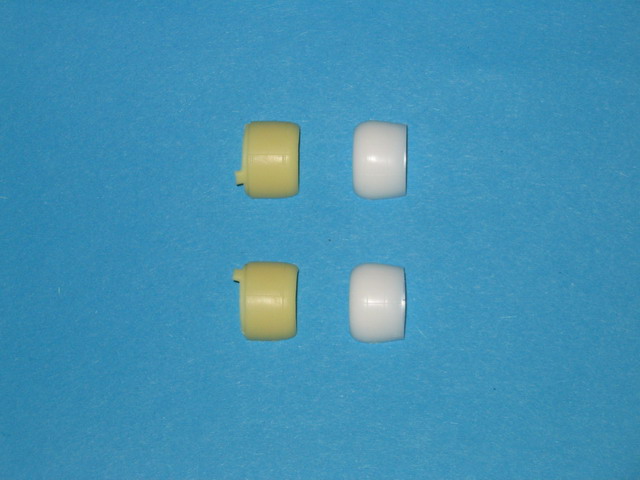
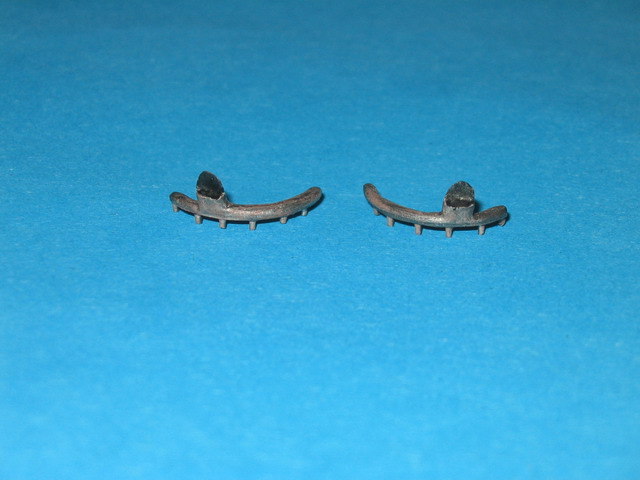
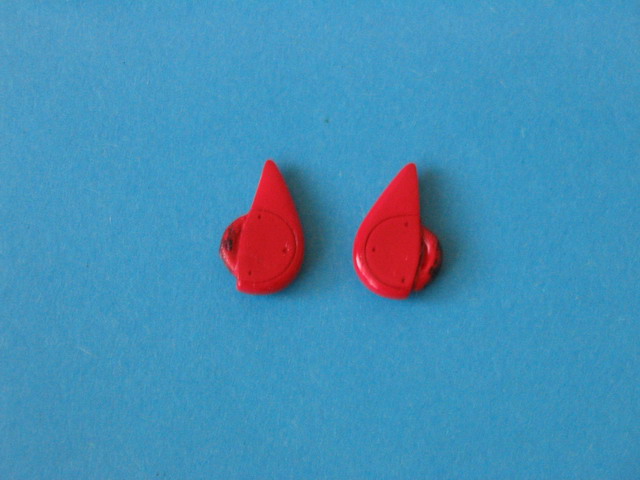
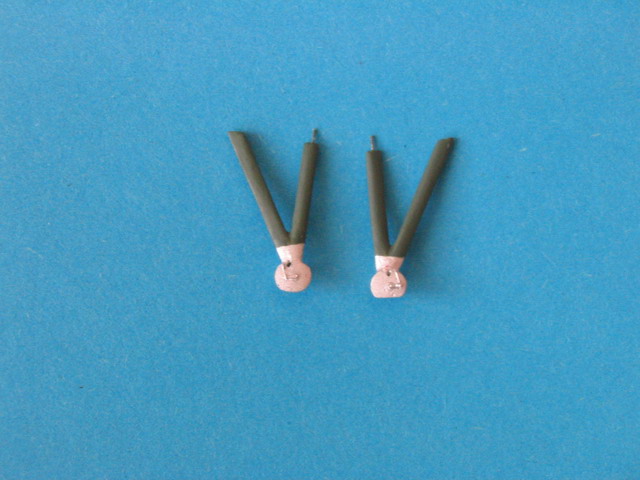
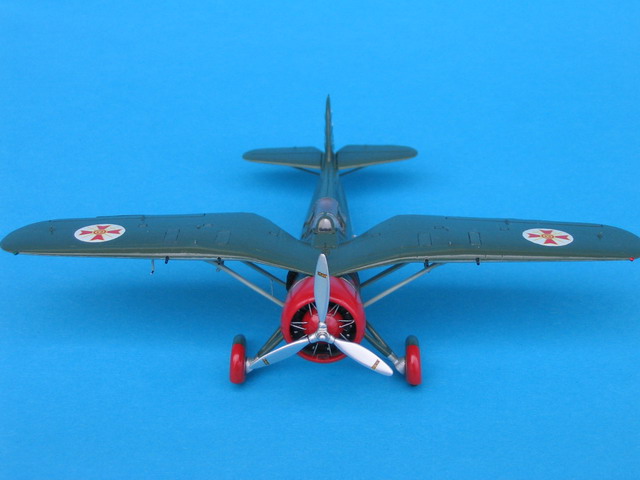
Now was time for the undercarriage. Because I like weighted tyres in my
models, I gave up the possibility of wheel turning. After painting
wheels black, I glued them into fairings. Then I could polish fairings
to proper shape and paint them red. Repeatedly I tried to made masks for
decorative painting of this part, but effects were lousy and I painted
it at last with paintbrush. I cut longitudinally undercarriage legs,
inserted inside the steel wire, so it stood from closer end. I bored
openings in suitable places of fuselage, getting by this way
amplification of legs, and the leg- fuselage joint ( indispensable this
seems- model is heavy, gentle undercarriage, just and resin distorts
with time). Brake levers and lines were glued onto external ends of the
legs.
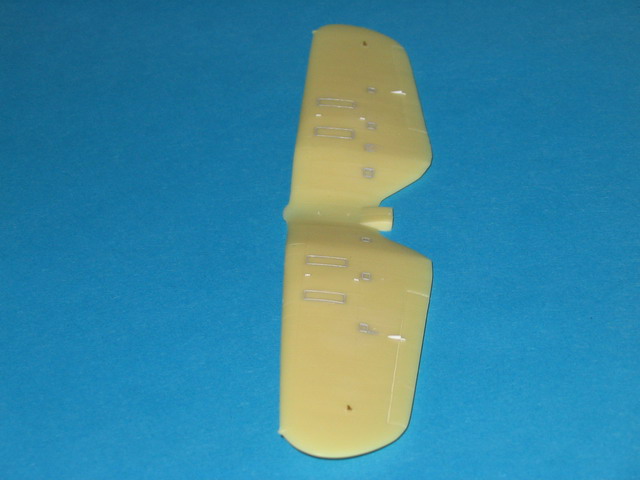
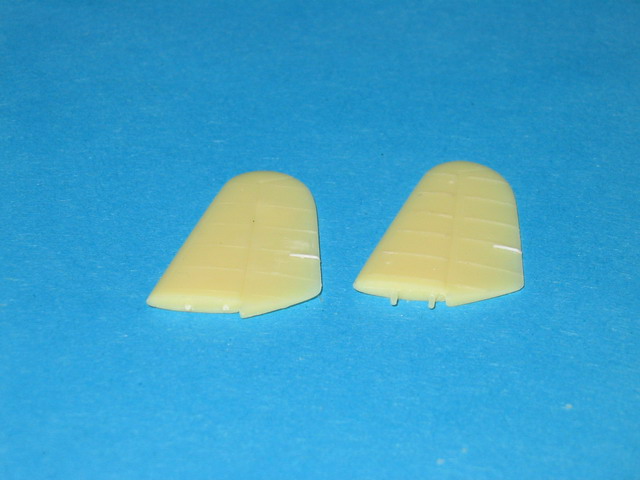
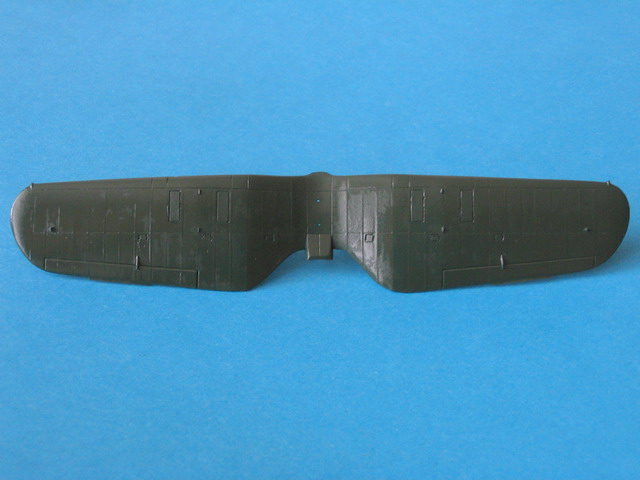
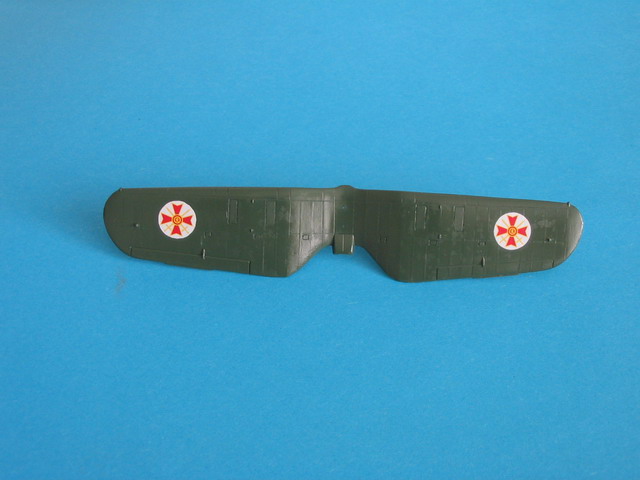
Because the wing struts are in the same colour as the wing undersurface-
light-blue, and fuselage in this place is green, I glued them to wings,
so I was able to slip them suitably onto fuselage. Wings to fuselage fit
is almost ideal, so I could made this after gluing on of all gizmos. And
it is a lot to made: aileron tabs and push-rods, crane hooks on upper
surface, streamlined shell ejector for central machine guns, Pitot tube,
as well as aileron hinges on bottom surface- they were scratchbuilt, but
I used antenna mounts and bomb racks from Part's “photoetch”.
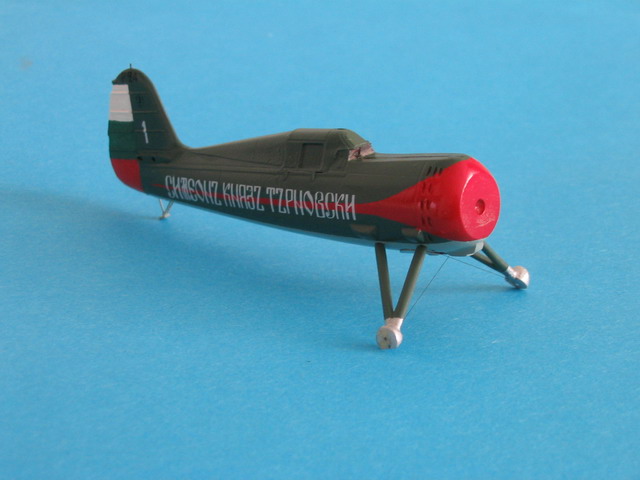
Painting,
Markings and Finishing Touches
|
So I got several almost
finished components, which I painted separately (experienced with rudder
painting, I used Humbrol enamels). Some panels were painted with
somewhat brighter tint. Then unusually, I set decals and sealed them
with Future. The decals are from Kagero, included with their “PZL P-24
A-G” book, and as national markings I used decals from Czech firm HiPM
from their Fw-56 "Stösser” kit. Both settled superbly on kits surface,
reacting well to Agama setting liquids. Decal with inscription in
Cyrillic alphabet was very thin and I destroyed it in some places at the
transfer, but I was able to repair without trace.
In between I altered exhaust outlet arrangement. I cut off original
exhaust pipe from engine cowling. The outlet was well made for the Greek
version, even with the opening at the end, but the pipe was too flat. I
glued rods imitating pipes running to individual cylinders, and added
“3D” to the flat pipe with epoxy glue. I glued suitably shapen gill to
exhaust outlet. The whole pipe was painted Burnt Metal metalizer and
treated with dry brush in rust colour.
Then I glued together all model basic elements: fuselage, wings,
horizontal stabilizer, undercarriage and engine, I added a sublte wash
using Tamiya Smoke thinned with Future and gentle dry-brushing of
protruding elements with a brighter tint of camouflage paint. I
varnished then, to get equal degree of gloss. You can see clearly on the
pictures, that airplanes were gloss painted, therefore such is my model.
I took off masking from external and internal side of cockpit canopy and
I glued remaining parts: propeller, exhaust pipes, oil radiator on the
starboard side of the fuselage, gun barrels made from injection needles,
undercarriage braces, cockpit canopy handle, photoetched gunsight, Holt
flare launcher on starboard strut, and also I made position lights.
For years I wondered how
to make a model of "Pezetel” with its inscription in the Cyrillic
alphabet, and finally the Kagero book with included decal made this
possible.
I can sincerely recommend this kit to modellers with some experience in
building resin kits, both in the Greek version, and as a conversion into
the Bulgarian variant.
Click the thumbnails below to view larger
images:
Model, Images and Text
Copyright © 2005 by
Piotr Dmitruk
Page Created 09 September, 2005
Last Updated
09 September, 2005
Back to
HyperScale Main Page |
 Home
| What's New |
Features |
Gallery |
Reviews |
Reference |
Forum |
Search
Home
| What's New |
Features |
Gallery |
Reviews |
Reference |
Forum |
Search