|
Retreat in
Normandy
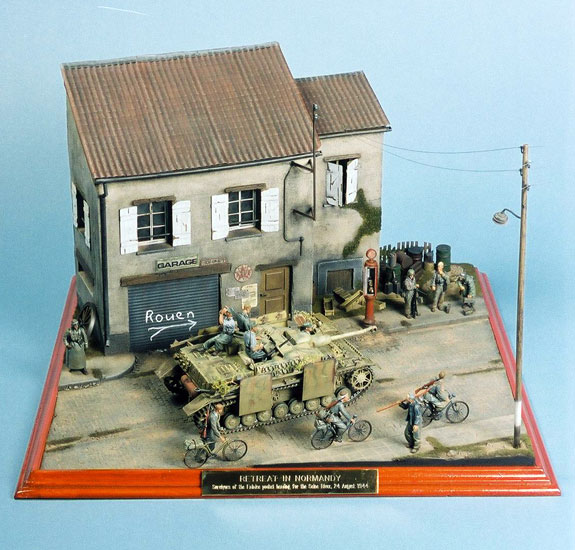
Survivors of the Falaise pocket heading for the
Seine River, 24 August 1944
by Gert du Preez
|
 |
|
Retreat in Normandy |

HyperScale is proudly supported by Squadron.com
The Allied D-Day landings on the Normandy coast in June 1944 and the
subsequent two and a half month-campaign have always fascinated me from
both a historical and a modeling viewpoint. From the latter perspective,
the Normandy campaign provides a considerable variety of subjects in
terms of armour, weaponry and uniforms used – any diorama builder’s
dream! It is perhaps for this reason that Normandy dioramas have been
dominating my display cabinet thus far…
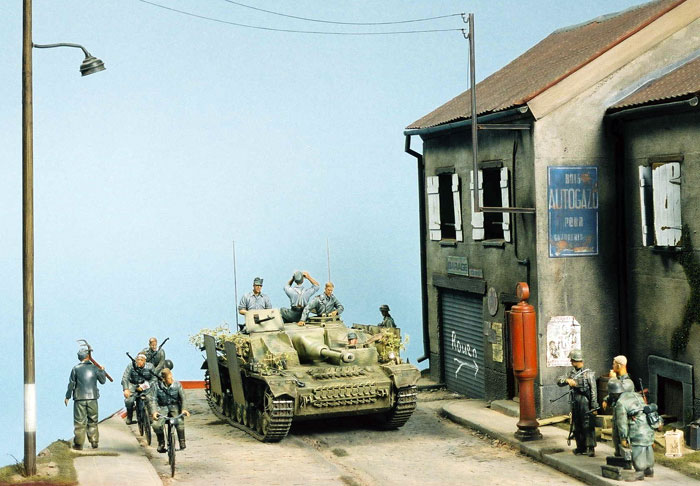
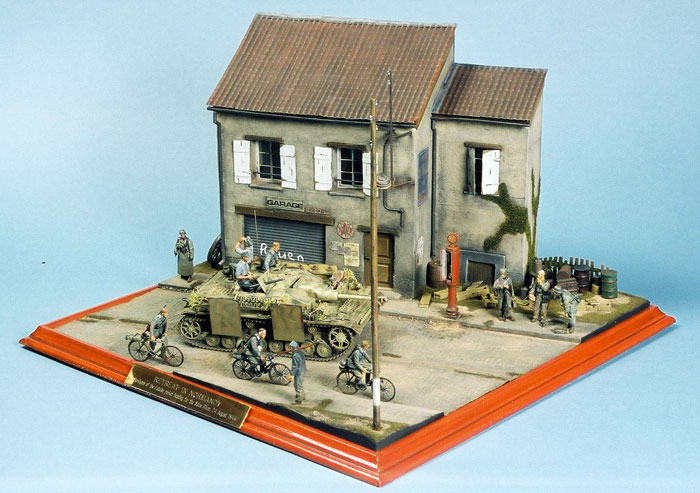
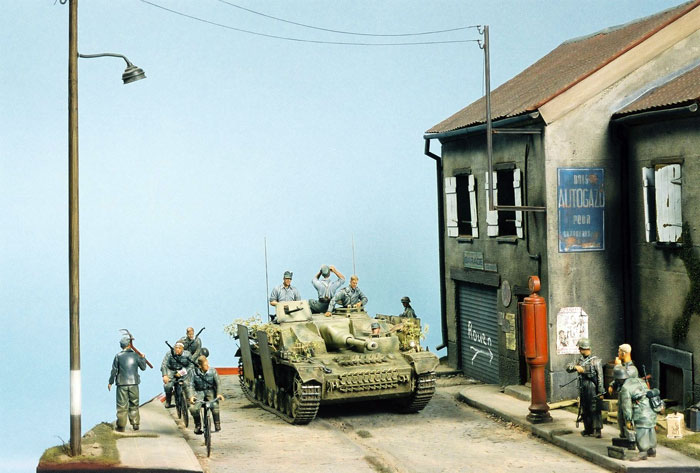
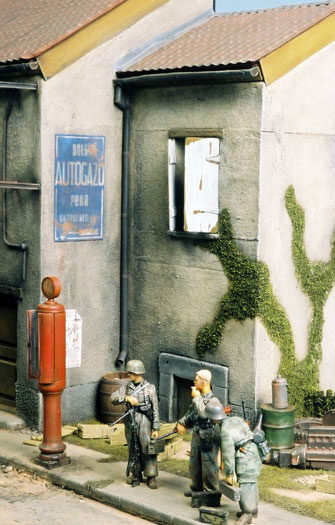
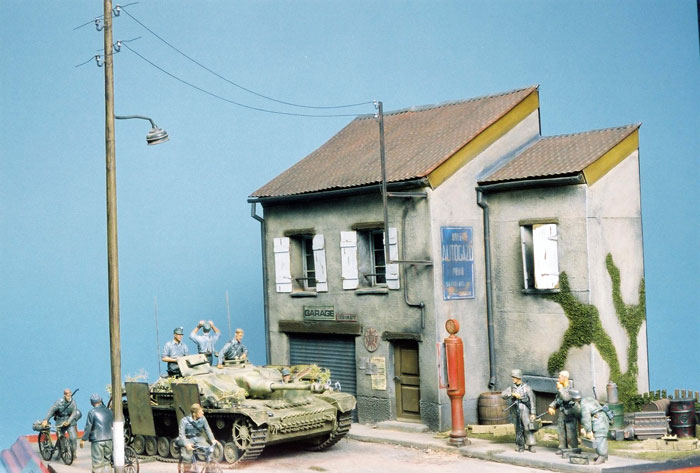
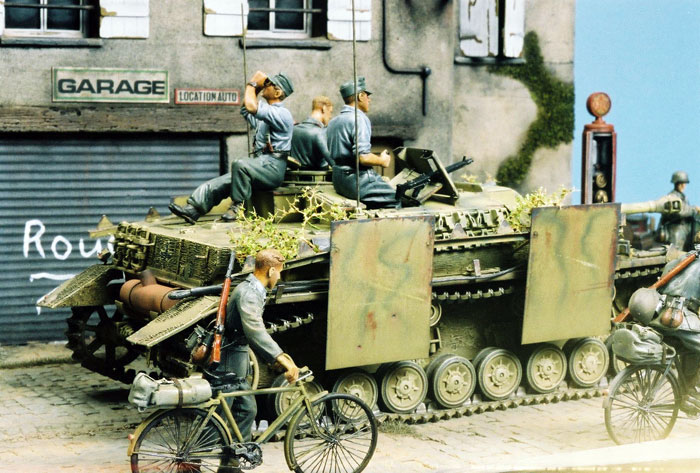
With the diorama described in this article I tried to reflect the
atmosphere of the German retreat of late August 1944, depicting
survivors of the Falaise pocket heading for Rouen, where the largest
part of what was left of the retreating German 7th Army
crossed the Seine River into central France. Reference material on the
retreat show that while it was conducted very orderly, Army, Waffen SS
and Luftwaffe units all got mixed up in the dash for the Seine. From
there the army StuG IV, dismounted army motorcyclist and army infantry
on bicycles and the two Waffen SS and Falschirmjäger next to the road.
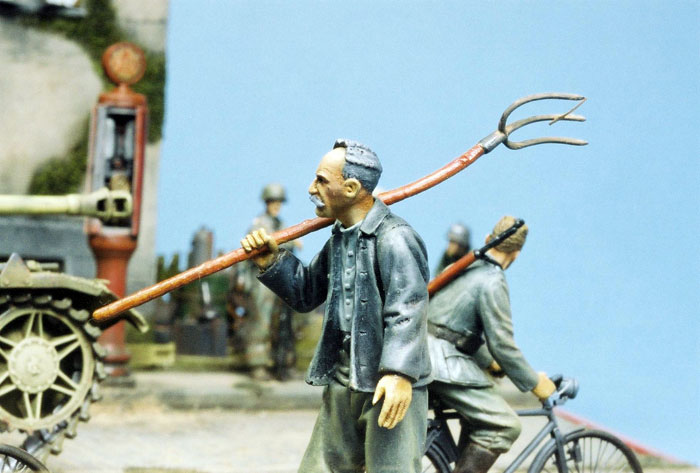
The French farmer, walking in the opposite direction to the Germans, was
added to give civilian life to the scene and to reinforce the effect of
movement.
As commercially available ceramic/plaster buildings are on the expensive
side and because examples of intact buildings are rather scarce, I
decided to try my hand at making my own buildings, starting with the
garage used in this diorama. While I must admit that the enterprise made
me realize why these items are so expensive, the finished product
certainly provides a lot more satisfaction when you know that it is your
own handiwork…
 I
based the design of the garage on an item seen in an old catalogue of
the French manufacturer JMP and slightly modified it to suit my
requirements. Masters for the two front-facing walls, the center
dividing wall and the left wall were made from 10mm polystyrene sheets,
with the holes for the windows and doors cut out. Balsa wood strips
simulating wooden beams were then inserted and glued into the
polystyrene sheets above the windows and doors, while the entrance door
to the cellar is a plaster casting from a Verlinden item also
inserted and glued into the polystyrene sheet. To create the rough
texture of the walls, I glued sandpaper cut to the desired sizes onto
the polystyrene walls, using strips of a thicker grain paper on the
lower part of each wall. Once the masters were finished, moulds of the
four walls were made from liquid rubber, a very useful (and cheap)
product for the casting of flat, two-dimensional objects, although its
elasticity once dry can cause a warped casting if not properly supported
during the casting process. After 15-20 coats of liquid rubber each the
dried moulds were removed from the masters (the liquid rubber does not
stick to any surface, not even the course sandpaper) and plaster mixed
with white glue poured in. Once dry, the rubber moulds were carefully
peeled off the castings, which were left to dry properly outside the
moulds. One more casting of the center dividing wall was then made and
cut to size to represent the right outer wall of the building. The
joining ends of the five walls were then sanded down to ensure a proper
fit, glued together with super glue and the gaps (of which there were
many…!) filled with Pollyfilla. Filled-up areas were then stabbed
with a rounded nylon brush to ensure continuity in the rough texture of
the walls. At this stage all the window and door openings also received
a coat of Polyfilla which was subsequently sanded smooth, as did
any other areas on the walls which required a touch-up following the
casting process. I
based the design of the garage on an item seen in an old catalogue of
the French manufacturer JMP and slightly modified it to suit my
requirements. Masters for the two front-facing walls, the center
dividing wall and the left wall were made from 10mm polystyrene sheets,
with the holes for the windows and doors cut out. Balsa wood strips
simulating wooden beams were then inserted and glued into the
polystyrene sheets above the windows and doors, while the entrance door
to the cellar is a plaster casting from a Verlinden item also
inserted and glued into the polystyrene sheet. To create the rough
texture of the walls, I glued sandpaper cut to the desired sizes onto
the polystyrene walls, using strips of a thicker grain paper on the
lower part of each wall. Once the masters were finished, moulds of the
four walls were made from liquid rubber, a very useful (and cheap)
product for the casting of flat, two-dimensional objects, although its
elasticity once dry can cause a warped casting if not properly supported
during the casting process. After 15-20 coats of liquid rubber each the
dried moulds were removed from the masters (the liquid rubber does not
stick to any surface, not even the course sandpaper) and plaster mixed
with white glue poured in. Once dry, the rubber moulds were carefully
peeled off the castings, which were left to dry properly outside the
moulds. One more casting of the center dividing wall was then made and
cut to size to represent the right outer wall of the building. The
joining ends of the five walls were then sanded down to ensure a proper
fit, glued together with super glue and the gaps (of which there were
many…!) filled with Pollyfilla. Filled-up areas were then stabbed
with a rounded nylon brush to ensure continuity in the rough texture of
the walls. At this stage all the window and door openings also received
a coat of Polyfilla which was subsequently sanded smooth, as did
any other areas on the walls which required a touch-up following the
casting process.
Note: A much better way to make moulds is of course to use proper
silicast, something I
started doing following this project. While it is a much more expensive
method,
especially for a once-off project, having perfect moulds saves you a lot
of filling
and sanding on your eventual castings.
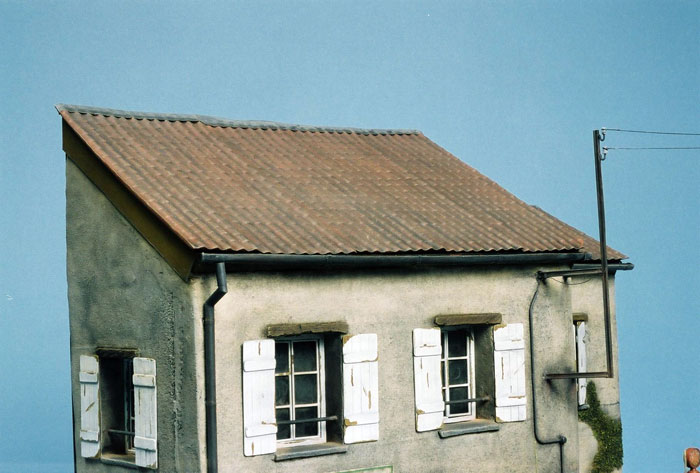
With the basic structure of the garage in place, the window frames (from
2mm x 2mm balsa strips), windows (from .75mm x .75mm plastic strips),
shutters and front door (from plastic strip) were constructed and the
garage door cut from a 1/50 scale plastic roof section. While the garage
door was glued in place before painting, the window frames, windows,
shutters and front door were painted separately and glued after the
building itself was painted. The roof tiles are plaster castings made
from a plastic roof tile section, which were glued onto a solid plastic
sheet resting on balsa beam sections glued to the tops of the five
walls. Gutters were made from a plastic straw cut in half and the
drainpipes from plastic tubing, with strips of thin aluminium tape
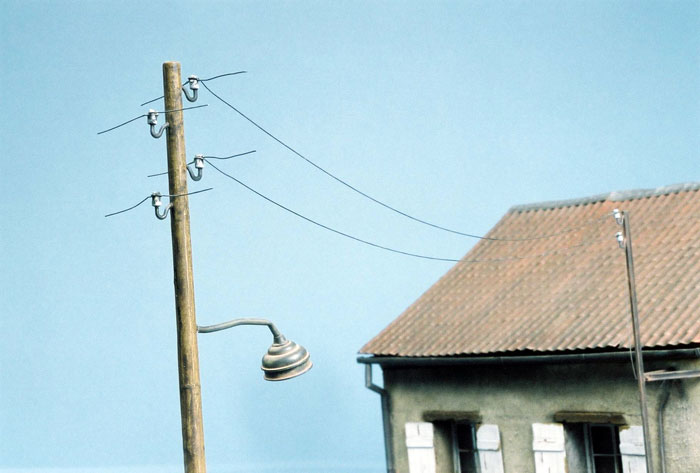
representing the joints. The telegraph line mount on the wall was made
from Evergreen plastic I-beams and the pipe through which the
line enters the building is part of a Sd.Kfz 223 frame antenna.
Before fixing the garage to the base (a piece of hardboard cut to 39,5cm
x 39,5cm), Verlinden cobble stone road and sidewalk sections cast
in plaster were glued in place and a shallow drainage canal in the
middle of the road was made from modelling clay imprinted with a liquid
rubber cobblestone mould prior to curing. Once these in place, the
garage was glued to the base on a 10mm polystyrene sheet (to get it on
sidewalk-level) and the areas of open ground covered with Polyfilla,
over which was sifted small stones (from plaster) and fine sand while
still wet. Once dry, static grass was added where appropriate, including
here and there on the road and sidewalk. Dried used tea leaves were
glued in place to simulate the ivy creeping up the right wall and over
the wooden fence section, which was taken from an old Tamiya Road
Signs kit.
Painting was done from the highest point to the lowest, ie first the
roof (Tamiya Red Brown), then the building (acrylic mixture of
whites, greys and yellows), the sidewalk and road (Tamiya XF63
mixed with white and flat earth) and then the gravel/grass sections (Humbrol
Dark Earth). Once dry, a series of black/raw umber oil paint washes were
applied to the whole scene, followed by further individual washes to the
different components of the scene (black and burnt sienna on the roof,
more black/raw umber on the building, raw umber on the sidewalks and
road and black on the gravel). This was followed by drybrushing (with
oils) of the various components with progressively lighter shades of the
respective base colours. Subtle rust stains on the garage door and on
the garage walls were added with thin Burnt Sienna oil washes. Once
satisfied with the overall finishing, the ivy and grass were drybrushed
with Olive Green and Cadmium Yellow oils, with the ivy receiving a final
brushing of Deep Green. Lastly, red brown, orange and white pastel dust
was “drybrushed” onto the roof and a coat or two of Mig Productions’
European Dust pigments were added to the street, sidewalk and gravel
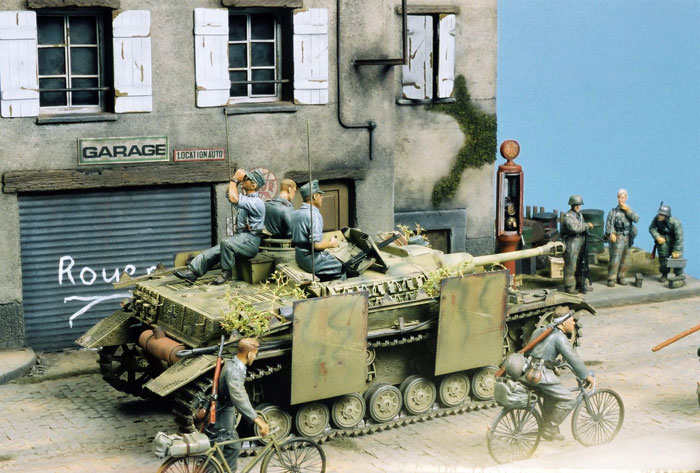
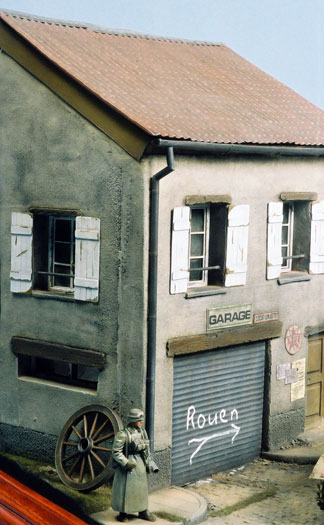
sections. Finally, Verlinden commercial signs and posters were
glued on where appropriate and the “Rouen” and arrow handpainted on the
garage.
As I had no intention of doing the interior of the building for this
diorama (which I might do one day for a “follow-up” diorama to depict
the same scene a few days after the Germans passed through it, this time
with the garage destroyed and a Sherman winding its way through the
rubble on the street…), I closed off the back of the garage with
plasticard and airbrushed it matt black.
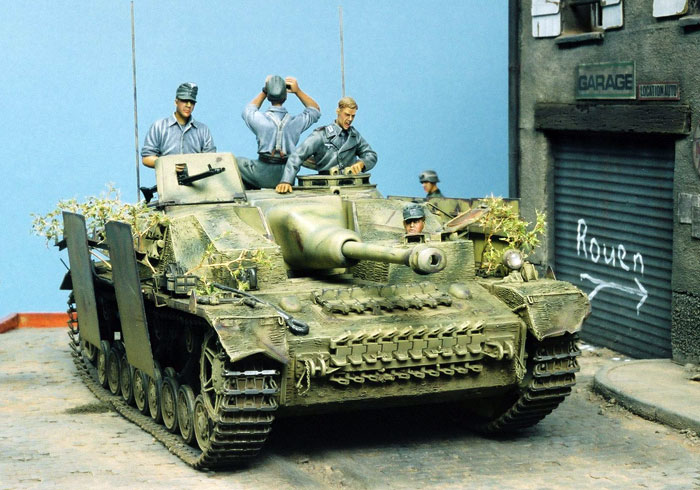
For the StuG IV, I used Tamiya’s old 1971 kit and combined it
with Aber’s three excellent photo-etched brass detail sets
specifically designed for that kit (basic set, sideskirt brackets and
sideskirts) as well as the equally superb Friulmodel tracks (for
which I had to replace the Tamiya sprocket wheels with those from
the Italeri StuG IV kit). Zimmerit was applied with a fine
soldering iron prior to construction.
After construction and without sideskirts and tracks, the model was
primed with Tamiya’s fine (white) primer and airbrushed with
lightened Tamiya Dark Yellow acrylics. Then followed Olive Green
camouflage stripes (again Tamiya acrylics) to produce a scheme
representative of a vehicle of StuG Brigade 394, one of the three
independent StuG brigades deployed during the Normandy campaign (the
other two being StuG Brigade 12 (Fallschirmjäger) and StuG
Brigade 341), according to the publication Les Panzer en
Normandie (see list of sources below). This particular scheme is
based on a colour plate appearing on page 65 of this publication, in
which it is mentioned that some of StuG Brigade 394’s StuGs – which
included StuG IVs – managed to escape the Falaise pocket.
As few markings appeared on the colour plate used as reference, I only
handpainted German national crosses on the rear plate and sides of the
superstructures, as seemed to have been the practice from other
references. A series of Raw Umber and Black oil washes was next,
followed by dry brushing with a mix of Yellow Ochre and Titanium White
oils. Painting of details (tools, vision blocks etc) followed, while
scratches and peeled and worn paint were simulated by adding random
spots and streaks of first a rusty colour and then a dark grey colour on
the most exposed surfaces of the vehicle and the sideskirts, followed by
light drybrushing with Humbrol Polished Steel. Rust streaks were
added where appropriate with orange pastel powder. An avid follower of
Tony Greenland’s painting methods since I bought his excellent book
Panzer Modelling Masterclass, I airbrushed the substructure and
running gear with Humbrol’s Dark Earth, followed by drybrushing
with oils (Yellow Ochre and Titanium White, increasing the amount of
white with every drybrushing).
Once the painting was completed, I added a white 4mm Greif light
lens to the headlight without cover as well as a 1.5mm red lens from the
same manufacturer for the reflector on the rear mudguard.
The metal tracks received a base coat of Humbrol Dark Earth (as
per the Tony Greenland method), followed by several washes of Raw Umber
oils, which on a dark surface normally dries to a dust colour. (In this
regard, applying Mig Productions’ European Dust pigments should
certainly be a more effective and less time-consuming option.)
Drybrushing with Humbrol’s Polished Steel completed the tracks.
Finally, a few branches for camouflage against air attack – a common
feature on German vehicles throughout the Normandy campaign – were fixed
to the StuG. These were made from Verlinden’s excellent Trees and
Hedgerows set, which unfortunately does not seem to be available
anymore.
The StuG crew consists of slightly modified Verlinden figures
(commander and gunner), a Dragon driver – the commander and
driver with Hornet replacement heads – and a Warriors
loader (sitting outside the fighting compartment). The commander was
given a new right arm from Dragon, while the Warriors
figure’s right leg was straightened (cut and filled with Milliput)
to better fit his position on the toolbox.
The three cyclists are from Tamiya and were given Hornet
heads and a Verlinden hand here and there to better grip the
handle bars. The two riders’ hair was sculpted from Milliput on
bald Hornet heads, while the wounded man also received
Milliput bandages around the head and left hand. The bicycles are
from Tamiya, again super-detailed with Aber’s photo-etched
sets. Rifles are from Dragon and their slings from paper with
Aber buckles.
The two SS men and the Fallscirmjäger are Wolf items with
Hornet replacement heads, with only the MG 42 gunner having been
slightly modified from carrying an extra ammo case on a wooden stick to
resting his hand on the MG, which received a tin foil sling and an
Aber buckle. The dismounted motorcyclist is from Hornet.
The French local is a Verlinden figure.
Once all the component parts of the diorama were finished, various
accessories were painted and added, ie the Verlinden gas station,
equipment associated with a garage (oil and fuel drums, an old engine
block, old tyres, cans etc), a wagon wheel, a water-filled barrel and a
telegraph pole. A few empty Verlinden Panther ammo cases and a
cardboard box were also added, not only to fill some empty space, but
also to reinforce the idea of a hasty retreat.
Prior to fixing the model, figures and accessories to the diorama base,
the latter was “framed” by gluing cheap pine wood mouldings (cut to
size, stained with thinned Burnt Sienna oil paint and given a few coats
of gloss varnish) to its sides. Where my free-hand 45-degree angles did
not fit properly, I used Milliput to fill in the gaps prior to
staining.
·
Les Panzer en Normandie (Yves
Buffetaut & Jean Restayn, Militaria Magazine, Hors Série no 1, Histoire
& Collections, Paris).
·
La Bataille de Normandie (Yves Buffetaut &
Jean Restayn, Militaria Magazine, Hors Série no 13, Histoire &
Collections, Paris).
·
Operation Goodwood (Yves Buffetaut & Jean
Restayn, Militaria Magazine, Hors Série no 26, Histoire & Collections,
Paris).
·
Normandie: Août 1944 – La Retraite Allemande
(George Bernage, 39-45 Magazine, Hors Série no 4, mars-avril 1988,
Editions Heimdal).
·
Sturmgeschutz III & IV, 1942-45 (Hilary
Doyle & Tom Jentz, Mike Fuller, Peter Sarson, New Vanguard No 37, 2001,
Osprey Publishing).
Sturmgeschutz III &
IV, 1942-45
New Vanguard
37 |
|
|
|
|
Author: Hilary Doyle & Tom Jentz
Illustrator: Peter Sarson, Mike Fuller
US Price: $14.95
UK Price: £8.99
Publisher:
Osprey Publishing
Publish Date:
June
25, 2001
Details: 48 pages; ISBN: 1841762865 |
|
|
Click
the thumbnails below to view larger images:
Model, Images and Text Copyright ©
2004 by Gert du Preez
Page Created 29 September, 2004
Last Updated
29 September, 2004
Back to
HyperScale Main Page |
 Home
| What's New |
Features |
Gallery |
Reviews |
Reference |
Forum |
Search
Home
| What's New |
Features |
Gallery |
Reviews |
Reference |
Forum |
Search