|
Classic
Airframes new 1/48 scale
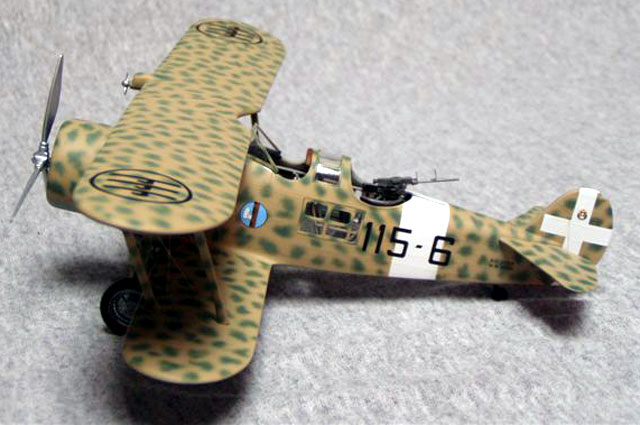
IMAM RO.37 & RO.37 bis
by
Phil Hale
|
 |
|
IMAM RO.37 |

Classic
Airframes' 1/48 scale RO.37 & RO.37 bis
are both available online from Squadron
For a detailed examination of the kit
contents, see
Steven "Modeldad" Eisenman's in-box review here on HyperScale.
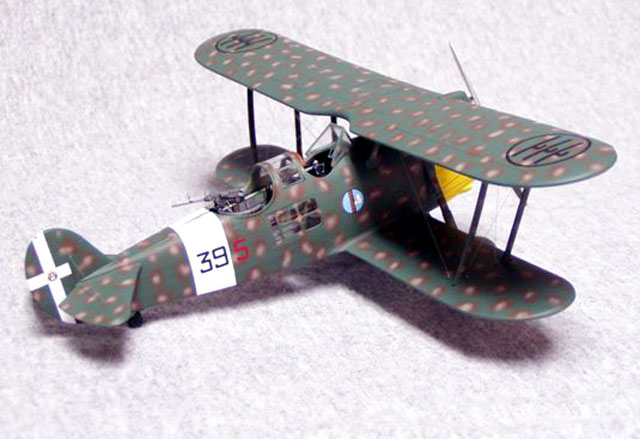
Leave it to Classic Airframes to release another unusual subject from
the early part of World War II.
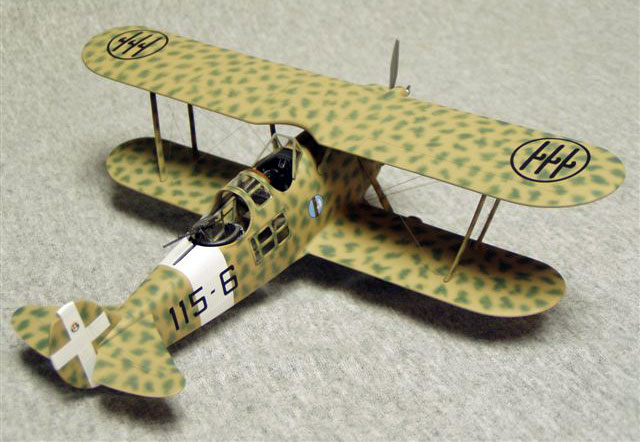
The IMAM RO 37 was first used in the Spanish Civil War and began life
as an observation airplane but soon graduated into light bombing and the
counterinsurgency role. The Italians called it “the maid of all work”.
As the name implies, it was used in various roles during the war.
Classic Airframes IMAM RO 37 - Kit # 468
The kit consists of fifty dark gray plastic pieces, five clear pieces
and eleven resin parts.
It features recessed panel lines and the scribing is very delicate.
There is also a very nice photo etched metal fret and clear film for the
instrument panels. The detail on the photo etch is of high quality and
contains two different front instrument panels and rear auxiliary
instrument panels. There are several parts for the rear machine gun
mount and very nice ring and bead sights for both the pilot and the rear
gun.
Three colorful decal schemes are included.
Most of the parts are the same for both versions inline engine and
radial engine.
I began by cutting the forward part of the fuselage using the
instruction sheet as a guide. I must confess that I have very little
info on the airplane so I had to “wing it” so to speak. Be careful when
you cut because sometimes in limited kits there may be slight
differences in the fuselage length.
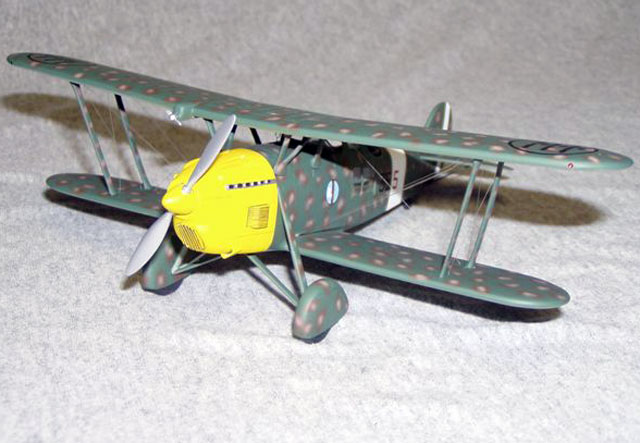
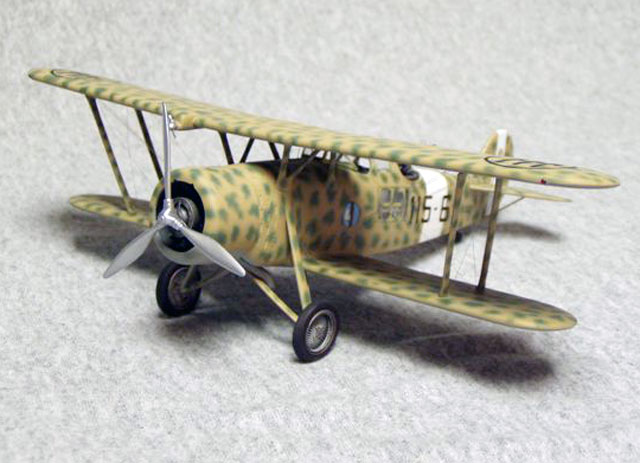
I cut the left side and glued the inline cowling to the fuselage. I
then mated the right side, using tape, to the left in order to make sure
of my cut on the right side. I still had a slight mismatch but nothing
that a little sandpaper can’t handle. Make sure that the front of the
cowlings line up because this would be the hardest part to sand out.
Also the propeller spinner is inset in the cowling.
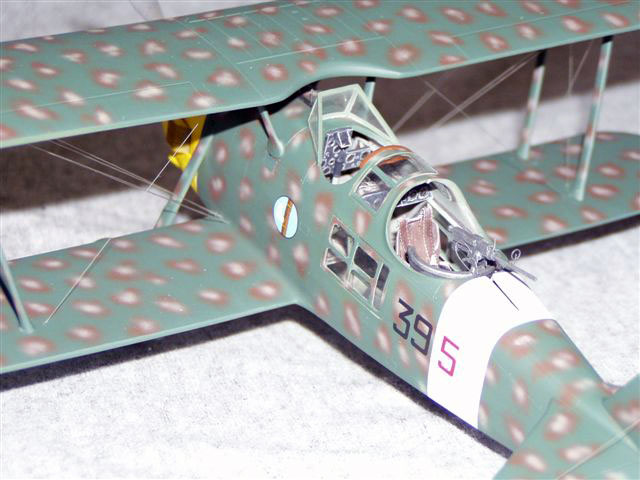
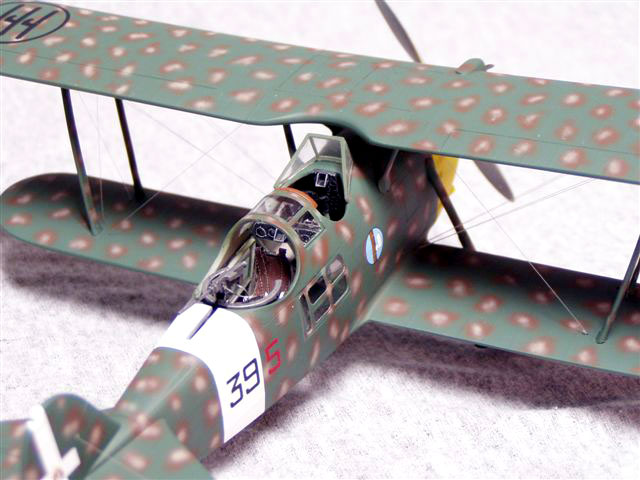
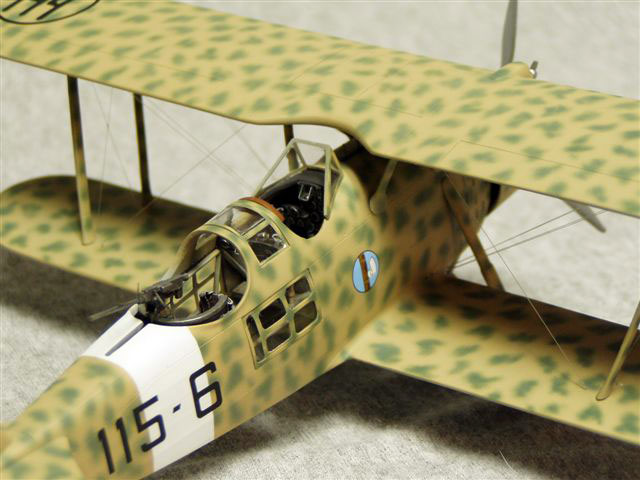
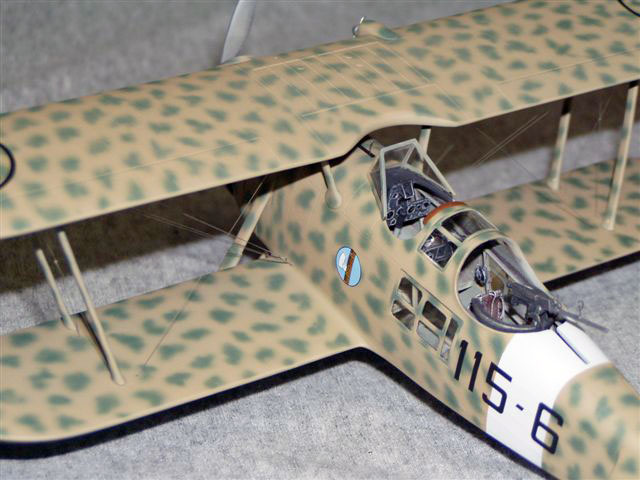
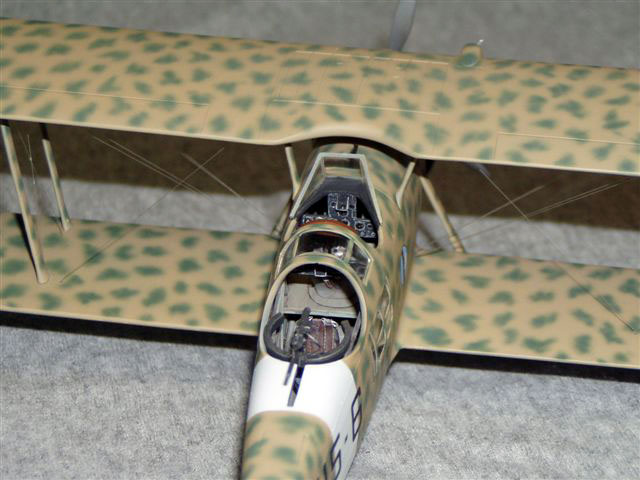
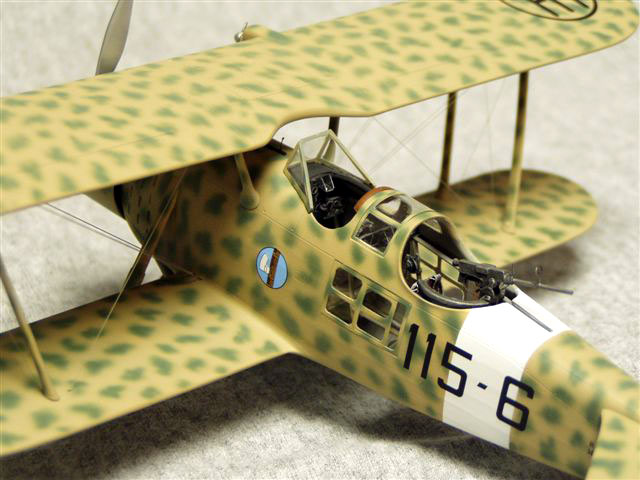
I then began my normal cockpit clean up and painting. The cockpit is
fairly plain and but with no cockpit photos, I have no idea what the
real thing is like but the kit gives enough to be very acceptable in
1/48 scale.
The etched instrument panels are very nice and etched seat belts are
well represented. The Italians had a very convoluted seat belt
arrangement with chains and straps. This is a nice touch and adds a lot
to the cockpit.
Filling and sanding presented few problems. I needed a little filler
to fair the wing into the fuselage but none for the rear stabilizers.
The landing gear is a three part affair but with a little test
fitting, it went together very well. There are recessed areas on the
fuselage side where the main strut locates. Take your time in this area
and make sure that everything is lined up properly.
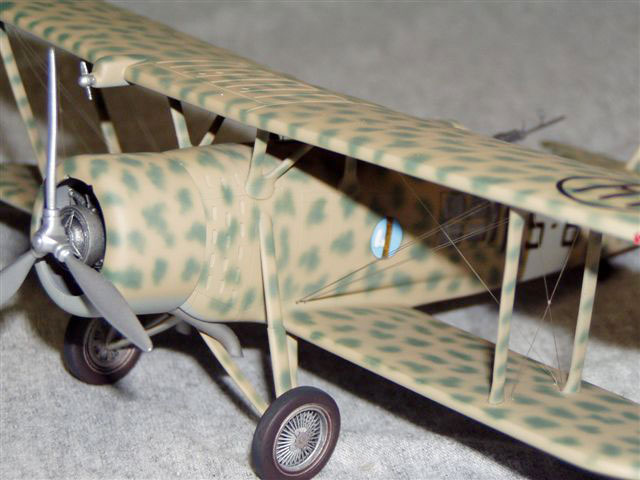
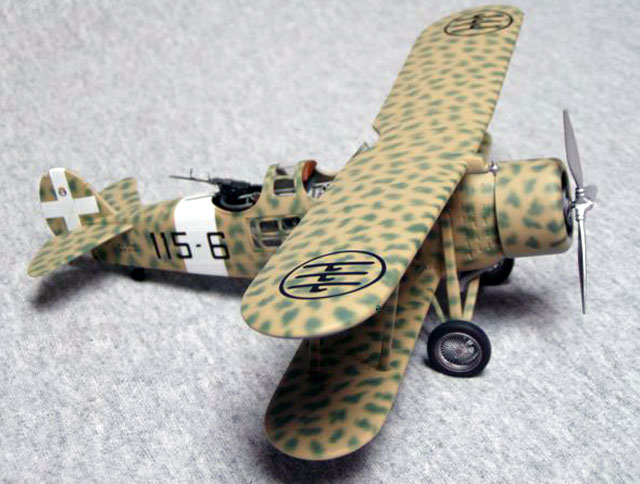
You have the option for wheel spats or exposed wheels. This
particular scheme required the spats. A very nice set of spoked wheels
are given on the photo etched fret. This presented a slight problem at
first but a little trial and error, I was able to get the wheels
together. The tires are in two pieces, a left and right half. You have
to trap the spoked wheel inside the tire halves and at the same time
trap a small rod in between the spoked sides to make the center bow
outward like that on a bicycle. I decided not to use the rod as it was
too long and used two smaller plastic disks instead. I glued one to each
interior side of the spoked wheel and then glued them inside the tire
halves. Then I glued the tire halves together and got the results I was
looking for. The spokes bow out in the center and look very realistic.
Before painting, I drilled holes for the rigging.
Painting,
Markings and Final Assembly
|
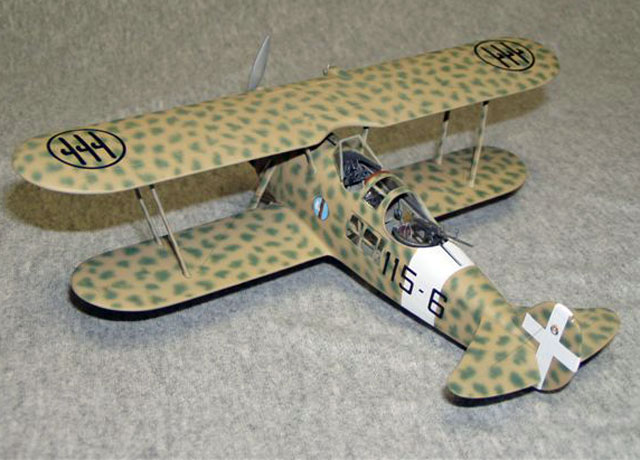
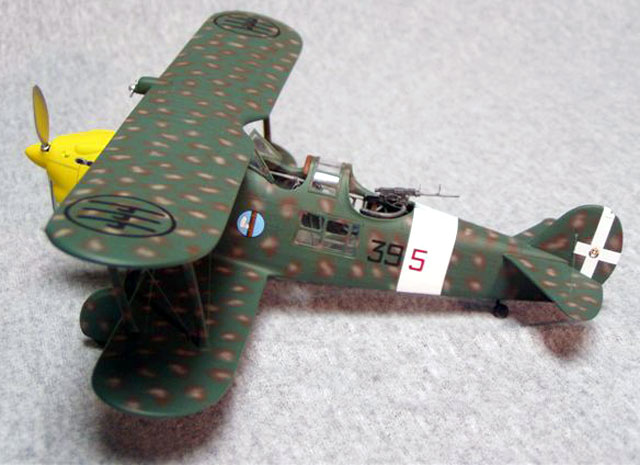
 I
painted the various parts, fuselage/lower wing unit and the upper wing
separate and then attached the upper wing to the fuselage. I used Model
Master Italian colors except for the dark green which is closest to FS
34092(Euro One Green). I
painted the various parts, fuselage/lower wing unit and the upper wing
separate and then attached the upper wing to the fuselage. I used Model
Master Italian colors except for the dark green which is closest to FS
34092(Euro One Green).
I had a little trouble getting the outboard struts to fit well to
upper and lower wing. I used brass pins to strengthen the attachment
points and attached the outboard struts first and then I attached the
fuselage (cabane) struts.
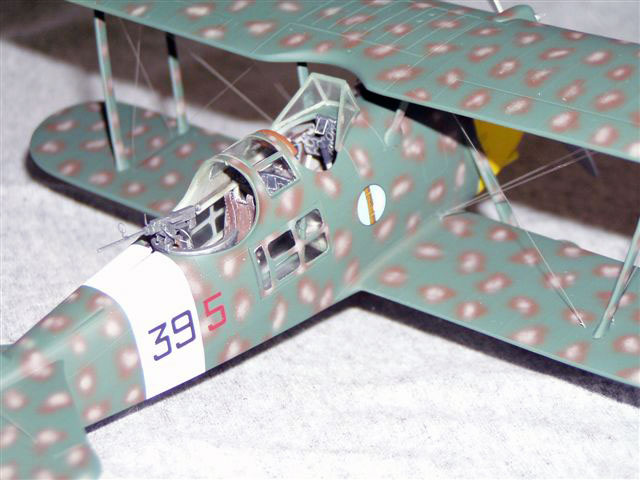
Decaling went well and quickly. The decal sheet is printed by Micro
Scale and is up to their usual standards. I used a little setting
solution on the white cross on the tail to make into conform. The model
has five clear pieces including windows for each side and one on the
underside. I had to trim these pieces to get them to fit as they are a
little large.
The clear piece that goes between cockpits needs to be trimmed a
little as well.
There is nothing really major to watch for in building this kit. As
it explains in the instructions, these are limited run kits and as such
require a little more clean-up.
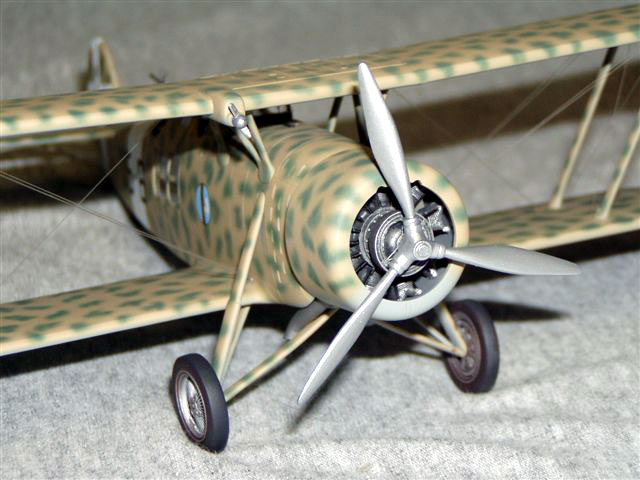
Classic Airframes IMAM RO37 bis - Kit # 469
There are only a few differences in these two kits. The main
difference is the RO 37 bis has a radial engine. You won’t have to worry
about making cuts to fit the inline engine to this one.
The kit consists of 51 dark gray plastic parts, 12 resin parts and
five clear pieces. Once again there is a photo-etched fret included.
This a common fret for both kits and it does have a part for the radial
engine. Construction is fairly straight forward with a few fit problems.
The wing to fuselage joint required a little filler to blend it
smoothly and I had to trim the resin radial engine to get it to fit
inside the cowling. I had a little trouble with the struts but these fit
better than the ones in the inline kit ( #468). This is odd because they
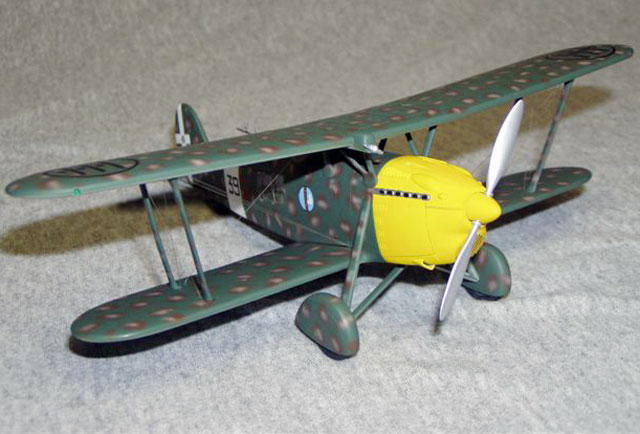
are a common tree for both. I left the wheel spats off of this one to
expose the beautiful spoked wheels.
Painting, decaling, and final assembly went well.
In summary, these are both nice little kits of an unusual subject. It
fits well and anyone with some experience with limited run kits will
have very little problem with this one. It also helps to have built a
biplane or two.
If you like Italian aircraft from this time period, you’ll enjoy this
kit. It is not hard to build and it will be unusual in your collection.
Try a limited run kit, they get better and better.
Thanks to
Classic Airframes for the sample
Click the thumbnails below to view larger images:
Model, Images and Text Copyright © 2004
by Phil Hale
Page Created 01 November, 2004
Last Updated
01 November, 2004
Back to
HyperScale Main Page
|
 Home
| What's New |
Features |
Gallery |
Reviews |
Reference |
Forum |
Search
Home
| What's New |
Features |
Gallery |
Reviews |
Reference |
Forum |
Search