|
Italeri's 1/72 scale
Savoia Marchetti
S.79
by
Dave Pluth
|
 |
|
Savoia-Marchetti S.79 |

HyperScale is proudly supported by
Squadron
As most folks will know, the SM-79 was used by the Italians as a
bomber/torpedo bomber during WWII. Rather than wasting time with a great
deal of history, I’ll leave it to you (and the reference list at the end
of this review) to figure out the details.
After all you just want to know about building the kit.
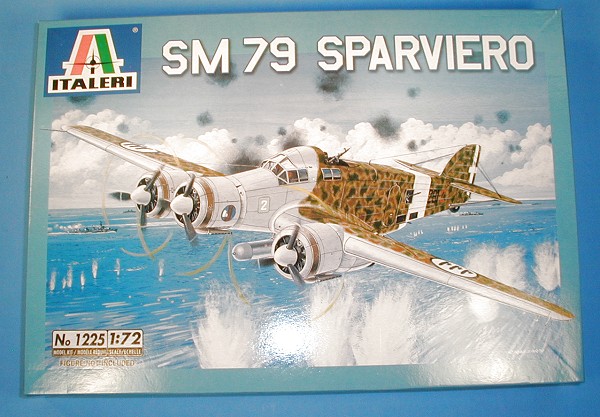
Italeri's
new 1/72 scale S.79
|
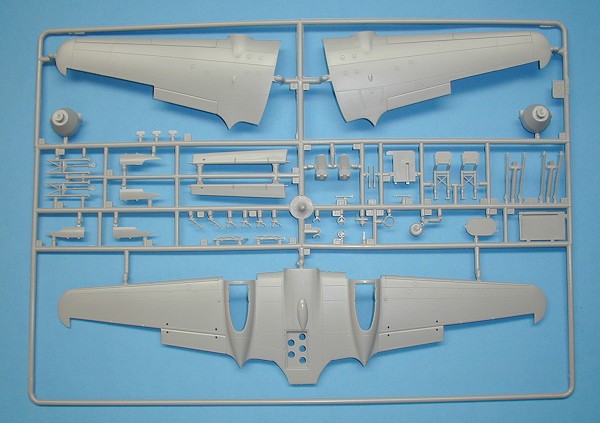
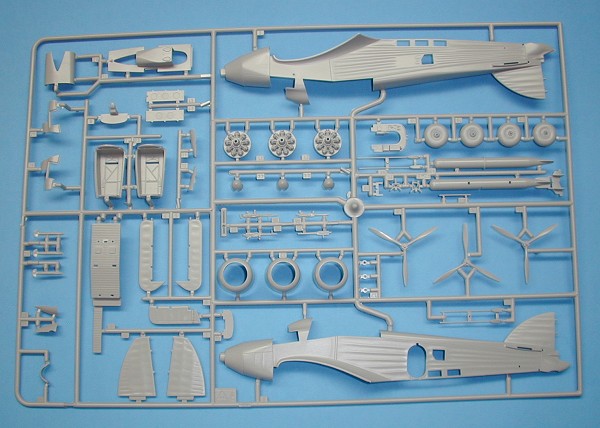
The new kit consists of 105 pieces with an additional 13 clear pieces.
The molding is very nice in most cases. The panel lines on the wings are
a bit overdone, but work out nicely for either drawing in or using a
wash to bring out the panel lines. Conversely the molding on the cowls
is quite a bit under done and will need a bit of re-scribing to improve
the finished look.
Click the thumbnails below
to view larger images:
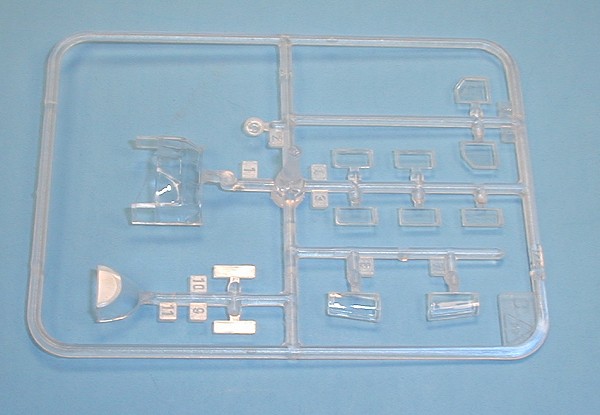
The kit glass is overly thick and as you’ll see later in the review,
rather poor fitting. The tree arrangement (especially the ease of
removal without damage) is very well done.
The instructions sheet also leaves just a bit to be desired. Locations
of many pieces are less than obvious in some cases and will cause you to
make errors if you are not careful. I would strongly suggest reviewing
and re-reviewing the entire instruction sheet upon completion of each
step. If you don’t, you will miss something!
The Cockpit
My first view of the cockpit left me a bit disappointed. It is
extremely simple and there is little detail to be had. The seats are
very much over simplified and no seatbelts (decals, molded in or
otherwise) are provided. That said, when you complete the kit, you can
see very little inside the cockpit (even with all the glass), so I don’t
know that I’d waste a great deal of time or money on it.
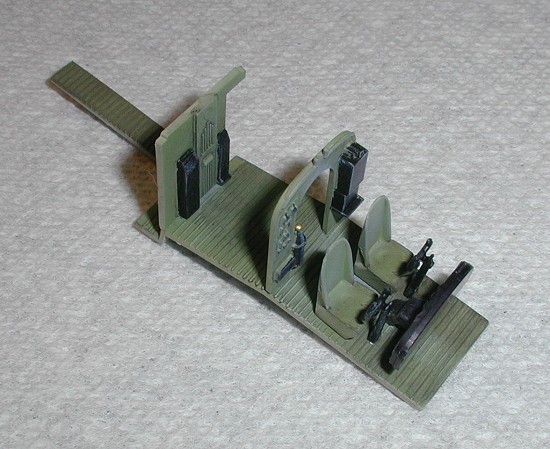
I chose to do the cockpit without the instrument panel decal. You are
given an option for either a decal or a panel that you can paint with
simple instrument outlines on it. In retrospect, I think I would have
opted for this option as it does add just a touch more detail.
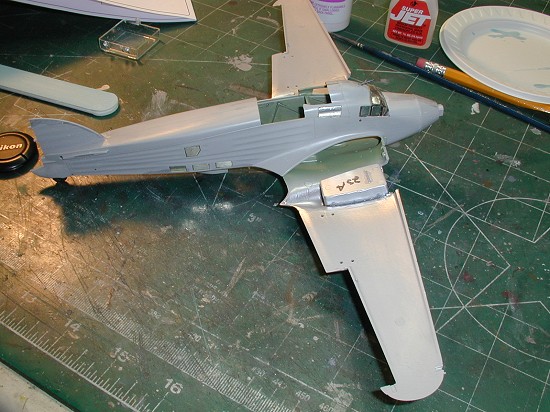
The Fuselage
The next stage was to assemble the fuselage. This was a bit more
difficult than I expected. The first phase was to put in all the glass
on the fuselage. Sounded quite easy, but a fair amount of
sanding/trimming/fitting is required to get things to fit. While not a
huge deal to do, you just need to make sure that you do a lot of test
fitting before putting any glue on. Also, I took the opportunity to mask
all the glass using Bare Metal Foil before installing. This will save
time masking later and is way easier at this stage than when the kit is
together.
The biggest fit problem with regards to the windows is the curved
windows that go near the upper gun deck. I wish I could tell you how I
got them to work out, but frankly I didn’t. My recommendation would be
to take the extra time before putting parts 27 & 28 together.
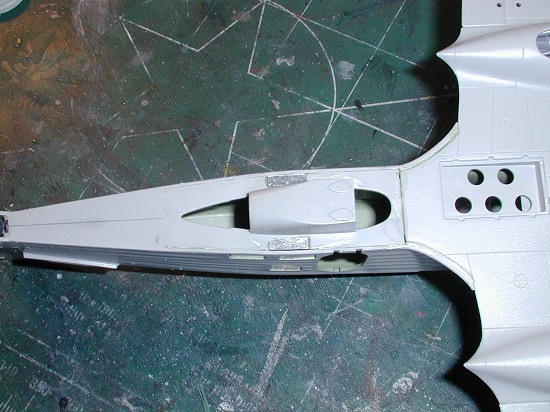
The next phase is to put the lower gun bay into the fuselage as well as
the cockpit. The cockpit goes in quite easily; however it’s kind of
difficult to figure out where exactly it goes based on the instructions.
The lower gun tub has a few fit problems as it appears to be just a bit
narrow for the fuselage. Spend a bit of extra time here dry fitting the
pieces and make the adjustments to the positioning before you glue the
halves together. I didn’t do this and my gun tub is slightly (very
slightly mind you) off center.
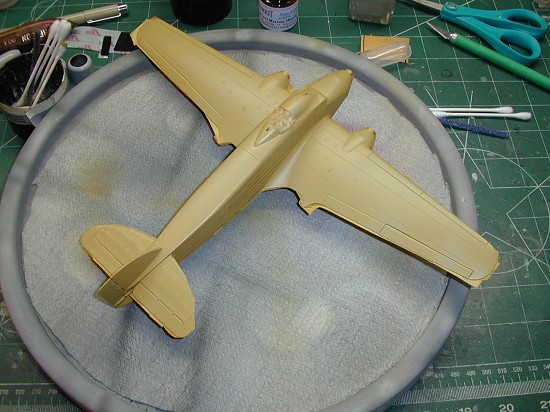
In general, if you care careful, the rest of the fuselage goes together
quite nicely, in fact the fuselage is quite pliable allowing the
assembly to be quite easy as you can glue your way down the fuselage and
align as you go.
One other area to watch is the cockpit greenhouse. Be very careful in
adjusting to get it to fit. I over-adjusted (sanding off what I thought
was an overhang on the top) and ended up having to fill and attempt to
sand the area.
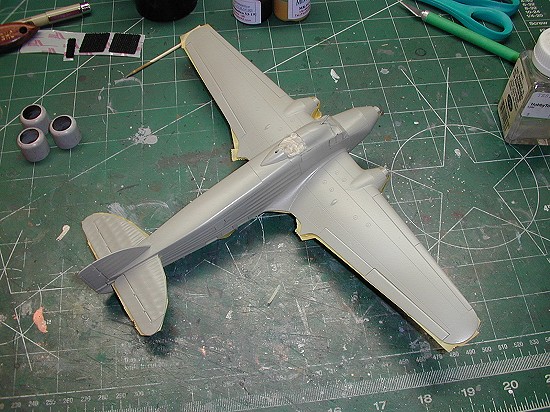
Wings, landing gear and more fuselage
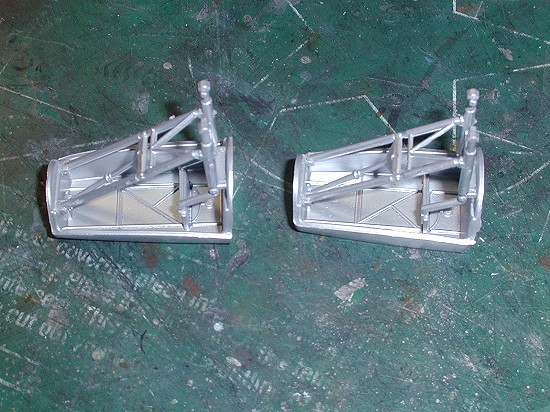
The landing gear is the next step. It is well engineered and fits
together very well. It is also quite sturdy once assembled. This
subassembly is put into the lower wing before attaching to the fuselage.
These fit quite nicely after playing around with different positioning
(magically it pops in to a tight fit).
The next step is assembling the wings. This kit does things a bit
differently. You glue the lower wing onto the fuselage and then the
upper wing on to that. This process actually works out quite well and
allows the fit into the wing root to be quite snug.
There is quite a bit of filling to be done on the lower fuselage at
this point. Between the gun tub and the lower wing there are some large
gaps. I used gap filling superglue for this task. It’s actually
relatively easy to fill and sand the area as it is almost flat. This
ended up being much less of a task than I had originally anticipated and
worked out quite well.
Click the thumbnails below
to view larger images:
The final phase of this stage was adding the elevators and rudder. A
bit of filing and sanding is required to make things fit, but the
overall effect is very nice once it is attached. The elevators went on
quite well and I pulled one of the supporting rods from the parts tree
(33B/34B) to ensure proper placement and elevation.
The last major piece of fuselage assembly was adding the pieces that
would hold the engine nacelles on the wings. These proved to be somewhat
testy to put in and required a great deal of fitting and filling to get
them to fit. This would be one area that may be simpler if you assembled
the wings in the more traditional method (separate from the fuselage) as
you could more easily sand out some of the rougher spots. All in all it
looked much more difficult than it was.
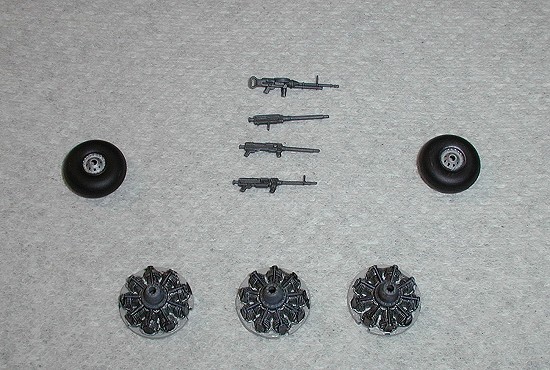
The engines themselves are very nice. The attention to detail is quite
good and the prop blades are very fine. The propeller hubs are a spot
that could use some help from a resin maker. The two kits that I have
both have some basic molding problems (injection sinkage) that could
probably be fixed with some work, but would be a nice opportunity for
some simple resin pieces.
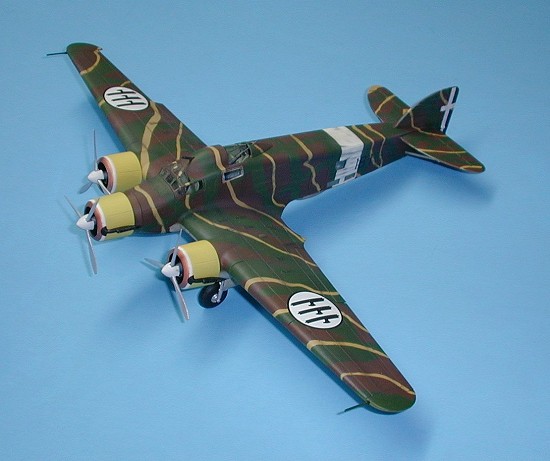
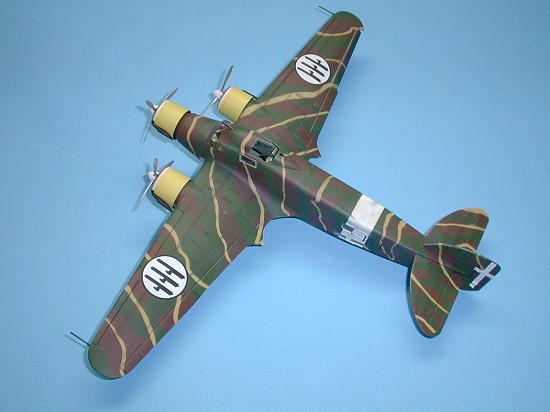
There was little else of interest in the building portion of things.
The kit comes with markings for four different aircraft with a real
variety of schemes available. The schemes range from very simple green
over gray to elaborate dapple patterns.
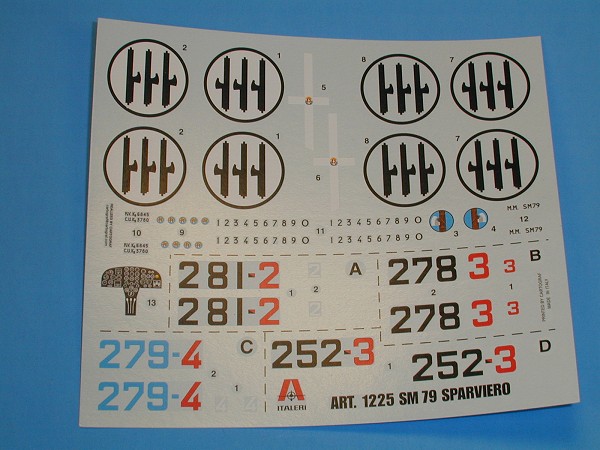
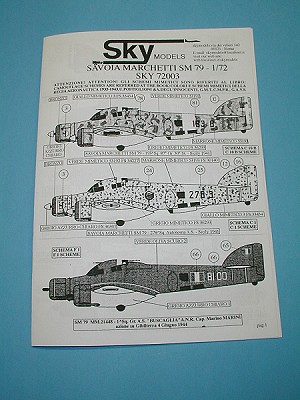
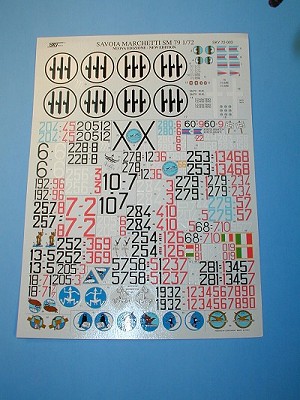
I chose to use Sky Decals set number 72003.
Click the thumbnails below
to view larger images:
These markings are actually for the old Airfix kits, but work quite
nicely for our purposes.
Sky is probably the single best decal maker out there. They give you 60+
options for markings as well as a very nice color guide to reference
various paint types and their Italian names. The decals settle in quite
nicely without any chemical (sols or sets) enhancements.
The only downside to Sky Decals is their documentation is very limited.
Because you get a booklet with many different schemes, there is little
info on decal layout on the wings or any type of supplemental decal
placement. Also, as the instruction booklet is black and white, it is
hard to discern the real color layouts or what order to apply colors in.
That said, the Sky Decal sheets are probably the best value for your
modeling dollar that you can get!
For paint I used MisterKit acrylic colors (paint.jpg) and a silly putty
masking technique. The MisterKit paint is very different to work with
than the enamels I normally use. The paint does not grab has hard as the
enamels do (duh!) so you have to be more careful when working with the
finished product so you don’t scratch it. The paints also aren’t very
opaque. I learned quickly that you have to make several very thin passes
to get the paint to dry correctly.
The biggest problem I had with the paint was to find a thinning agent.
As the bottles have no instructions I did some experimenting. My first
try was with the standard Floquil acrylic airbrush thinner (the blue
stuff). This worked pretty well, but didn’t offer much bite to hold the
paint on. My next try was lacquer thinner, which was a complete no go.
The paint wouldn’t even mix with it (paint-mix.jpg). My final try was
with mineral spirits with similar results to the lacquer thinner.
All in all the paint was OK, but nothing special as far as application.
The color of the paint is terrific. It matched up with the colors from a
couple of the color photo books that I have. The bit of struggle I had
with the paint was more than made up for with the colors that they
produced.
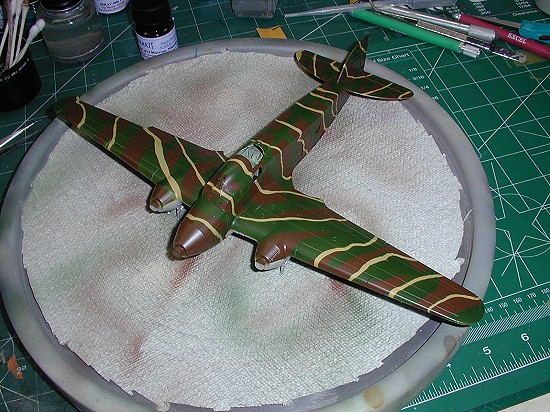
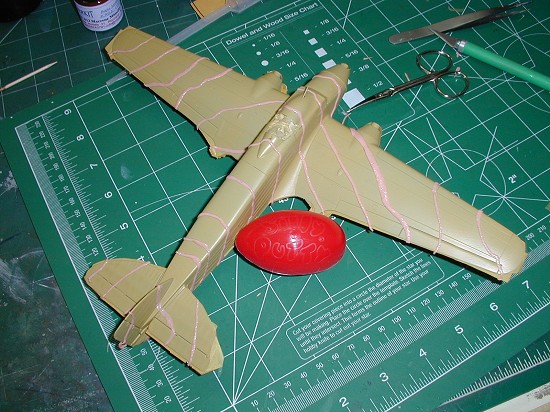
Using Silly Putty to Mask
As I had chosen a somewhat tiger striped scheme, I decided to use
silly putty to mask the kit. Now this sounds kind of strange but the
reality is that the putty is very pliable and much quicker and simpler
to use than tape or paper masks which I had used previously.
Painting started with an overall coat of the underside color as
something of a primer.
I then taped off the lower surfaces and sprayed with the next
lightest color.
I then rolled thin pieces of silly putty and laid them out over the
yellow paint.
The green surface (the next lightest color) was sprayed. Next,
thicker pieces of silly putty were put on to protect the green
surfaces...
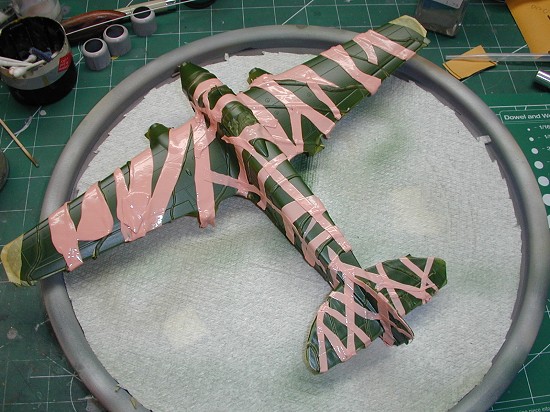
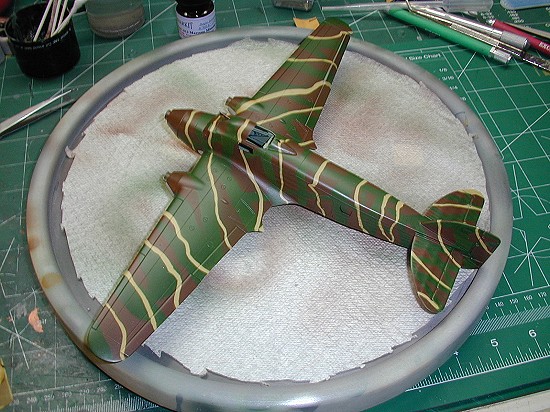
...and the final coat of brown was sprayed (paint6.jpg).
The silly putty was now removed (and you can still reuse it, so don’t
throw it away!) and you can see the result.
Click the thumbnails below
to view larger images:
One thing to be very careful of is to not put paint on too thick. You
will develop ridges that will be trouble later on when decaling.
Fortunately the MisterKit paint is thin enough where this wasn’t much of
a problem.
Overall I enjoyed building this kit. I will say that there are
challenges with it (I guess that’s called modeling), but you don’t get
short-changed for the price of the kit. I spent about 25 hours on the
kit, which is far more than I expected, but the end result was worth the
effort.
My thanks to Roll Models for the review copy as well as the paints and
decals for the review.
-
Savoia Marchetti S.79 in Action –
squadron signal publications
-
Wings of Italy, The Italian Air Force
in original WW2 colour pictures, Giorgio Apostolo Editor.
-
Courage Alone, The Italian Air Force
1940-1943 by Chris Dunning, Hikoki Publications.
-
Regia Aeronautica by Christopher
Shores, squadron signal publication.
Model, Images and Text Copyright ©
2004 by Dave Pluth
Page Created 19 April, 2004
Last Updated 19 April, 2004
Back to HyperScale
Main Page
|
 Home
| What's New |
Features |
Gallery |
Reviews |
Reference |
Forum |
Search
Home
| What's New |
Features |
Gallery |
Reviews |
Reference |
Forum |
Search