|
Hasegawa's
1/48 scale
SBD-3 Dauntless
by
Bob Carr
|
 |
|
Douglas SBD-3 Dauntless |

Accurate Miniature's 1/48 scale SBD-3 Dauntless is available online from Squadron
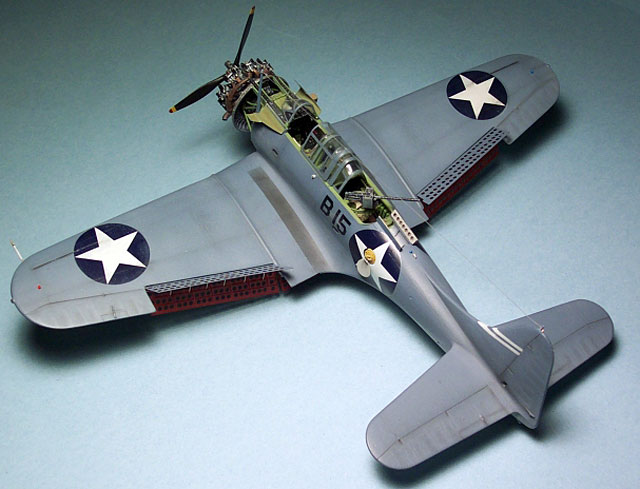
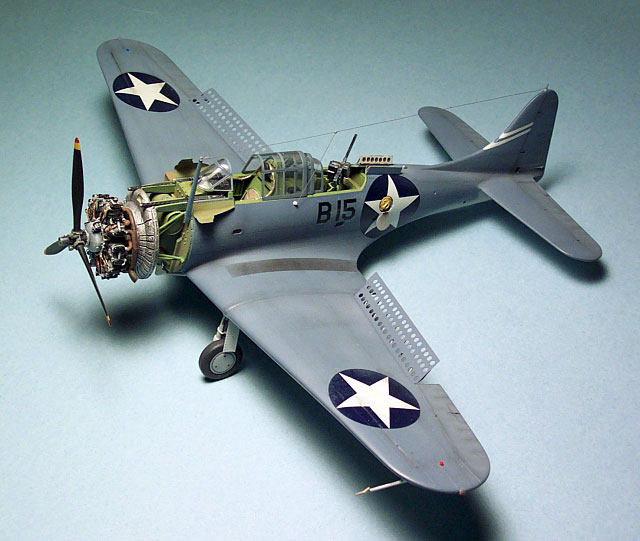
This model is the 1/48 Hasegawa (JT-109) SBD-3
Dauntless. I obtained this kit and began work on it before becoming
aware of the Accurate Miniatures offering in much the same way as I had
kids before becoming aware of the associated sleep deprivation.
Determined to finish, I obtained the Verlinden update set for the
Accurate Miniatures SBD and steeled myself for some serious
scratchbuilding. I wanted to display the engine with panels removed, a
detailed cockpit, and a few interesting opened access panels.
Armed with the Detail and Scale (SBD Dauntless,
Vol. 48, Bert Kinzey) publication and as many Internet photos as I could
find, I plunged in.
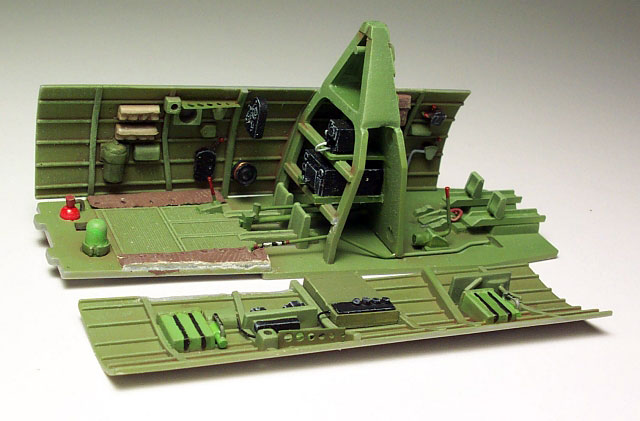
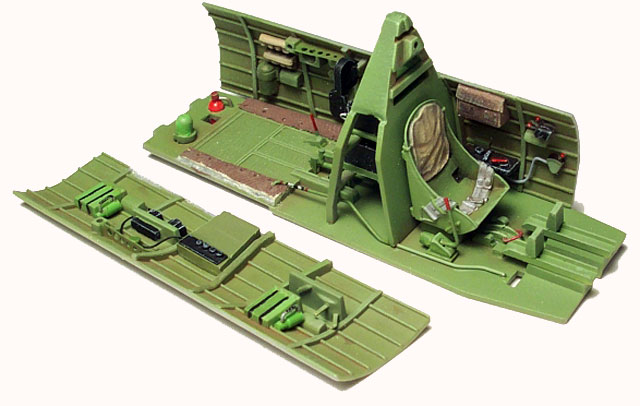
The Hasegawa kit is a bit of a disappointment
compared to most of their other kits that I’ve worked on. In particular,
the cockpit details are minimal, incorrect, and extremely simplified. I
worked with what was present as well as adding a great deal of scratch
built items. For example, the flare cartridge holders were
carved/modified to better show the individual pockets and cover flaps
were added from putty. Additional cockpit details included knobs,
switches, air vent, antenna reel, fire extinguisher, cabling, seat
adjustment lever, emergency hydraulics pump, radio gear, oxygen bottle,
and … well… just about everything. The rear compartment required
modification of the sides of the floor to add what appeared in photos to
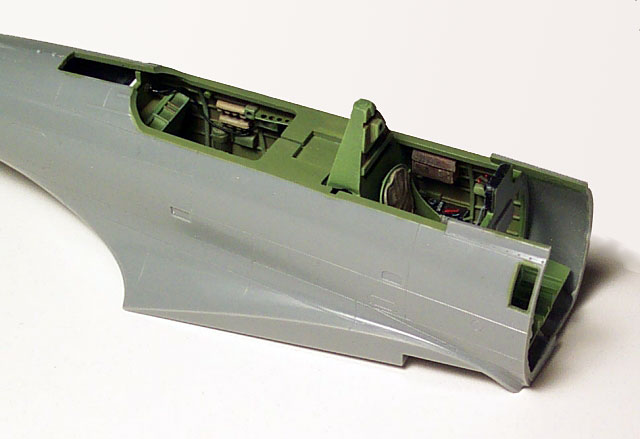
be canvas covers (?). Unfortunately, once the cockpit is enclosed in the
fuselage, little of the detail can be seen.
That’s okay, I know it’s there and the enjoyment
and satisfaction that went into it is its own reward.
In hindsight, I should have removed all the molded on detail from the
kit cockpit and scratchbuilt the entire area. Trying to modify and adapt
vague representations was probably more work than scratchbuilding would
have been.
This particular issue of the Hasegawa kit provides photoetch dive flaps
which I chose to model in the open position. The activating rods and
linkages just didn’t look convincing in flat photoetch so I scratchbuilt
those as best I could.
The kit canopies are clear but too thick to stack in the open positions.
I managed to thin the pilot, main, and gunner’s canopies enough to
stack, but was unable to make the rearmost small gun canopy fit and had
to leave it off.
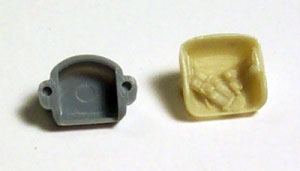
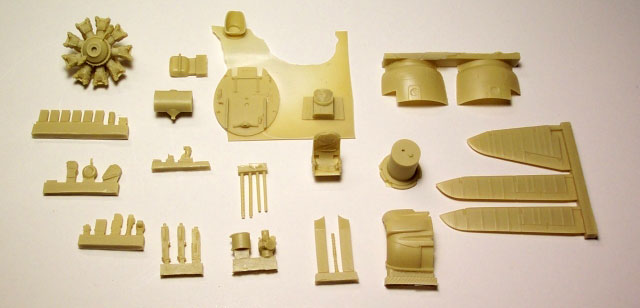
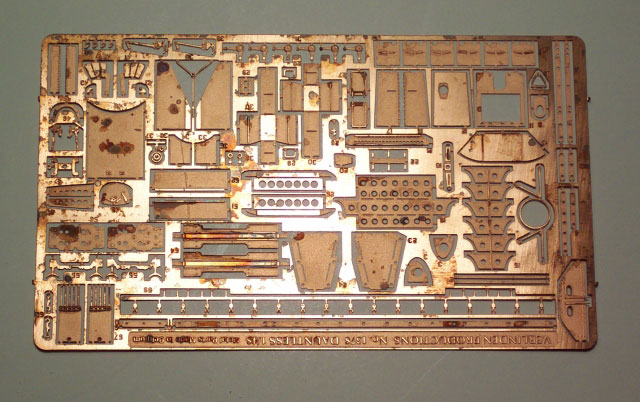
The Verlinden update set was a mix of resin and photoetch with what I’ve
found to be their usual mix of quality. The majority of the resin parts
were outstanding with a few being so-so. The photoetch is generally very
good as far as detail and somewhat hit and miss regarding fit. The metal
fret was corroded or stained on one side and almost all the parts
required cleanup. To be fair, a light sanding with very fine sandpaper
was sufficient to restore the parts to original condition.
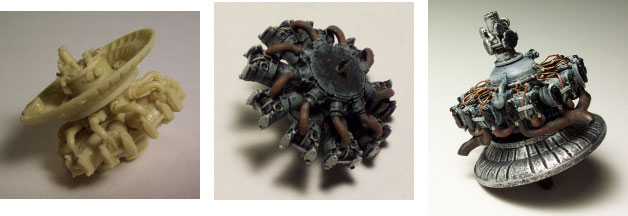
A notable problem area was the engine. Some of the metal engine parts
did not fit the resin very well and had to be omitted. An example was
the cowl flap support ring. I wanted to leave the cowl flaps attached
but just couldn’t get various parts to fit. Perhaps it was just a lack
of skill on my part. Regardless, when completed, the engine is a very
nice representation.
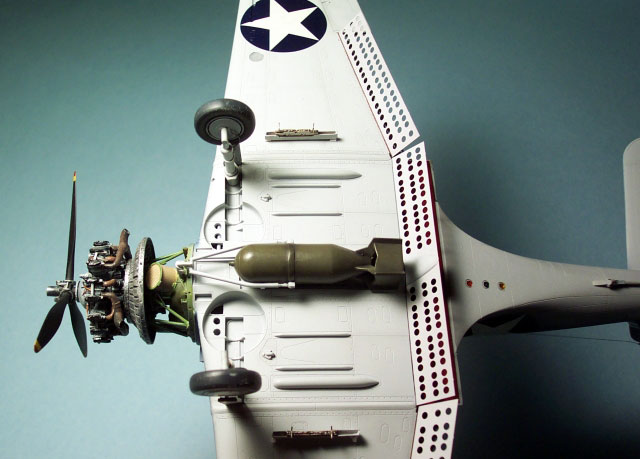
Though it doesn’t show well in the photos, the
multi-part photoetch bomb racks are outstanding.
The Verlinden gunner’s seat, gun, and related items provide a big boost
in appearance. There is even a photoetch laced support harness which,
though tricky to assemble, is stunning when complete. Again, too bad
it’s almost invisible in the completed model.
Overall, the update set is a huge improvement over the kit and well
worth the cost. It would be interesting to compare it to the Accurate
Miniatures kit that it’s intended for and see how well it stands up.
That’s on my modeling to-do list which, given the size of the list,
should be completed several years after I die.
The open circular panel behind the wing on the port side is the stowage
compartment for a life raft. The open panel is scratchbuilt from sheet
brass and the raft was molded from putty and sits inside an aluminum
tube.
The box sticking out of the starboard side above the wing and to the
front is an ammunition container for the cowl guns and was fashioned
from styrene. There’s an excellent picture of some sailors servicing
this in the Detail and Scale publication.
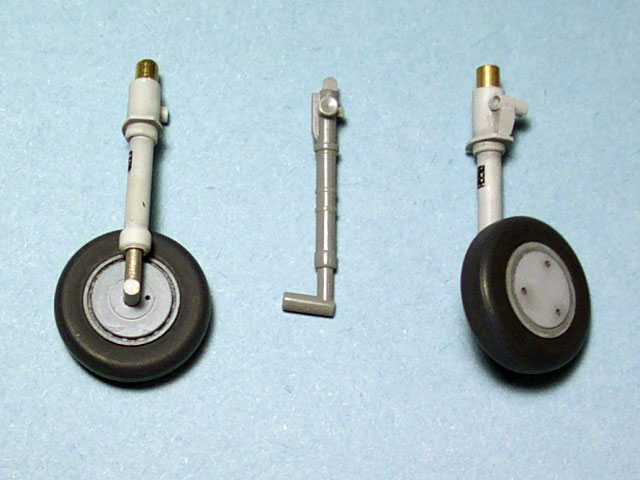
The main wheel mounts were scratch built from brass tubing and styrene
and are a huge improvement over the kit items.
I wanted to add 1/48 figures servicing the aircraft but I’ve been unable
to find any WWII ground crew or, for that matter, any scale figures that
could be successfully modified. Why isn’t 1/48 better represented? My
local hobby store operator says companies have tried to provide figures
in the past but they haven’t sold well enough to continue manufacturing
them. I’ll keep looking.

In summary, the project was thoroughly enjoyable and the Hasegawa kit
eventually yielded a reasonable representation of an SBD-3. Next time,
though, it’s Accurate Miniatures!
Bob Carr
Canton, Michigan USA
Click
the thumbnails below to view larger images:
Model, Images and Text Copyright ©
2006 by Bob Carr
Page Created 05 January, 2006
Last Updated
04 February, 2006
Back to
HyperScale Main Page |
 Home
| What's New |
Features |
Gallery |
Reviews |
Reference |
Forum |
Search
Home
| What's New |
Features |
Gallery |
Reviews |
Reference |
Forum |
Search