|
Accurate Miniature's 1/48 scale
SBD-3 Dauntless
by Jeroen Veen
|
 |
|
Douglas SBD-3 Dauntless |

Accurate Miniature's 1/48 scale SBD-3 Dauntless is available online from Squadron
Here are a number of pictures of Accurate
Miniature' SBD-3 Dauntless.
This was the first kit of this manufacturer that I
built, and what a joy it was. I liked from the minute I opened the box
until the final finish and I can tell you now already that I have some
others waiting in my stash.
I will probably do another one this winter (SBD4).
Without judging on efforts from other companies – which are often great
- I think that everybody who has build a kit from AM had to have the
feeling that it really is something else.
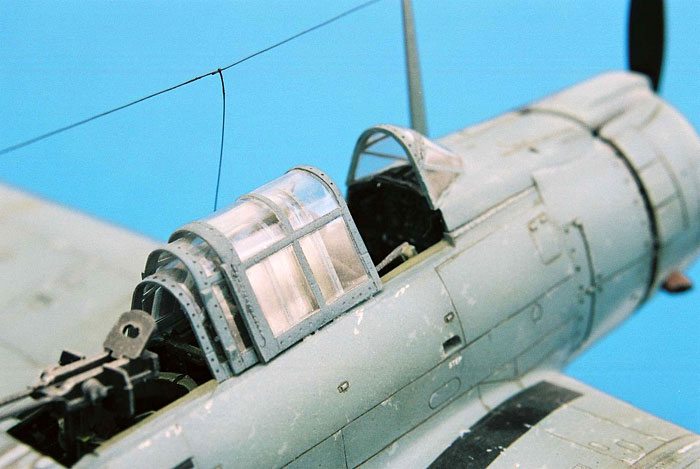
Of course this kit also started with building the
cockpit. As always I paint this with Humbrol paints. I think they are
best for doing the weathering and drybrushing job I like in that working
space. They are a bit rough for this scale but the weathering can easily
be exaggerated a bit. I like this effect in the dark surroundings of the
cockpit interior, because with the lack of light colors come together
easily which makes for a dull impression, at least in my opinion. So I
am looking for a bit of contrast to keep details visible. And there is
lots and lots of detail in this area, straight from the box. Great!
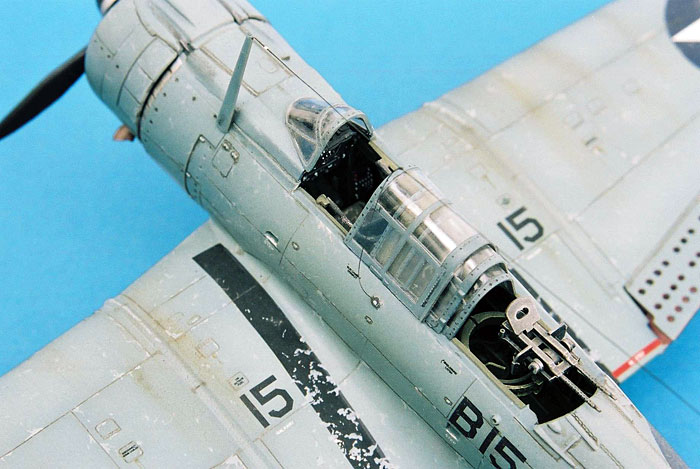
Anybody who really wants to go to town can now get
a cockpit update set from Aires. I didn't use it though at the time I
was building this kit.
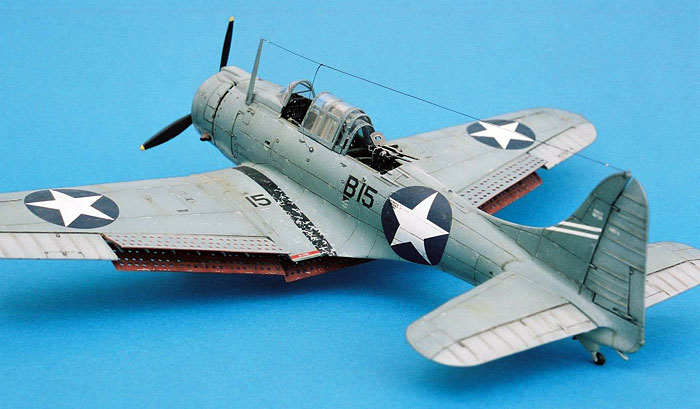
Although the kit has a somewhat complex breakdown
in parts, in the end it is really easy to build and all parts fit
together exactly. I think I never had to use filler. And because of all
that detail it was very enjoyable to paint.
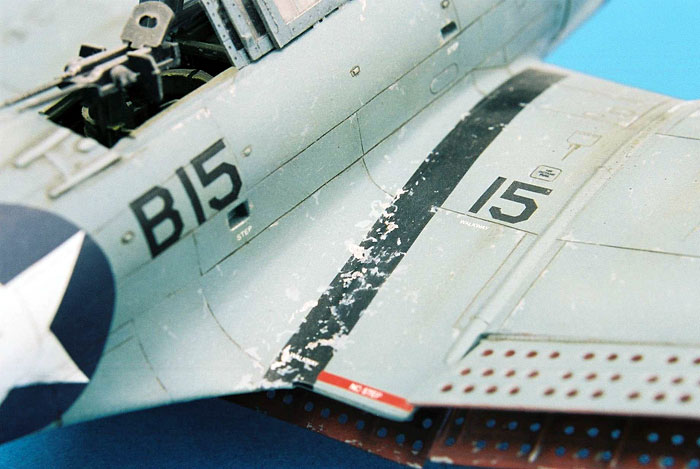
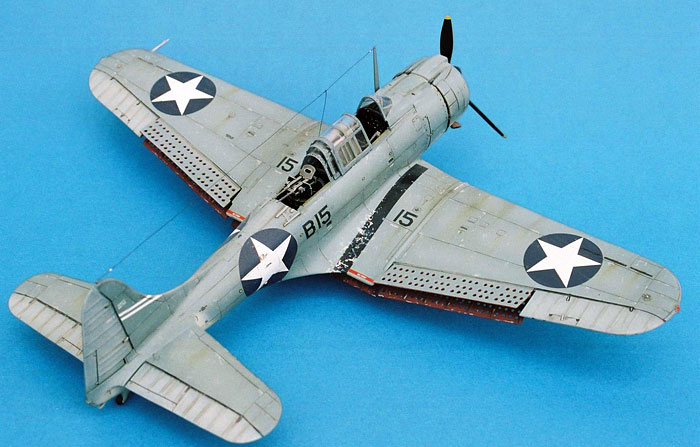
This is the two tone scheme (yes, the SBD-4 in my
stash will get the three tone scheme). I first gave the kit a base coat
from Humbrol, over which the appropriate colours (Xtracolor gloss
paints) were airbrushed.
I used the decals from the kit and they went on beautifully.
Matt varnish was next, and after a couple of days
drying time the weathering started. The usual washes of diluted oil
paint brown and black went on, the chipping of paint was painted on with
a brush and small details were painted. Last details were glued on the
kit and a final round of matt varnish all over completed this one. The
masking of the canopy came off, putting the cockpit in full view again.
Finally, and this was a first for me, I added some streaks with brown
and black pigments.
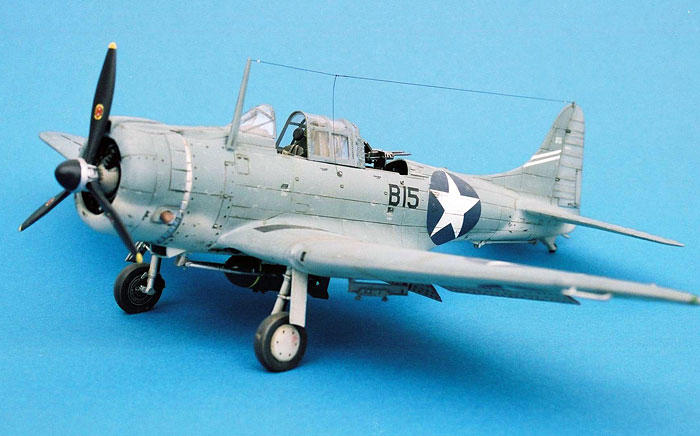
The most important reason why I am building aeroplanes is because I love
to paint and weather them. That’s my main interest. I think I will not
be far off when I assume that these planes got their share of beating up
because of the elements, fighting and so on. What better excuse does one
need to bring life into this aeroplane?
And with all the detail AM has cramped into this
model everyone who loves weathering can really have a field day with
this!
Click
the thumbnails below to view larger images:
Model, Images and Text Copyright ©
2005 by Jeroen Veen
Page Created 13 October, 2005
Last Updated
12 October, 2005
Back to
HyperScale Main Page |
 Home
| What's New |
Features |
Gallery |
Reviews |
Reference |
Forum |
Search
Home
| What's New |
Features |
Gallery |
Reviews |
Reference |
Forum |
Search