|
Classic Airframes' 1/48 Scale
Hawker Sea Hawk
by John
Valo
|
 |
|
Hawker Sea Hawk |

Classic
Airframes' 1/48 scale Hawker Sea Hawk may be ordered online from
Squadron
For a look at the contents of
Classic Airframes' 1/48 scale Hawker Sea Hawk,
see the in-box
review elsewhere on HyperScale.
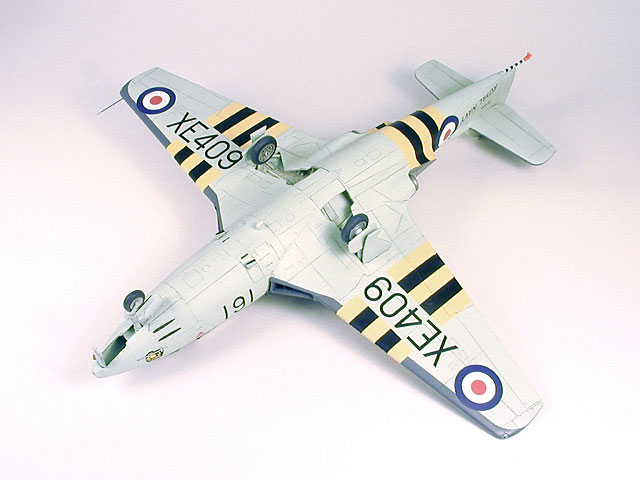
Time for Fleet Air Arm fans to rejoice - Classic
Airframes has just released the 1/48 scale Sea Hawk, and it is a beauty!
Upon first inspection, some of the engineering looked a bit daunting,
with split forward and aft fuselage parts, separate exhaust egresses and
resin inserts for the wheel wells and intakes. I'm glad to say, looks
aren't everything - all the parts fit with minimal extra work.
As I usually do with any limited run kit, I spent the
first night cutting out and cleaning up parts, and removed most all of
the ejector pin stubs.
This is an important step, as a number of the stubs will
interfere with parts fit as you progress - better to just get rid of
them right off the bat.
Once the basic cleanup was done, the kit went together surprisingly
quickly.
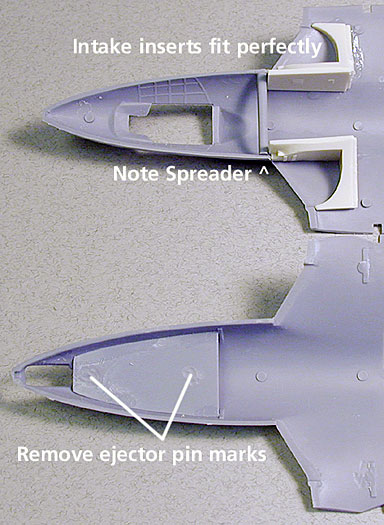 I
did insert a small piece of sprue to act as a spreader on the top half
of the forward fuselage so it would match the lower half precisely. The
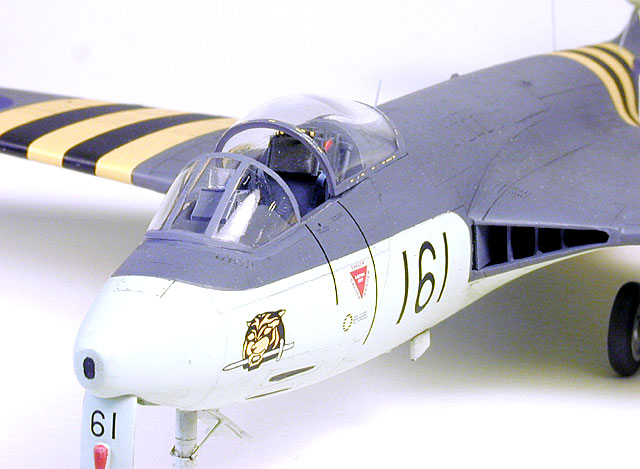
instructions accurately show that the cockpit tub must be thinned a bit
to fit over the nosewheel well roof. The cockpit is nicely detailed and
looks the part when washed and dry-brushed. A quarter ounce of weight
worked perfectly to prevent tail-sitting. The main wheel well insert fit
perfectly, and is rife with detail. Likewise, the resin air intakes were
a perfect fit. The separate exhaust fairings need to be gently sanded to
fit the forward fuselage; this is also noted in the instructions. I
tacked one fairing to the left side of the rear fuselage, and one to the
right forward fuselage, and was able to mate the assemblies and tweak
the fit of the fairings as necessary. The resin jetpipes are a bit too
long for the fairings; these were simply sanded to size. I
did insert a small piece of sprue to act as a spreader on the top half
of the forward fuselage so it would match the lower half precisely. The
instructions accurately show that the cockpit tub must be thinned a bit
to fit over the nosewheel well roof. The cockpit is nicely detailed and
looks the part when washed and dry-brushed. A quarter ounce of weight
worked perfectly to prevent tail-sitting. The main wheel well insert fit
perfectly, and is rife with detail. Likewise, the resin air intakes were
a perfect fit. The separate exhaust fairings need to be gently sanded to
fit the forward fuselage; this is also noted in the instructions. I
tacked one fairing to the left side of the rear fuselage, and one to the
right forward fuselage, and was able to mate the assemblies and tweak
the fit of the fairings as necessary. The resin jetpipes are a bit too
long for the fairings; these were simply sanded to size.
I can't comment on how the wing folds work, as I wanted
to build my Sea Hawk clean with the wings extended. The mating edges of
the wings and root sections need careful cleaning up and dry-fitting to
achieve a smooth joint.
Small plastic spacers are provided to span the joint,
and these need some careful thinning and sanding to tweak the fit, to
avoid any bulging at the joint. Once cleaned up, the outer panels slid
in place nicely, with only a touch of putty necessary to fill some very
minor gaps.
The stabilizer and associated acorn fairing fit well to the vertical
stabilizer, just be careful to watch the alignment of the tail surfaces.

The landing gear is straightforward and well enough detailed. After
assembly, I noticed that the main gear upper doors seem to hang a bit
low; these should probably be shortened a bit.
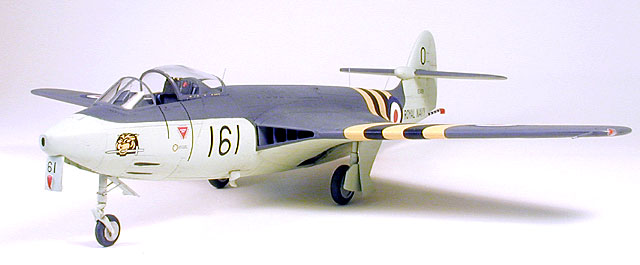
 I
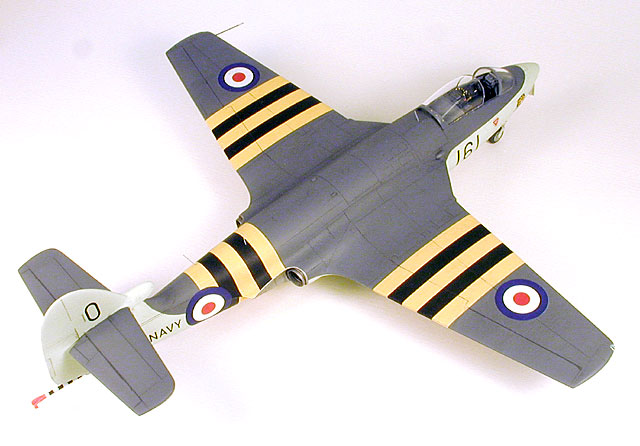
finished my Sea Hawk in PollyScale acrylics. I
finished my Sea Hawk in PollyScale acrylics.
The decals are beautifully printed by Microscale and
provide markings for three British aircraft and one Dutch. The Suez
stripes fit nicely, but the white of the fuselage roundel let the
stripes show through a bit. I rectified this by cutting out two small
circles of white from a spare sheet and doubling-up the white areas
before applying the red centers.
An eggshell-sheen clear coat finished the job.
The one-piece canopy is very clear and benefits from a bath in Future. I
used a razor saw to cut mine open - if you do this, be sure to
thoroughly layer tape on the 'glass' areas before sawing, as an errant
skip of the blade can really ruin a good day!
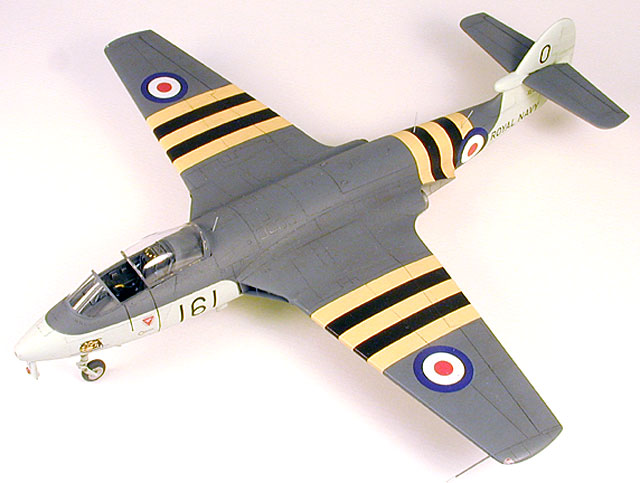
The Classic Airframes Sea Hawk builds into an absolutely
beautiful model.
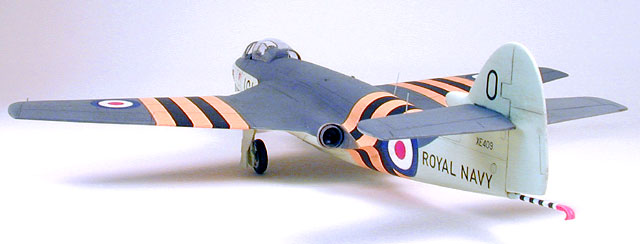
I have always had a soft spot in my heart for this
lovely airplane, and I'm glad to have it in my collection - gotta love
those stripes!
Recommended to Sea Hawk fans everywhere.
Click on the thumbnails
below to view larger images:
Model, Images and Text Copyright © 2004
by
John C. Valo
Page Created 09 July, 2004
Last Updated
09 July, 2004
Back to
HyperScale Main Page |
 Home
| What's New |
Features |
Gallery |
Reviews |
Reference |
Forum |
Search
Home
| What's New |
Features |
Gallery |
Reviews |
Reference |
Forum |
Search