|
Czech Master Resin's 1/72
scale
Sea Vampire T.22
by
Mark Davies
|
 |
|
De Havilland Sea
Vampire T. Mk.22 |

HyperScale is proudly supported by Squadron.com
The Sea Vampire T.22 was not a carrier capable
aircraft, but it did provide the Royal navy with a useful jet trainer,
and the modeller with potentially some very attractive colour schemes to
finish models of this pretty little aircraft in.
A useful in-box review of this kit is provided by Internet Modeller at:
http://www.internetmodeler.com/2005/august/first-looks/CMR_Vampire.php
This was my second resin kit, and generally I had
few problems. The cockpit is highly detailed, and like the original it
is cramped. This required making sure that enough of the seat bottoms
was removed to be able to close the lid! However the cockpit really has
so much very nice detail that modelling it with the canopy open would be
a good option.
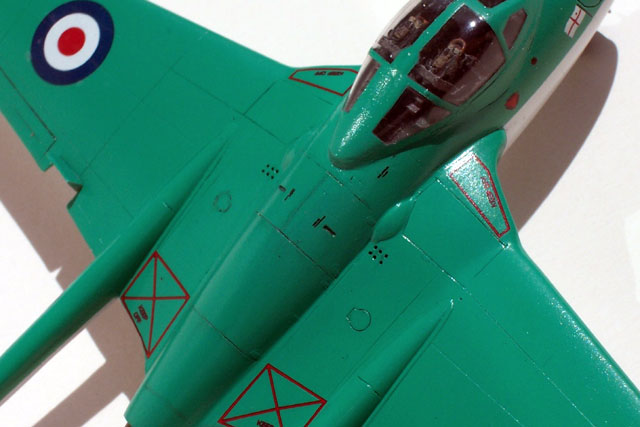
I should point out that CMR give you two vac-form
canopies, and I ended up super-gluing my practice on in place instead of
the intended copy! As a result the canopy is a little too high at the
rear. I will fix it one day, but it’s hard to create more work just when
you finish a model and want to move onto the next project.
The trickiest part is fitting the top and bottom fuselage halves
together if you choose to have the nose hatch closed like I did, as it
is a complex join line. However it wasn’t that hard to do. I think it
would be easier to build wit the nose lid open displaying the interior
detail, but I generally like to have the lines of my planes unbroken,
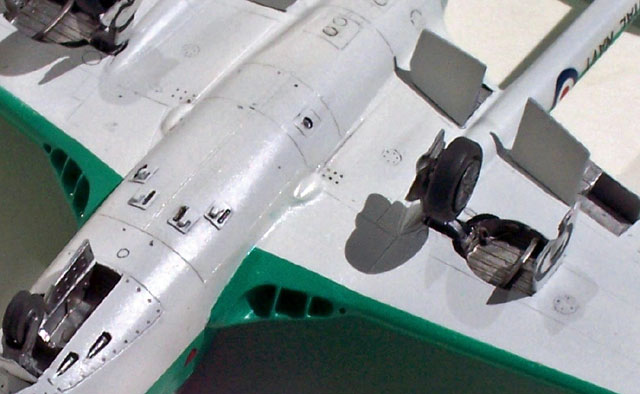
although in this case I was happy to have the flaps down and seed brakes
open. There is plenty of nice detail in the wheel wells and the cannon
ejection ports are nicely moulded too.
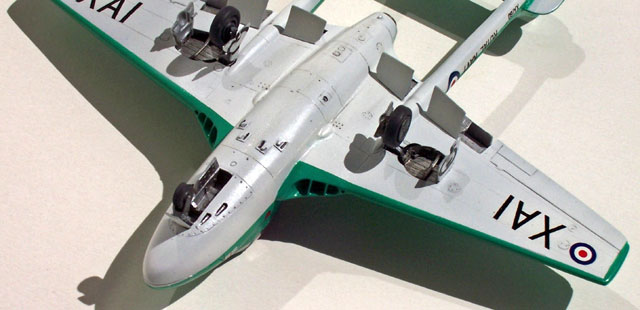
The modeller is required to make the air-intake
bars. I chose to use sharpened brass tube of two different radii to cut
pieces of 10 though plasticard. I ended up with what can best be
described as looking like toenail clippings in shape (sorry, I don’t
want to put you off your modelling!). I then made three small razor-saw
cuts in the bottom of each intake, cut one end of each plastic “toenail”
top match the top inside of the intake, and placed them in each saw cut
and superglues them in place. Then it was simple to slice off the excess
on the bottom side of the intake and clean up the resulting area.
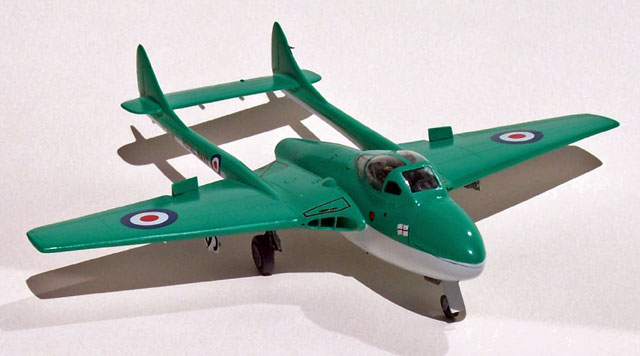
CMR provide a great choice of five schemes, and all
are very attractive in my opinion, but I had to do the emerald green
admiral’s barge. I went for a semi-gloss finish, but it still reflected
the light a bit too much in the photos. The decals went down perfectly
without the need of solvents.
I feel that given this was my second experience of
a resin kit that it should be well within the capabilities of a more
practiced resin modeller, but can be tackled by first timers as well,
although there are simpler options for a first time resin build
available. I’m just glad that CMR has given us a range of really nice
Vampire kits, and I will build some more in the future.
Click on the thumbnails
below to view larger images:
Model, Text and Images Copyright ©
2006 by Mark Davies
Page Created 15 March, 2006
Last Updated 21 February, 2007
Back to HyperScale
Main Page
|
 Home
| What's New |
Features |
Gallery |
Reviews |
Reference |
Forum |
Search
Home
| What's New |
Features |
Gallery |
Reviews |
Reference |
Forum |
Search