|
Roden's 1/72 scale
Sopwith 2F1 "Ship's Camel"
by Roger Fabrocini
|
 |
|
Sopwith 2F1 "Ship's
Camel" |

Roden's
1/72 scale Sopwith 2F1 Camel is available online from Squadron.com
This is Roden’s 1/72 scale Sopwith 2F1
Camel (“Ship’s Camel”), kit #044. My quick assessment of the kit is that
it is finely detailed, whose fit can best be described as fidgety. It is
molded in a soft, tan plastic which makes the removal and clean-up of
the very small detailed parts easier, with less chance of breakage.
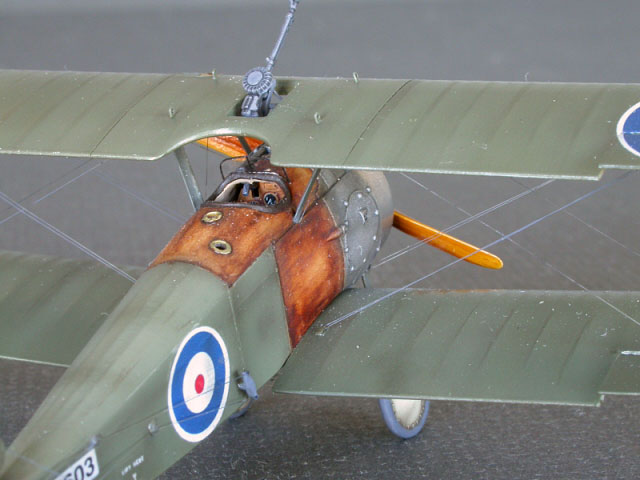
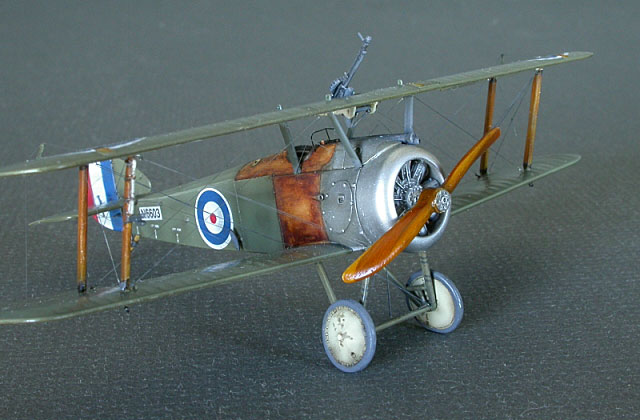
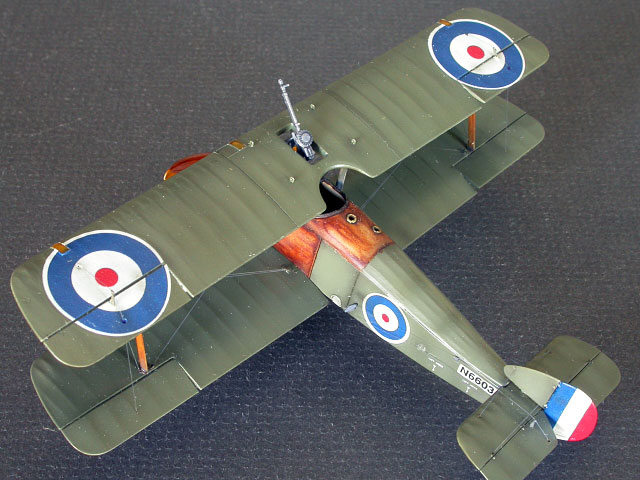
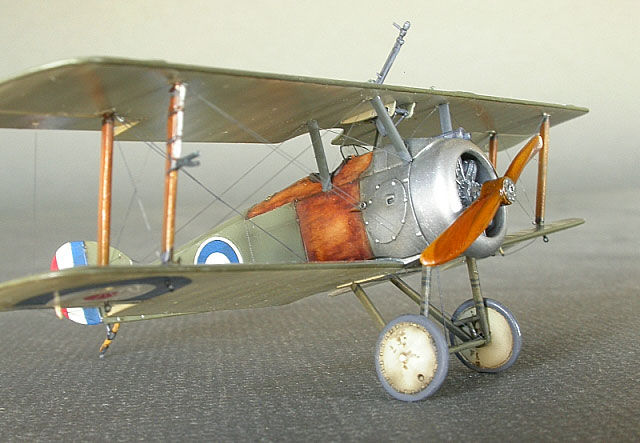
I built the Camel in five sub-assemblies.
The fuselage, lower wing and inter-plane struts, top wing, landing gear
and tail surfaces. Once the fuselage was complete I temporarily fixed
the lower wing, attached the inter-plane struts to it, aligning it with
the upper wing using a simple cardboard jig and assembling and aligning
the landing gear.
All flying surfaces were cut and
repositioned. All sub-assemblies were then disassembled and painted.
Added details included:
-
P.E. seat from Part
-
instrument decals from Mike Grant’s
Decals
-
Control horns from Part set #s72-161
-
Prop boss from Part set #s72-213
-
Upper wing sling points from Eduard’s
set #48-406
-
Scratch built Admiralty top mount for
the Lewis gun
Once painted the sub-assemblies were
assembled. For a reason that remains a mystery, once the top wing was
attached the kit cabane struts proved to be too long by about .10 “. I
used some strut material I had to fashion new ones, losing the kit
supplied Rotherham fuel pump that was molded on the right rear cabane
strut. (anyone make a P.E. replacement?)
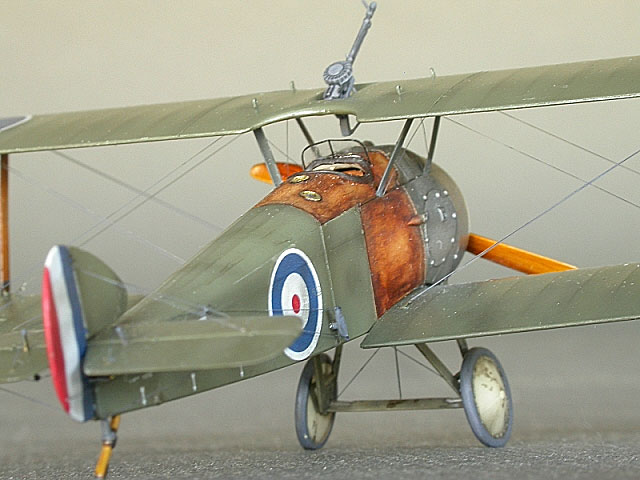
Doped surfaces: I custom mixed
Gunze-Sangyo acrylics for the PC10 and doped linen. H-421, H-309, and a
drop of hemp H-336 for the PC10 (a hue which is too green I‘ve been
told, a bit of artistic license on my part), sail H-85, H-318 for the
clear doped linen. The CDL surfaces were broken up using different
shades, and hues of the base colours. The same method was used on the
PC10 surfaces. Doped surfaces are top coated with Floquil lacquer based,
flat coat giving them a perfect (to this modeler’s eye) scaled gloss
look.
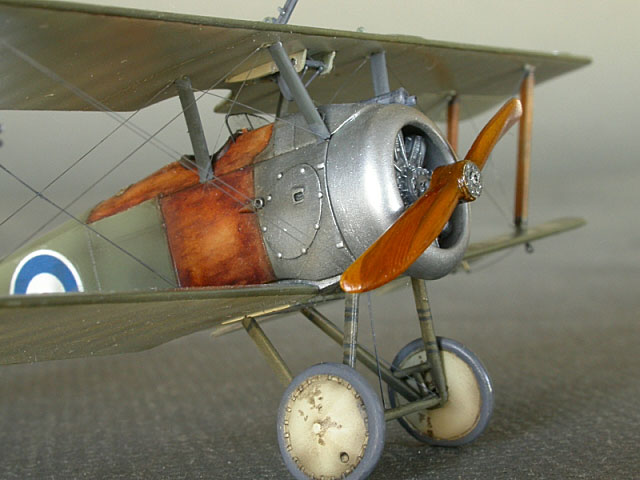
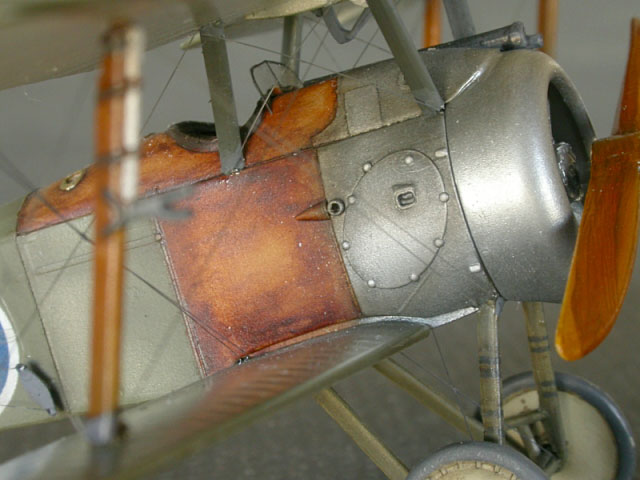
Wood Surfaces:
 I
use a base coat of Floquil lacquer based foundation #R84. Once dry I
apply a mix of artist oils, thinned with turpentine. The Camel’s wooden
fuselage section is said to have been stained to a red-brown hue, so a
created a mix of transparent red iron oxide, burnt umber and raw sienna,
staining the Floquil foundation with it. I
use a base coat of Floquil lacquer based foundation #R84. Once dry I
apply a mix of artist oils, thinned with turpentine. The Camel’s wooden
fuselage section is said to have been stained to a red-brown hue, so a
created a mix of transparent red iron oxide, burnt umber and raw sienna,
staining the Floquil foundation with it.
I let that dry for about five minutes (I
wait for the sheen to leave the paint) then loaded my #1 brush with
turpentine and coated the surfaces again. I work the oil paint coat into
streaks along the panels. I also work the paint to create highlights and
shadows within the various panels.
Though the panels are suppose to be gloss
lacquered I found the dull finish more pleasing to my eye and a nice
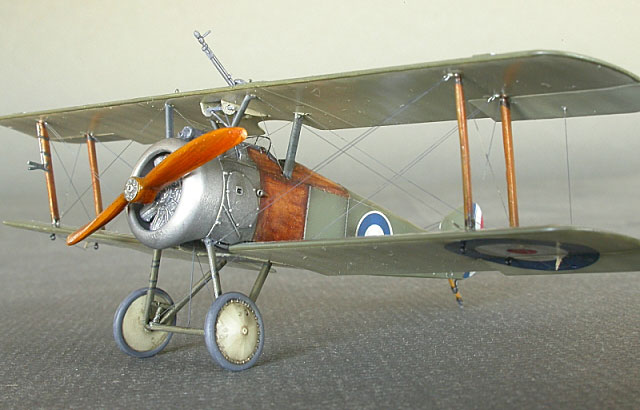
contrast to the “gloss” doped surfaces. The prop is finished in
basically the same fashion, but clear-coated with a mix of Tamiya clear
orange and yellow.
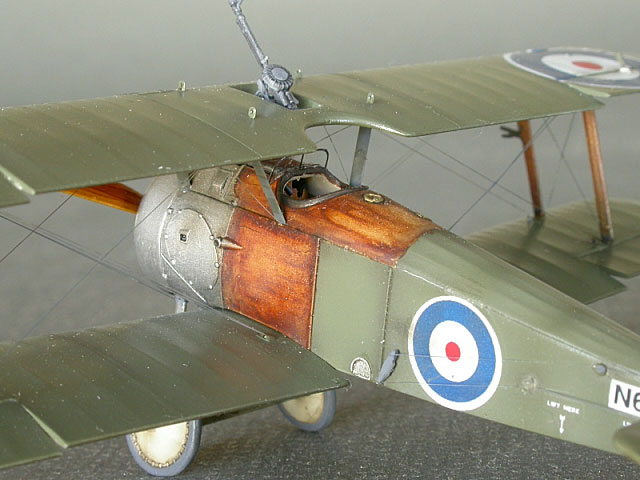
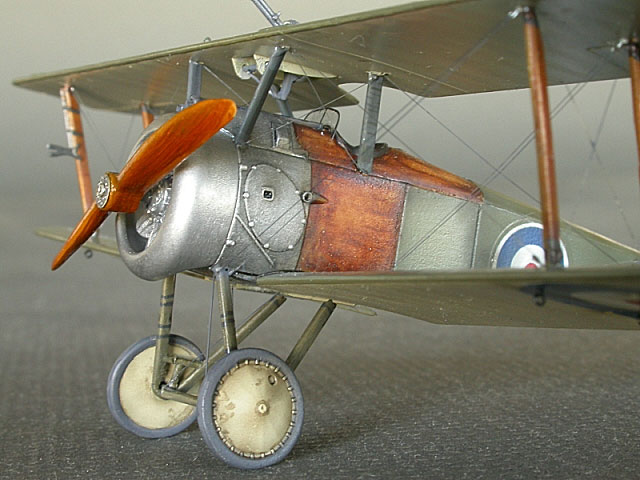
Aluminum Surfaces
I will state here and now that I know
that the cowling was finished in “Battleship Grey”. I just liked the way
the Camel looks with the aluminum cowling. Alclad dull aluminum was used
as a base coat, followed by dry brushings of Mr. Metal Color Stainless
(213), iron (212) and lastly, aluminum (218). Artist oil washes of
Payne’s Grey and black were also applied.
Final weathering was done with small controlled washes and post-shading
with the usual heavily thinned Tamiya Red-brown/Black mix.
My main concern was using rigging
material that was too thick. It could potentially make the double flying
wires look over scaled and generally overpower the delicate feel of WWI
aircraft.
I find fly-fishing monofilament the
easiest material to work with and recently found some .002”/.95# test
line available through Roll Models. com. Its only drawback is that it is
clear, necessitating a colouring of some sort. Most holes were drilled
before painting and “Hashimoto” turnbuckles (see Bucky Sheftall’s LVG
C.VI feature) were attached to the inter-plane struts to help space the
double flying wires. My fears of attaching the double wires were largely
unfounded. I started at the lower wing attachment point, looped it
through the turnbuckle, then back to the starting point. I found the
.002 monofilament very easy to cut and any slack in the line was taken
up by applying heat to the wire using a butane fueled soldering “wand”.
Wires were painted using Vallejo Dark Grey.
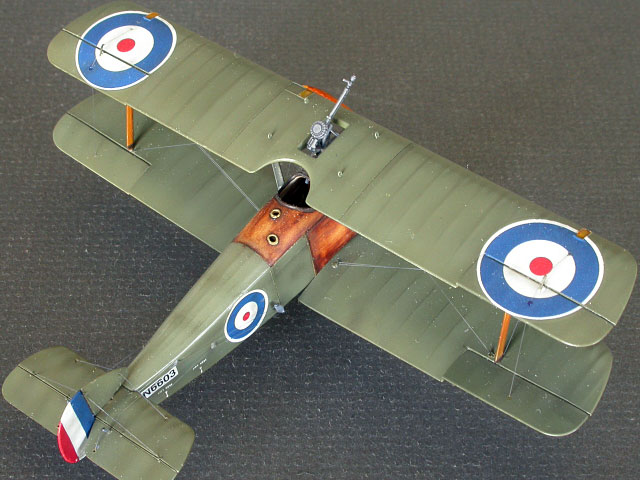
The kit supplied decals were used for 2f1 #N6603. They conformed well
using MicroScale products, though a bit thick with out of register
cockades.
Though there are errors, Roden’s Camel
rewards one’s patience with a nicely detailed replica.
I must admit to being inspired by
Monsieur Jean-Baptiste Verlhac’s builds on
http://wwi-models.org , especially
his Eduard 2F1. Also thanks to Bucky Sheftall for passing on little bits
of his vast knowledge of WWI a/c and model building.
As always, Thanks to Brett and all HyperScalers.
Click the
thumbnails below to view larger images:
Model, Images and Text Copyright © 2005
by Roger Fabrocini
Page Created 11 October, 2005
Last Updated
10 October, 2005
Back to
HyperScale Main Page |
 Home
| What's New |
Features |
Gallery |
Reviews |
Reference |
Forum |
Search
Home
| What's New |
Features |
Gallery |
Reviews |
Reference |
Forum |
Search