|
1/700 scale Soya meets
The Penguin Army
by
Valentin E. Bueno
|
 |
|
Soya |

HyperScale is proudly supported by
Squadron
It’s the 12th day of our situation. Spirits are still high. The
Russian icebreaker Ob is on its way to rescue us. All we have to do is
wait for it to arrive. As I look out my portal I noticed an army of
penguins looking over our ship with a bit more than idle curiosity. I
wonder what they are thinking of our big orange ship blundering into
their neighborhood?
I love Seals Models plastic kits. I can’t get enough of them. I bought
the Mikasa, the Izumo, the Iwate and now the Soya. The Soya is a bit of
an oddity when compared to the rest of the Seals Models range of
turn-of-the-century warships. The previous models were all participants
in the Battle of Tsushima straits while the Soya is a 1950’s Antarctic
research ship. Information on this ship is scant. If Google can’t find
it, I’m knee deep in natto. Oh well, that means I can’t get too involved
in correcting and detailing this tiny little kit.
Let’s get started.
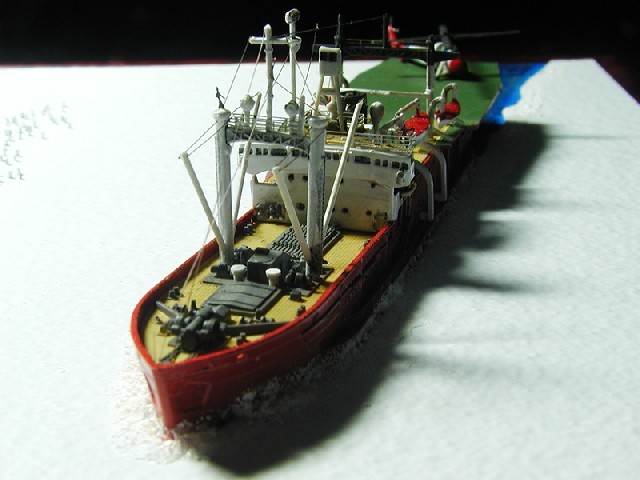
The hull comes in two halves. Most 1/700-scale ships I have built in the
past had their hulls molded as a single large part. Seals Models likes
to mold their hulls in two halves. This allows more detail to be
incorporated into the hull surfaces. The parts fit well and after a
quick swipe of 600 grit sand paper on the seams, I sprayed the hull
Tamiya IJN Gray as a primer. Once satisfied with all the seams (all two
of them), I shot the hull with Tamiya Red from the spray can. Though the
color drawing on the bottom of the box shows an orange hull, the photos
look red to me. That’s my lie and I’m sticking to it! Actually, I don’t
have any orange paint in my paint rack and wanted to get the hull
painted in a nice gloss color, thus the red.
 The
wooden areas of the separate deck parts was painted Polly S Deck Tan.
The surface detail such as hatches and platforms were painted Polly S
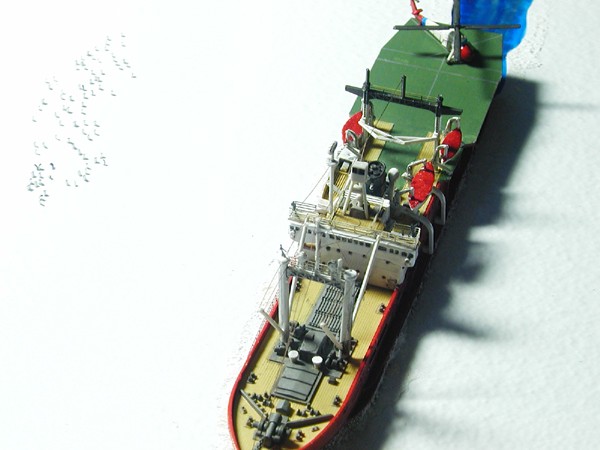
Ocean Gray. The helicopter deck on the stern of the ship was painted
German Olive Green. White portions of the hull and superstructure were
painted with Tamiya Gloss White. I painted as much of the ship as
possible before assembly. As with most research ships, there is
equipment is stacked and stored all over the place. Getting a paintbrush
in between all this equipment would have been a nightmare. The
wooden areas of the separate deck parts was painted Polly S Deck Tan.
The surface detail such as hatches and platforms were painted Polly S
Ocean Gray. The helicopter deck on the stern of the ship was painted
German Olive Green. White portions of the hull and superstructure were
painted with Tamiya Gloss White. I painted as much of the ship as
possible before assembly. As with most research ships, there is
equipment is stacked and stored all over the place. Getting a paintbrush
in between all this equipment would have been a nightmare.
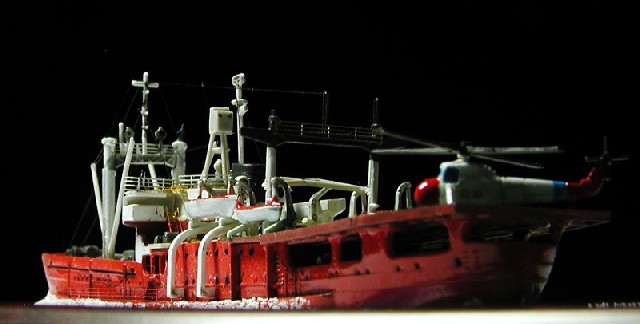
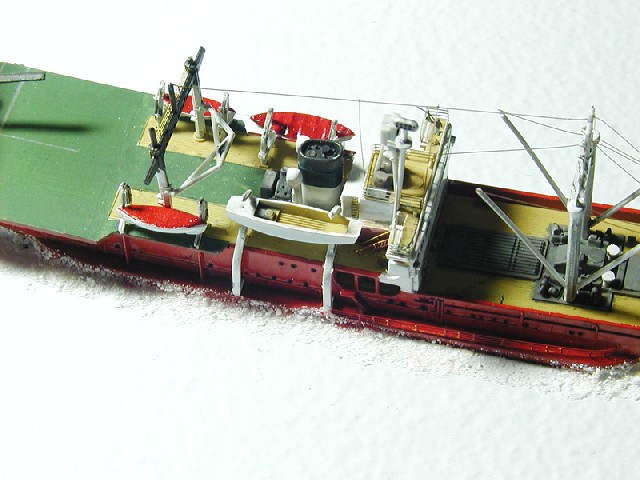
After the pre-painting was done, assembly was started and before I
knew assembly was done. Humph. After gazing lovingly at the photo on the
box top, I noticed railings in places I though there wouldn’t be. There
was railings on the top of the bridge, along the hull blisters and along
the top of the crane cross beams. I dug out leftover Tom’s Modelworks PE
from a Fletched class DD and applied these to the areas as desired. I
also used some of the PE ladders here and there on the superstructure. I
also added a few crewmembers about to add interest. I wish Eduard would
come out with Pre-Colored Photoetch figures in 1/700 scale, I know they
just released a set for 1/350 scale!
Rigging was accomplished with ½ lbs fishing line attached with CA and
tightened up with a smoldering wooden match. The portals and bridge
openings were washed with a dirty thinner sludge. This made the ship
look well used as well. The real Soya hull was quite battered with large
areas of chipped red paint where the ice had rammed into the hull.
Brrr...
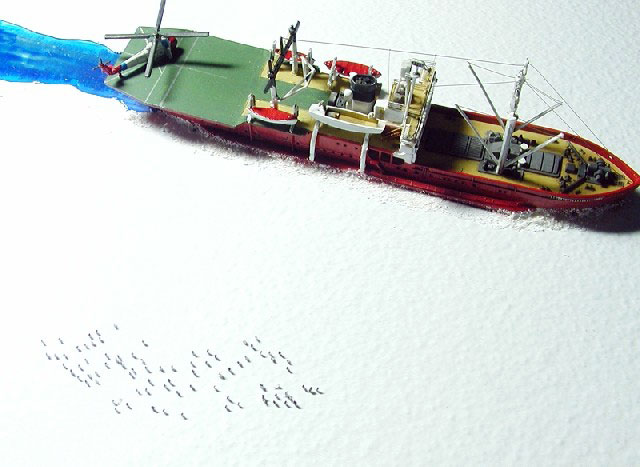
I was lurking around the Plastruct section of The Hobby Company when
I saw some sheet plastic used to emulate stucco wall covering. That
looks like snow and ice, I though to myself. I picked it up and fit it
into some picture frames I picked up at Costco, three for $9! I cut two
pieces of sheet plastic to fit in the top of the picture frame, one from
0.40 plastic sheet as the supporting base and one from the stucco sheet
as the ice. I placed the Soya on the sheet and after deciding where I
wanted it, I penciled in the outline of the ship’s hull onto the stucco
sheet. I cut out the section for the hull and painted the lower sheet
clear blue. I put it altogether and used some Microballons to simulate
the crushed ice around the hull of the ship.
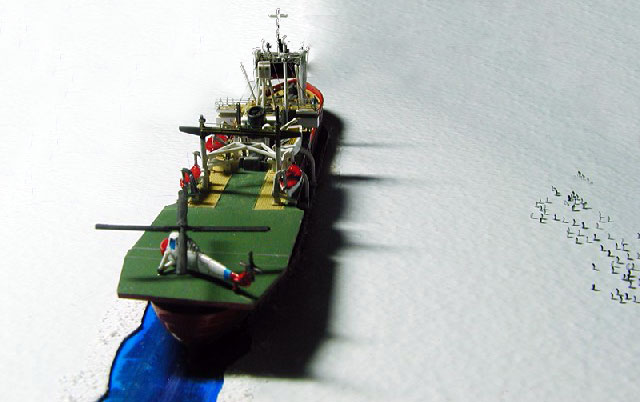
The penguin army was made with some 1/16” half round Evergreen plastic
strip. I painted the curved portion with black paint and sliced them
into slivers of half round cakes. I placed a pool of CA on a paint
bottle cap, dipped a wire held in a pin vise into the pool of CA,
touched the CA to where I wished to place the “Penguins” on the ice
sheet.
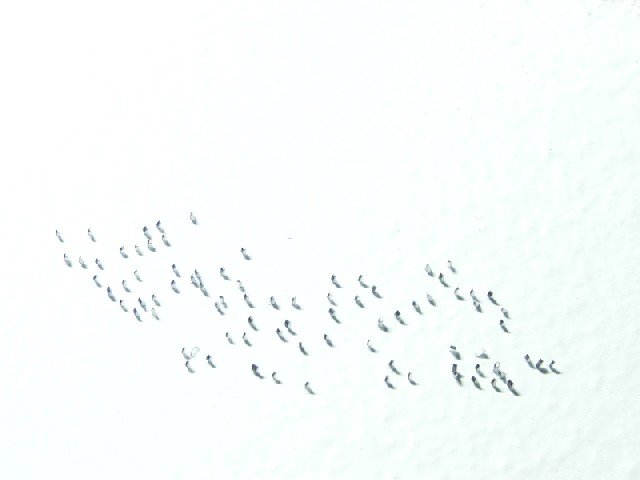
I picked up each “Penguin” with a needle nose tweezer and placed the
“Penguin” upright in the puddle of CA on the ice sheet. I did this about
eighty times more spread over two days. From about five inches away,
they really look like penguins! As the VP of IPMS-Hawaii said, “The
Penguins are cool!”
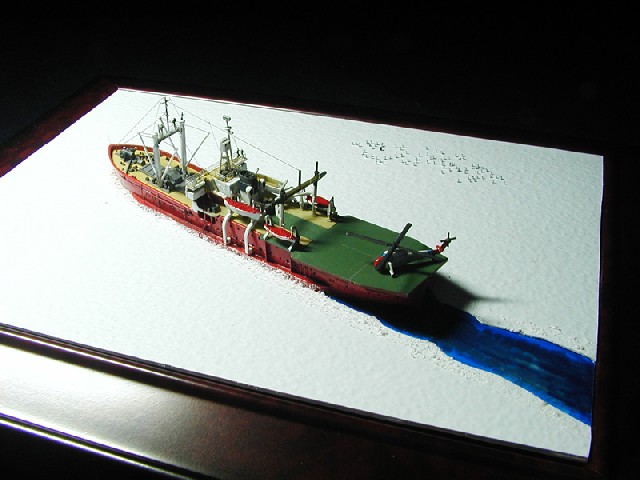
Don’t Eat Gray Snow...
Ship models are the hardest things in the world to photograph. When
the macro mode of a digital camera is activated, the depth of field
suffers. That’s not helpful when photographing something long and thin.
Thankfully this model is short and fat so it was easier to keep stem
and stern in focus. I placed the model on a piece of black poster board.
The background is black foam core board rigged at an angle so that it
was in shadow. This allows the back to be pure black. No light
reflecting off of that black foam core board!
A stack of close-up filters was threaded onto my favorite (and only)
Olympus C2100UZ. The normal macro focus range with my standard Uzi is 4
inches (about 100mm) with the close up filters attached it becomes 1
inch (25.4mm!) The camera was attached to a tripod. A single fluorescent
light was used to light the model to mimic the long and low Antarctic
sun. A remote control was used to snap the shutter so that my bumbling
hands didn’t shake the camera while the shutter was open. The only bad
thing about getting this close to the model is that any specks of dust
is highly visible. They sure weren’t visible to my naked eye before
snapping the shutter!
Because the white of the snow was pure white, it tended to fool the
camera’s light meter into using a shutter speed or aperture that was too
low. In other words, the white snow would be gray and not white. I
always set the EV (Exposure Value) of the camera at +.7 to +1. This
allows the camera to capture the snow as WHITE!
Second Place
The model was part of IPMS-Hawaii’s Maritime night contest and
garnered second place. A truly beautiful use of the Mini Hobby Model’s
USS Arizona as the sunken tomb won a well-deserved first place. I
thoroughly enjoyed building this model and makes for a great break from
my usual models. Oh wait, I really don’t have usual models………
Click the
thumbnails below to view larger images:
Model, Images and Text Copyright ©
2004 by Valentin E. Bueno
Page Created 14 June, 2004
Last Updated
14 June, 2004
Back to
HyperScale Main Page |
 Home
| What's New |
Features |
Gallery |
Reviews |
Reference |
Forum |
Search
Home
| What's New |
Features |
Gallery |
Reviews |
Reference |
Forum |
Search