|
Airfix + White
Ensign Models' 1/72
Short Sunderland
by Bryan "Tuck" Tucker
|
 |
|
Short Sunderland |

Airfix's
1/72 scale Sunderland Mk.III is available online from
Squadron
The Short Sunderland was a workhorse of the RAF Coastal Command. The
flying boat served with honor and distinction during the lengthy
maritime patrols. Somewhat unsuited to the task in both armament and
open sea performance, the Sunderland nevertheless achieved legendary
status. While many crews spent entire deployments never sighting the
enemy or firing guns in anger, many others lost their lives in mortal
struggles with surfaced U-Boat crews in a desperate struggle for
survival. The type served until well into the 1950’s, proving its
hardiness and longevity.
The Airfix 1/72 scale Sunderland
Airfix’s 1/72 Sunderland kit first appeared in the 1960’s, which I
think was the vintage of my sample. You get appropriate detail for the
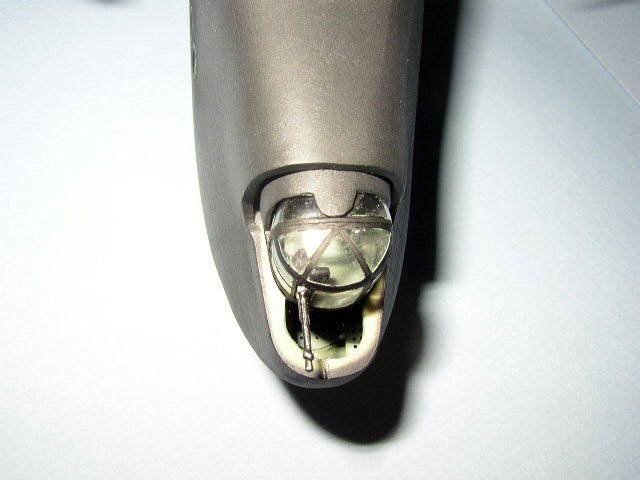
time - ie raised surface detail and functioning parts such as sliding bomb
racks and a retractable nose turret. The kit’s interior is almost non-existant with simple seats, floor and control columns provided.
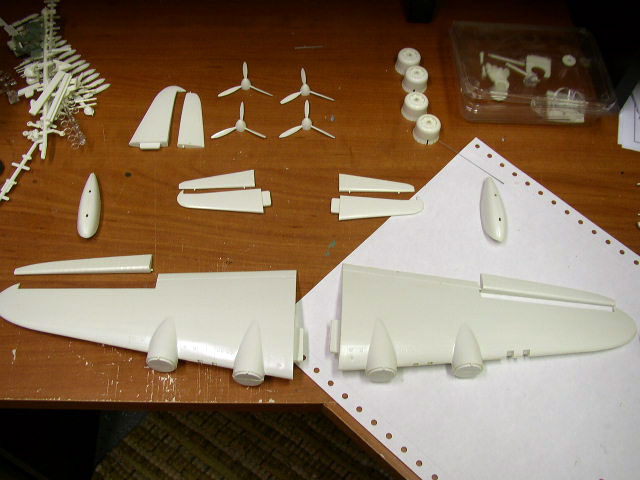
The moldings were
flash-free with no warping and minimal sinkholes and ejector-pin marks.
The level of detail is somewhat basic, with no separate engines, etc.
The kit transparencies are thick and opaque. Decals are provided for a
single RAF boat. Full beaching gear is provided; a nice touch for
displaying a flying boat.
The Detail Sets
White Ensign Models has provided brass photo-etch details providing a
much needed upgrade to the basic kit interior, although much of it will
be hidden upon closing the fuselage halves.
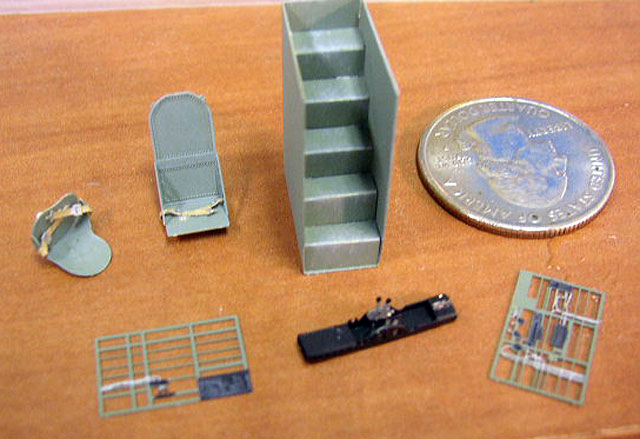
Three separate sets are available:
-
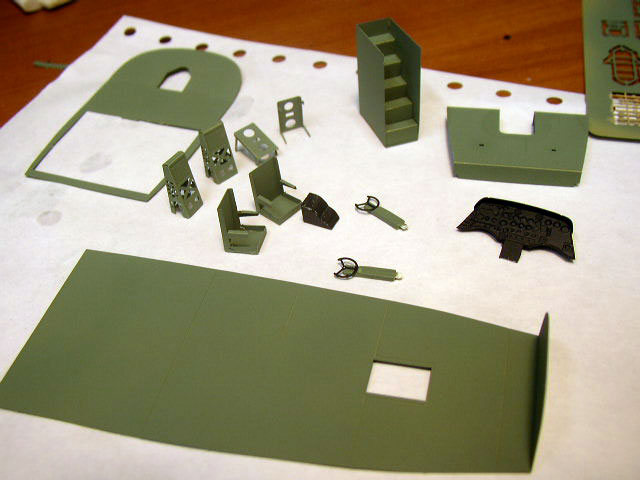
The interior detail set provides the
builder with all the major bulkheads, seats, control columns,
instrument panels and radio gear.
-
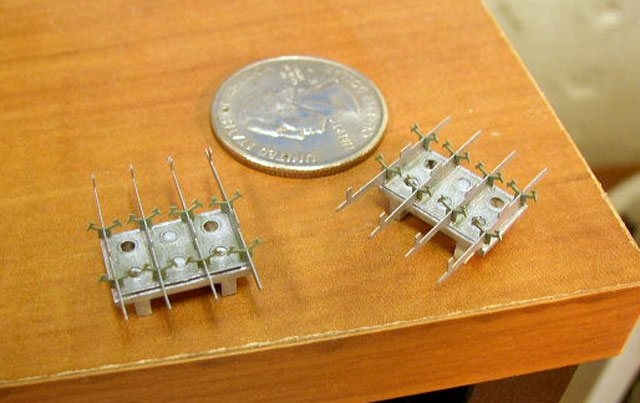
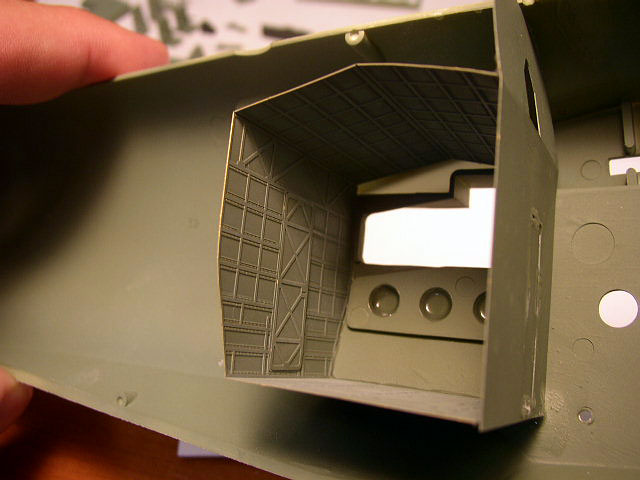
The bomb bay set provides bomb racks,
shackles and the floor, roof, bulkheads and separate doors.
-
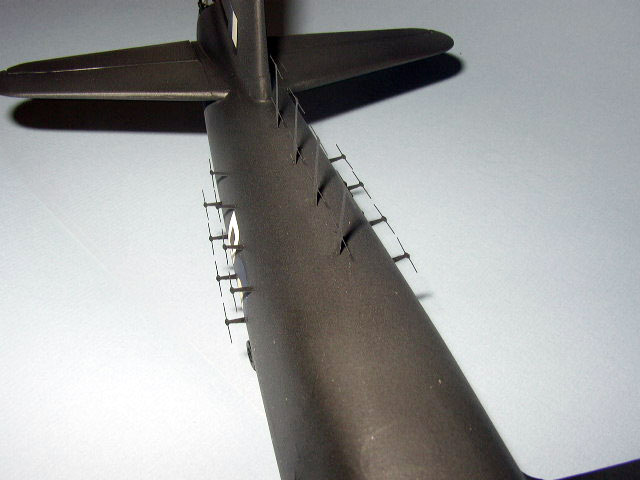
The exterior set provides all the
Yagi antennae and a couple of bracing wires for the outrigger
floats.
I also used Squadron vacu-form replacement canopies to better see the
insides.
First, I removed all the major plastic parts of the kit and cleaned
them of all flash and sprue-attachment remnants. I then assembled all
the control surfaces, wings and tail. When they were dry I gently sanded
all surfaces with 1000 grit-wet sandpaper to take down the raised
surface detail. My goal was to knock it down, not eliminate it
altogether. A gentle sanding removed the bumps, but left the impressions
of the detail.
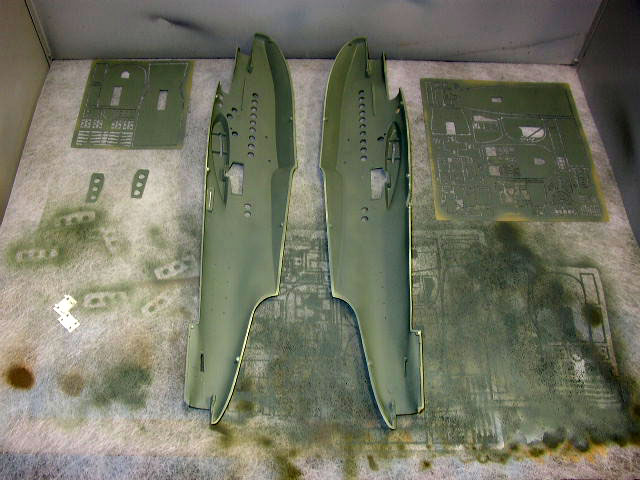
I then soaked the photoetch frets in mineral spirits to remove all
solvents and oils to allow better adherence of paints. I painted the
interior of the kit and the interior photoetch set RAF interior green
(Model Master Acryl). After the paint dried overnight, I painted all
detail areas (control panels, radios, throttle quadrants, etc) of the
interior. I dry-brushed with light gray to bring out the details and
followed up with a dry brush of silver on highly worn areas on floors,
ladders, etc.
Click the thumbnails below to view larger images:
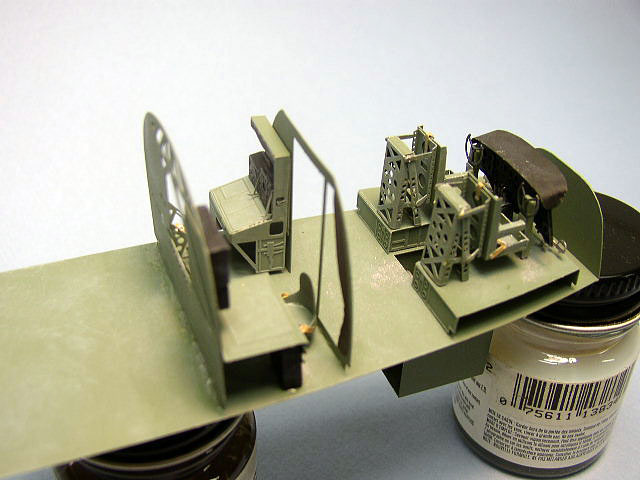
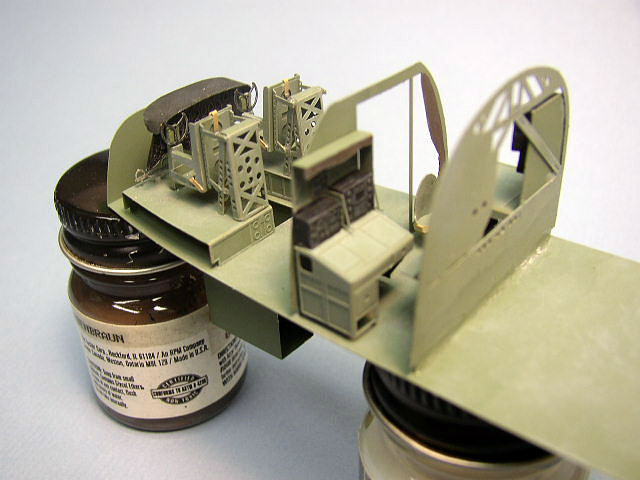
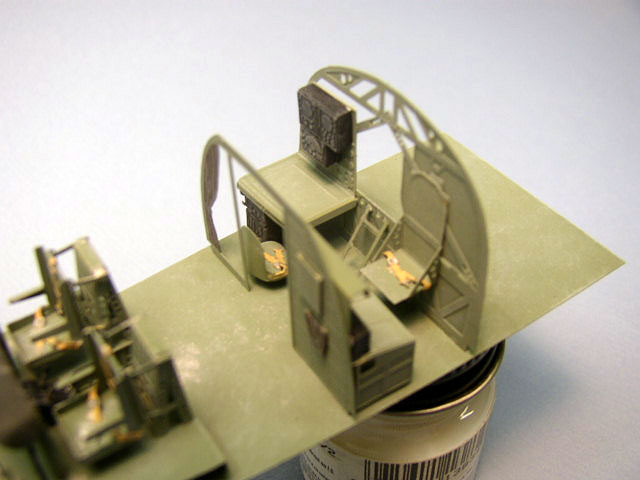
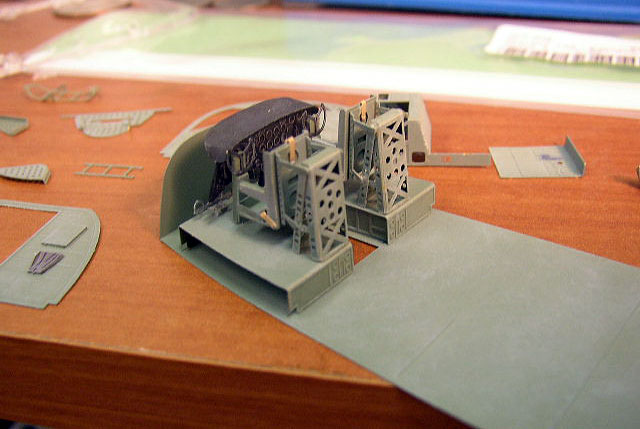
I then assembled the bomb bay per instructions and installed the
completed bay in the fuselage half with super glue.
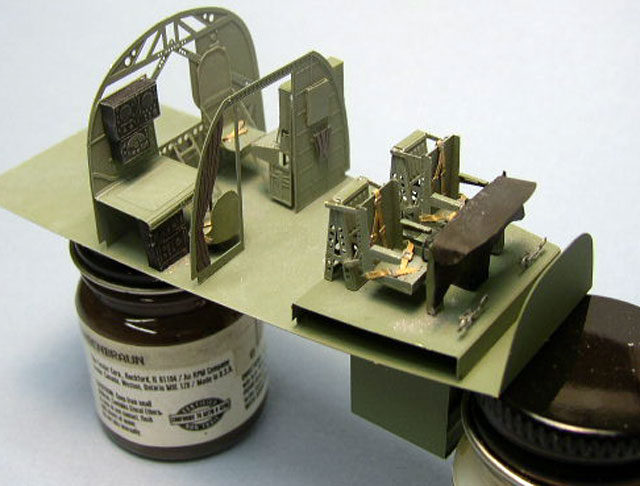
The interior was then assembled per instructions. I found a problem with the instructions
regarding the staircase to the lower level of the boat from the flight
deck: Part 3 should be glued at the top of the staircase, not the
bottom. All other stairs should be moved down accordingly. If you build
it as shown, the top stair will be missing when looking though the
opening in the cockpit. This appeared to be the only error in the
comprehensive instructions. The brass is easily cut out with a sharp no.
11 blade and very easily bent to shape, as almost all bends are
90-degree angles. The throttle quadrant was difficult to bend to the
curved shape, but take your time and you’ll be fine. The pilot’s seats
and harness go together with no issues and look awesome when completed.
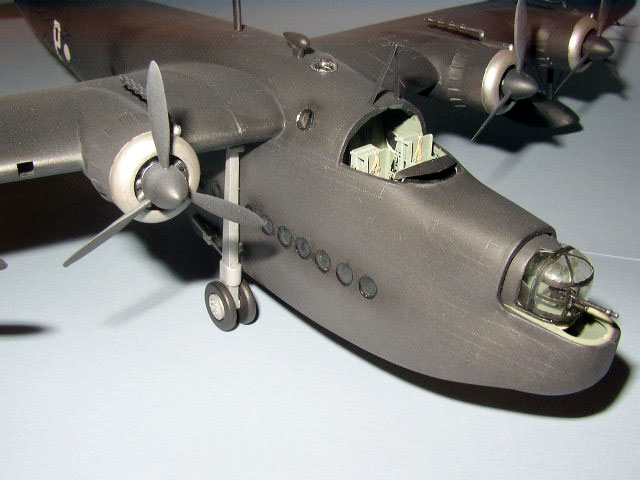
The completed cockpit is convincing, but sadly will mostly disappear
when the halves are closed.

Click the thumbnails below to view larger images:
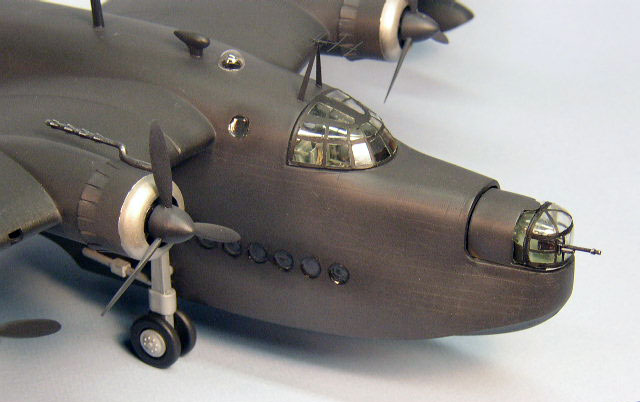
After installing the cockpit and footsteps for the retractable nose
turret I closed the fuselage halves. All major subassemblies were added
(wings, tail, horiz. Stabilizers). Don’t forget to put the nose turret
assembly in if you want it to retract.
All seams were cleaned up and
sanded.
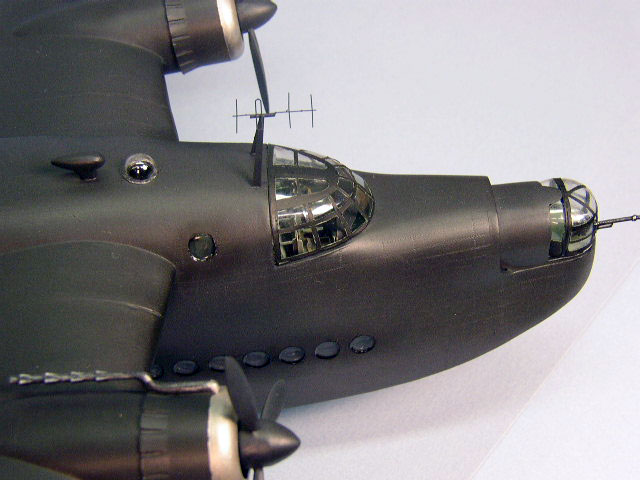
Since the aircraft I was doing did not have the mid-upper
turret, I filled this hole with styrene stock and putty. I assembled the
outrigger floats and added stretch sprue cables that were drilled into
the wing and flat with a pin vise. The external photoetch cables between
the float struts did not fit well, so I replaced them with stretch sprue.
This was the only photo-etch part that did not fit. I installed the bomb
racks on their rails and glued them in place. I final sanded the entire
surface again to smooth out any scratches, etc. and off to the paint
booth.
All paints were acrylic. I used Model Master and Floquil on this kit.
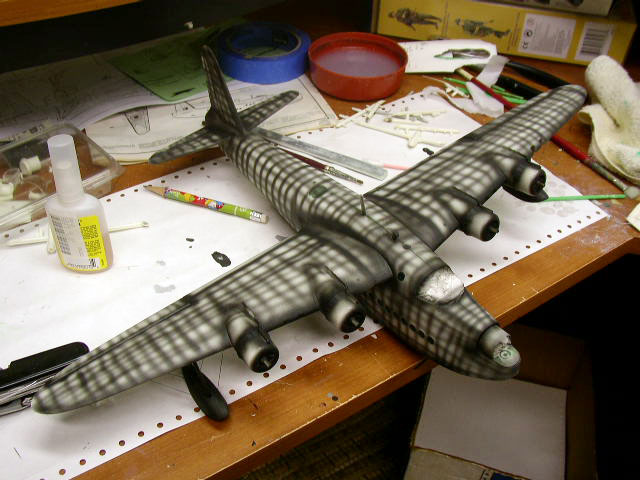
I attempted to do pre-shading for the first time with this kit. I
sprayed Model Master Flat Black on all major panel lines, etc. and
followed with light mist coats of Floquil Grimy Black. This did not turn
out as good as I hoped, the boat being for too gray, so I did a liberal
spraying of Floquil Night Black haphazardly and quickly. The result is a
black-gray boat that has a bit of depth as opposed to an all flat black
paint job. I sprayed Model Master Gloss and waited 24 hours to place
decals.
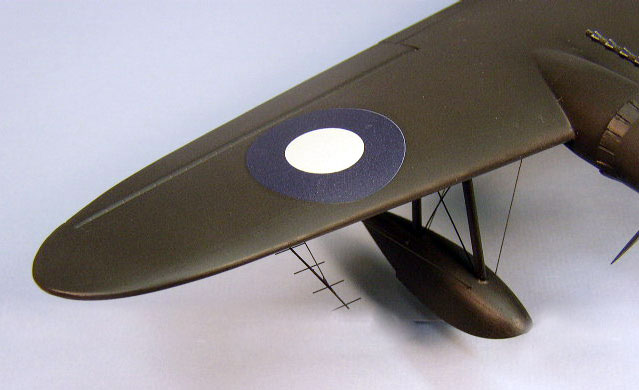
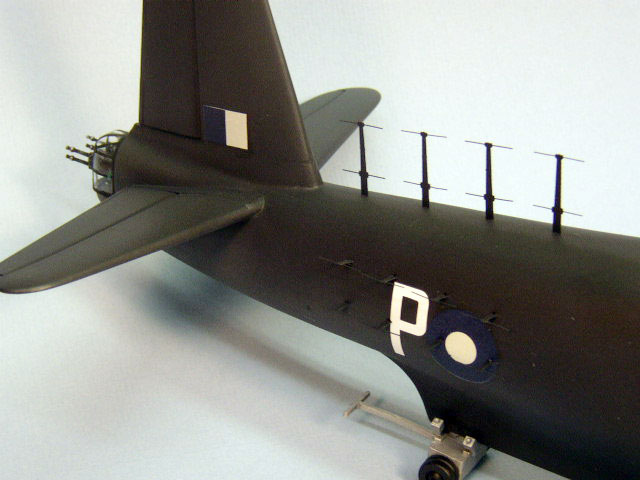
I chose to do a boat based in Koogala, Ceylon in 1944. Black P “Peter”
was a well-known boat that participated in dusk/dawn bombing missions,
thus the paint job. My references disagreed on weather the color of the
internal roundel was off-white or light blue. Luckily by friend Derek
Pennington came to the rescue with reference photos that seemed to
indicate white roundel centers and fin flash. The “P” was taken from a
PBY Catalina sheet graciously provided by friend Tom Heinrich. The
roundels and fin flash were taken from a Matchbox Lancaster kit. All
reacted well to solva-set. After the decals had dried I applied a flat
coat.
Final Assembly
I painted and assembled the beaching gear, turrets and cockpit canopy
and installed them. I opted to leave the cockpit canopy unglued at this
time so I can remove it to see the interior. I used Micro Krystal Kleer
on all the side portholes and to attach the turrets. I then added the
very fragile Yagi antennae to the rear fuselage, top cockpit and under
wing locations. These are extremely delicate, but look excellent and
to-scale.
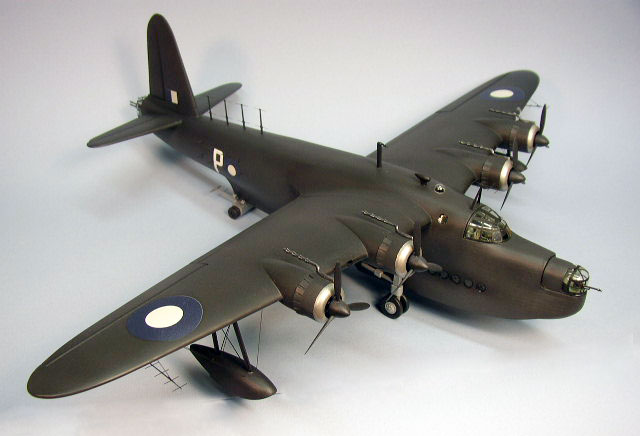
I had good intentions to weather the heck out of this boat, but I ended
up keeping it just like all the others in my collection, clean builds.
The Airfix Sunderland is ancient, but can be built. I believe most
sit in a musty corner of the basement simply because of the basic
detail.
The White Ensign Models detail sets bring this kit leaping into
the 21st century in the realm of detail, even if you cannot see most of
it (I know it’s there). On a scale of 1 to 10 I give the Sunderland an 8
and the WEM sets a 10. I honestly have never worked with photetch that
was so easy to use. I highly recommend it.
The finished kit is BIG, so
make sure you have space!
- Warpaint Short Sunderland
- Osprey Short Sunderland Units of WW2
Click the thumbnails below to view larger images:
Model, Images and Text Copyright © 2004
by Bryan "Tuck" Tucker
Page Created 02 October, 2004
Last Updated
02 October, 2004
Back to
HyperScale Main Page
|
 Home
| What's New |
Features |
Gallery |
Reviews |
Reference |
Forum |
Search
Home
| What's New |
Features |
Gallery |
Reviews |
Reference |
Forum |
Search