|
T-28A in 1/32 scale
with some help from Collectaire
by Frank Mitchell
|
 |
|
North American
T-28A |

HyperScale is proudly supported by Squadron.com
As some on the list will recall, I have not always
been a big fan of this manufacturer. However, a couple of years ago, I
ended up with two of the more recent 32nd kits: the F-80, which I have
talked about before
http://hsfeatures.com/features04/f80fm_1.htm, and the T-28, which is
the subject of this dissertation.
I have always thought that the T-28 would make a nice 32nd model; not
sure why, it just looks kind of interesting. Unfortunately, while the
Collectaire kit will help the process, it won’t be easy.
On the good side, the fuselage aft of the cowling is accurate and well
molded and, as with the F-80 kit, two canopies are supplied, which is a
nice touch. The gear and other small parts are white metal, and the
decals are very useable. Although there is some interior supplied, with
those large canopies, a healthy dollop of additional detailing is called
for (see below). There are, however, two very real problems with the kit
that could be a deal-breaker for some: the cowling and the wing.
The wing is a one-piece molding that is much too thick throughout its
length and has almost no dihedral. Since a major part of the very
characteristic look of this airplane is the significant dihedral (10
degrees) along with a relatively thin wing, this is not good. Because
the wheel wells are a part of the one-piece, correcting the dihedral
would be a difficult process, and thinning the entire wing would be very
messy, to say the least. In addition, when the wing was compared to
several sets of drawings, the shape appeared to be wrong in plan view as
the "sweep back" of the leading edge is incorrect, which throws the
whole wing out of shape.
The cowling, which is nicely shaped, appears to have been made for a
somewhat larger scale kit. It is about 1/8 inch too tall in the vertical
plane, and in plan view, it also bulges out and is too large.
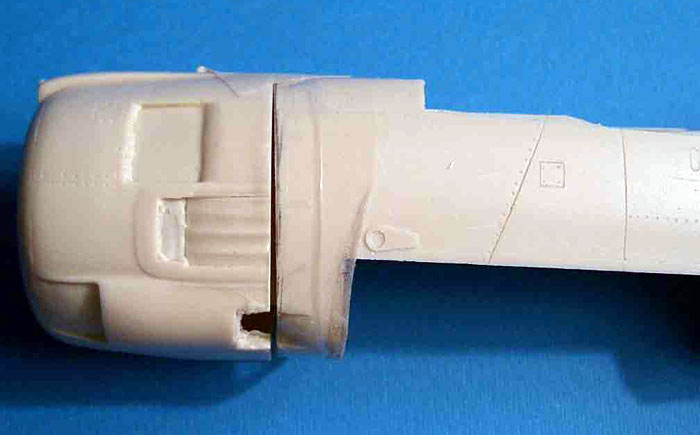
It would take a major effort to correct this problem, and I
even have some doubts it could be accomplished. I have to wonder if
whoever made the master tried to fit the two parts together.
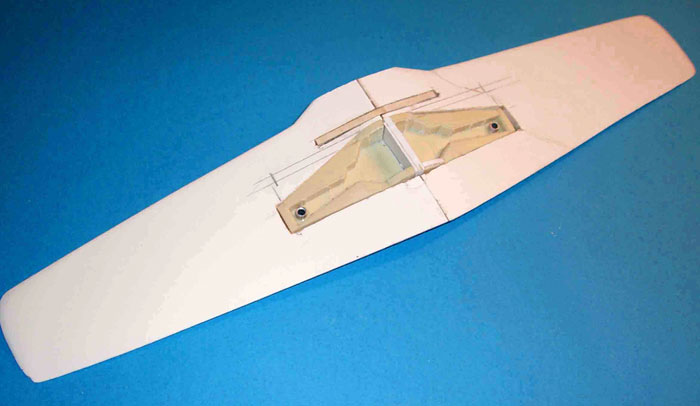
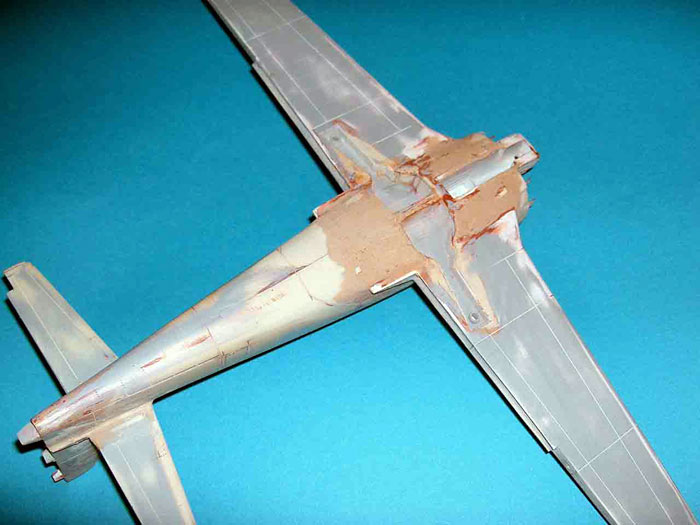
After some thought, I decided that the easiest way
to attack this kit would simply be to scratch-build a new wing. In the
long run, it was far less time-consuming than trying to correct the
extremely inaccurate piece in the kit. Since I was doing a scratchbuilt
project at the time, I carved out a mold for a new wing from balsa and
vacuum-formed that along with the other model’s parts. However, I then
had the even brighter thought that I could save some trouble and simply
cut the wheel wells out of the Collectaire kit and graft them into the
new wing. Bad idea. Took for bloody ever to get it all done, but it
looks right, if, that is, it is not inspected too closely.
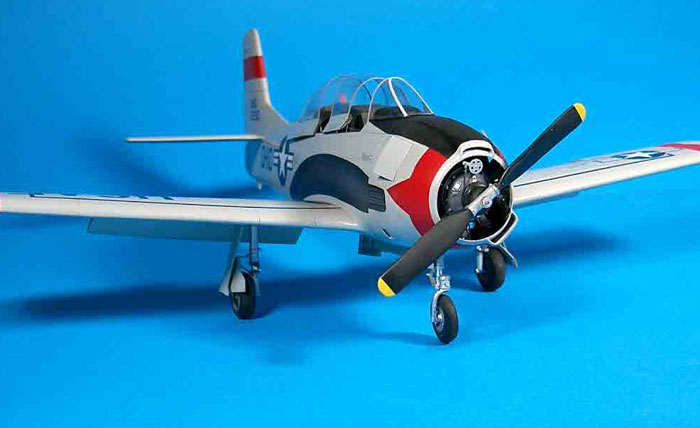
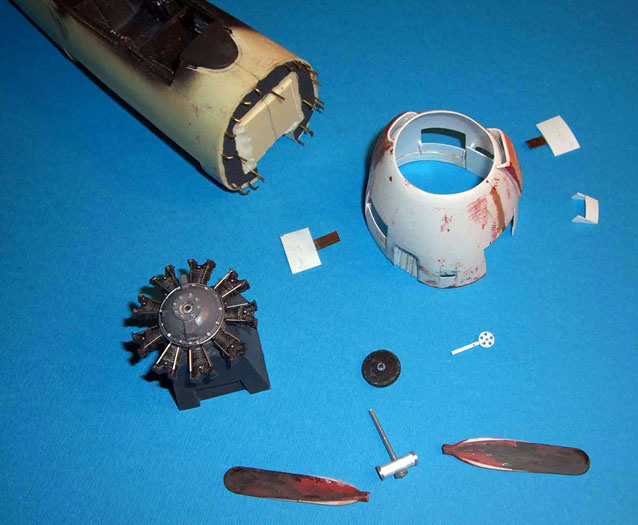
However, in a burst of misplaced ambition, I then made one of those
decisions that sounded good at the time; i.e., if I was going to make a
new cowling anyway, why not do a T-28A? Sounded good, so a new cowling
was also carved from balsa and vacuum-formed. I then learned that there
is a lot of work in a T-28 cowling, regardless of what version the
aircraft might be. Scoops, doors, and exhausts all over the place, plus,
of course, I had to scratchbuild a new two-blade propeller.
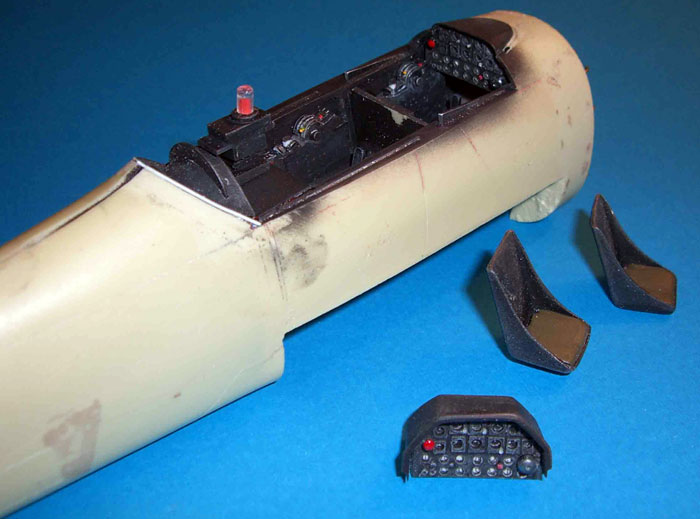
There was a fair amount of detailing that needed to added after the
conversion/correction work was done. As with most of the Collectaire
kits, there are a fair number of bubbles, pinholes, and rough surfaces
that have to be dealt with, and the cockpit needs lots of attention,
even though the basics are supplied. It is not that the kit parts are
the wrong shape, they just tend to be the wrong size. The consoles, for
example, don’t come up the walls far enough, the seats are too wide, and
the area behind the rear seat needs lots of work. On the other hand, the
instrument panels and canopy parts are very nice.
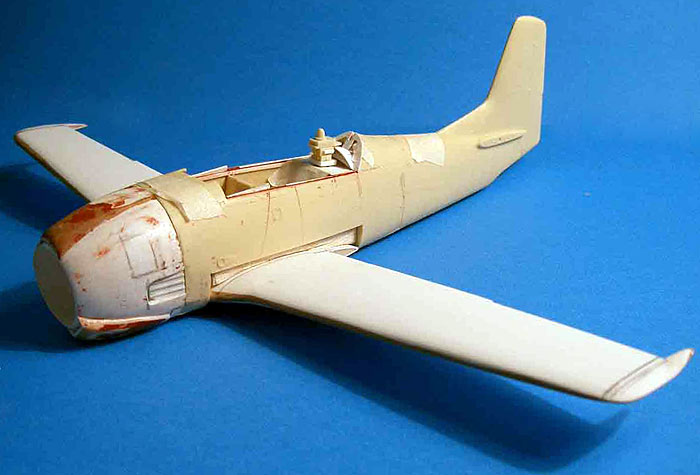
All of the control surfaces were also cut and re-positioned, mainly
because you just don’t see pictures of the T-28 with the flaps up. Not
surprisingly, the scribing needed to be re-done because of all the
changes I made.
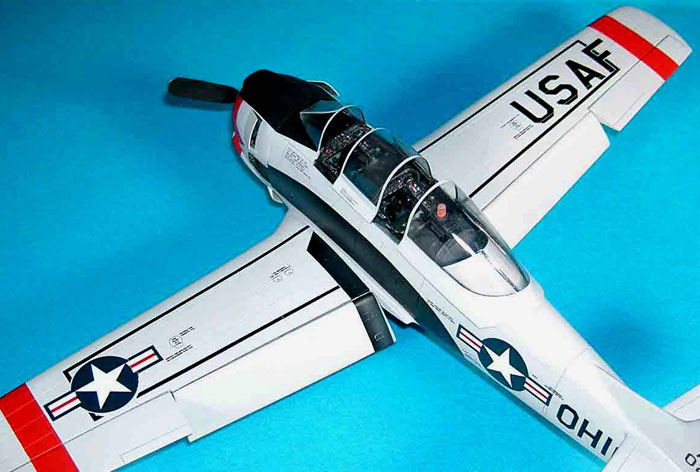
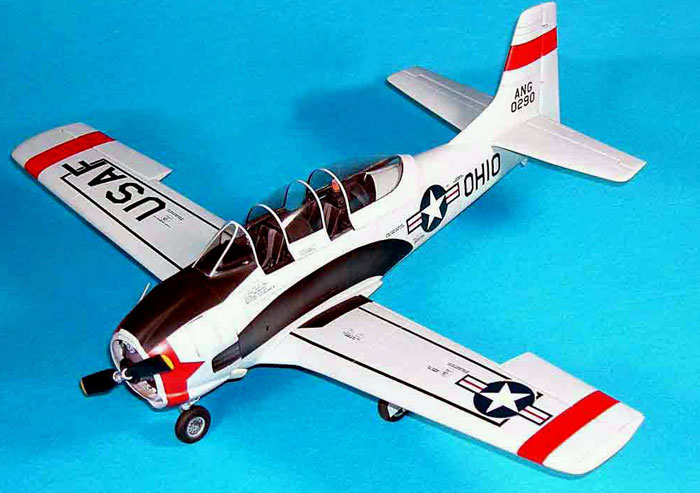
I chose an overall gray finish, simply because I
had done three natural metal models in a row, and could not face another
one. I therefore picked a National Guard aircraft that had been (as were
most T-28As) painted light gray.
The paints are Gunze, with the final finish being
a combination of Floquil Flat finish with some areas further coated with
Testor’s Dull coat both with and without some tinting.
The decals were
mostly from the stash since the kit markings were fine, but for Navy
birds.
Was the model worth the effort?
Not really, but I just couldn’t see throwing away
an expensive kit, regardless of the quality. I added to my own problems
of course, but since I have a habit of doing that, there is nothing new
there.
In summary, these kits, as with many aftermarket kits, need to be
considered carefully before purchase. If you are willing to put in the
required effort, a good representation of fairly rare subjects can be
obtained, but whether that distinction is balanced by the work and
expense involved is obviously up to the individual.
Click on the thumbnails
below to view larger images:
Model, Images and Text Copyright ©
2006 by Frank Mitchell
Page Created 29 August, 2006
Last Updated
21 February, 2007
Back to
HyperScale Main Page |
 Home
| What's New |
Features |
Gallery |
Reviews |
Reference |
Forum |
Search
Home
| What's New |
Features |
Gallery |
Reviews |
Reference |
Forum |
Search