|
Aconcagua's 1/48 scale
T-34A/B Mentor
by Gil
Hodges
|
 |
|
T/-34B Mentor |

HyperScale is proudly supported by
Squadron.com
This is Aconcagua's 1/48 scale T-34A/B Mentor kit. To my knowledge,
it is the first 1/48 scale kit of the early Mentor used by The USAF and
USN as a trainer.
The Metor was designed so that, with a minor modification and the
inclusion or exclusion of certain antennas, you can build a T-34A,
T-34B, or even a “COIN” B-45.
In the box
The kit consists of about 45 parts cast in a smooth gray resin. The
parts in both of the kits I built exhibited no pitting, bubbles, or
warpage. The surface detailing is well done with finely scribed panel
lines. The characteristic Beechcraft corrugations are sharply done with
laser cutting!
Note that both of my models had mold release on the resin parts; one
more so than the other. Take the time to scrub it off completely. Not
only will it interfere with painting; it even seemed to affect
superglue! The kit also has PE main panel faces with film instruments to
mount behind them. The control sticks and grab handles are white metal.
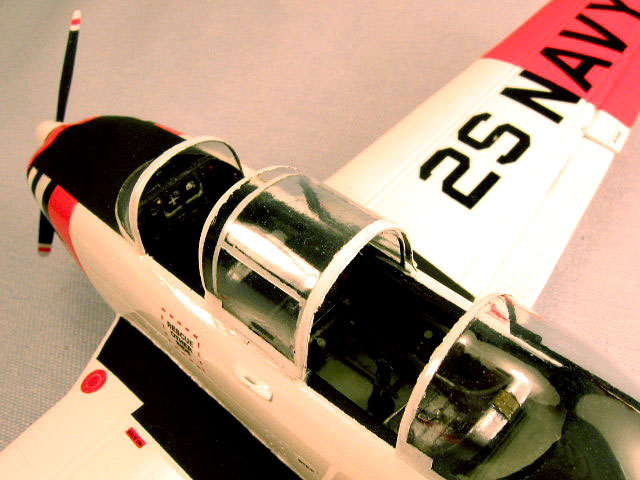
The kit includes two vac canopies. But, atypically, they are molded to
be displayed open. It would actually take more work to mount them in the
closed position.
The decals include markings for USAF and USN T-34’s; as well as
Chilean and Argentinian B-45’s. Various antennas for the foreign
versions are included, but the “coin” gun packs have to be ordered from
the manufacturer separately.
All in all, this is a very complete kit!
The instructions are good, consisting mainly of exploded view
drawings. Extra references aren’t a necessity, but certainly help.
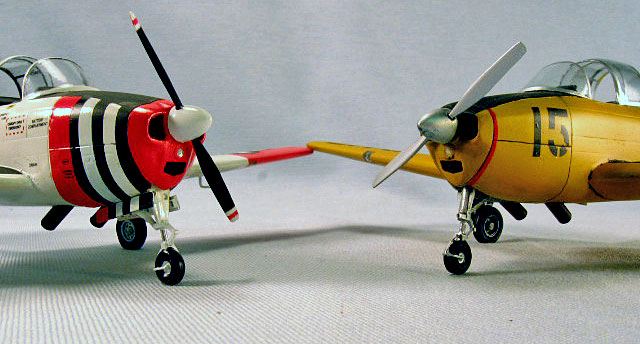
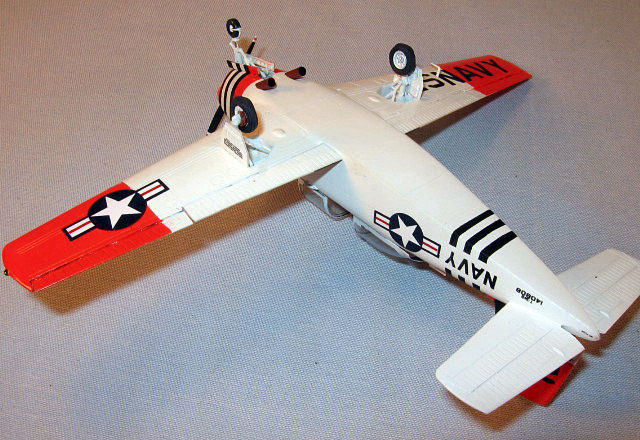
The fuselage halves are hollow cast with side wall details cast
inside. I strongly suggest using a motor tool to “hog out” as much
excess resin as you dare aft of the cockpit. This will allow you to pack
enough weight into the nose to allow it to sit on its gear properly. (as
you can see, on one of them I didn’t, and on the second one I did!) This
also has the bonus of opening the indentions in the rear fuselage sides
for the tail planes. That, with careful clean-up of the tail planes,
will allow for a tab/slot arrangement.
The cockpit tub has cast in side consoles with raised
detailing. It fits perfectly in the fuselage. However, the resin rear
main panel in both of my kits was a little wide. On the first kit I
sanded the sides to get it to fit. This worked, but it meant I also had
to trim the sides of the PE panel to fit too. That was tougher! On the
second T-34, I carved notches in each fuselage side to fit the rear
panel into. This worked much better, allowing the fuselage to close
easily and yet avoiding the alteration of the PE panel. The seats are
finely cast with the harnesses built in. A little paint and a wash is
all that’s needed to bring them to life.

The model was assembled with thin superglue and a mixture of
superglue and baby powder. The glue/powder mixture has the advantages of
filling large areas easily, sanding feather smooth, remains workable
(not rock hard) even after 24+ hours, and will also help prevent fogging
of clear parts. The model assembles easily with no nasty surprises. A
little filler was needed along the bottom of each wing/fuselage seam. By
the way, I suggest that the pour stubs for the wings be trimmed down,
but not removed. You can drill holes into the fuselage wing roots (which
will be hidden by the interior side consoles) and create ”pin”
attachments to strengthen the wing joints. Don’t forget to add as much
weight as possible in the nose around the nose gear bay before adding
the nose cap. I compacted and crushed lead fishing sinkers in order to
fill every nook and cranny. The short “balance arm” typical to the T-34
due to its gear being so far forward makes this imperative to have any
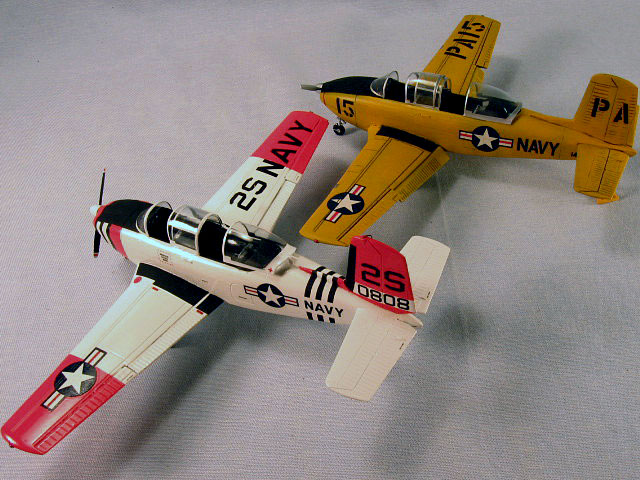
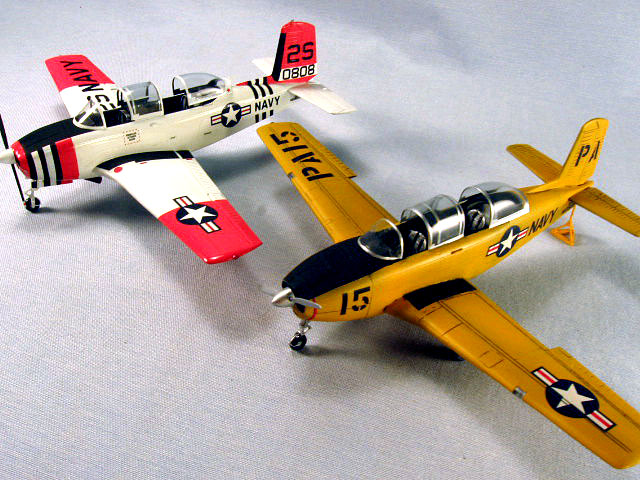
hope of balancing the model on its gear. By the way, note that the nose
gear on the yellow Mentor is backward (DOH!); the one on the
white/orange T-34 is correct! The missing nose gear doors on the one is
OK because they were often removed in service.
If there is one “con” to the Aconcagua T-34, it’s that the small
parts are very fragile. Parts such as the main gear supports and nose
gear actuator will remove easily from their pour stubs, but handle them
gently during assembly too! On the “pro” side, the kit has wire
reinforcements cast integrally into the main and nose gear struts. This
makes them more than strong enough for the weight of the model!
Another nice feature of this Mentor kit is that the flaps and
ailerons are molded separately. You can easily display them in neutral,
down or deflected positions. And, they fit very well in any of those
positions!
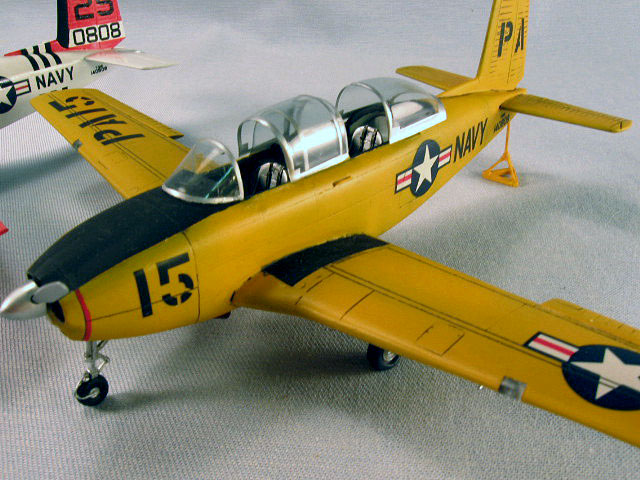
I built both models as USN T-34B’s. This simply involves the clipping
of the bottom of the vertical tail.
The first one was painted in the overall yellow trainer scheme from
the late 1950’s. Floquil Railbox Yellow was the overall color while
Alclad Aluminum was used for the gear and the canopy framing. The
markings all came from the spares box.
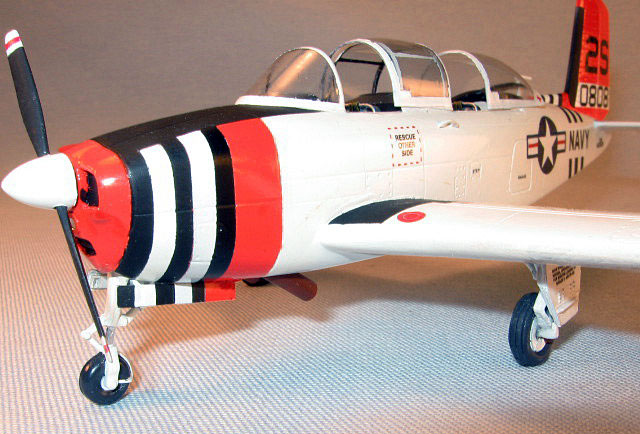
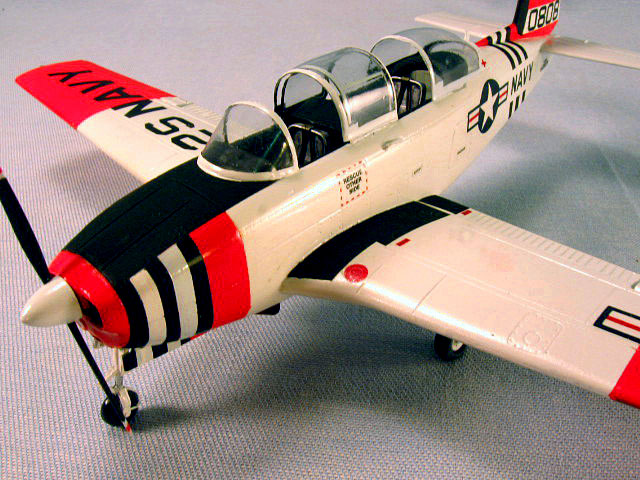
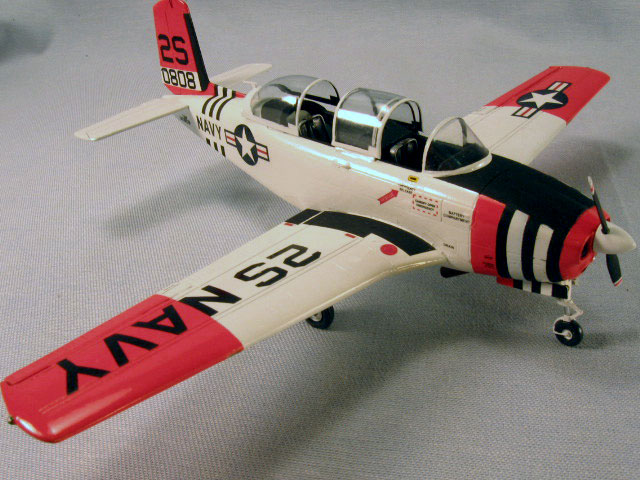
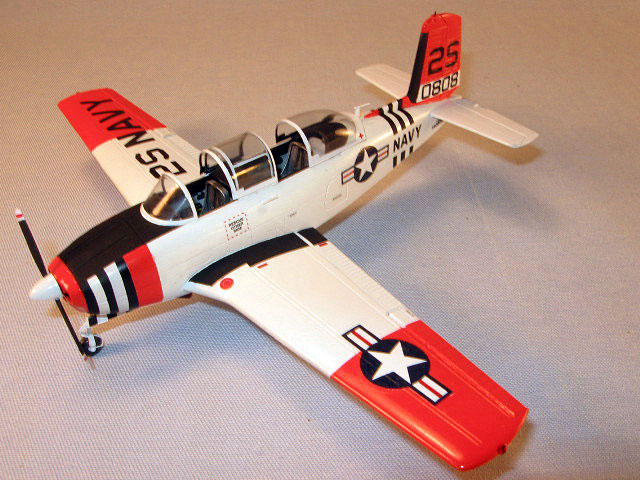
The second T-34 was done in the typical white/orange trainer scheme
from the “60s/’70s. Model Master gloss enamels, thinned with lacquer
thinner, were used. The striping (which is supplied on the decal sheet)
was painted. The orange on the wings was masked to allow for the
stars/bars decals to go down over the white since they aren’t opaque
enough to prevent bleed through. The kit decals were used throughout and
laid down very well with a little solvent.
I highly recommend this little kit to anyone with some resin and/or
muti-media kit experience. It costs in the $60-$70 range (USD), which is
very reasonable for such a complete short run resin kit. I got my
Aconcagua T-34 in the vendor area at an IPMS show, and the second one
was supplied by the owner (commission job). Please contact Luis Santos
(the distributor) at: selpingudo@aol.com to either order directly or to
find out where you can get your copy. Cheers!
Click on the thumbnails
below to view larger images:
Model, Images and Text Copyright ©
2006 by Gil Hodges
Page Created 25 January, 2006
Last Updated
21 February, 2007
Back to
HyperScale Main Page |
 Home
| What's New |
Features |
Gallery |
Reviews |
Reference |
Forum |
Search
Home
| What's New |
Features |
Gallery |
Reviews |
Reference |
Forum |
Search