| The A-4 Skyhawk has
always been in my top ten favorite aircraft.
This model is the 60th
model I ever built. Being completed in May of 1982, it
is also the oldest built model that still sits on my
model display shelves in the living room. It is also the
fifth Skyhawk model I ever built and the second one in
1/72nd scale.
Yes, I am perverse enough to know
and track all this information.
Back in the 1970s and early 1980s, Minicraft
was a US outlet for Hasegawa model kits. This was
similar to how Testors is an outlet for
Italeri kits, today. This model is the Minicraft
release of the Blue Angels TA-4J Skyhawk in 1/72nd
scale.
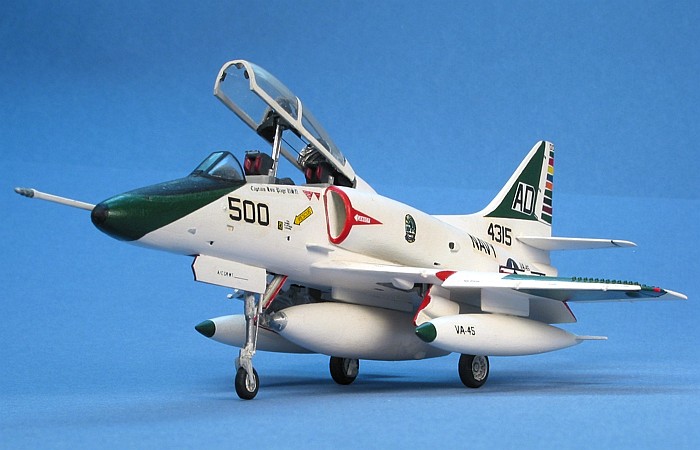
Even at this early stage in my model building, I
recognized the potential for some extra detailing to
this otherwise ordinary kit. Since I was still in my
"move the control surfaces just because you can" phase,
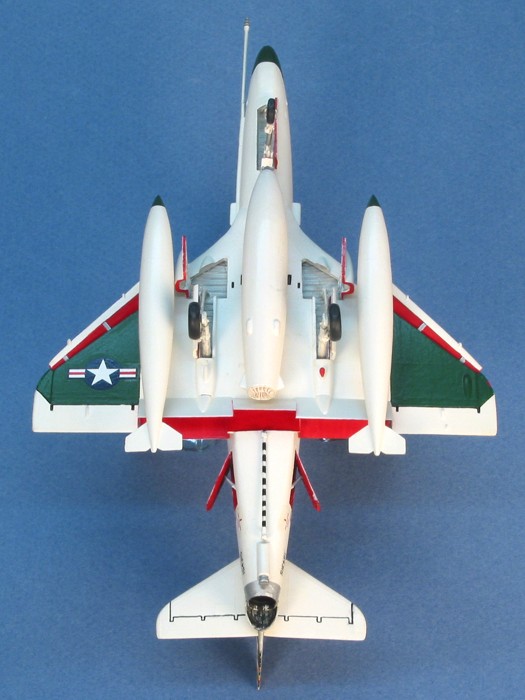
I decided to do some extra detailing, including cuting
and repositioning the wing flaps and slats. I did the
following to the kit:
-
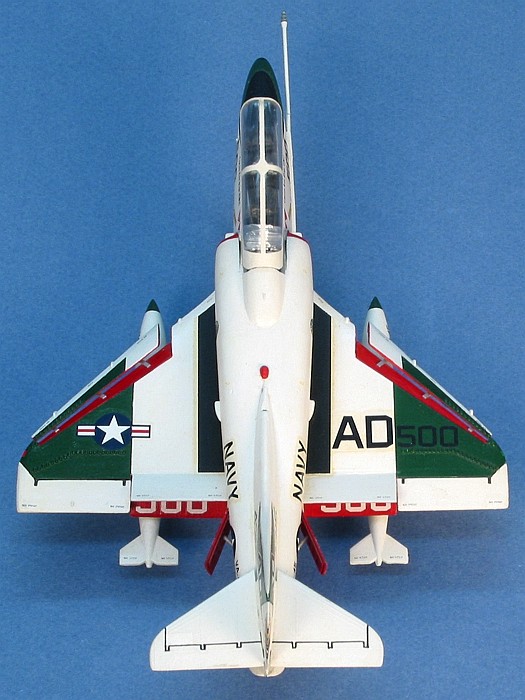
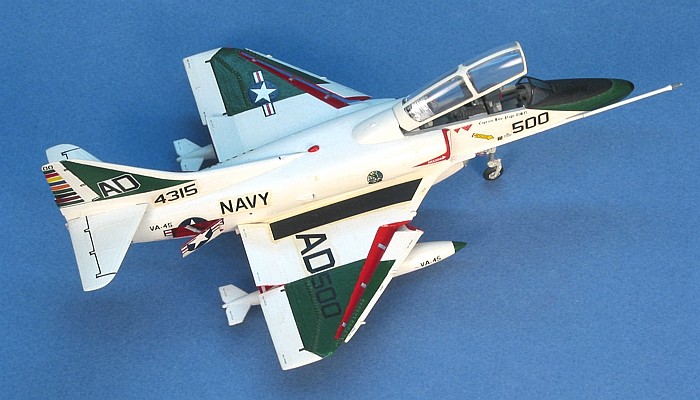
I cut and
repositioned the wing flaps in the lowered position.
This included erroneously treating the "hell hole"
door between the wing flaps as a flap and opening
it, too. At the time, I did not know better.
-
I cut and
repositioned the wing spoilers in the raised
position. This positioning of the spoilers can not
occur without the aircraft being powered, but again
I did not know better at the time.
-
I cut and
repositioned the wing slats in the lowered position.
This was an easy change that greatly effected the
look of the completed model. Most all Skyhawks
(except Blue Angels) have their wing slat deployed
on the ground.
-
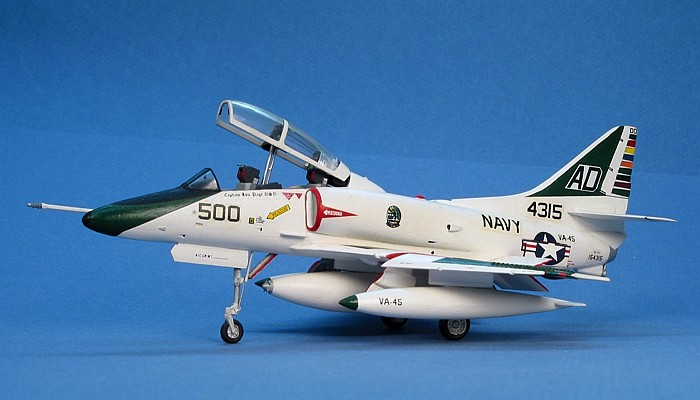
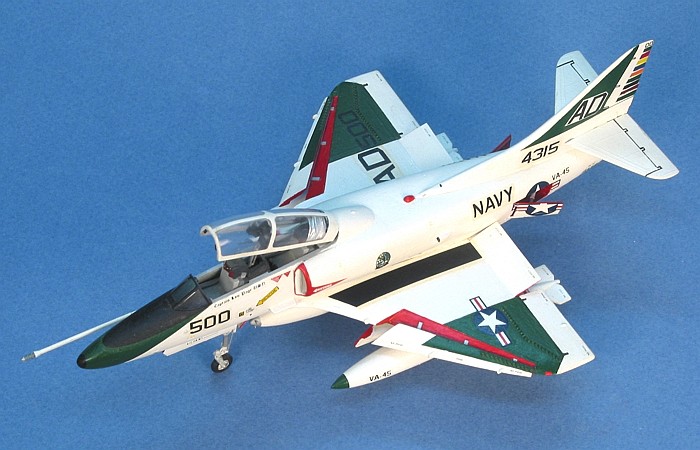
I enhanced the
detailing on the two ejection seats, adding ejection
handles to the seat bottoms and headrests. The seats
are still nowhere near to being accurate
representations of the ESCAPAC seats found in the
Skyhawk, but the detailing helped.
-
I added rear view
mirror details to the forward portion of the canopy.
-
I added the
instrument training hood in the open position on the
rear portion of the canopy. This is nothing more
than some carefully shaped aluminum foil, bunched up
at the rear of the canopy. I then added the guide
wires for the hood using stretched sprue.
-
I added an aerial
refueling "buddy tank" to the centerline weapons
pylon. The refueling tank was fashioned out of an
F-4 Phantom centerline fuel tank. I cut off the tail
end of the F-4 tank and scratch built a
representation of the refueling drogue.
A few years after I did all the work to detail out
this Skyhawk model, Fujimi issued several new
kits of the Skyhawk in 1/72nd scale using new
molds that provide most of these details right in the
box. I guess I was just a little ahead of my time.
 To
paint the model, I used all Testors "Little
Bottle" enamel paints. These were applied entirely by
paint brush as I did not yet own an air brash back then.
The dark green trim is Beret Green. I custom mixed the
cockpit interior gray color. The top coat over the
decals is Krylon spray satin clear paint. To
paint the model, I used all Testors "Little
Bottle" enamel paints. These were applied entirely by
paint brush as I did not yet own an air brash back then.
The dark green trim is Beret Green. I custom mixed the
cockpit interior gray color. The top coat over the
decals is Krylon spray satin clear paint.
The decals come from SuperScale on decal sheet
72-210. The unit markings are for VA-45 "Fightin' Black
Birds". While the majority of the markings are accurate,
I applied some artistic license to the vertical tail and
added a "rainbow" on the rudder where none existed on
the real aircraft.
I highlighted the engraved flight control surfaces
using a pen and India Ink, but did no other weathering
to the model.
This was a fun little kit when I built it. It has
nice detailing, was easy to build, and gave me a chance
to stretch my "plastic surgery" abilities. The kit has
since been outclassed by the newer Fujimi A-4
kits with these later releases providing in the box most
all of the details that I modified into this kit.
I very much like these markings. If (when)
Hasegawa releases a 1/48th scale TA-4J,
these will be the markings I build it in first.
|
 Home
| What's New |
Features |
Gallery |
Reviews |
Reference |
Forum |
Search
Home
| What's New |
Features |
Gallery |
Reviews |
Reference |
Forum |
Search