|
Trumpeter's 1/32
scale Avenger as a
Grumman Tarpon
by Jamie "Haggis" Haggo
|
 |
|
Grumamn Tarpon |

Trumpeter's 1/32 TBF Avenger is available online from Squadron.com
The Trumpeter Avenger was awaited by most modellers with guarded
anticipation.
I had read with interest all the criticism of Trumpeter following the
release of their previous offerings and was expecting the same with this
kit. However, after the model hit the shelves there was a strange
silence. Could it be that the Avenger was accurate, even according to
the critics?
When I got my kit I decided to just launch into building it and took the
fact that because all the internet forums were quiet that the model must
be accurate. The first thing I did was to decide on which particular
aircraft I was going to model, the first part was obvious. Being a pilot
in the Fleet Air Arm it was no strange thing that I decided on a British
Tarpon, but which one? I looked at building a BPF aircraft, possibly one
that took part in the raids on the Sumatran oil fields; however I
discounted this due to the fact that almost every Tarpon model I had
seen was in these markings.
Next I considered a D-Day aircraft but most had some form of badge or
personal markings for which there were no decals for. I went to the
Hannants web site in a light bulb moment and searched for decals in all
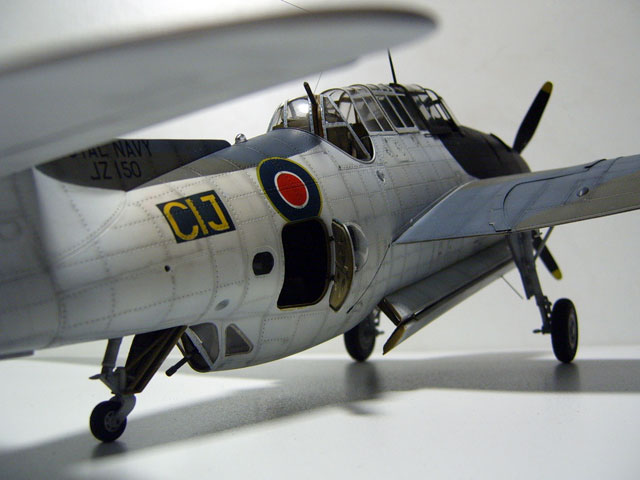
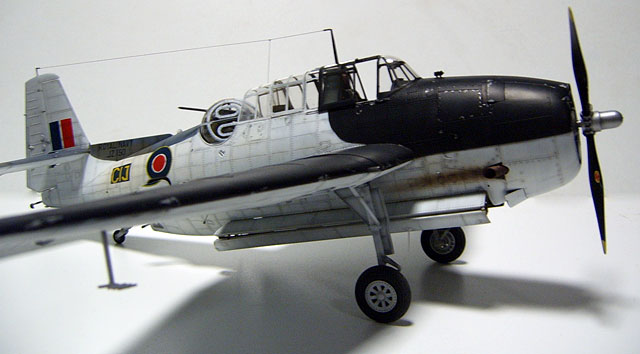
scales for some inspiration. There I came across an unusual white over
temperate scheme with some nice big black areas, the aircraft in
question being from 711 Sqn based at RNAS Crail in 1945.
Right, let’s get started then.
Instructions
The biggest omission in the instructions is the lack of paint chart.
The instructions tell you what Gunze paint number to use but this is
pretty useless without a decode so unless you can get hold of a decode
chart off the web you will have to dig out all those Hasegawa
instructions, what a nausea! The moral of the story is get some
references.
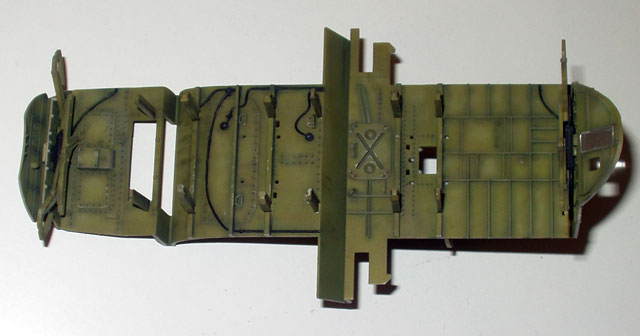
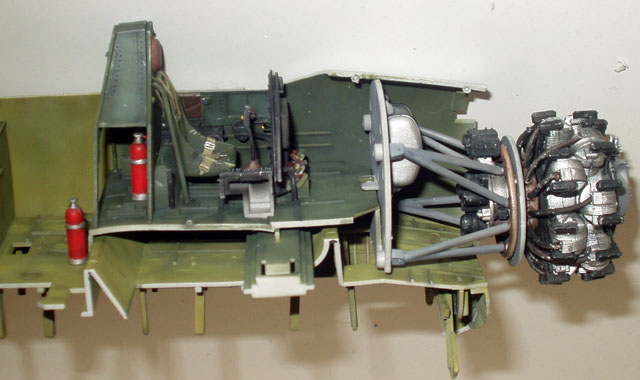
For such a big, complicated model it is important to take time out
and have a quick look at the construction sequence. Basically the engine
fits to the pilot’ cockpit, which fits to the avionics bay, which fits
to the gunner and radio operator’s stations, all this lot then fit’s on
top of the bomb bay. This is then trapped within the fuselage halves
with the rest of the construction being conventional. Looking at the
instructions there seemed to be some odd elements in that certain sub
assemblies are completed and then left to sit in the pending pile for an
age until added to the main construction.
Guess where I started? You got it, the engine. This is a very
complicated sub assembly but highly detailed, all that’s missing is the
ignition harness, which I couldn’t be bothered to do! This was then
attached to the engine bearers which were in turn attached to the
firewall. A word of warning, the engine bearers are flimsy, make sure
that the bearers are fitted in accordance with the instructions. This
sounds obvious but I still managed to mix them up and when I came remove
them to do it right I snapped the mounts (the dangers of super glue).
This assembly is put to one side, due to the fragile nature of the
assembly I would suggest you leave this to the end of the fuselage sub
assemblies.
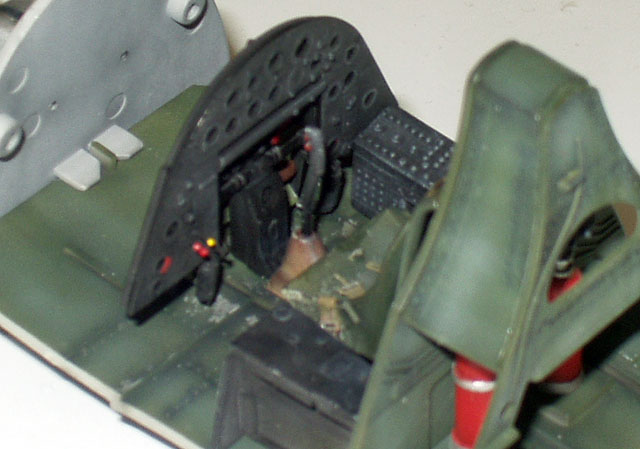
With the engine completed it was on to the cockpit. Here you have to be
careful with the cockpit colour, some Tarpons were painted with the
complete interior painted in USA interior green whereas some had the
pilot’s office painted in bronze green, this was applicable to the
aircraft I was building therefore it was painted with Tamiya XF-5. I
think at this point it is worthwhile explaining how I paint the cockpits
of my models. If the plastic is fairly dark then I will prime with
Halford’s grey primer as this technique relies upon a good contrast
between the flat areas and the detail which is pre-shaded with thinned
black paint. I concentrate the pre-shading in the nooks and crannies as
well as in the natural shadow areas. Next I will apply a thin coat of
the base colour sparingly enough to allow the pre-shading to show
through. Following that the base colour is thinned and lightened with
white (or yellow if using green) and sprayed onto flat areas and areas
of natural highlights. Next a very thin (90% thinner) mix of Tamiya
black/brown is sprayed in the shadow areas. Finally the components are
given a dry brush of light base colour using enamel which is far better
than trying to dry brush acrylic. The final final thing is to give a
very light and restrained dry brush of dull silver to areas to simulate
wear.
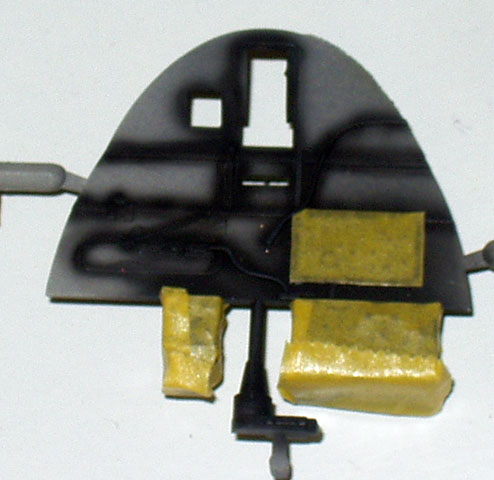
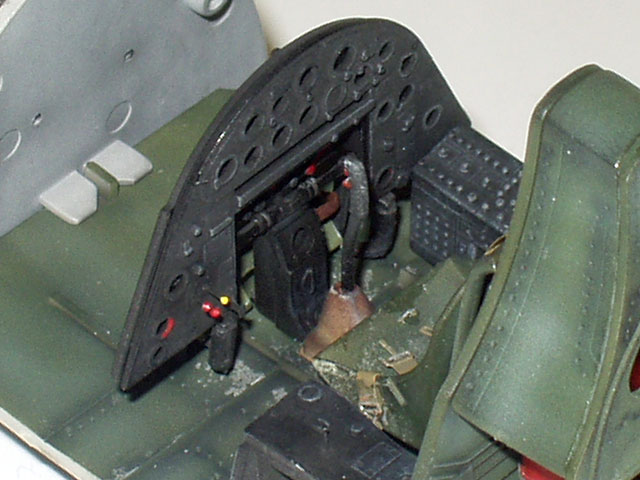
Trumpeter has a novel way of doing the instrument panel. They cast the
panel in clear plastic with the holes for the instruments drilled out,
this is painted black. Then you attach the acetate printed instruments
to the back if the panel and paint the back white thus the dials show
up, to the holes clear varnish is added to simulate the glass. My
question is what’s the point of having the panel moulded in clear
plastic if you’re going to paint it black and have the holes drilled
out? Either mould it in grey styrene or have the holes filled in!
The final point to note reference the front cockpit are the etched seat
belts that are included on the etched set. This is a fabulous idea and I
wish every kit came with a set of seat belts in this medium but only if
they are long enough, in this kit they are not!
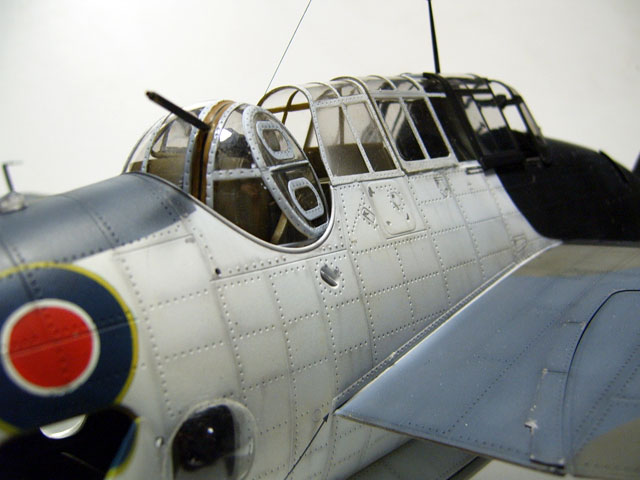
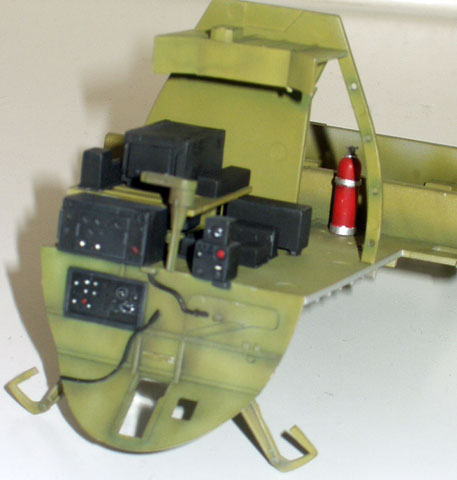
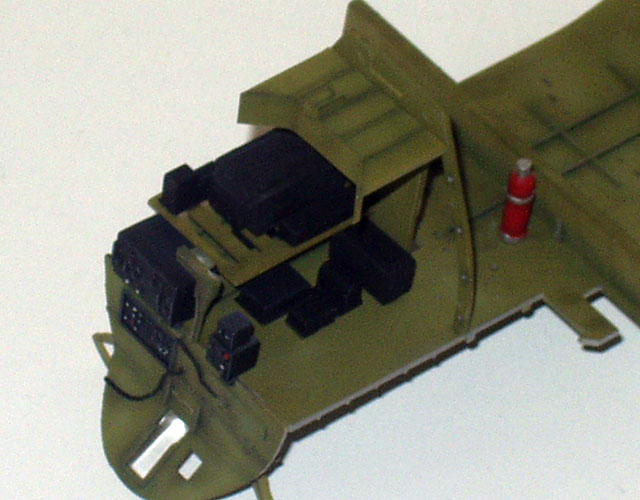
Being a Tarpon the rear cockpit layout is considerably different to that
of the American Avenger. The Fleet Air Arm aircraft had an extra seat
for an Observer forward of the turret in place of the avionic rack. I
could not find any pictures of this area and despite living 5 minutes
from the FAA museum at Yeovilton had no material to work from therefore
I made it up. My mate Phil from IPMS Avon cast a couple of seats for me
(good job as I trashed the first one) as well as moulding some of the
bubble windows at the same time. Anyway, I made up a mounting for a seat
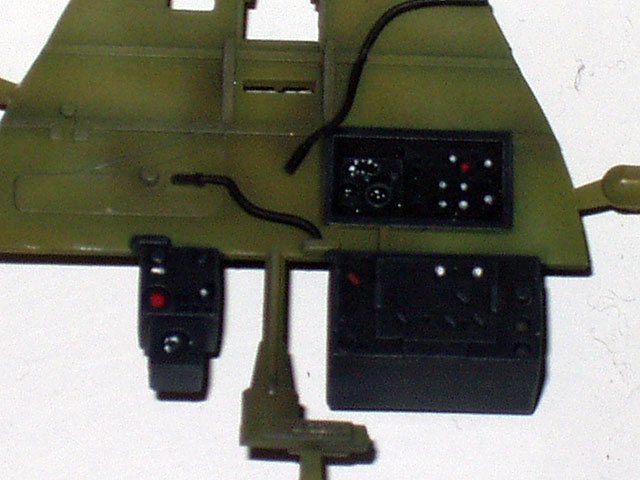
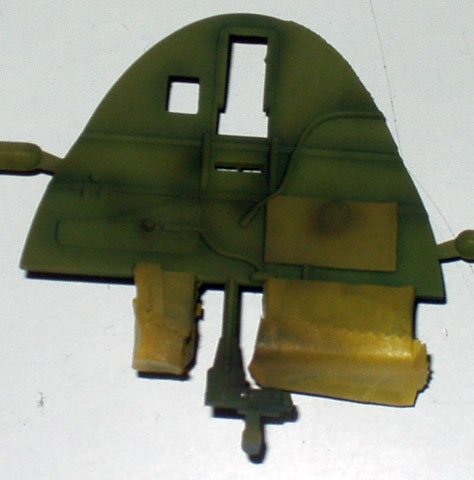
out of tubing and an adjustment lever from sprue. I added a set of
temporary seat belts from masking tape but as I have had a set of
British seat belts from MDC arrive they will now be replaced. I also
made a chart table from sheet styrene which was painted in a wood effect
using brown and tan enamel paint. For a bit of interest I made a map
from paper and a pencil and Dalton Computer from sprue and scrap. The
avionics boxes were relocated in spurious location which I made up in a
logical fashion as the place I put them was the only available place. To
sum up I don’t know whether it’s accurate and frankly I’m not that
bothered because one; inaccuracies don’t phase me if they are minor and
two; it’s too late to do anything about it anyway. I’m sure there are
some commentators on the various web forums that would have me burned at
the stake for being a witch but talk to the hand cos the face aint
listening. So there!
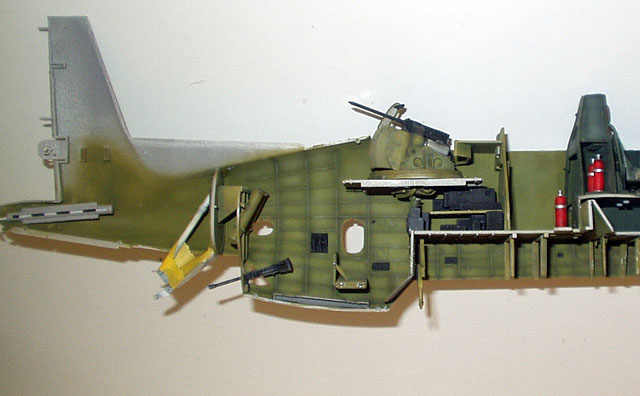
The rear cockpit and the Bomb bay were built straight from the box and
weathered in my usual way. I added an asymmetric bomb load to add a bit
of interest. The front cockpit was tacked into the starboard half and
the floor and bulkhead positions marked out, this enabled me to paint
the fuselage interiors the correct shade of green. With the Accurate
Miniatures Avenger the dorsal turret can be added after the fuselage
halves have been joined which makes painting a lot easier, however this
is not the case with this kit so the turret was assembled, masked and
added, it is free to rotate however which does simplify the painting
later on. When done the sub assemblies were glued into the right hand
fuselage and the halves glued together. The fit was very good indeed
with no filler required and minimal rubbing down, this was good to see
as the surface finish has fine engraved panel lines and recessed rivets.
The tail planes came next. Many commentators have stated that the
Trumpeter method of attaching control surfaces using etched metal hinges
is fiddly and results in a weak joint, well I totally agree! I still
added the hinges but glued the elevators in position. This leads me
nicely onto the wings. Here the modeller has the age old decision to
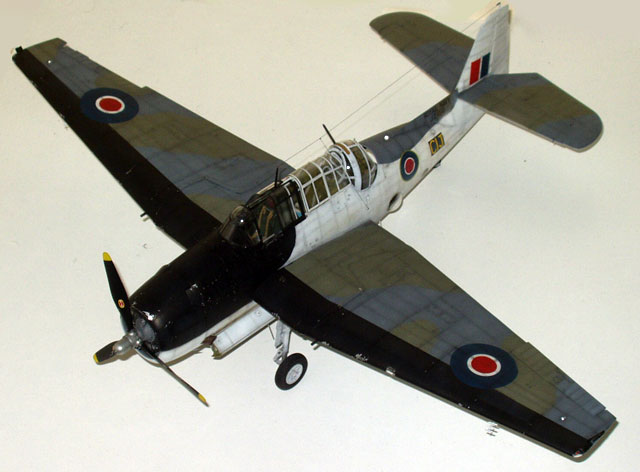
make when building a Navy aeroplane, to fold or not to fold. I’d wager
that for this kit this decision will be influenced by the sheer size of
the model. I wanted the wings spread on my kit as I think folded wings
spoil the lines of an aircraft, however the wing fold has good detail
and the wingtip tie downs are exquisite in their finesse; there is even
some fine thread to simulate the tie down ropes for the wing tips, all
in all very impressive.
I painted the inside of the wheel well and weathered it before building
the wings. The order in which I constructed the wings in hindsight was
probably not the easiest therefore I will explain what I think an easier
method is. I would first glue the inner and outer top halves of the wing
together and then add the etched strengthening strips over the join, and
then repeat for the lower halves, a bit of jiggery pokery will be
required for the wing fold bulkheads. Then attach the upper and lower
halves in the conventional fashion. Once the wings were completed they
were attached to the fuselage, here there was a strange snag in that the
port wing did not fit as well as the starboard wing, how odd. I filled
the gap with white glue and wiped it with a moist finger (ooh er) and
then sealed it with paint. The undercarriage legs were pre painted white
and added, a departure for me as I usually leave the legs until last but
as they were painted the underside colour I added them now.
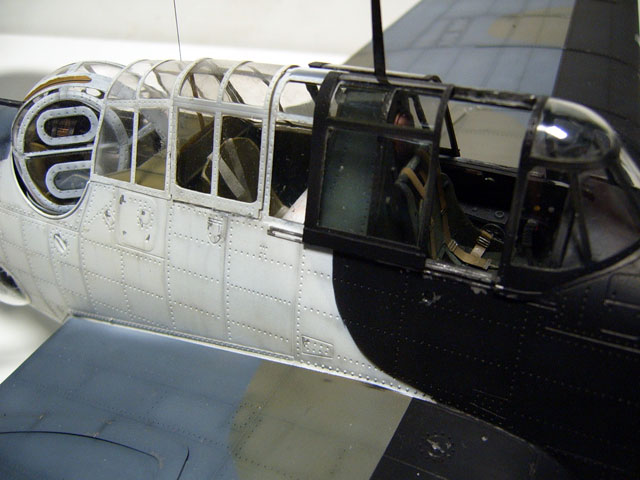
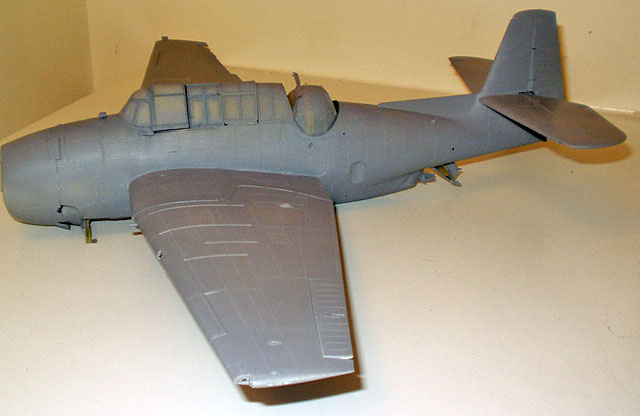
The canopy was masked off inside and out and sprayed with the relevant
green, the inside masking was removed and the canopy attached to the
model, the cowling glued on and a coat of Halfords grey applied. The fit
of the model was very good indeed and so no corrective action was
required.
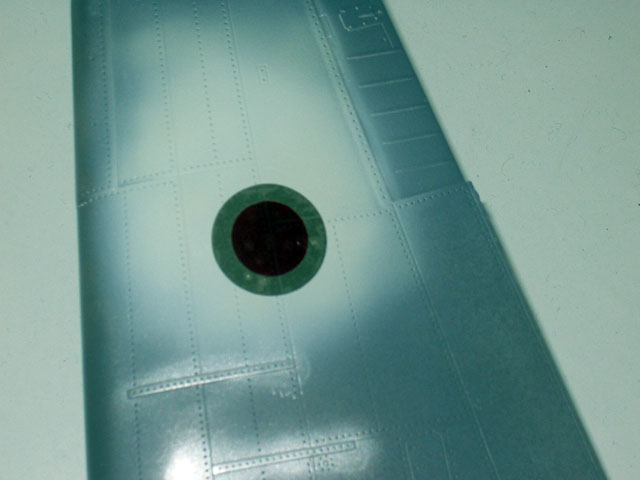
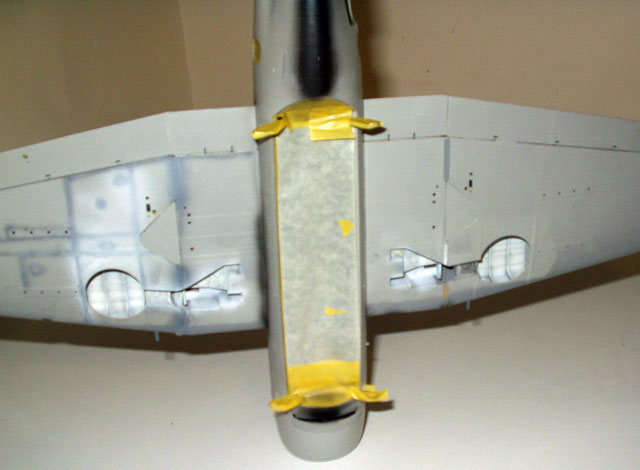
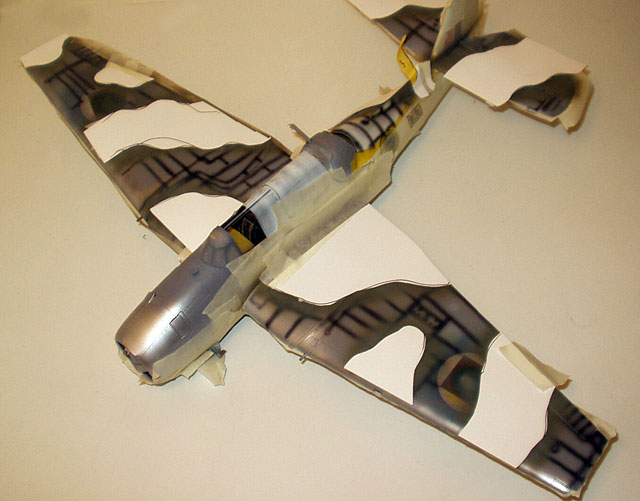
The model was pre-shaded with black which was very tedious due to its
size and the number of panel lines/rivets. I intended to paint most of
the markings so Tamiya white was sprayed on the relevant roundel
positions. I used a mixture of Eduard Hinomaru masks and masking tape to
mask off the white portion of the roundel. The inner red portion of the
markings were sprayed and then masked followed by the blue/yellow. A bit
of touching up was required especially as some of the roundels were hard
not to get out of register. The fin flash was painted after the
camouflage. The unit codes were done by first spraying the area yellow,
then the letters were masked using the Eduard IFOR set designed for AFVs.
The blue was then sprayed on and then masked however in hindsight I
think this should be Extra dark sea grey. With all the fiddly bits taken
care of it was time to spray the camouflage, I started with the white
which was a pain, first off I used Tamya flat white as it has good
coverage, when I had run out this was buffed with a soft cloth before
being finished off with Xtracrylic white which was misted on. I left the
room to ventilate as I was sitting in a cloudy room with white nostril
hair (an advert for a face mask if ever there was one)! When I came back
the white had dried to a hard satin finish, ideal as I still haven’t
cracked gloss varnishes. The relevant white was masked off and
Xtracrylic Extra dark sea grey and Dark slate grey were sprayed on. I
added a bit of RLM 76 light blue a bit at a time to the pot to fade the
paintwork, this gave a pleasing effect. When this was all done the
masking tape made another appearance and the black area was masked and
the black sprayed, again being faded this time with light grey. I had
undercoated the cowling with Humbrol silver and before the black was
fully cured I used sellotape to pull up areas of black to simulate paint
chipping.
With all the making tape removed I shot the model with Xtracrylic matt
varnish. With this all done it was time for more weathering, a mix of
10% Tamiya black/brown and 90% alcohol thinner was sprayed along panel
lines and in the rivet detail as well as being streaked along the flying
surfaces.
With the model almost there it was time to add all the fiddly bits. The
undercarriage was completed and added along with the wheels and the
annoying rubber tyres, as soon as I can get some resin replacements I
will. The prop was added as was the bomb bay doors, these are a clever
design in that the inside faces are etched brass with good detail, the
fit is very good indeed. With the nav lights added along with the bubble
windows from Phil all that remained was the aerial wire. This was
stretched sprue with a tensioner made from coiled wire.
In conclusion the Avenger from Trumpeter is on of the best 1:32 scale
kits on the market. The rivet counting anti Trumpeter lobby on the web
forums have been conspicuous in their absence, the fit is very good
indeed and the interior is finely detailed however I am sure there will
be resin enhancements to come. The only niggly things are ones that come
with most large scale Trumpeter kits namely the fiddly flying control
hinges and rubber tyres. As for the price, well it is expensive but
don’t forget the discount from Andy in Antics.
In summary then, a great kit and highly recommended.
Click on the thumbnails
below to view larger images:
Model, Images and Text Copyright ©
2005 by Jamie Haggo
Page Created 06 October, 2005
Last Updated 06 October, 2005
Back to HyperScale
Main Page
|
 Home
| What's New |
Features |
Gallery |
Reviews |
Reference |
Forum |
Search
Home
| What's New |
Features |
Gallery |
Reviews |
Reference |
Forum |
Search