|
Building the 1/72
Amodel Tu-160
"Dealin' Blackjack"
by "Bondo" Phil Brandt
|
 |
|
Tupolev Tu-160 Blackjack |

HyperScale is proudly supported by Squadron
Background
At first glance, the
Tupolev Tu-160 “Blackjack” and Rockwell B-1"Bone” would seem to have
strikingly similar outlines. Moreover, the longstanding Soviet reverse
engineering of Western aviation technology certainly lends credence to
such a line of reasoning. Noted Russian aviation author, Yefim Gordon,
argues that, given the requirements and role of these two weapon
systems, it entirely believable that the basic configuration of both
might turn out independently to strongly resemble each other.
The “Bone” long suffered financial indignities of developmental
penny-pinching, actually dying on President Jimmy Carter’s watch, only
to be given CPR and revived by the Reagan administration. Conversely,
according to Gordon, the Blackjack program basked in the financial
largesse of an aggressively managed Soviet defense community, developing
into a much larger, significantly more powerful, faster, longer-ranging,
more weapon-diverse, bird.
With the breakup of the Soviet Union serious money problems did
eventually catch up with the Blackjack fleet; today’s aircraft are not
maintained at desirable standards, and aircrews are hard-pressed to stay
current, especially with regards to air refueling. Meanwhile, the B-1
fleet is very busily operating in the Middle East conflict.
The Kit
Per my earlier review in
Hyperscale, the Amodel “elves” in the Ukraine have excelled in taking
the lead in limited production, mixed media kitting of large Soviet
aircraft. That is, main airframe components (fuselages, wings and,
sometimes, tails) are done in hand-laid epoxy glass, while the remaining
components are in injected plastic. In theory this is a clever solution
to ease construction. In practice, however, meshing the two mediums is
not a walk in the park, by any means, and requires the obligatory use of
CA glue. Further, the nature of laying up and impregnating fiberglass
layers invites ill fitting joints between plastic and glass. Plus, the
cast-in engraving of the epoxy-glass sections is on the aggressive side,
and often has discontinuities in the depth of panel lines, a
characteristic difficult to fix.
So, there I was with a 50% complete, righteous-buck ($205) Blackjack
when the significantly lower priced Trumpeter Tu-160 hit the market
about a year later. The execution quality of the all-injected CHICOM
release simply blows away the earlier Amodel. Although this curmudgeon
is on record as frequently bowing to the forward march of model
production science, willingly trashing a started kit when an obviously
superior release of same hits the street, $205 was a strong inducement
to “dance with the one that brung ya”, and I pressed on, even though
also buying the new Trumpeter kit.
The relative roughness of
the Amodel kit needed a color scheme which would help to camouflage the
many surface discrepancies, and I didn’t feel that solid white, as the
operational fleet is painted, was it. While reading the Yefim Gordon
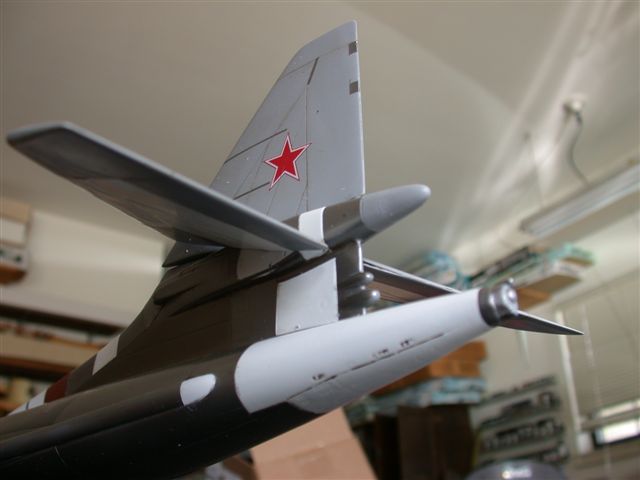
book (“Tupolev Tu-160 Blackjack”, Red Star Vol. 9, Midland Publishing) I
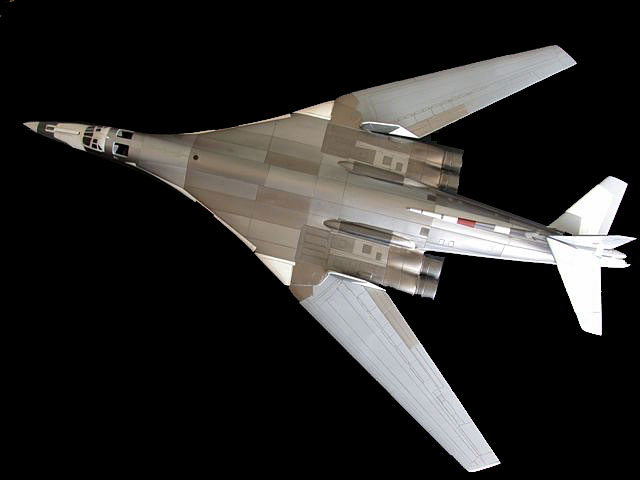
was struck by the series of color pix showing “29 Grey”, a
pre-production demo bird, in flight and on the ground at a Russian air
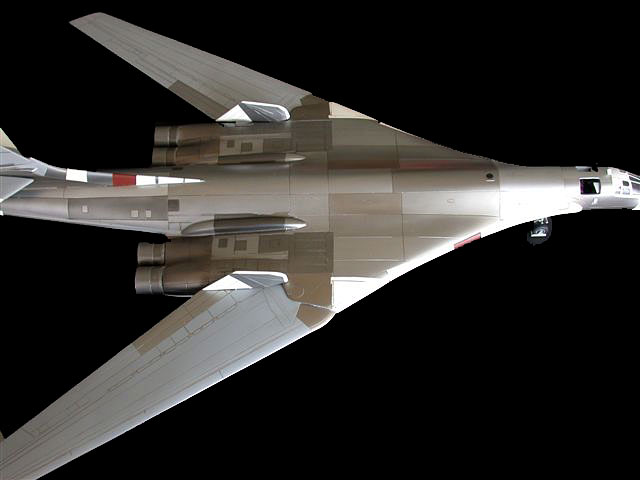
show. The entire airframe surface is a crazy-quilt of dirty, variegated
metal panels, white fiberglass/composite fairings, gray wings and
vertical fin. Perfect! And, since the Amodel kit had no flap/slat
options, I’d do it with wings fully swept, leaving the Trumpeter kit to
be finished in all-over operational white, wings full forward, slats and
flaps deployed.
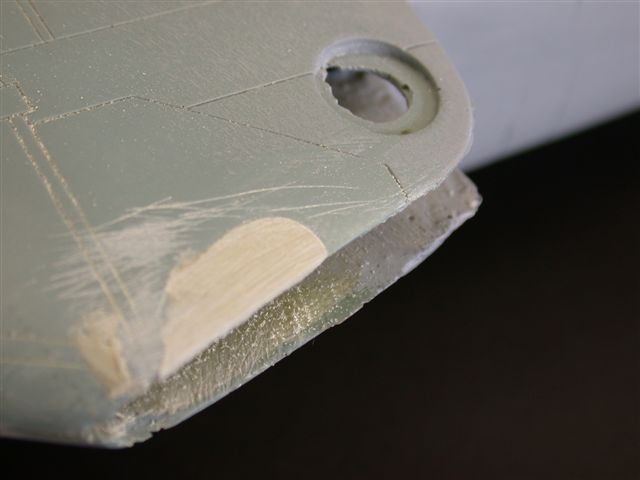
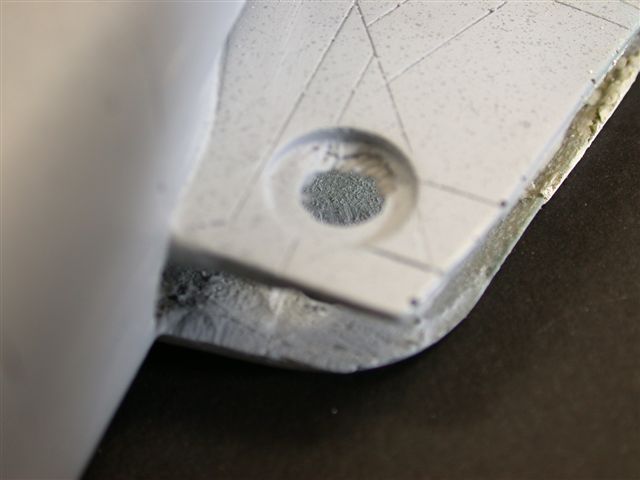
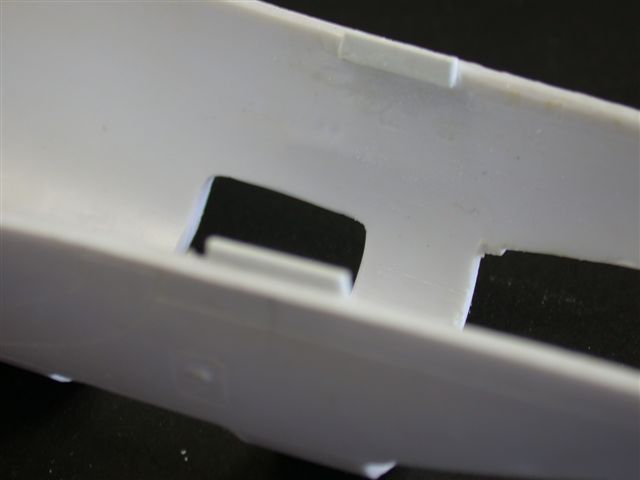
When doing an Amodel kit,
one has to expect many fit problems and soft plastic, and this builder
was not disappointed. Then there’s the razor sawing removal of the thin
epoxy glass covering of the wheel wells, etc. and the Dremmeling of
epoxy glass join areas to accept the injected components in reasonable
fashion; lotsa fun, but just another day at the Bondo Industries
Difficult Kit Division office! The multipiece injected maingear wells
were especially difficult to assemble in such a manner as to fit into
the rock hard fuselage. And, we won’t even talk about the surgery that
was required to install the ill-fitting wing pivots late in the game,
after everything had been painted...
Click the
thumbnails below to view larger images:
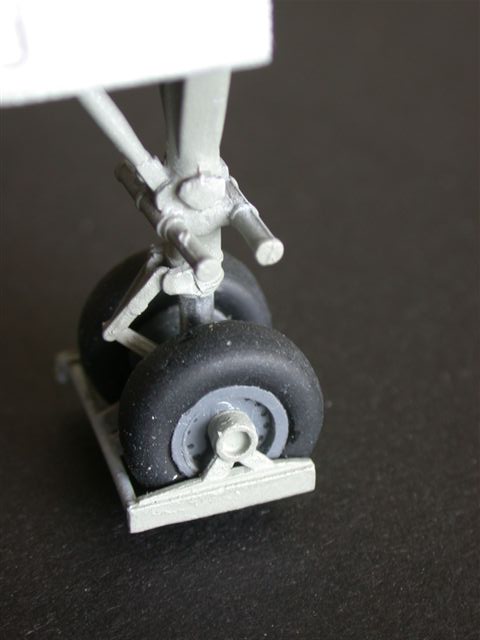
The gear struts are also
multipiece, complex units, but both struts sweep aft; their strength and
mounting scheme leaves something to be desired. After finally resting
the completed airframe on its gear, both main units folded in about
thirty minutes and had to be completely cleaned off and remounted with
copious CA and Zap. With the wings full aft and the large flying
surfaces installed, the model was very tail heavy. I dropped numerous
pieces of lead sinkers into the laser window just aft of the radome
following with drops of CA to fuse the stuff together.
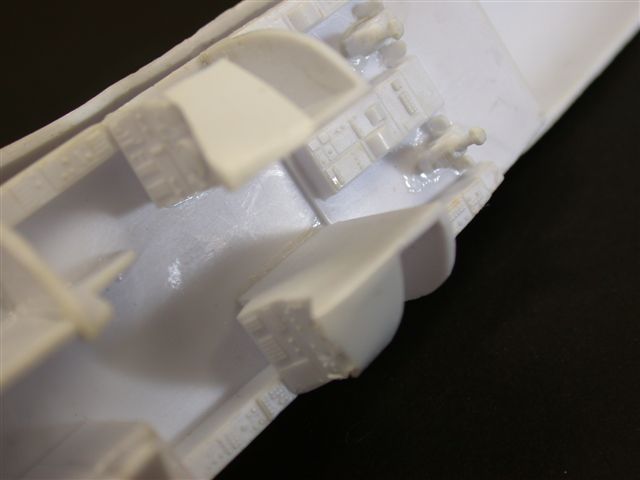
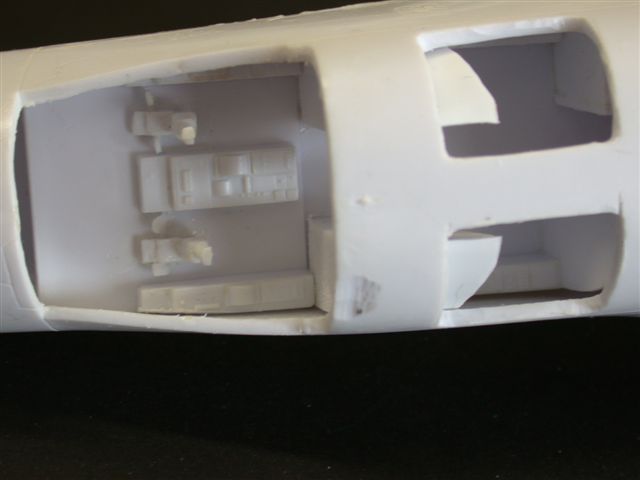
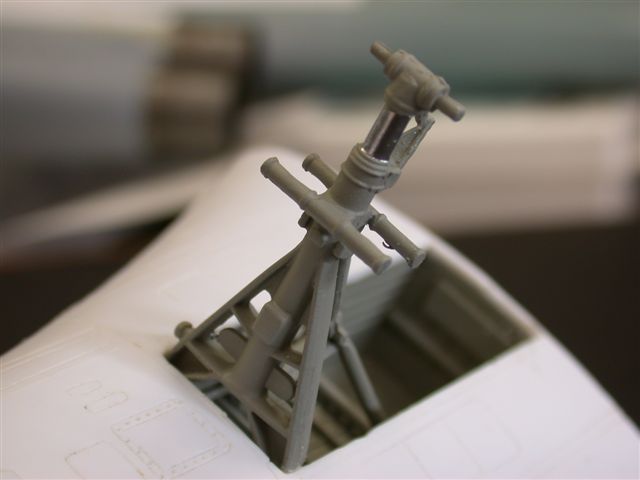
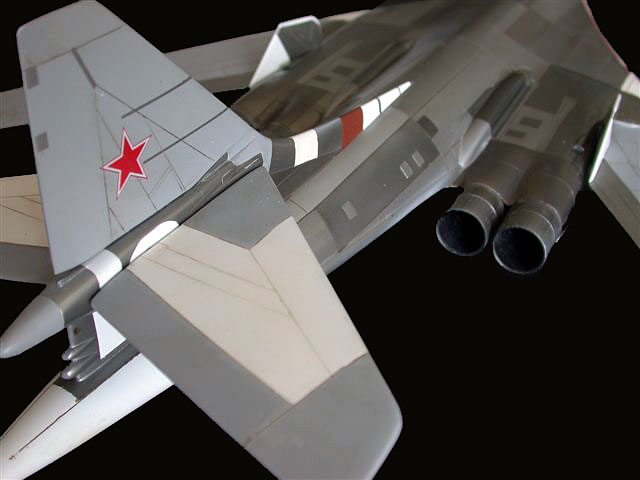
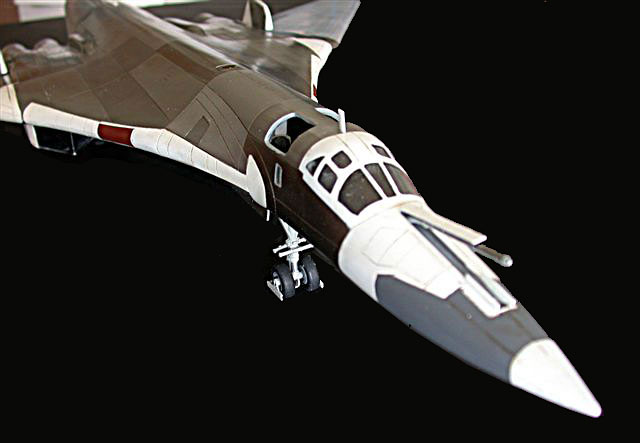
You’ll note that the aft aircrew ejection seat blow-away hatches–the
four aircrew members enter the bird from underneath the fuselage, behind
the nose gear–have been cut out to allow viewing the interior. Openings
for two small aircrew windows on the forward fuselage sides were marked
by Amodel, but it’s up to the modeler to cut ‘em out and fit injected
clear panes.
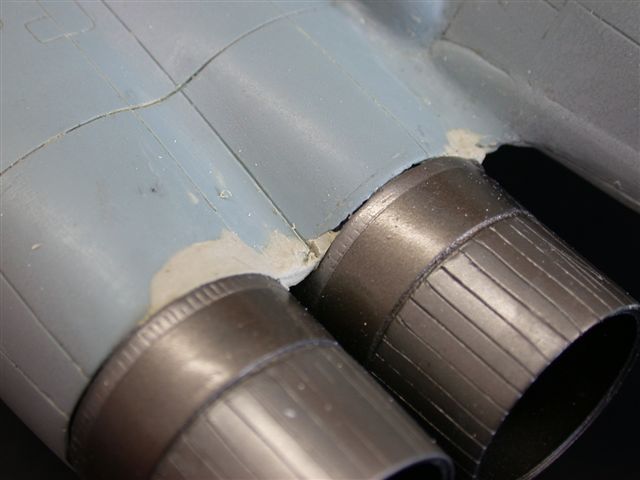
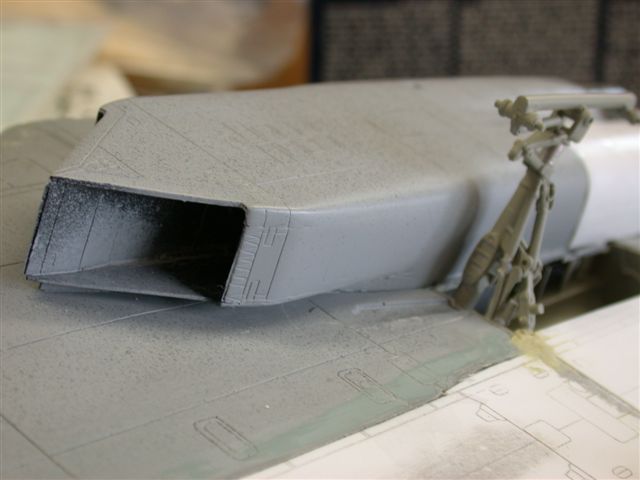
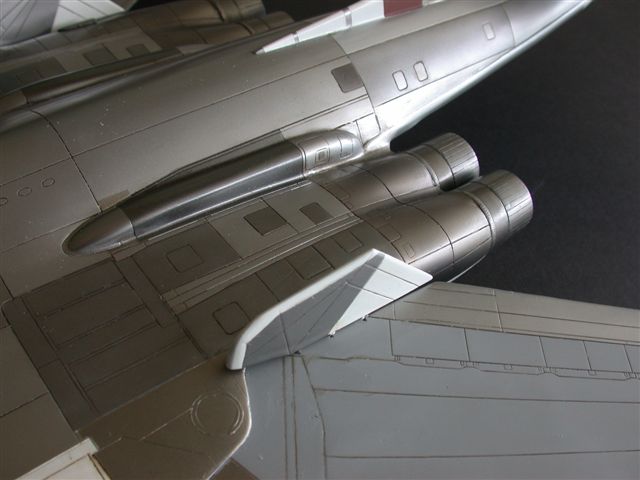
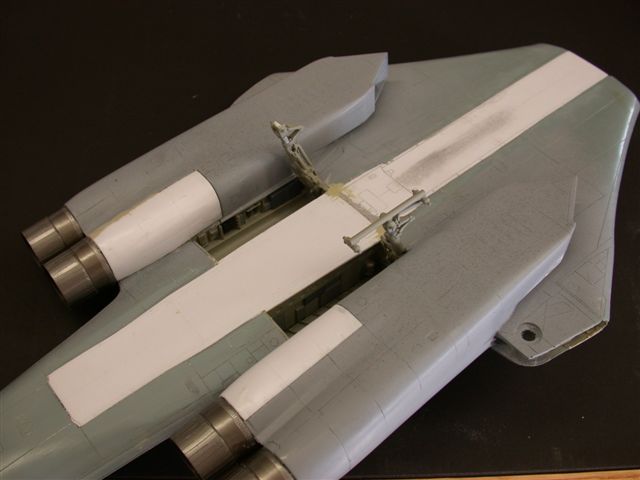
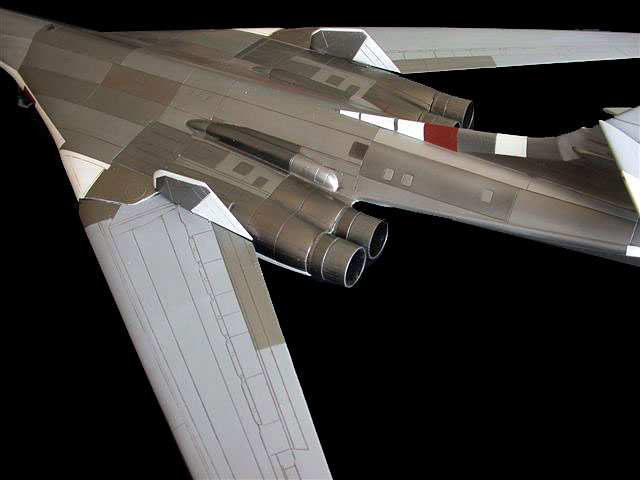
The engine pods/compressor faces also were not easy, and required much
filling and sanding. OK, OK, don’t hit me again, I’ll level with ya;
EVERYTHING needed filling and sanding!
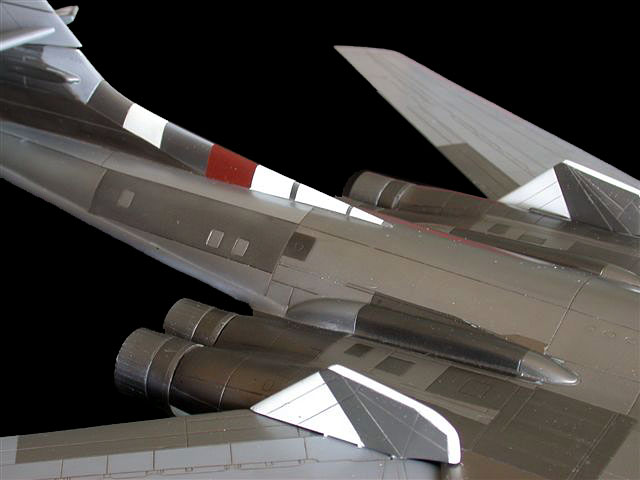
Because a significant amount of oil-based wash would be used to simulate
the considerable grime covering the real thing, I used lacquer products
exclusively: Alclad II, of course, in at least five shades (some custom
mixed), and gray and white Tamiya primer in spraycans. The pigment of
these great lacquer primers is so fine and the spray pattern so even
that often no sanding is required. I wet sanded anyhow, up through 8000
grit (MicroMesh), and the semi-gloss Tamiya took on a pure gloss.
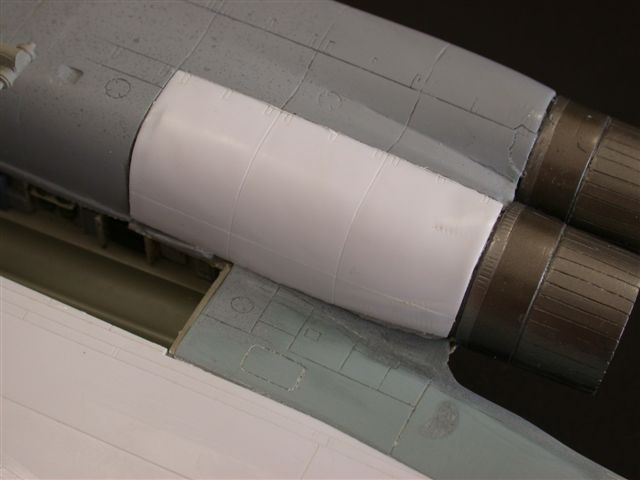
The same Tamiya primers
were used as topcoats for the wings, vertical fin, slabs, engine pods
and simulated composite structures.
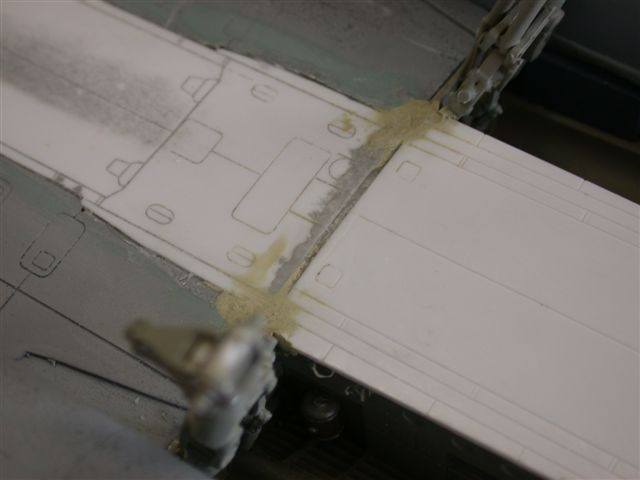
There were some bonding
problems (masking media lifted all paint coats) between the Alclad/primer/epoxy
glass, but they were in very small, tight areas; the wet sanding hadn’t
reached into ‘em enough to create proper “tooth”. Decalling was a
no-brainer since Grey 29 sports only a single red star on each side of
the fin.
This modeler can now
afford to look back with gladness and relief that I stuck with this beeg,
trying sucker, and I still look forward to future innovations and daring
subjects tackled by the Ukrainians.
In any event, the Amodel
folks are usually the first–-often the only ones--to market these
“Amonster” subjects, and, therefore, usually sell out their limited,
albeit less-refined runs before Trumpeter hits the streets with
significantly improved, all-injected versions. It’s the old
“one-in-the-hand-equals two.....” gamble; sometimes this curmudgeon is
lucky and, well, you get the picture.....
Click the
thumbnails below to view larger images:
Model, Images and Text Copyright ©
2006 by Phil Brandt
Page Created 17 May, 2006
Last Updated
16 May, 2006
Back to
HyperScale Main Page
|
 Home
| What's New |
Features |
Gallery |
Reviews |
Reference |
Forum |
Search
Home
| What's New |
Features |
Gallery |
Reviews |
Reference |
Forum |
Search