|
Classic
Airframes' Vampire FB.31
Noddy's Interceptor
by Brett Green
|
 |
|
De Havilland
Vampire FB. Mk.31
25 Sqn RAAF, Pearce, Western Australia, Sqn Ldr C.F. Favish |

Classic
Airframes' 1/48 scale Vampire Export Version
is available online from Squadron.com
 If Noddy was a fighter pilot, surely his mount would have to
be a Vampire. If Noddy was a fighter pilot, surely his mount would have to
be a Vampire.
They have plenty in common. Both are largely constructed of
wood, both are diminutive and both have a close association with Big
Ears. Furthermore, the Vampire FB.5 and Noddy are each endearing and
enduring relics of 1950s Britain.
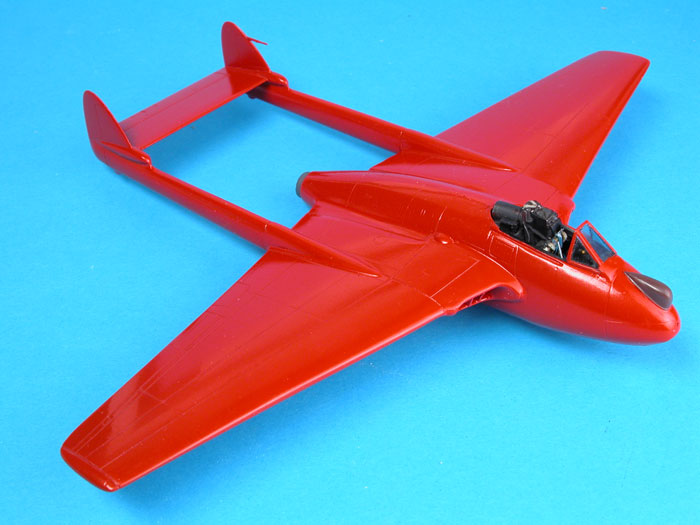
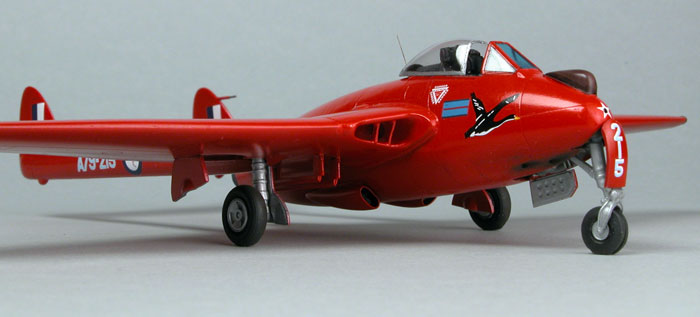
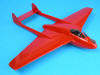
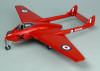
Noddy's Vampire would have to wear a suitable finish. No camouflage
on this little airframe. High gloss red would be the right choice for
patrolling the skies above Toytown.
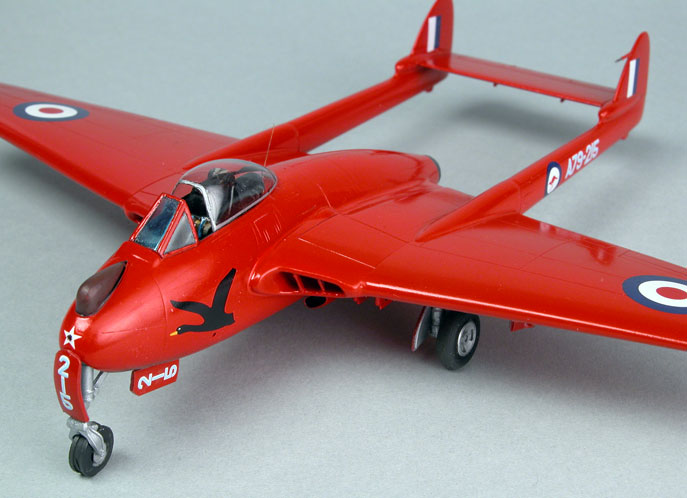
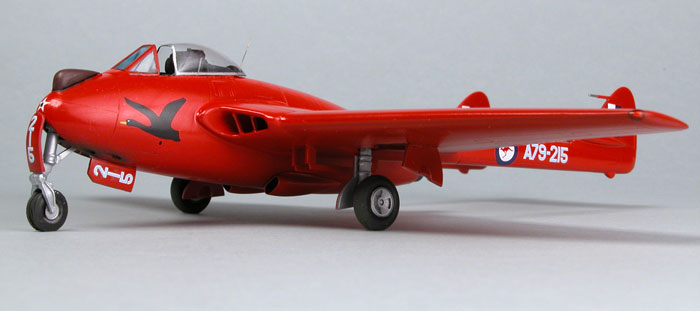
By happy chance, just such a Vampire flew with the Royal Australian
Air Force. This was a special scheme worn by Squadron Leader C.F.
Favish's Vampire FB.31 of 25 Squadron in the late 1950s. Classic
Airframes' new 1/48 scale Vampire Export Version kit includes markings
for this aircraft.
Classic Airframes recently released their 1/48 scale Vampire single
seater export version kit (#495), which included the option of an
ejection seat. However, I started my Australian Vampire FB.31 before
this model was available, so I commenced building the original release -
kit #470, the Vampire FB.5 - with the Aeroclub Martin Baker MB.2 seat
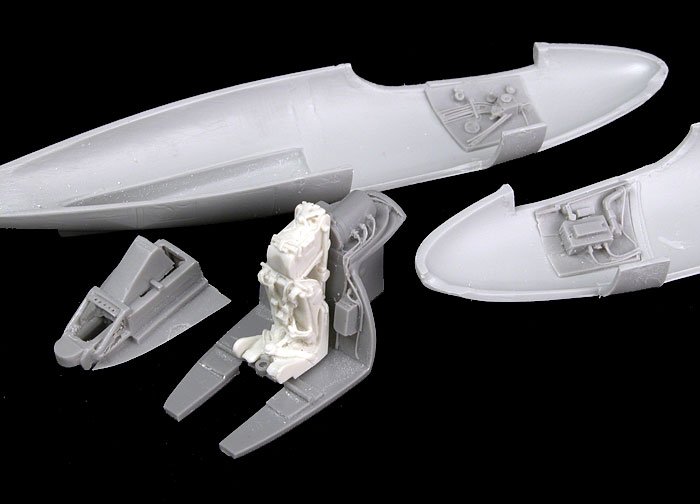
Unbeknownst to me when I started building, the ejection seat equipped Vampire
featured a significantly revised cockpit. The rear bulkhead was
moved further back to accommodate the much bulkier ejection seat, and it is
seems that the cockpit floor was lowered for the same reason. In my
ignorance, I tried to shoehorn the Aeroclub seat into
the space designed for a flat pan and backrest. Not surprisingly, I had
some difficulty. I trimmed a few millimetres from the bottom of the
seat, and managed to squeeze the seat into the FB.5 cockpit.
I should emphasise that this was not the fault of the very nice
Aeroclub seat. Classic Airframes' Vampire Export Version boxing includes
the revised cockpit (the original tub is included in the kit too) and the supplied ejection seat fits perfectly.
My
advice is, if you are building a Vampire fitted with a bang seat, buy
Classic Airframes' kit number 495!
I also used the Aeroclub replacement fuselage, which is 3mm longer
than the kit parts and locates the cockpit opening 2mm further forward.
Many modellers will consider these dimensional discrepancies are not
worth worrying about, but I thought that the Aeroclub fuselage delivered
a noticeable improvement to the shapes and relationships around the
forward fuselage pod, the canopy and intakes.
Click the thumbnails
below to view larger images:
|
|
|
|
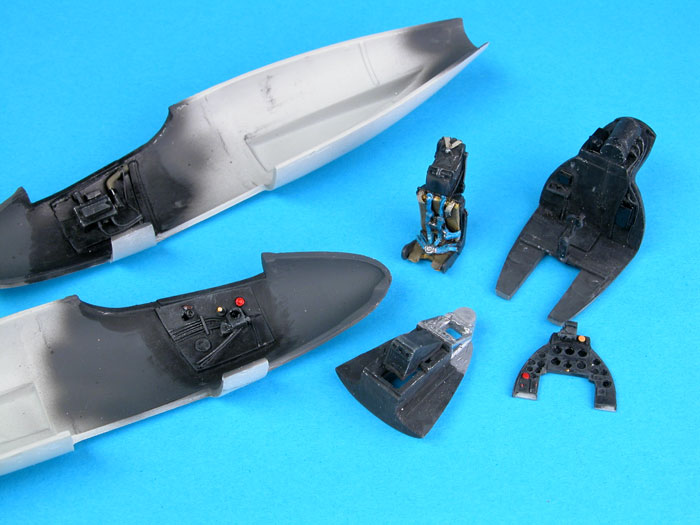
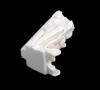
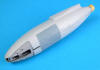
Aeroclub's Martin Baker seat was used. I had to cut a few millimetres from the bottom of the seat to help it fit into the FB.5 cockpit. |
|

|
|
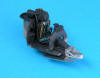
The cockpit components are painted and ready for assembly |
|
|
|
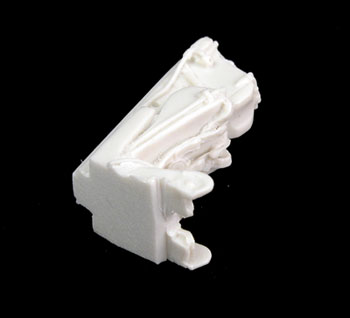
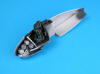
Because the cockpit is located further forward, the fit will be improved by trimming the front corners of the cockpit floor. |
|
|
|
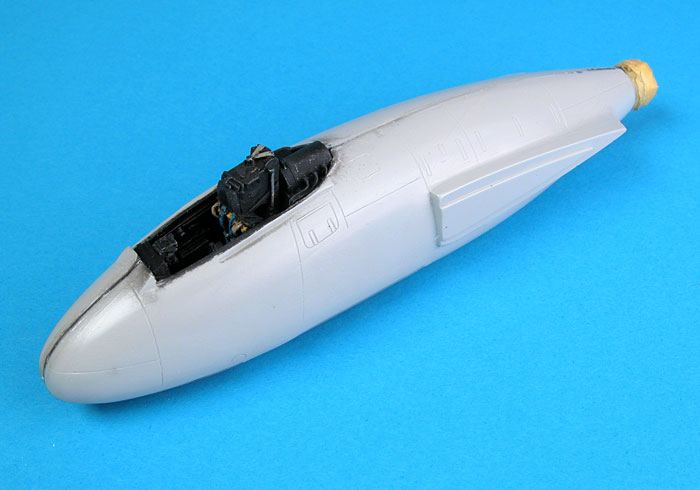
Plenty of nose weight is required to avoid the Vampire sitting on its tail booms. These are small lead sinkers held in place with super glue. |
|
|
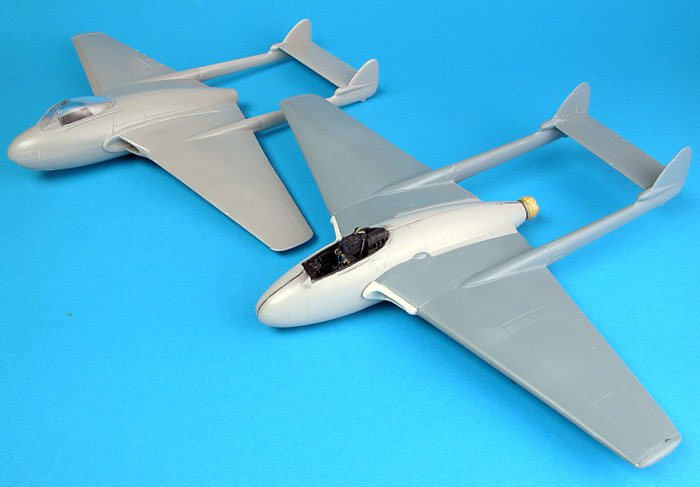
Construction was typical for the current generation of limited run,
multi-media kits. The most important steps are thorough preparation of
the parts and test fitting.
Test fitting suggested that the cockpit floor was too wide at the
front to fit between the Aeroclub fuselage halves. This was not
surprising, as the cockpit is located several millimetres further
forward in the Aeroclub fuselage compared to the original kit fuselage.
The front sides of the cockpit floor was trimmed and tested again until
a good fit was achieved in this narrower space. The sides of the
instrument panel needed to be slightly trimmed too.
This model demands plenty of nose weight to avoid tail-sitting. I
packed as many lead sinkers as would fit into the nose, and also in the
front of the wing just behind the intakes.
Click the thumbnails
below to view larger images:
|
|
|
|
After a little fiddling, the fit of the Aeroclub replacement fuselage is really quite good. The only major area requiring attention was a gap between the fuselage halves behind the front wheel well insert. |
|
|
|
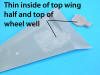
The inside of the top wing and the top of the resin wheel well must be thinned before assembly |
|
|
|
I also "scooped out" some material on the mating surfaces of the resin Aerclub intakes using my Dremel fitted with a dental burr to get a nice, flush fit against the fuselage side. |
|
|
|
The fit of the wings to the fuselage was trouble free, although there was a step at the wing root. This was reduced by sanding with course abrasive paper. |
|
|
After several dry runs, I glued the fuselage halves together. The fit
was really quite good, with the only significant gap between the cannon
access panel and the forward wheel well. Fortunately this was an
even gap that was easily filled with plastic strip.
In common with many other limited run kits, the inside of the top wing
halves
needed to be thinned substantially before the resin wheel well inserts
were installed. The top of the wheel well inserts were also thinned
until the resin was almost transparent.
To their great credit, Classic Airframes corrected the shape of the
wing intakes in the Export Vampire kit. They are an obvious improvement
over the items included in the Vampire FB.5 kit. However, as mentioned
earlier, I started my project before the Export version kit was
released. I therefore used Aeroclub's resin replacement intakes. These
slotted into the wings with a slight overlap at top and bottom. The step
was backfilled with Milliput and, when set, sanded flush.
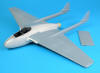
The wings were secured to the fuselage pod at this time. I considered
installing a spar to reinforce the join, but decided that the bond was
probably strong enough as it was. Once in place, the dihedral of the
wings was almost flat, comparing well with the real aircraft.
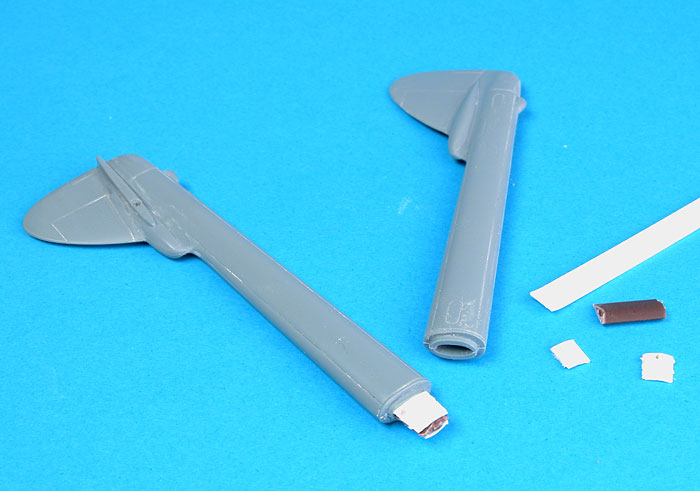
Each of the tail booms is moulded with a narrow locating lip.
I beefed up the joint with airfoil-shaped styrene and scrap plastic. I
was originally going to use telescoping brass rods, but decided that the
additional weight aft of the main wheels would more than offset the
extra weight that I had so carefully squeezed into the nose of the
model.
The plastic reinforcement worked well, creating a strong, positive
bond.
Click the thumbnails
below to view larger images:
|
|
|
|
Fine wire was inserted in each end of the horizontal tailplanes, and a corresponding hole drilled on the inside of the booms, to ensure a solid join. |
|
|
|
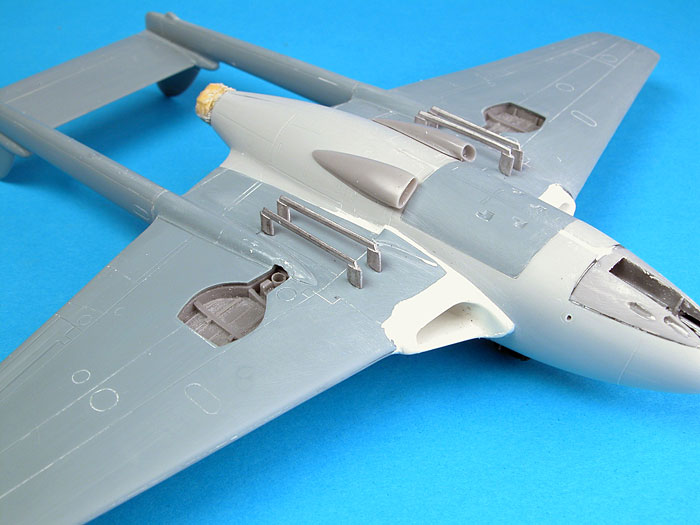
Australian FB.31 Vampires were fitted with auxiliary "Elephant Ear" intakes on the lower fuselage. These are supplied in the CA kit. Rocket rails were sourced from a Dynavector Wyvern. |
|
|
The horizontal tailplanes did not have any locating
aids, so this join was reinforced with brass pins drilled into each end.
I should have paid as much attention to assembly as preparation, though,
as I glued the tailplanes on upside down!
With the main airframe completed, I filled a number of
gaps and seams with Milliput.
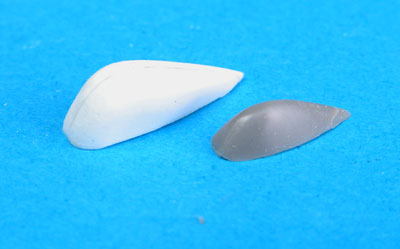
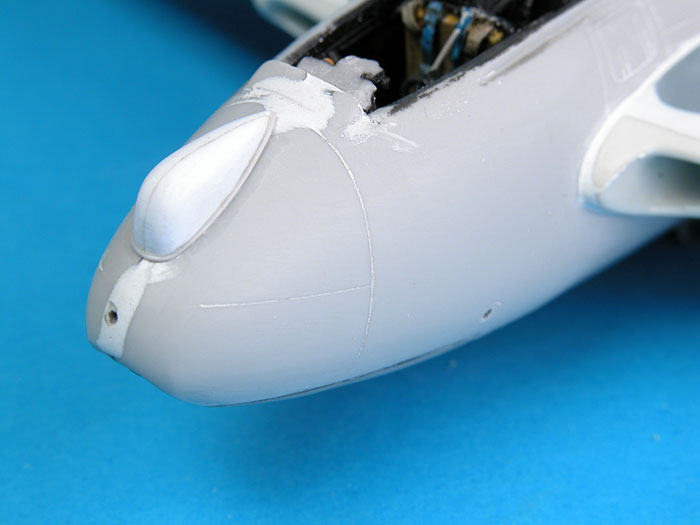
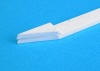
Classic Airframes supplies a cover for the auto-pilot
gyro in their new kit, but I had already formed my own using plastic
strip, a hobby knife and a sanding stick. Comparing the home-made
version with the resin kit part and reference photos shows that mine is
a bit too big, and the Classic Airframes part is a bit too small. Having
already invested the time, I used my oversized fairing. A narrow bead of
stretched sprue was wrapped around the base and secured with liquid glue
to finish off the distinctive cover.
I also drilled a hole in the middle of the nose, as may
be seen in several reference photos of this aircraft.
Click the thumbnails
below to view larger images:
|
|
|
|
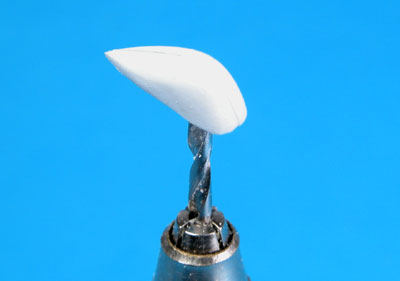
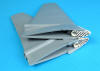
The new gyro fairing was formed from two pieces of styrene strip glued together, the cut to a rough shape. |
|
|
|
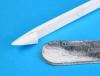
The shape was improved by sanding. |
|

|
|
Final sanding and shaping delivered a new, lager gyro cover for the Vampire's nose. |
|

|
|
The kit fairing is seen on the right hand side. With the benefit of hindsight, I realise that I made the fairing too big. The correct size is probably about halfway between these two. |
|
|
Another characteristic of Aussie Vampires is the fitting
of "elephant ear" intakes on the bottom of the fuselage. These
supplementary intakes directed additional air to the Rolls Royce Nene powerplant.
By the time I got to this stage of construction, the Classic Airframes
Export Version kit had arrived, which includes a pair of elephant ear
intakes. These were simply glued in place.
This particular airframe was also fitted with a pair of
rocket rails under each wing. I raided my unbuilt Dynavector Wyvern kit
for these parts. The front mounts of the white metal rails were
shortened to fit the Vampire, then secured beneath the wings with super
glue.
The kit pitot tube was glued to the port side fin, and
the undercarriage elements were cleaned up and assembled prior to
painting.
Painting
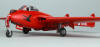
This Vampire features a very, very simple colour scheme
- overall high gloss Post Office Red.
I started with a coat of Tamiya Surface Primer straight
from the can. This highlighted a few spots that needed rescribing or
filling.
Next, two coats of Tamiya TS 49 Bright Red, also
straight from the spray can. After around an hour, the glossy finish was
polished with Micro Mesh cloths, starting with 4,000 grade and moving up
to 12,000 grade before a final buff with the tip of my index finger.
This would have to be one of my fastest paint jobs ever!
Weathering
Weathering was kept to a minimum. A thin mix of
semi-gloss black was painted into the aileron and elevator hinge lines.
A sooty black-brown was also sprayed around the cannon ports. These
blast stains can be seen in reference photos on the otherwise impeccably
finished airframe.
Click the thumbnails
below to view larger images:
|
|
|
|
The model received a base coat of Tamiya Surface Primer before its coat of Tamiya TS 49 Bright Red. The primer and paint were applied straight from the can, then polished with MicroMesh cloths. |
|
|
|
Thanks to the high gloss finish, no special preparation was required before decals were applied. They performed flawlessly. |
|
|
|
Kit decals were supplemented with the star on the nose, plus the ejection seat warning triangle and Sqn Ldr pennant on the starboard fuselage side. |
|
|
Decals
I have access to a colour reference photo that shows
this aircraft with a rectangular Squadron Leader's pennant behind a
flying bird on the starboard side, and a prominent warning triangle
behind the pennant. The photo also reveals a small white or (more
likely) light blue star surrounding the hole in the tip of the nose.
None of these decals are supplied in the kit, so I
scrounged my decal collection. The ejection seat warning was a
combination of a white triangle from a Dutch Decals sheet, superimposed
with a smaller red triangle from a Model Alliance sheet. The pennant
came from an Aeromaster decal set for late mark Spitfires, while the
small star was sourced from a 1/35 scale Tamiya armour sheet.
The Classic Airframes decals performed beautifully. The
edges of the decals disappeared against the paint - so much so that I
decided not to even add a gloss coat.
Finishing Touches
Aeroclub supplied a vacform canopy with their
replacement fuselage. I used the vacform sliding section - which has a
better profile than the kit part - but the Classic Airframes' windscreen
was installed. I sprayed the front of the windscreen Tamiya Clear Blue
to represent the tinting sometimes applied to Australian Vampires.
The gear legs are positively secured in their positions
via deep locating mounts. The only problem is that the front gear leg is
angled forward, whereas it should be almost vertical or even angled
slightly back according to
reference photos. I shortened the retraction strut and bent the front
gear leg back, but even this was not quite enough. Next time I will
probably cut off the locating pin before repositioning the gear leg.
The final task was to install the whip antenna on the
back of the canopy. I drilled through the canopy to the fuselage deck,
so the whip antenna was not only decorative but also served as an anchor
for the canopy.
When I placed the model on its wheels it rocked back
onto its tail booms. I did not have enough noseweight! I glued another
two lead weights inside the nose wheel bay and, to my relief, that was
enough to make the model tip forward and sit on all three wheels.
I love the quirky form of the Vampire, and I was
delighted when Classic Airframes released their new series of kits.
But how does the newcomer compare to the incumbent?
I took the opportunity to slap together the old
Hobbycraft Vampire in a half-hour session to place the two kits side by
side. The conclusion is unmistakable.
The Hobbycraft kit looks just awful.
The worst aspects are the fuselage pod, which is located
too far forward (it does not even protrude behind of the trailing
edge of the wings), the oddly shaped nose, the skinny booms and the
woefully undersized fins, which are probably 25-30% too small. The booms
are also too close together, and the intakes bear no resemblance to the
real thing. Perhaps the most striking aspect is the anhedral (droop) of
the wings. Some minor faults might have been forgivable, but the
Hobbycraft kit looks almost like a Salvador Dali surrealistic impression
of a Vampire.
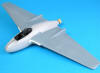
On the other hand, Classic Airframes has nicely captured
the essence of this unique jet fighter. It is clearly superior to the
Hobbycraft kit in terms
of both shape and detail.
Is the kit perfect? No. However, if you are the sort of
modeller who is not bothered about a few millimetres discrepancy here and
there, you will build the Vampire straight from the box and be pleased
with the result.
For those who want a Vampire that will pass the
micrometer test, Aeroclub offers a simple solution via their replacement
fuselage, which also includes a new canopy. Classic Airframes themselves
have addressed the problem of the intakes with their redesigned resin
parts in the Vampire Export Version kit (#495).
Regardless of whether or not you use after market parts,
this is the best injection moulded 1/48 scale Vampire available today.
If you have previous experience with limited run models,
you won't run into any surprises building Classic Airframes' kit of this
important pioneering fighter aircraft.
Thanks to Classic Airframes for the sample
Model, Text and Photographs Copyright ©
2005 by Brett Green
except Noddy image from the BBC website
Page Created 28 April, 2005
Last Updated 28 May, 2005
Back to
HyperScale Main Page
|
 Home
| What's New |
Features |
Gallery |
Reviews |
Reference |
Forum |
Search
Home
| What's New |
Features |
Gallery |
Reviews |
Reference |
Forum |
Search