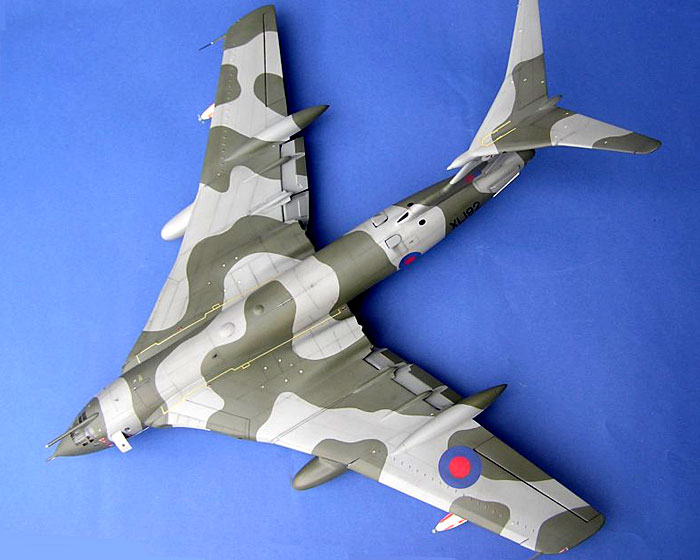
For me, the Victor represents aircraft thinking of the fifties - big,
bold ...and beautiful
Seeing this plane with its large tail is like seeing an old dinosaur. It
ended its life as a tanker and saw action in both the Falklands conflict
and in the Gulf War.
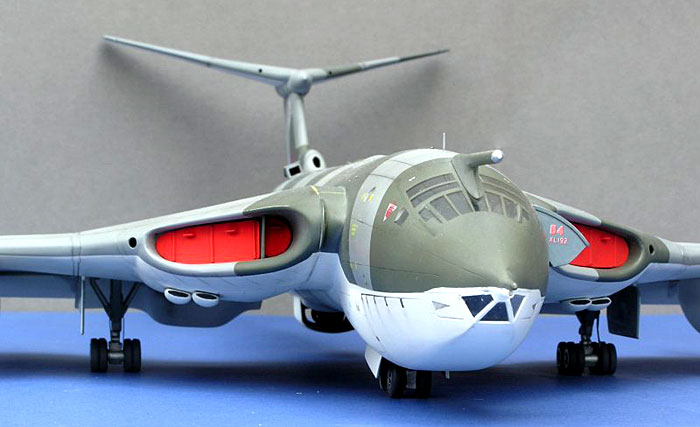
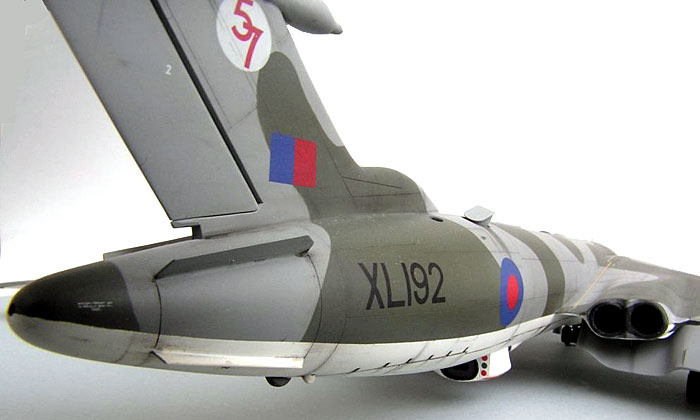
I intend to build a Gulf War tanker and a white V-bomber later, but this
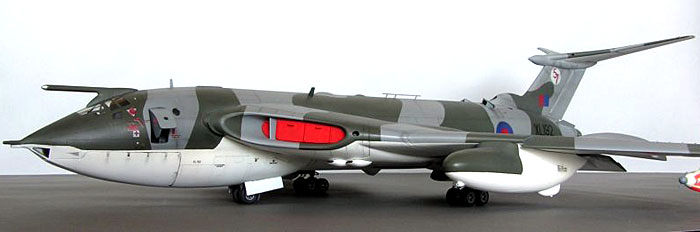
time it was XL192 from the Falklands in 1982 that was built. This was
the K.2 tanker that followed Vulcan XM607 on both the trip to Asuncion
and on the first Black Buck mission.
The Matchbox
1/72 scale Victor
|
The old Matchbox Victor is a very good kit, the only drawbacks are
the trenches some panel lines look like. Overall measurements seem good
enough, and it’s a lot of plastic! In my case in white, grey and dark
green as I had the Matchbox edition (there is a grey plastic Revell
edition of the Operation Granby Victor).
Flightpath’s K2 set with white metal cones for the tailplane and some PE
to enhance the in-flight refueling equipment was purchased. And of
course there was the brass framing for the cockpit glazing! The frame
looked beautiful with small rivets and lots of detail. This was to be
used.
Fuselage
Aeroclub seats that looked like the right ones replaced the
originals, apart from those only original parts were used. I had no clue
of how much weight to put in the fuselage, so that had to wait.
The longitudinal panel lines were rescribed before joining the fuselage
halves, the fuselage halves were glued together and the other panel
lines were scribes.
Then it was time for the wing attachment areas to be prepared and here
some work was needed to get a good fit for the wings, due to Matchbox
very unusual solution. I found it necessary to strengthen the fuselage
with extra spars made from heavy duty tubes. This I do on most airplanes
as too much strain is put on the fuselage joins otherwise when handling
it.
The kit ram air intakes for the turbines in front of the fin were too
simple, and had to be replaced. Holes in the fuselage were cut, and new
intakes were modeled from Plasticard and finally there was a PE part for
the front edge. Tabs were glued on the inside of the fuselage and
painted black, and the new intakes were glued to the tabs after painting
the fuselage.
The air brakes on the rear fuselage did not look good, in fact this is
the only area I’m dissatisfied with on this kit! I decided to have the
air brakes in the closed position as open air brakes destroy the clean
lines of the rear fuselage, and the internal mechanism were so
rudimentary the choice was simple. I glued them shut, applied some
Milliput and sanded everything flush, then I scribed along the edge of
the air brakes and made new strakes from Plasticard.
Wings
The wing halves were scribed before joining upper and lower halves.
The intakes are difficult to improve as there is a plethora of guide
vanes inside that are virtually impossible to put there. The lower lip
was extended slightly downwards with Milliput and all the inside was
lined with Plasticard.
The guide vane closest to the opening was replaced with a more
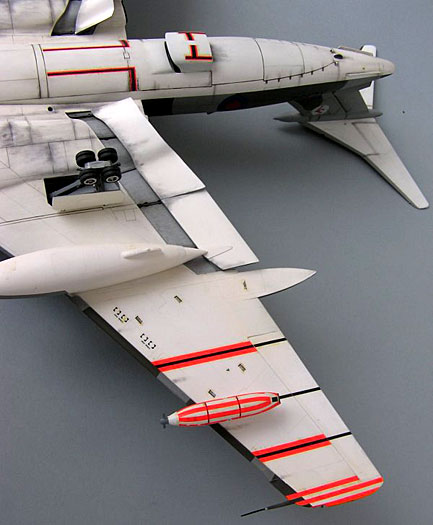
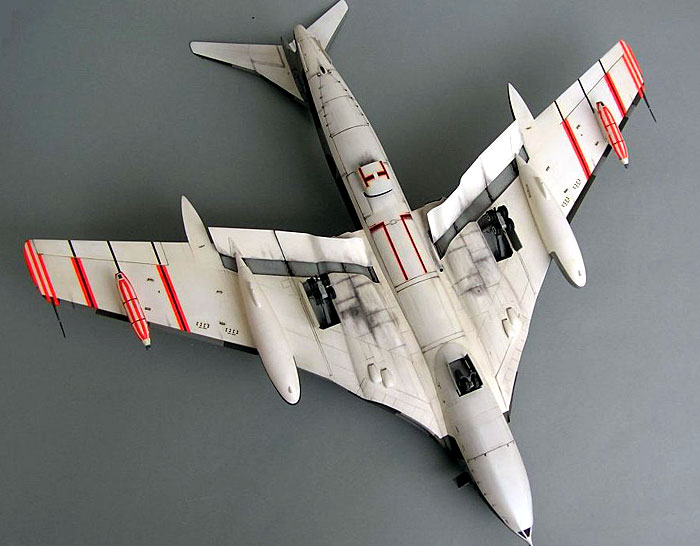
correct one, and covers for the inlets were made and painted bright red.
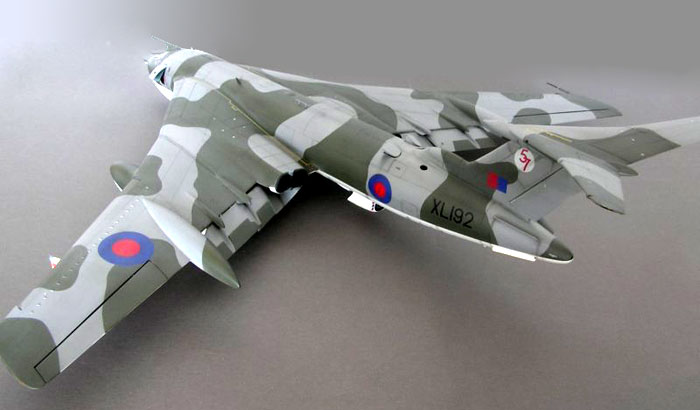
The wings have a dihedral where the inner and outer wing panels are
connected, but this was not present on the kit and had to be corrected.
Photographs and drawings were used when preparing the outer wing panels.
A piece of the wing forward edge was cut and angled downwards to
represent extended slats. I chose to have the flaps in the extended
position as it gives more weight to the plane, and some rails and rods
were added for the extension mechanism. The rear end of the faired in
wing tanks had to be cut off and modified to fit the extended flaps,
this is something Matchbox has missed to do.
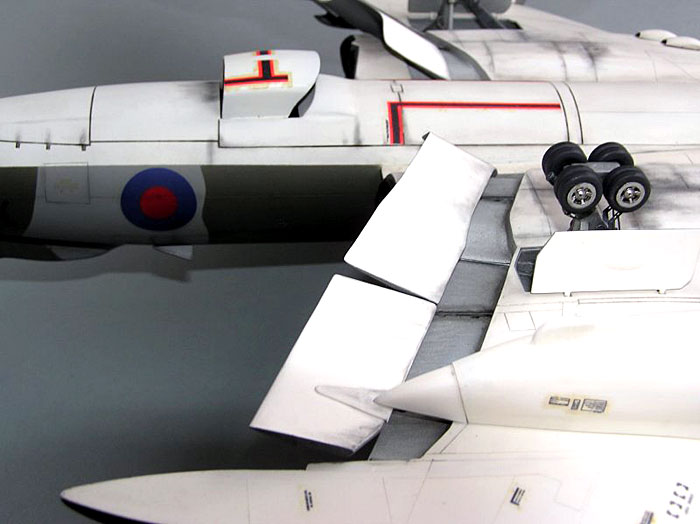
The wings were mated with the fuselage and everything looked good, but
later a former RAF mechanic told me the wing tips with the pitot tubes
should be twisted downwards. This can be seen on photographs but I
missed it! The inner/outer wing panel joins were very good, no problem
at all in spite of the old kit.
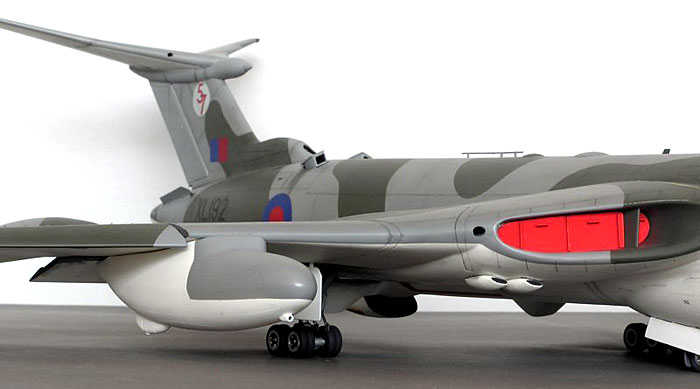
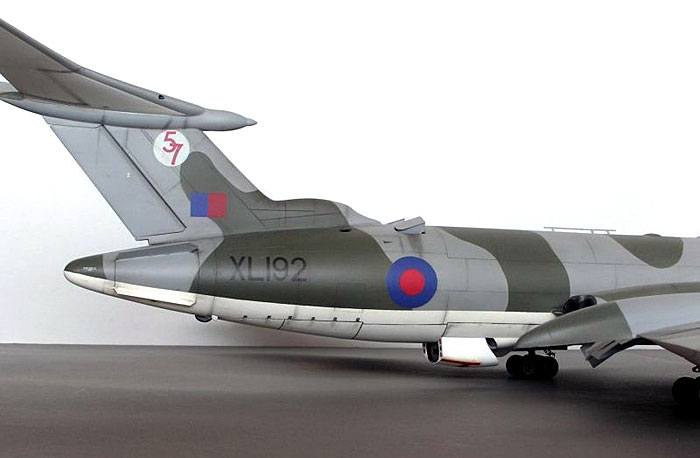
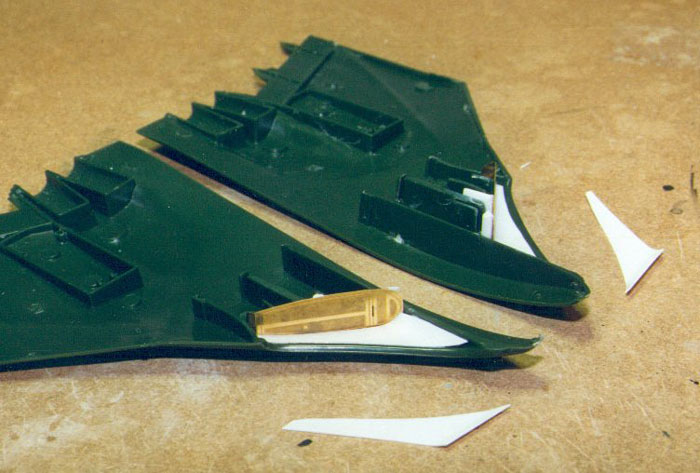
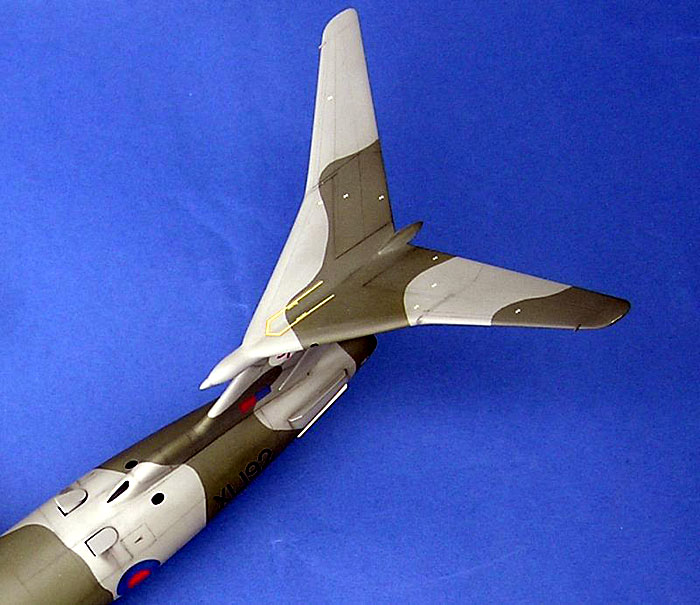
Tailplane
The vertical fin was thinned down substantially and rescribed. When
aligning the tailplane it is best to place the model horizontally on the
desk to get the tailplane absolutely vertical. As a symmetrical airframe
is vital this should always be done, and to be able to adjust the tail
while the cement is curing it is best to use old fashioned liquid
cement. The stabilators were added on top of the fin at the correct
angle according to photographs.
Flightpath white metal cones on the back and front of the tailplane
replaced the original cones, this required some Milliput and lots of
work.
The model almost completed and time to check for necessary nose
weight by balancing the model on the main gear, or piano wire
representing it. Twenty-five grams was needed and lead was glued into
the nose from a hole in the fuselage belly.
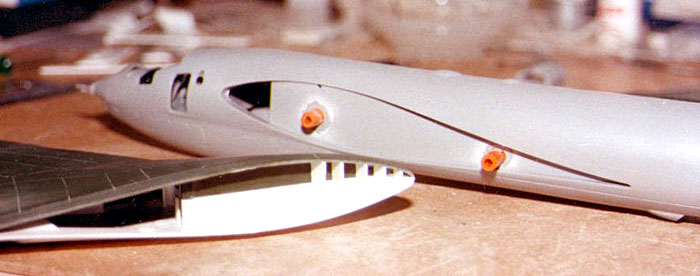
Cockpit Canopy 1
Now to the nerveracking part of this story!
The PE canopy framing was formed to a cylindrical shape over a tube of
the right size, but the problem is that the Vulcan canopy is curved in
two planes which is impossible to obtain unless heating, cutting and
soldering the brass, but I could live with this simplified canopy as the
framing was beautiful. The next obstacle was to find the thin “window”
plastic, and as I found it necessary to use CA glue to fix the plastic
to the brass it must resist the glue. Eventually I found a suitable
piece and glued the plastic film to the PE framing (already painted) and
installed it all to the fuselage. Some Milliput and it all looked
beautiful, except a small problem in profile because of the omission of
the double curvature.
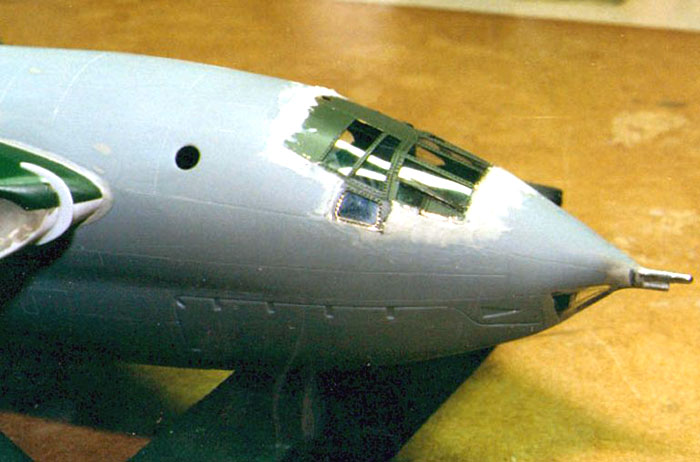
It looked like that for a week, then the windows cracked! I did it
all again with another window material and this time it lasted for three
weeks and then I gave up!
At this stage the model was painted and almost ready, and it’s not the
first time I had to change course completely when building models. I
have repainted several models when I was unhappy with something. It’s
never too late to improve the model!
Cockpit Canopy 2
The thick, terrible looking original canopy was retrieved from the
scrap box and thinned down from the inside, polished and dipped in
Johnson Kleer and glued against the Plasticard fuselage rim, as I had to
build up the fuselage after the brass frame experience (picture 6) The
fuselage and canopy were sanded flush and polished to a beautiful shine!
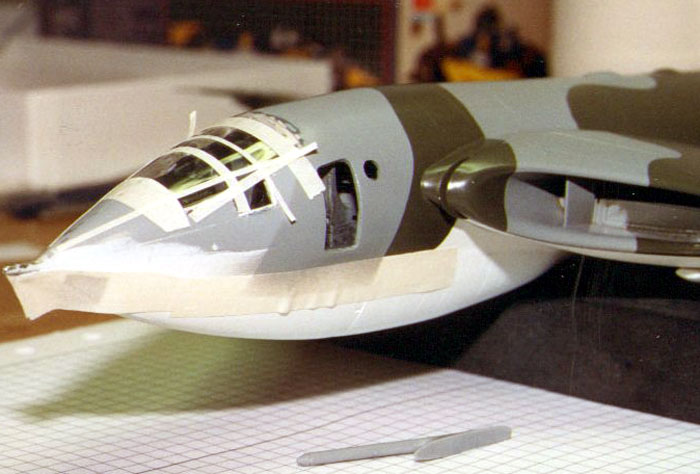
The location of the glass panels was measured, and the framing covered
by tape strips, then the glass panels could be masked. When all panels
were covered the tape covering the framing was removed and all could be
painted.
Why didn’t I do this from the beginning, the result was perfect!
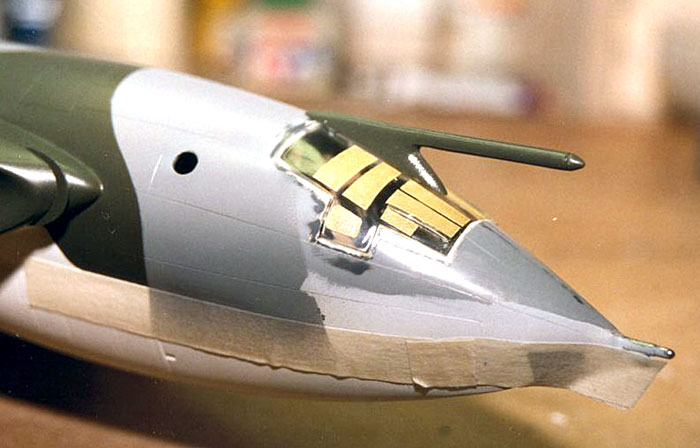
Landing Gear
The gears are standard with a small PE fret. When testing the landing
gear height the model sat perfectly with wing tips at equal height! The
gears are sturdy enough to carry the weight of the model in my transport
box.
Painting was done after the first cockpit canopy attempt, and was
completed after the final canopy was there! I used Xtracolor paints and
ordinary masking tape for the sharp demarcation lines between the
different colors. The standard paint scheme was dark green and medium
sea gray with white underside.
Before putting on decals I gave the whole model a coat of Johnson
Kleer, which I repeated after the decals were set. Then I used a wash of
white spirit and dark brown oil color to tone down the colors.
For the final weathering touch I used dry pastel powder and a small
brush on the matte surface achieved by a small amount of Tamiya Flat
Base in Johnson Kleer.
I’m glad I finally built this monster aircraft, and looking at it in my
glass cabinet is rewarding.
Two more to go!
Click the
thumbnails below to view images full-sized.
Click the "Back" arrow on your browser to return to this page.
 Home
| What's New |
Features |
Gallery |
Reviews |
Reference |
Forum |
Search
Home
| What's New |
Features |
Gallery |
Reviews |
Reference |
Forum |
Search