The Avro Vulcan was developed in parallel with the Victor and put
into service in 1957. The sheer size of the gigantic delta winged
aircraft is awe inspiring! When the Royal Navy took responsibility of
the strategic deterrent in 1969, the Vulcans were kept flying and acted
as a strategic reserve. The Vulcan was kept in front line service, and
would eventually see action in the Falklands conflict.
In the seventies some aircraft were converted to perform the maritime
radar reconnaissance role (MRR).
When Argentina invaded the small, isolated group of islands in the South
Atlantic Ocean called Islas Malvinas in 1982, the opportunity was
presented to resurrect the Vulcan. It was decided that bombing missions
against the airport in Port Stanley was necessary and to be flown by
Vulcans from Asuncion way up in the Atlantic! First of all, six Vulcans
were flown from Britain to Asuncion, escorted by Victor K2 tankers, each
Vulcan requiring two in-flight refuelings during the flight.
On each strike mission two Vulcans were used, one as main aircraft and
one as a backup and on the very first mission XM 607 was flying as the
backup. As the main aircraft had to abort when a cabin window would not
seal properly and the crew could not pressurize the aircraft, XM 607
took over and completed the mission. The bombs were released at 10000
feet but only one of the twentyone 1000 pound bombs hit the target. This
aircraft flew one more Black Buck mission, this time releasing the bombs
at 16000 feet, with no hit on the target.
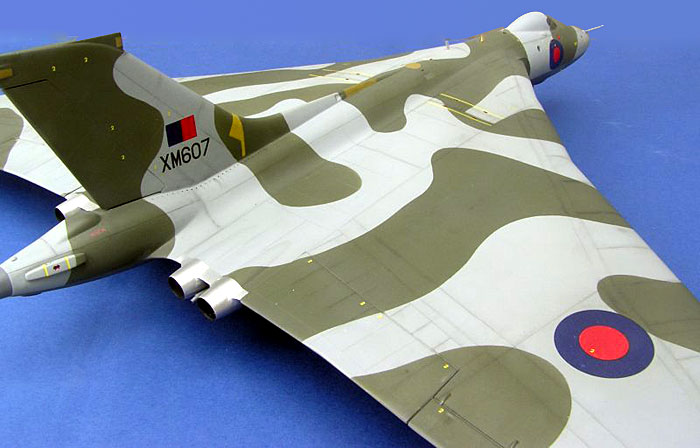
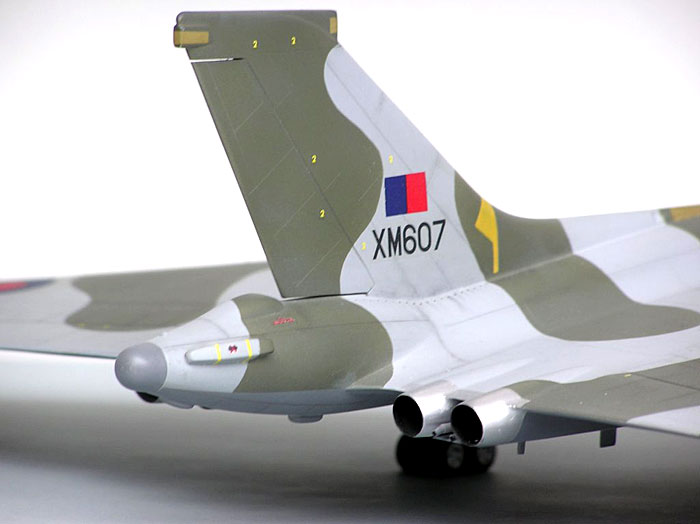
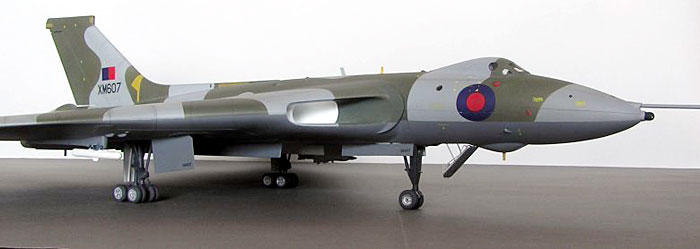
This Vulcan is equipped with one ALQ-101 jamming pod and is armed with
two AGM-45 Shrike anti-radar missiles.
As I am in the process of building the British air forces in the
Falklands conflict the specific aircraft was easy to pick: the first
Vulcan to bomb the airstrip of Port Stanley. The book Falklands, the Air
War covers every individual aircraft participating in the war and
describes the missions made by XM607 thoroughly.
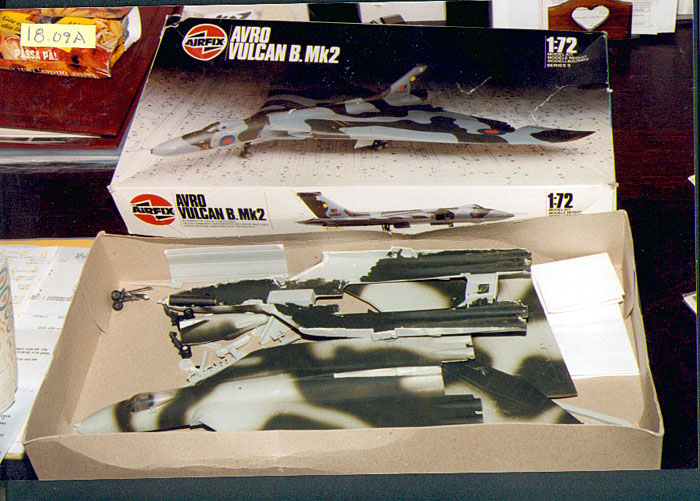
Airfix 1/72
scale Vulcan B.2
|
The 1/72 scale Airfix Vulcan B.2 originates from the seventies and
was released again a few years ago, so there should be no problem
obtaining one and it is accurate enough to make a decent model from it.
The airframe consists of a center fuselage split horizontally, upper and
lower parts for outboard wing panels and forward fuselage split
vertically. The detailing is not up to today’s standards, only the fin
and rudder spoil the vast surface area of the delta wing, and of course
miles of raised panel lines! The landing gear is very simple, but seems
accurate, but the cockpit is almost nonexistent!
Preparing the kit
When I started this project in 1995 I could not find any kit, so a
friend gave me his old already built model to try out!
I started by carefully, with a razor saw, separating the whole model
into its original pieces.
That was fairly easy as old styrene cement makes this plastic brittle
in the joins, but in the process some plastic disappeared and care had
to be taken when rebuilding it. I sanded off all panel lines and scribed
new after drawings and photos.
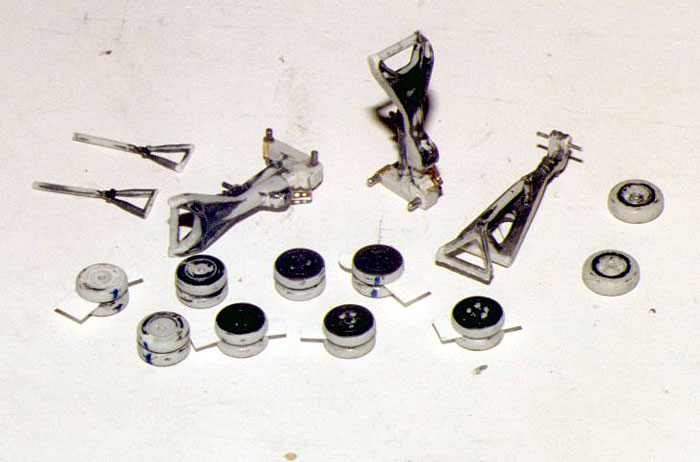
The landing gear with all the wheels was a sad affair, but in the end
I saved enough off all the wheels to reconstruct them and replaced the
axles on the landing gears with piano wire.
Construction
I did not make any big effort with the cockpit apart from replacing
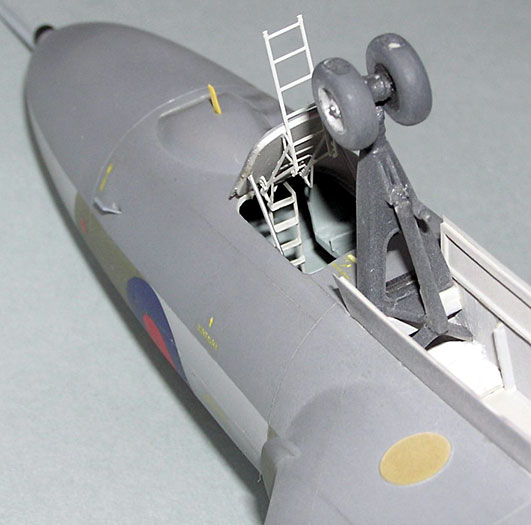
the original seats with white metal seats from Aeroclub as very little
of it visible from the outside. From the entry hatch on the belly you
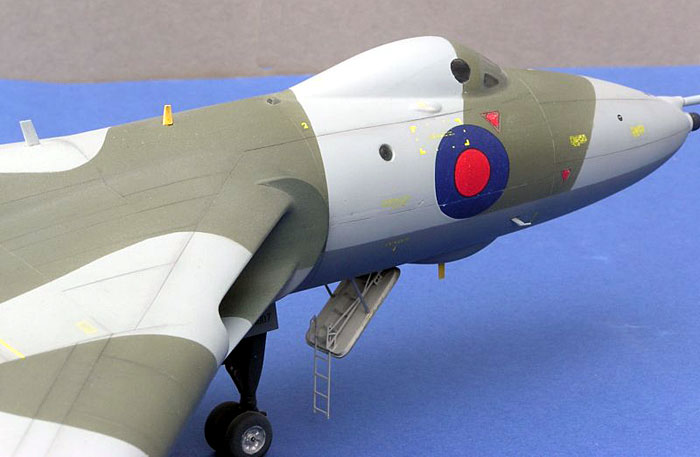
are able to see the interior, so I added some walls and a floor visible
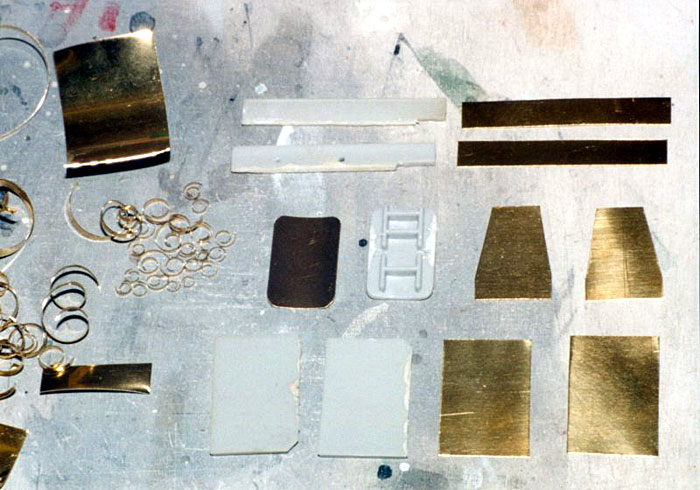
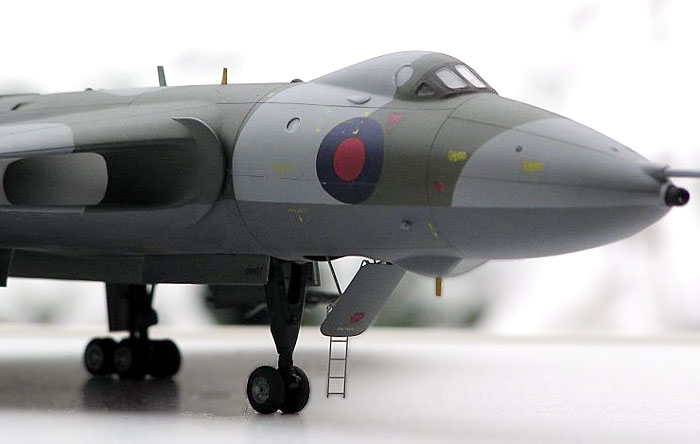
from underneath, and added PP Aeropart’s access ladder. (picture 3)
Lots of hours have been spent lining the inside on the air intakes with
Plasticard to get rid of the seams and strange surfaces.
The main wheel well doors were made from thin brass plate with a
Plasticard lining for the inside.
In the rear I exchanged the original exhausts with DB Resin exhausts
which are better but still very simple.
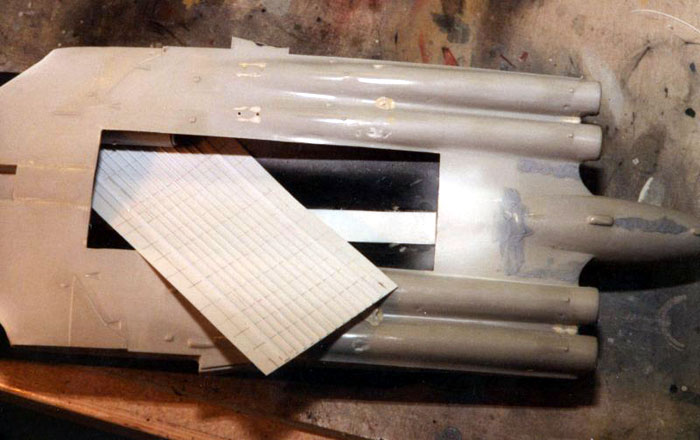
As I prefer the clean lines of an airplane I build mine in “flying
condition” without open hatches everywhere. With this in mind the Vulcan
does not offer much in the area of detailing, I after all decided to
open the bomb bay as I had some pictures and a drawing in an old
magazine.
I used a large sheet of Plasticard for the upper surface, on which I
attached several thin ribs at equal distances. I opened up a hole for
the two bomb bay doors in the lower fuselage half, and glued the
fuselage halves together. Then I inserted the bomb bay upper surface and
secured it in the right position.
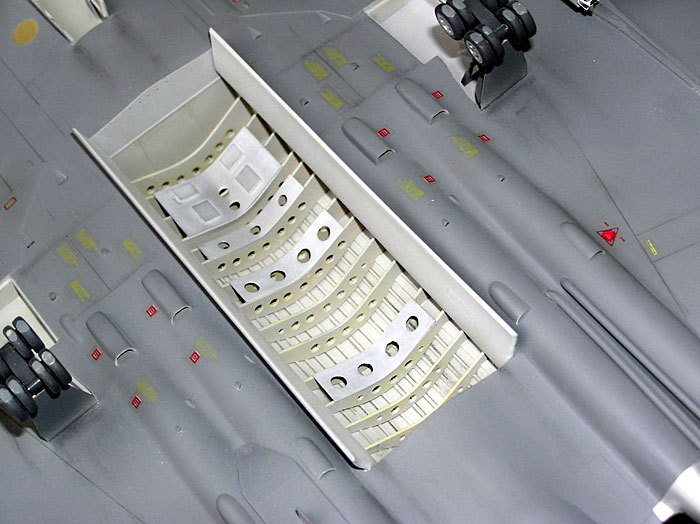
Now I could measure for the 13 ribs that had to be prepared
individually. This operation was very rewarding and I am pleased with
the result, even though I didn’t finish the work with the 21 bombs. I
plan to complete them some day! (
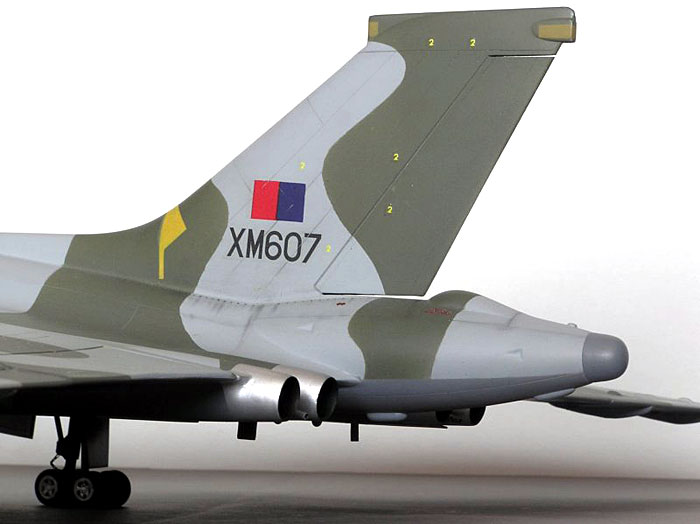
I used Xtracolor Dark Green and Medium Sea Grey for the upper
surfaces and Extra Dark Sea Grey for the underside, black oil color for
wash and dry pastels for weathering, topped off with Johnson’s Kleer
with some Tamiya Flat Base. The decals are mainly original with some
from Modeldecal’s set 71.
It was a nice experience building this old kit, and I am very pleased
with the result. My Vulcan won a Commended and the Bomber Command Trophy
and the British Aerospace trophy at Scale Modelworld 2003, eight years
after I built it!
Click the
thumbnails below to view images full-sized.
Click the "Back" arrow on your browser to return to this page.
 Home
| What's New |
Features |
Gallery |
Reviews |
Reference |
Forum |
Search
Home
| What's New |
Features |
Gallery |
Reviews |
Reference |
Forum |
Search