|
1/72 scale Frog +
Flightpath
Armstrong Whitworth Whitley
Mk.III
by Mark Davies
|
 |
|
Armstrong Whitworth Whitley Mk.III |

HyperScale is proudly supported by
Squadron
The Whitley was one of three new strategic bombers operated by the
RAF at the beginning of WW2, and the only purpose-designed night bomber.
Ordered in 1934, it was already considered obsolescent by 1937 when
aircraft like the Stirling, Manchester and Halifax were being
anticipated. Despite this, Whitleys conducted the first British leaflet
and bombing missions on mainland Germany, including being amongst the
first types to bomb Berlin. They were also the first RAF aircraft to
cross the Alps and bomb Italy. Later versions served in the vital fight
against U-boats with coastal command using radar and depth charges. The
Whitley helped develop British airborne forces by serving as parachute
and glider-tug trainers, as well as parachuting SAS and agents into
occupied Europe. It also served with BOAC as a civilian transport flying
to Malta and Stockholm until replaced by more suitable aircraft.
The Whitley was Armstrong Whitworth’s first aircraft to incorporate
monocoque construction, and proved to be a very strong and robust
aircraft. Originally designed without flaps, the wing had an 8.5 degree
angle of incidence which resulted in its characteristic nose-down flight
attitude. It went through several design changes during its life,
including the addition of split flaps and dihedral to the wings, this
dihedral being increased on the Mk III onwards. The shape of the fins
and rudders became more angular with the Mk V. The most significant
change occurred with the Mk IV where Merlin in-line engines replaced the
underpowered Tiger radials, effectively giving the Whitley a new lease
of life.
Defensive armament changed several times through the Whitley’s life. The
Mk’s I & II had all manual front and rear single-gun turrets, and an
ineffective dustbin ventral turret was added to the Mk II onwards,
although usually omitted in later Merlin-engined marks. A power-operated
single-gun front turret was introduced with the Mk III, then a four gun
power operated four-gun rear turret with the Mk V onwards.
All Whitleys other than The Mk V were officially declared obsolete in
1944, and the Mk V’s fooled in 1945. The last Whitley was retired in
1947 after being used by Armstrong Whitworth to tow their AW 52 tailless
glider. Sadly no Whitleys survive intact.
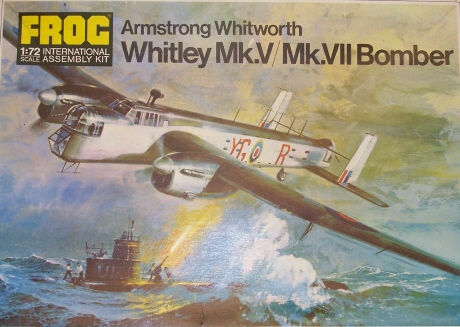
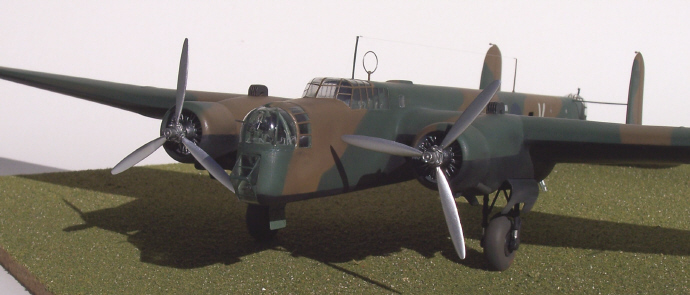
This conversion used the Frog kit, Flightpath Tiger-engine conversion
set, Airwaves photo-etched (PE) detail set, and Falcon replacement
canopies.
Click
the thumbnails below to view larger images:
The Frog Kit
At first glance the Frog kit seems quite good, with very delicate
raised detail and straight forward parts breakdown. The Merlin engine
cowls and radiators that are too tapered in appearance, the clear parts
are too heavily framed, and too simplistic in the case of the turrets.
Closer checks also revealed the rear fuselage to be too narrow in plan
view, the upper-side of the ailerons to be too large, and the chin below
the front turret to be wrong. A build-review of this Frog kit (albeit a
Maquette re-issue) and photo of it finished out of the box as a Whitley
Mk VII can be
found at Maquette 1/72 Armstrong Whitworth Whitley Mk.5/7.
I had long thought this to be the only 1:72 Whitley kit, but have since
briefly seen a largely assembled Contrail vac-from kit that I think
offered both Tiger and Merlin engined options. This kit was owned by a
mate whose father flew Whitleys and had the unpleasant experience of
baling out of one which was on fire.
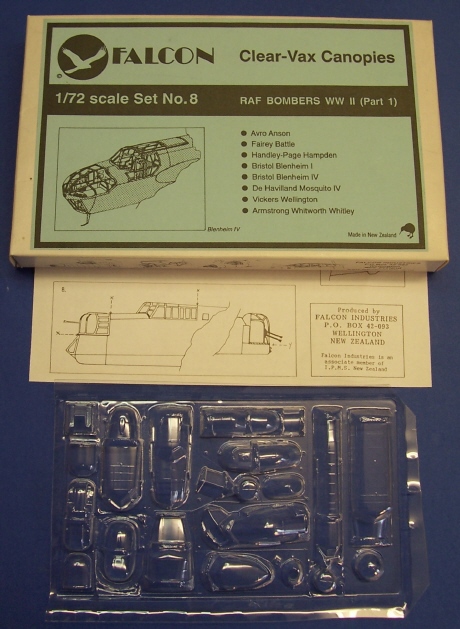
Falcon Canopies
Falcon’s canopies are superb as always, although perhaps compromised
in that the front turret and forward fuselage are one-piece and designed
to replace the kit’s parts directly, meaning the turret lacks a rear
side as it is moulded with the clear nose panels of the fuselage.
I would have preferred an entire and separate front turret.
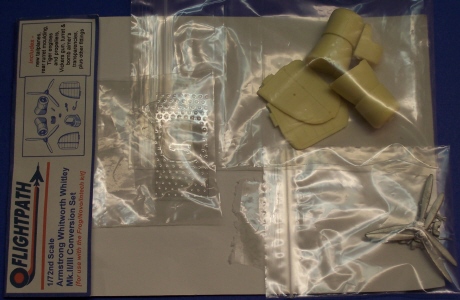
Flightpath Conversion
Taking the kit’s weaknesses into account building a Tiger-engined
variant (Mk's I to III) seemed the best option as it eliminated the
engine problem and allowed me to use my Falcon canopies. This last
choice limited me to building a Mk III as the Falcon canopy only caters
for the power operated FN turret used by Mk III’s onwards. Furthermore,
I have read that the Mk III onwards had increased dihedral on the outer
wing panels compared to the Mk’s I and II (the very first Whitleys had
no dihedral), so once again a Mk III made most sense as the Frog kit is
of the later Mk V or VII which had the same dihedral as the Mk III.
The Flightpath set provides:
-
Canopies for the Mk I’s bomb aimer’s
window, and rear turret in vac-form acetate.
-
Two resin engines, their cowls and
forward nacelles all in single mouldings for each side.
-
Two resin tail-fins and rudders.
-
White metal exhausts, propellers, oil
coolers and carburettor intakes.
Also provided in white metal is a “regular” Lewis gun, plus one with
a WW1-style jacket around the barrel, along with a rather useless hoop
to mount them on.
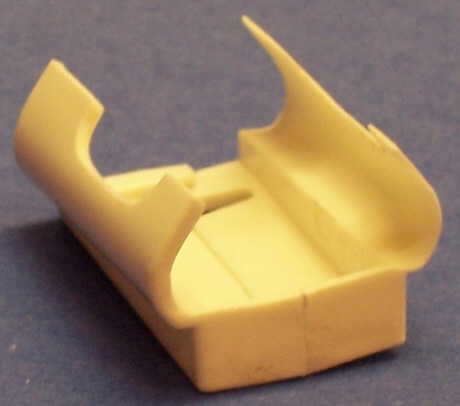
The resin is of reasonable quality, although the engine faces in the
one-piece mouldings are a bit messy where they meet the cowl interior.
This said, I must say that once painted they do capture the clutter of
pushrods that characterise Tiger engines quite well. Once cleaned up and
polished the propellers are probably the conversion set’s best feature,
capturing well the look of the real prop’s hub and centrifugal weights.
The rear manual turret’s cupola is a pathetic attempt at vac-forming
acetate; being undersize, the wrong shape, devoid of framing, and so
thin as to be unusable. The bomb aimer’s window didn’t look much better,
but I had no need of it anyway. No attempt is made to provide a manually
operated front turret to replace the Frog kit’s power operated turret,
an important oversight in a conversion kit for a Mk I or II Whitley.
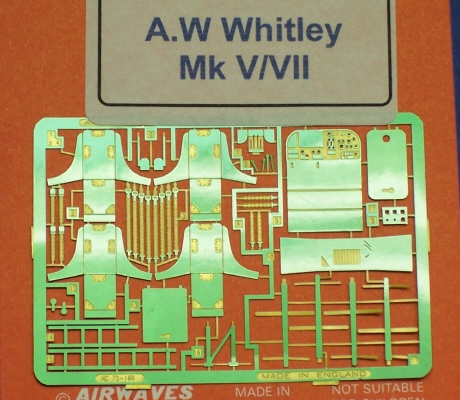
Airwaves Detail Set
The Airwaves PE set is OK, although I feel the seats are a bit too
large, the table too simple, and it’s not entirely accurate regarding
the instrument panel as it instructs you to have this place this
vertically rather than inclined forward (something the Frog kit does
correctly with its panel). I didn’t use the ladders or radar antennae,
but I feel they look a bit on-dimensional.
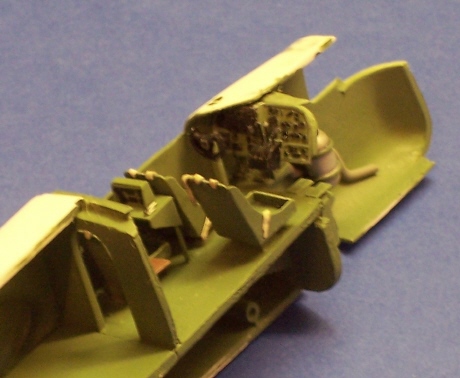
Cockpit
I scratch-built the cockpit floor, front and rear bulkheads, radio
operator’s desk, navigator’s fold-away table, parachute racks etc from
plastic card. I replaced the kit’s control column with one from an
Airfix SM 79.
I modified the Airwaves instrument panel to sit at correct angle on
plastic card backing plate and added cut rod to represent the instrument
casings behind the panel. The bottom portions of the instrument panel
were removed enabling a see-through effect to bomb aimer’s compartment.
I used Airwaves’ cockpit set for seats and harnesses, instrument panel
and throttle quadrant (this last item is a bit oversized). The radio
operator’s seat was modelled facing forward based on photos, unlike the
Frog kit Mk V and Airwaves detail set instructions which have the table
facing sideways facing to port. I’ve since seen photos that suggest this
seat was different to the Pilot’s and Navigator’s seats, but I can live
with it. The bomb aimer’s floor was made from plastic card, and some
general details added to this area using items from my spares box. A
bombsight was scratch-built from plastic card and scrap brass sheet.
Click
the thumbnails below to view larger images:
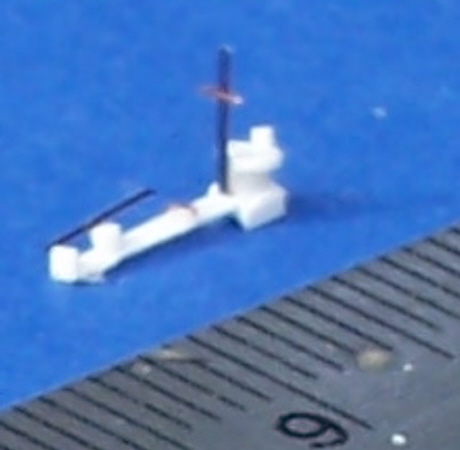
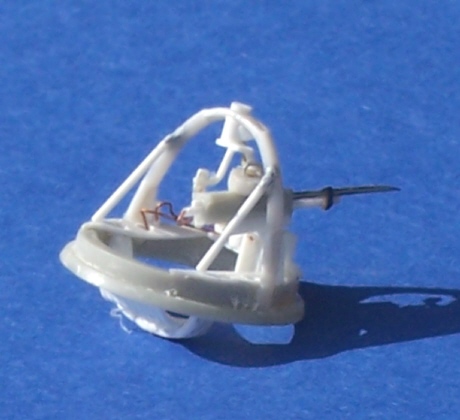
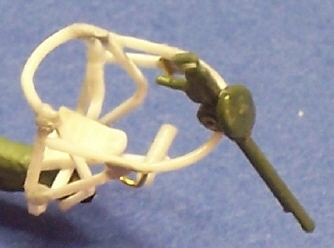
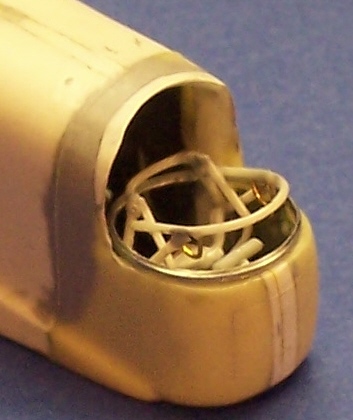
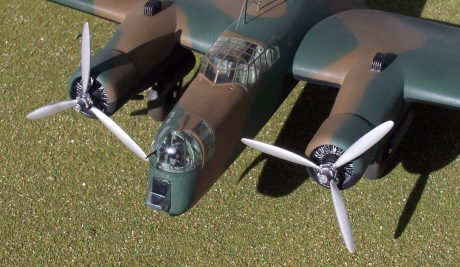
Turrets
The Fraser Nash FN16 turret was scratch-built based on photos and
drawings, as was its single Vickers K gun. The hooped frame that
connected the real turret’s services via the bulge above the turret was
backed by a clear section from a modified and cut-down spare Falcon
Lancaster turret. This was necessary as the Flacon Whitley nose turret
is moulded integral with the nose glazing behind the turret, an so has
no rear to the front turret. As an aside, it seems incredible that it
was the front and not the rear manually operated turret that was
replaced by a power turret first with the Mk III, especially on a night
bomber where being intercepted from the stern was far more likely than a
head-on attack.
Click
the thumbnails below to view larger images:
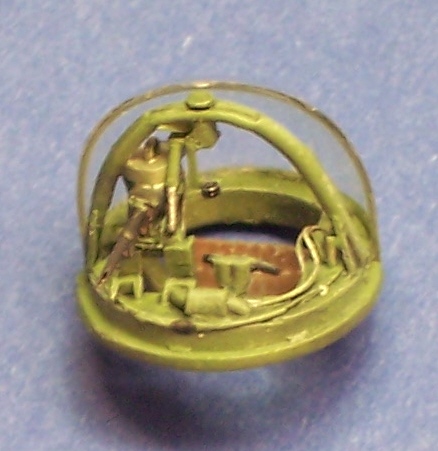
The rear Armstrong Whitworth turret was again scratch-built based on
photos. It was necessary to widen the rear fuselage ad Airwaves resin
turret base as these are far too narrow. I sued a wedge of plastic card
to achieve this top and bottom. An Italeri Ju 86 provided the Lewis gun
as this was in better condition than the Airwaves item. The Airwaves
rear turret canopy was worthless, being moulded from wafer thin acetate,
and of course was far too narrow. The turret canopy was sourced from
Falcon’s Avro Anson replacement for the Airfix kit as the Anson (and the
Oxford) used the same AW manual turret as the Whitley. A small ring to
mount this on was made from thin zinc sheet and curved around a pen. The
top of the Airwaves resin rear fuselage had to be extended and
re-profiled to correct its appearance and closely cowl the Falcon turret
canopy.
Click
the thumbnails below to view larger images:
The Whitley Mk II was the first fitted with an AW dustbin turret.
These ineffective turrets were usually omitted from aircraft after the
Mk III, although the hole they protruded through was retained for
dropping parachutists. The basics of a dustbin turret were made from a
scrap plastic pen barrel and its lowering and traversing frame were made
from plastic card. This was kept very basic as very little would be seen
later.
Fuselage
All windows were drilled, Dremeled and filed open as necessary.
Additional “skylights” above the instrument panel were let in, as were
the three windows either side of the dustbin turret behind the rear
bomb-bay. The nose and rear fuselage doors were Dremeled open and their
edges thinned down for scale effect. Later the Airwaves photo-etched
doors would be added to each doorway. The two small windows behind the
cockpit on either side were replaced with clear plastic from the spares
box as the Frog items were a very poor fit.
Click
the thumbnails below to view larger images:
A rear fuselage floor was made using sections of corrugated Italeri
Horsa glider floor. Internal framing was made form plastic card, as was
the tail wheel’s internal bracing structure.
It was necessary to cut and modify quite a bit of the fuselage. The rear
fuselage was removed just to the rear of the elevator hinge line to
accept the Airwaves resin rear fuselage to accommodate the AW manual
rear turret. The cockpit roof was removed for later fitment of the
Falcon vac-from canopy, and the forward coaming over the instrument was
moved in a V-shape based on photos that show this followed the line of
the windscreen. I fitted a support at the rear of the cockpit to enable
later sanding at the join line of the canopy and fuselage. A type of
raised vent behind the cockpit was opened up and its edges thinned down
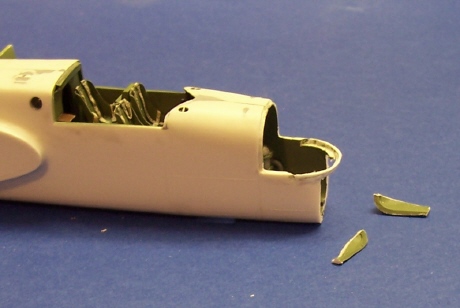
The area where the Falcon nose turret and glazing were to fit was
removed and then rebated with a Dremel to provide support when the vac-from
glazing was fitted. The kit’s lower turret ring area was Dremeled out to
accept the scratch-built front turret and its ring was glued in place.
The frog kit has a distinct lip below the front turret that is not
apparent in photos. Consequently I removed the front parts of the
fuselage either side of the bomb-aimer’s window and inserted a plastic
card plug and re-attached the nose pieces either side of the window.
This extension made the nose’s chin extend directly down from the turret
ring.
Click
the thumbnails below to view larger images:
The bombsight was fitted and the bomb-aimers window super-glued in
place. This caused some dramas later when it fell loose after the bomb
aimer’s window had been super-glued in place. It had to be repositioned
after being fed through a tiny gap in front turret ring after this too
had been permanently fitted in place.
I dip all my canopies in Future to prevent fogging when superglue ids
used. The canopies were then faired in and other seams attended to as
required. The kit’s fine panel lines were replaced where damaged from
sanding with fine stretched sprue. Bombay doors were scribed in as they
are barely apparent so fine are the raised lines on the kit. A disc of 5
thou plastic card was cut to represent the bottom of the dustbin turret.
The wing bomb cell doors (both inboard and outboard of the engine
nacelles were represented with scored 5 thou plastic card, and the flaps
were made with the same material. Finally, antenna wire posts and DF lop
were made from scrap.
Click
the thumbnails below to view larger images:
Wings
The kit wings were a poor fit and a bit warped. These were cemented
together without the undercarriage bays being fitted. A leading edge
lamp was made from scrap and glazed with a section cut and sanded shape
from a spare Hawker Hurricane canopy.
The kit’s ailerons had an exaggerated fabric effect which was remedied
with sanding and filler. The more I looked at the wing something seemed
wrong; and I realised the Frise-type ailerons of the real plane were not
represented properly as the aileron was the same dimensions top and
bottom. This led to the ailerons appearing far too large on the upper
wing. At the same time, and having primed the wings, I found that the
kit’s raised lines representing rib tapes on the fabric covered area aft
of the wing’s main spar and torsion box barely showed.
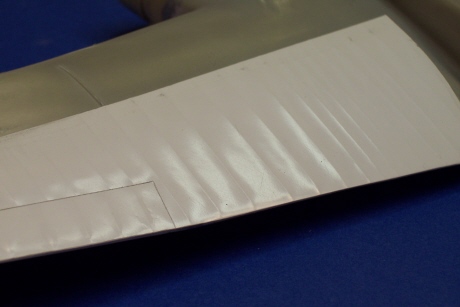
I decided to re-skin the fabric area of the wing in 5-thou plastic card
to better represent the fabric effect and resize the ailerons. This
involved filling the upper aileron hinge line, and drawing the wing rib
stations onto the plastic card with a pencil whilst it was supported on
a magazine to enable the pencil to create a soft raised line. The skins
were then attached with MEK and blended in with Mr Surfacer and Tamiya
filler. The skin was sanded gently to tone the effect down.
Click
the thumbnails below to view larger images:
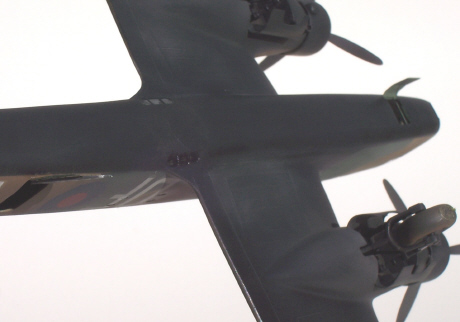
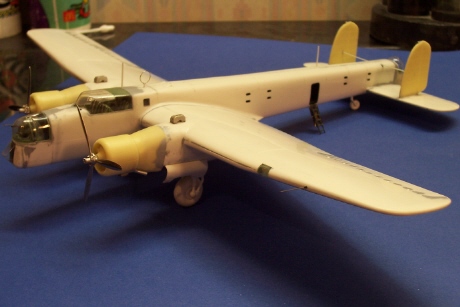
Engines
The rear of the Airwaves resin radial Tiger engine cowls were scraped
a little thinner and super-glued to the kit’s engine nacelles. These
were blended in using Tamiya putty which seems to adhere to the resin
very well. The white metal oil coolers and carburettor intakes were
added top and bottom, as were the white metal exhausts. Al white metal
items, including the very nice propellers, were sanded and polished.
Finally a pitot from piano wire was added and fine stretched sprue used
to replace sanded raised panel lines.
Undercarriage
The kit undercarriage doors are very thick. These were thinned down
with a Dremel, files and wet & dry paper. The interiors were lined with
plastic card to hide seams, although I didn’t detail this area as I
can’t see it when the finished model is in my display cabinet, plus I
lacked reference photos.
The kit wheels don’t look quite right because the tyres are too pointed
at the mid-point of their tread areas (fixed by sanding), and because
their sidewalls don’t swell enough away from the wheel hubs. This is
perhaps a minor point, and I decided it wasn’t worth the effort to
rectify after I found I had no wheels for a simple replacement.
I also shortened the tail wheel slightly as the tail seemed to sit to
high. I can’t be sure, but I do wonder if the tail wheel was lengthened
to allow for the increase in fuselage length when a power rear turret
was added.
Click
the thumbnails below to view larger images:
Tailplane
The tailplane was attached and the Airwaves resin fins and rudders
fitted. The holes in the fins for the Frog kit’ very thick and circular
tailplane bracing struts were filled with plastic rod and sanded flush.
The corresponding very thick strut mounting points on the fuselage were
removed as well. The struts themselves were made from Contrail strut
section. Finally, small mass balances for the rudders were made from
stretched sprue.
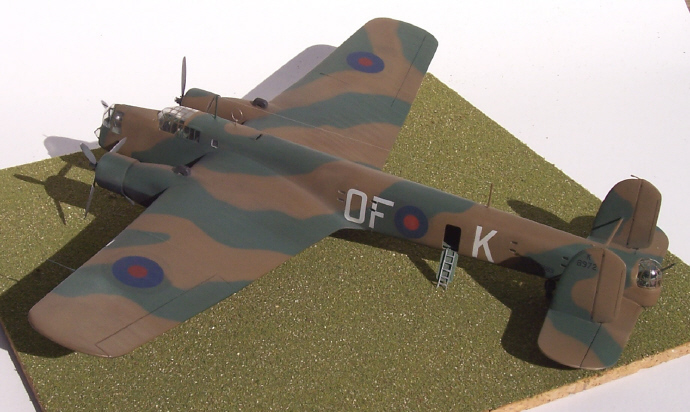
I chose to model a aircraft from 97 Sqn which operated Whitley Mk
III’s from Feb-39 to Apr-40. I considered modelling an aircraft based on
photos, but didn’t have the right combination of codes and serial
number, so I used a Whitley Mk III serial number and made a
representative aircraft. I must also admit that I was more interested in
finishing than waiting to buy some decals, and didn’t want to hassle
modelling mates for more decal help than I already had.
Click
the thumbnails below to view larger images:
The aircraft was painted using Humbrol paints; for no other reason
than it was what I chose to run with from my paint selection, plus it’s
easy to brush paint if small tough-ups are needed (they were!). The
model was glossed with Testor's Metalizer Sealer. I chose to use a
lacquer this time for speed and because of cold damp weather prevailing
when I clear coated. Testors Matt Lacquer was used after decaling.
I used some Kits at War decals for squadron codes and wing roundels.
They were nice enough decals, but the ink was printed off-register with
the carrier film. This meant that they had a very thin edge on one side
leading to the deals curling where no carrier film support existed. I
can’t comment on how they reacted to any solvents as none was needed.
The fuselage roundels came from an Esci sheet simply because they were
the size I needed. They were of predictably poor quality (although I’ve
seen worse), and were prone to cracking and flaking at their edges. All
roundels were placed over a previously sprayed area to suggest the real
aircraft’s outer yellow rings which were painted out with fresh paint.
The aircraft serial number came from a suitably chopped and rearranged
Matchbox HP Heyford sheet.
All canopies were framed with painted decal film, and the small fuselage
windows, instrument panel “skylights” and the six windows either side of
the dustbin turret were glazed with Humbrol Clearfix. Other finishing
touches included the aerial wire, DF loop, rear gun sight and open
fuselage hatches and ladder.
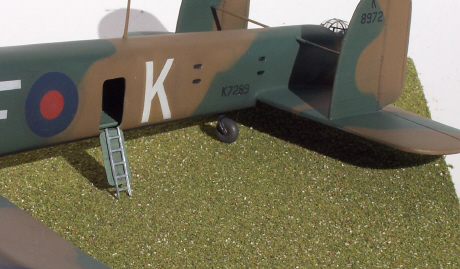
I am pleased with the final result in so far as it seems to capture
the look of the early Tiger-engined Whitleys, and the additional work on
detailing turrets, bomb-sight and cockpit interior are not lost thanks
to the clarity of Falcon’s replacement canopies.
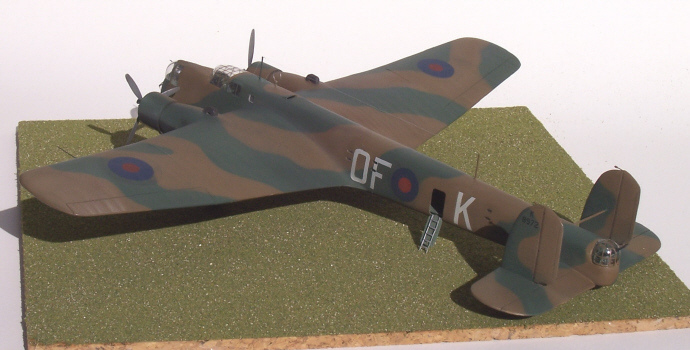
The actual standard of finish is far from IPMS competition standard,
but quite adequate as a cabinet model which is good enough for my
purposes. At some stage way off in the future I’ll build another Merlin
engined Whitley, but that won’t be for quite a while. It has however
whetted my appetite to build my Hampden and Stirling, Halifaxes
Wellington…..
Images and Text Copyright ©
2005 by Mark Davies
Page Created 10 August, 2005
Last Updated
10 August, 2005
Back to
HyperScale Main Page |
 Home
| What's New |
Features |
Gallery |
Reviews |
Reference |
Forum |
Search
Home
| What's New |
Features |
Gallery |
Reviews |
Reference |
Forum |
Search