|
Classic Airframes' 1/48
scale
Westland Wyvern
S.4
by
Chris Bowie
|
 |
|
Westland Wyvern
S.4 |

Classic
Airframes' 1/48 scale Westland Wyvern is available online from
Squadron
I had always thought the Westland Wyvern one of the
ugliest military aircraft ever developed, which naturally increased my
desire to build a model of this strange humpbacked beast.
When the Dynavector vacuform kit came out about a decade ago, I snapped
it up and, even though wary of doing vacuforms, eventually built it. The
kit was fantastic. Once you got all the pieces sanded out (I used my 80
grit tungsten carbide sanding block from Micro Mark to do this job), it
actually went together almost like an injection molded kit. I built my
model about six years ago and have always enjoyed looking at its strange
lines.
But the interior detail contained in the kit is not
great and the recessed panel lines are a bit faint. Still, the kit was
good enough that I purchased and built the Dynavector Sea Vixen (another
strange British beast), Javelin (also quite strange), and TSR-2
(actually quite attractive).
When Classic Airframes came out with their injected molded kit in
December, I had to buy it. The kit has been described elsewhere on
HyperScale. It has superbly molded recessed panel lines and resin detail
parts (including a really super cockpit).
I got to work.
I painted the interior dark gray, drybrushed with light
gray, added a black wash, and added various color dots to brighten
things up. I glued in some styrene strips behind the exhaust ports so
that when I did final assembly, I wouldn’t have the exhaust parts fall
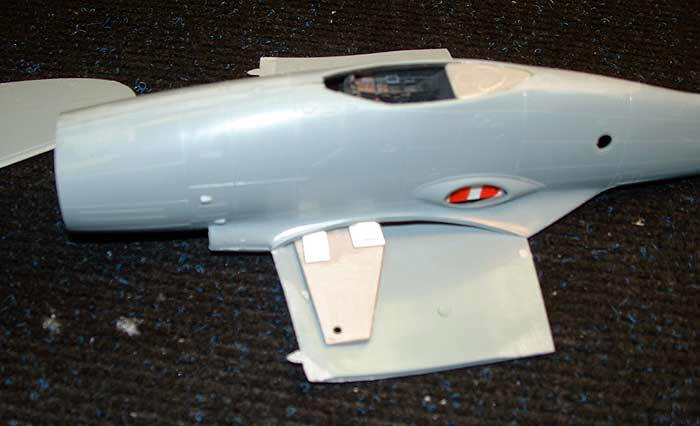
inside the fuselage. I glued the fuselage together and then installed
the cockpit from below. Although there are no locating points, the fit
was very good.
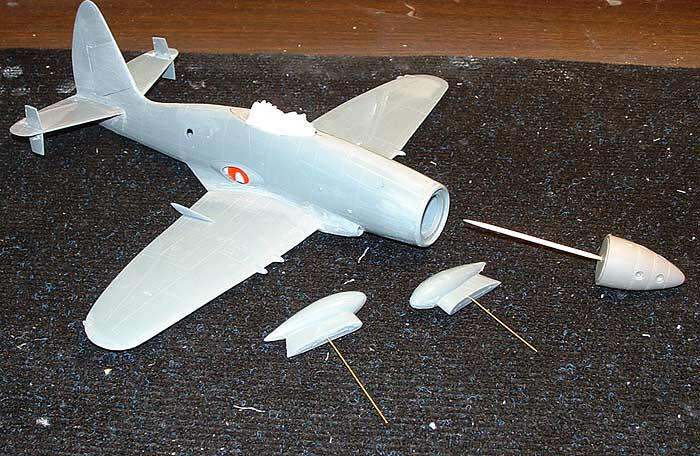
I sanded out the wing wheel wells and dryfitted to make sure they would
fit—in limited production kits, I often find I need to sand the wheel
wells thoroughly to get the wings to glue together.
I glued the wheel wells in place and then glued the lower center wing
section to the fuselage. I then dry fitted the wings and found that the
wing ended up too low on the fuselage. I had to use shims to get the
fuselage/wing joint alignment right.
To prevent the exhausts from falling inside the fuselage
when installing later, I superglued strips of plastic inside the
fuselage. To get the fuselage/wing joint to match up, I superglued
strips of styrene on top of the wheel well to get the height right.
Installing the upper wing, stabs
and vertical tail
I taped the upper wing in place, dribbled some liquid
super glue into the seam, and then dabbed on a bit of accelerator.
Presto, a perfect seam. I found the alignment between the upper and
lower wings to be off, but that’s what sandpaper is for.
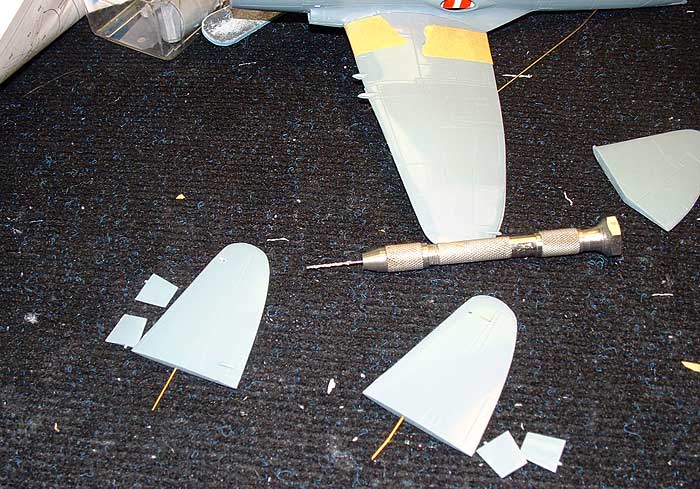
To get the right dihedral for the horizontal stabs, I
first installed a length of brass wire into the plastic sections. I used
this to mark and then drill a hole in the fuselage in the right place.
I then taped the model down to my work surface. I used the illustration
in the instructions to build a simple jig out of sheet styrene, which I
taped in place. Then I put the horizontal stabs in place, applied liquid
superglue, and a drop of accelerator. Now I could attach the vertical
tail.

Click the thumbnails below
to view larger images:
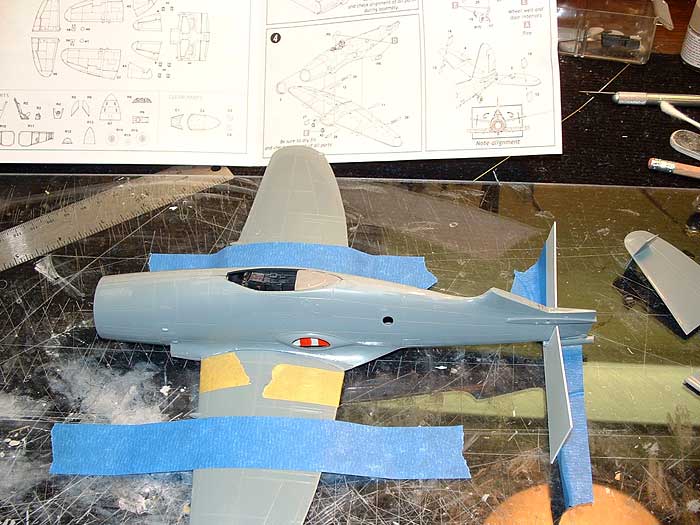
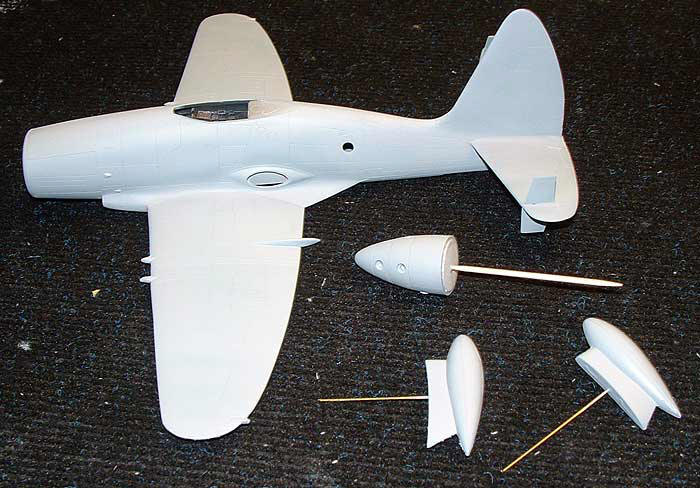
Final Assembly
Here the model is ready for primer.
The vertical tail is a separate section; I used brass
rod to hold it in position and superglue/accelerator to fix it. I used
gap-filling superglue to deal with the seam.
The model with a coat of primer is pictured below. I
thought the model fitted together quite well. I had to use some
superglue on the seams as a filler, but not bad at all.
There were some sink holes on the wing tanks that can be
easily filled.
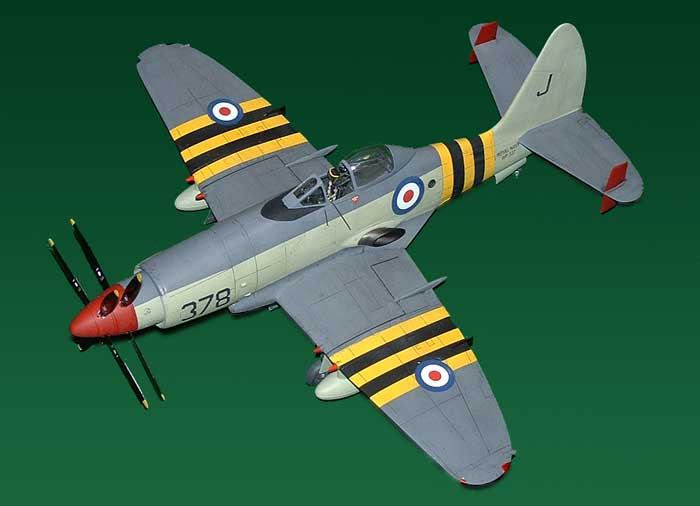
I painted the model using Tamiya Sky and my own mix of
Tamiya for the Extra Dark Sea Grey.
The Suez stripes were masked off using Tamiya Yellow and
Black; the spinner and tail areas colored maroon (a mix of Tamiya Red
and Blue). Then the whole model was sprayed with Testor’s Metalizer
Sealer to prepare for the decals.
Before decaling, I put a wash of black (1 part gloss
Tamiya Black, 10 parts water, 1 drop of dishwashing liquid) on all the
seams; I find this really accents the model nicely.
When dry, I wiped off the excess with Q-tips dipped in
Windex. I then decaled the model. I put a white roundel (from the Tamiya
Spitfire kit) as the underlay to the roundel overlaying the Suez stripes
(otherwise the black and yellow would show through).
Finally, I gave the model a coat of Poly S flat clear.
Classic Airframes' 1/48 scale Wyvern S.4 is a very nice
kit. My only complaint is that the resin spinner has all the propellers
in a line, so you don’t get the full effect of eight blades. But this is
really a minor complaint (and one easily addressed with a razor saw).
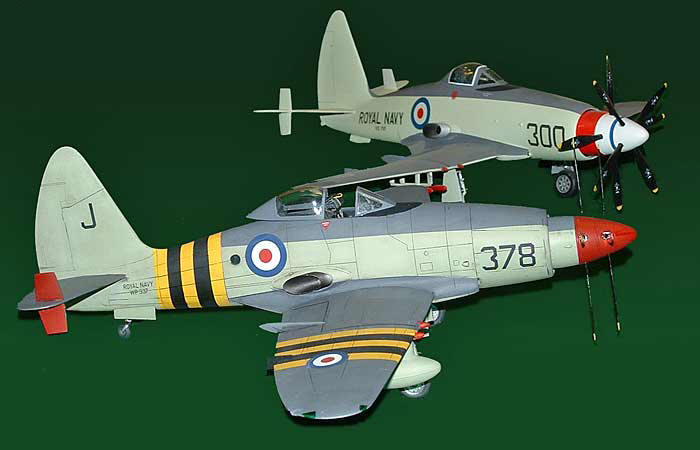
Here is my Classic Airframes Wyvern in front of my
Dynavector Wyvern. It is hard to believe that we now have two great kits
to choose from of this exotic aircraft! The Classic Airframe’s kit is
easier to build and better detailed but the Dynavector kit is great to
try for your first vacuform.
Text, Models and Images Copyright © 2005 by
Chris Bowie
Page Created 24 March, 2005
Last Updated
23 March, 2005
Back to
HyperScale Main Page |
 Home
| What's New |
Features |
Gallery |
Reviews |
Reference |
Forum |
Search
Home
| What's New |
Features |
Gallery |
Reviews |
Reference |
Forum |
Search