|
Classic
Airframes new 1/48 scale
Westland Wyvern S.4
by
Ron Getz
|
 |
|
Westland Wyvern S.4 |

Classic
Airframes' 1/48 scale Westland Wyvern is available online from
Squadron
For a detailed examination of the kit
contents, see
Steven "Modeldad" Eisenman's in-box review here on HyperScale.
The first turboprop Westland Wyvern flew on January 16,
1949 powered by a Rolls-Royce RB.39 Clyde gas turbine engine.
Problems with the Rolls-Royce engine resulted in
changing to an Armstrong-Siddeley Python engine. As a result of the
change in engines the first operational Wyverns did not fly of the
carrier H.M.S. Albion until September 1954.
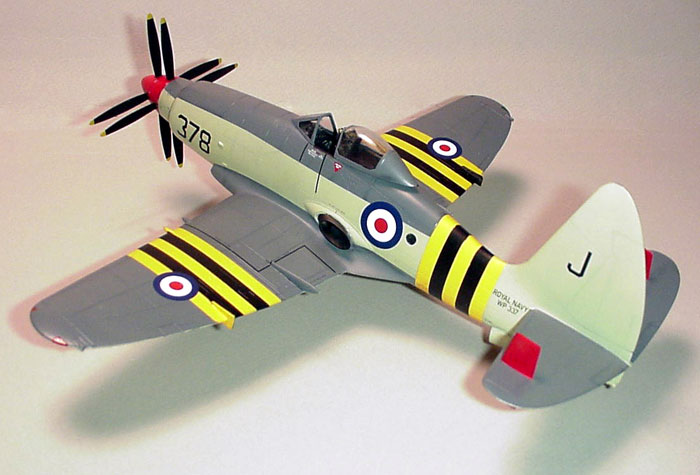
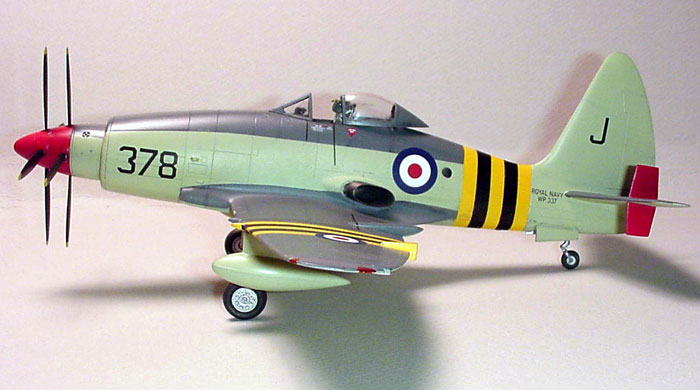
The final modifications on the S.Mk.4, which the Classic
Airframes model depicts, were a flat windscreen over the flat armored
glass, a strengthened canopy, and dive brakes added under the wing
center section. Even with these numerous modifications the Wyvern still
lacked the performance that the Royal Navy was looking for but the
aircraft continued into service due to the fact that there was no
alternative to replace it.
In May 1956 830 Squadron went aboard H.M.S. Eagle and
was the only unit to fly the Wyvern in combat. Nine aircraft flew six
days of sorties against Egyptian targets in the Suez Canal Zone in Oct.
& Nov. 1956 as part of Operation Musketeer.
The end of service for the Wyvern came in March 1958.
Only one Wyvern remains - a Mk. 1 VR137 piston powered machine that
never flew.
All the rest were all scrapped.
This is the first injection moulded Wyvern kit in 1/48. All other 1/48
Wyvern offerings have been vacuform kits.
The kit measures out to be right on for scale
dimensions. The cockpit, wheel wells and spinner are all resin and look
very good. The rest of the model is the normal gray plastic - not to
hard and not to soft. The canopy parts are crystal clear but I dipped
them in Future for protection and a little more clarity.
I started with the cockpit and painted it all Model
Master interior black and the instrument panel flat black, then picked
out detail with a silver pencil and light gray paint for the knobs. On
the instrument panel I simulated glass with drops of epoxy. The seat was
painted flat black and seat belts off white. The cockpit fit well in the
fuselage half's but I did need to thin the plastic abit around the
opening and I was able to glue the fuselage halls together and then put
the cockpit in after.
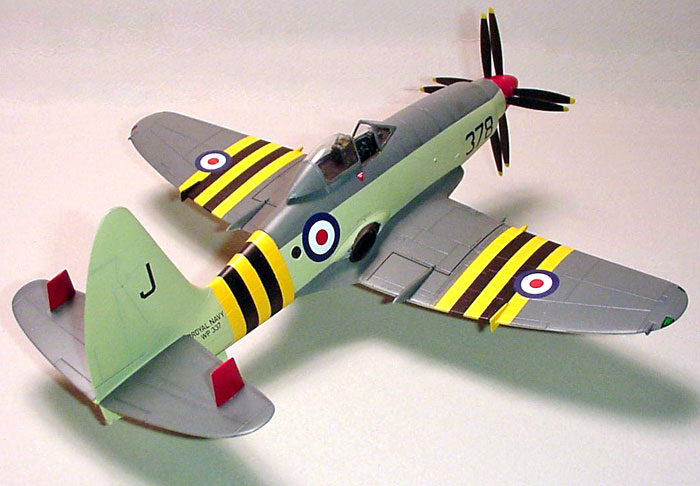
Most models have some problems with the wing fit to the
fuselage and this is the case here. To get the wing root to fit good
with the fuselage I glued the top half of the wing to the fuselage first
on both sides right and left. With a little sanding and fitting I then
glued the bottom half of the wing to the fuselage wing combo. The fit
was OK but still needed to be filled some around the joints.
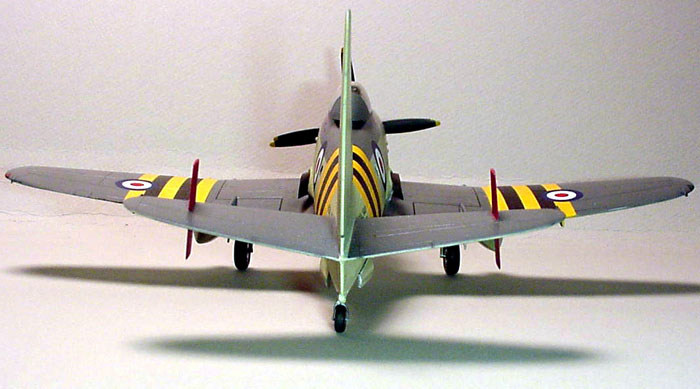
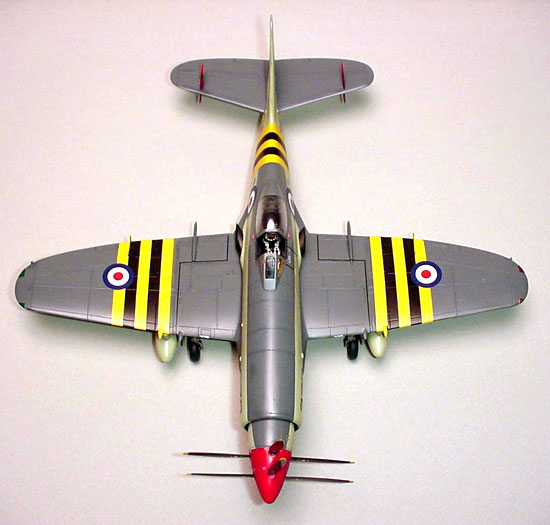
The biggest problem with the kit is the tail. The
horizontal stabs need to be at 10 deg. and the mating surfaces are flat
and if glued up that way the surfaces would be straight. My fix for this
was to make a simple jig to get the 10 degs. that was needed. I sanded
the horizontal stabs to the degrees and then glued and filled as needed.
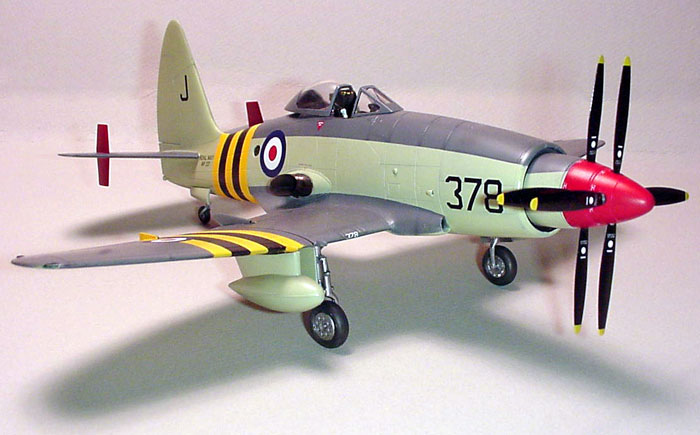
The inner landing gear doors are locked in the closed
position on the ground. The landing gear its self needs to be positioned
at an angel forward about 20 degs. I made the mistake of positioning the
gear straight down. I didn't see this until I had the gear in position
and didn't want to break the gear to reposition it.
I still like enamels and will use them as long as I can.
I started by priming the model in white mainly because
of the yellow strips and to fix any flaws that I may have missed. It is
much easier to paint strips now there isn't as much to mask off this
way. The yellow is Model Master chrome yellow 2 coats with the white
under the yellow that's all you need. After the yellow dried I masked
for the black and the maroon red on the tail and spinner.
After the red and black dry I painted the dark sea gray
here I used some old Floquil. I think that this was the best enamel
paint ever I have always had good results with it. Next I did the
pre-shading and then another thin coat of the dark gray. I masked off
the gray for the sky color again Floquil.
After all had dried I removed the masking except for the
canopy and sprayed the model with gloss coat and applied the decals.
After the decals had set one more coat of gloss coat and then a coat of
semi-gloss.
:
This is a limited run kit so be patient - it is worth
the effort.
The Wyvern is one of those strange looking British
aircraft but a nice addition to a 1/48 collection. It build up to about
the size of a P-47. Now I would like to do some more of the Operation
Musketeer aircraft because the yellow and black stripes look cool. So
many model so little time keep on building.
Thanks to
Classic Airframes for the sample.
Click the thumbnails below to view larger images:
 Model, Images and Text Copyright ©
2005 by Ron Getz Model, Images and Text Copyright ©
2005 by Ron Getz
Page Created 22 January, 2005
Last Updated
22 January, 2005
Back to
HyperScale Main Page
|
 Home
| What's New |
Features |
Gallery |
Reviews |
Reference |
Forum |
Search
Home
| What's New |
Features |
Gallery |
Reviews |
Reference |
Forum |
Search