|
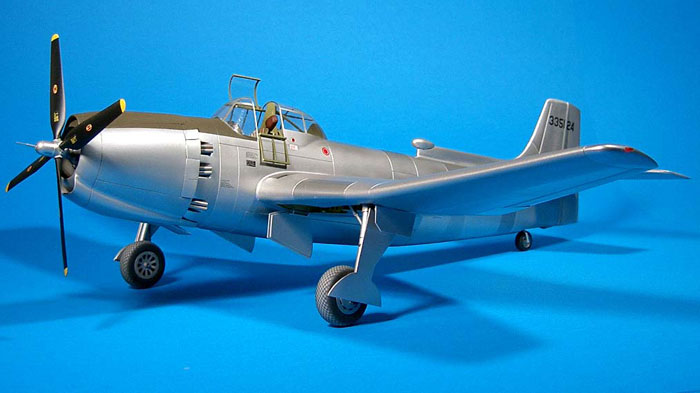
1/32 scale scratchbuilt
Vultee XA-41
by Frank Mitchell
|
 |
|
Vultee XA-41 |

HyperScale is proudly
sponsored by Squadron.com
As some may have noticed, I have a thing for big,
broad-shouldered, aggressive-looking airplanes. If they happen to be
prototypes, that just makes it better. The Vultee XA-41 certainly fits
into that category. It was a one-off prototype, definitely big (54-foot
wingspan), certainly aggressive-looking, and even though it was single-engined,
that engine was a Pratt and Whitney R-4360.
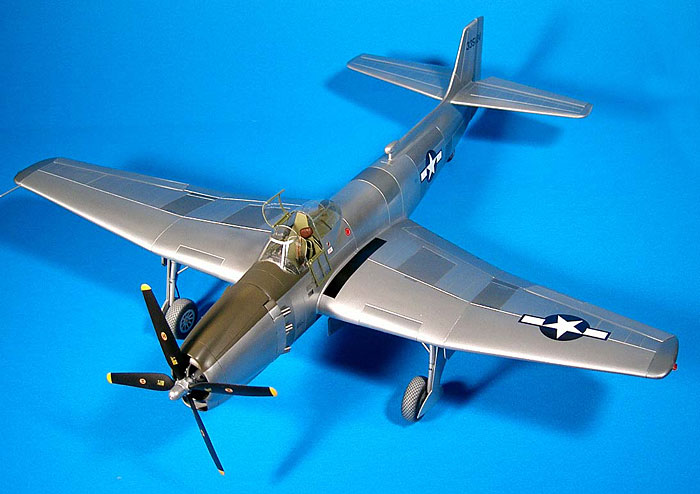
The XA-41 was originally ordered in November 1942 as a dive bomber, but
the contract was later amended to change the role from dive bomber to
low-level ground attack. Only one was completed. It made its first
flight on 11 February 1944 and showed relatively good performance. It
could, for example, turn inside a P-51. Since the XA-41 wouldn't have
been ready for combat until late 1944 or early 1945, the production
program was canceled along with construction of the second prototype.
The first prototype was completed primarily as a
test bed for the R-4360, but in actuality, I suspect that the airplane’s
primary problem was the jet engine it did not have. In production or
not, however, I still thought that it would make a neat model and so
gathered up what information I could find.
The model was built in my usual way, so I will let
the pictures do most of the talking. I suspect I will be expanding this
someday to make a presentation (or maybe even a book chapter), but if
you have read any of the other articles I have done on scratchbuilding,
there won’t be much all that new.
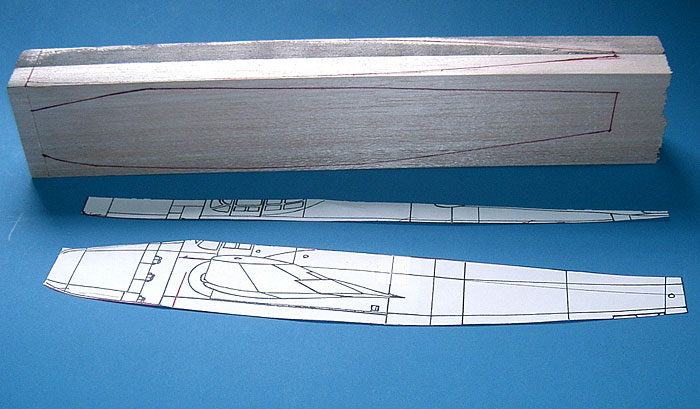
The basic molds were carved from balsa (wing and fuselage) and basswood
(tail). After being vacuum-formed, the real work could start, beginning
with the wings. One problem was the very thick inner wing, and producing
the pronounced outer dihedral. I chose to produce one mold for the
entire wing, and then cut it into sections after molding the plastic.
That worked pretty well, but even so, because the wing was too large for
my vacuum-forming capability, I had to heat and smash in four sections
which were cut to match the divisions in the wing. Another
(self-induced) problem was the fact that I mis-measured the drawings,
and therefore had to cut the wing at the centerline and add a couple of
mahogany spars to increase the span. Fortunately, I also made the same
mistake on the outline so that when the span length was corrected, the
wing outline in plan view was right on.
Luck, not skill.
Click on the thumbnails
below to view larger images:
The mistake was actually beneficial in another way since having the
spars made it possible to cut a much smaller area out of the fuselage to
mount the wing. That avoided a nasty little problem of cockpit
interference and a very weak fuselage. Again, a matter of luck, not
planning.
Once the wing was skinned and the surface was primered and finished to
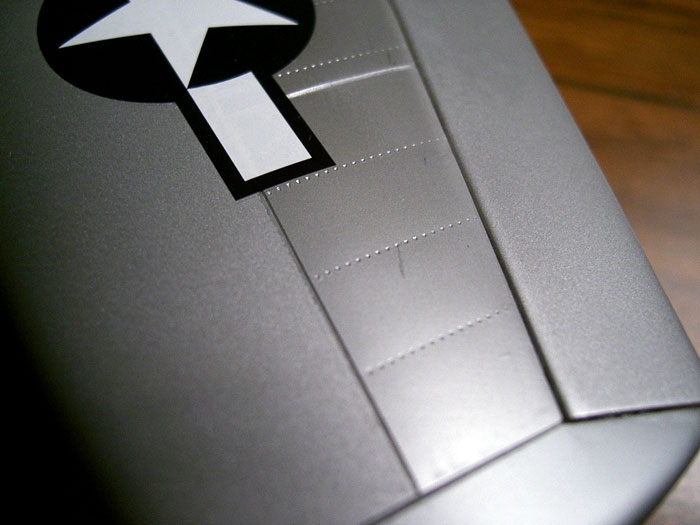
my satisfaction, I tried using the new Rosie the Riveter. I have not
really been an advocate of rivets, for a variety of reasons, but I
decided to give it a try on this model. I made no attempt to do all of
them, just enough to give a suggestion, and mainly on the wing and tail
surfaces. I have to admit that it does give a good deal of character to
the surface, and when I used sufficient pressure to get good rivets, the
skin over the balsa core “pushed in” just enough to give a pleasing
surface appearance. This tool is a good one and I will have to play with
it some more. Stay tuned.
One rather tricky area on the XA-41 was the landing gear, which has
curved main legs. I guess that was to make the very large wheels fit
properly. Whatever the reason, they made life interesting for a while.
The materials were brass and aluminum tubing. The wheels were cast resin
from turned wooden masters using centers from a 24th P-51.
The fuselage was fairly straight-forward, apart from the size. The skin
was vacuum-formed over balsa molds. One trick is that I carve the basic
shape of the cowling as a part of the fuselage, therefore assuring that
it will fit and match the shapes after being cut off and detailed. The
canopy was a separate mold, and I used vinyl for the final shape. The
cockpit area was removed from the fuselage and detailed in the usual
way.
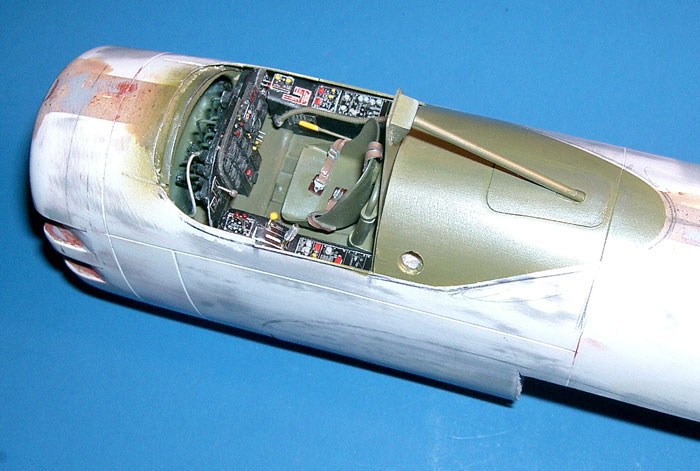
As with most prototypes, every picture shows some changes, and the XA-41
is no exception. I chose to portray the aircraft in a very early
configuration, without the spinner and armament. This was decided
because of a chance visit at the IPMS Phoenix Nationals. Obscureco had
the incredible F2G Corsair conversion and I immediately bought one. In
it, I discovered a beautiful R-4360. Immediately returned to their table
and, accompanied by whining, begging, and perhaps a few tears, asked if
they would provide a spare engine. About two weeks later, an engine
appeared in the mail. These are great people; go buy a couple of their
kits. That is why the early version; it allowed me to showcase the front
of the engine and the prop.
The tail construction was similar to the wing, I just used basswood
instead of balsa for the basic shape.
The assembly was pretty simple; no big fillets to deal with. I did have
to turn the ADF football from acrylic rod and fit it to the basswood
fillet, but that wasn’t too bad.
 On
the real aircraft, the forward section of the wing was smoothed, filled,
and obviously painted as opposed to the natural metal of the rest of the
aircraft. Therefore, this section was painted in darkened Testor’s Flat
Aluminum with a about a fourth of it being Floquil Flat finish. The
latter allowed me to mask off the wings without anything lifting. On
the real aircraft, the forward section of the wing was smoothed, filled,
and obviously painted as opposed to the natural metal of the rest of the
aircraft. Therefore, this section was painted in darkened Testor’s Flat
Aluminum with a about a fourth of it being Floquil Flat finish. The
latter allowed me to mask off the wings without anything lifting.
|
|
Natural
Metal Finish and Markings
|
The “natural metal” paint used was Alclad, which I
have used for many years, even back when it was known as Spray N’ Plate.
I have always used it directly over well-sanded automotive lacquer
primer. I don’t see any great benefit from using additional coatings
such as a gloss paint, since it doesn’t seem to add much except an
additional spraying (and waiting) session (which, for me, means another
opportunity to screw up) and another coat of paint to hide details.
For those that might be interested, my way of applying Alclad is to
first paint any colored markings, anti-glare panels, etc. After masking
these off, I then apply a good coat of Aluminum shade to which I add a
dollop of retarder (I think this gives a much smoother finish and adds
only a couple of minutes to the drying time). After that is thoroughly
dry, usually overnight, I polish this basecoat with something like a
silver polish or whatever is available. For the XA-41, I used Brasso,
applying it with a damp rag and immediately polishing with an old
T-shirt. Obviously, one uses a bit of a light touch, but the dried
Alclad will take a lot. The “paneling” process then begins.
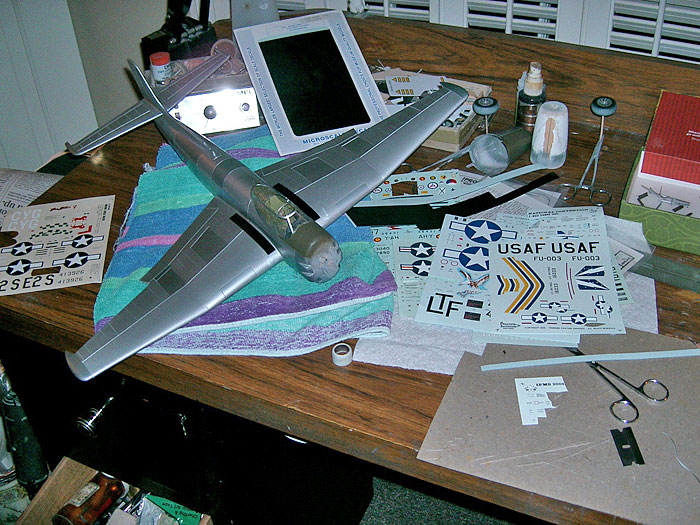
I don’t use the many alternate shades available. No particular reason
other than I hate cleaning the airbrush that often. Instead, I will plan
out which panels I want in order of their “darkness” or shade, and mask
off a number of them with Frisket, drafting tape, or whatever is handy.
Usually, I will try to mask three or more sets of them at a time. I then
fill the airbrush cup with Aluminum, add a bit of black, blue, or
whatever color I am after, and spray the first set of panels. I will
then add a bit more black (or whatever) to the cup and spray the next
set, and so on. The masking can be removed almost immediately, and the
whole process starts over, but I end up having to clean the brush only
once. I also add a bit of retarder to every cup. When the painting is
complete, I might polish a few of the panels, or leave them, or whatever
seems appropriate. All this is just based on only my experience and
there are, of course, many other ways to use the Alclad paint.
One other point about the paint is the wheels. I have a friend that is
an electronics/computer genius-type that came up with some strips of
plastic that had a waffle pattern. He said they would work well for
simulating the tread pattern of WWII tires without the aggravation of
cutting the shapes. He was right.
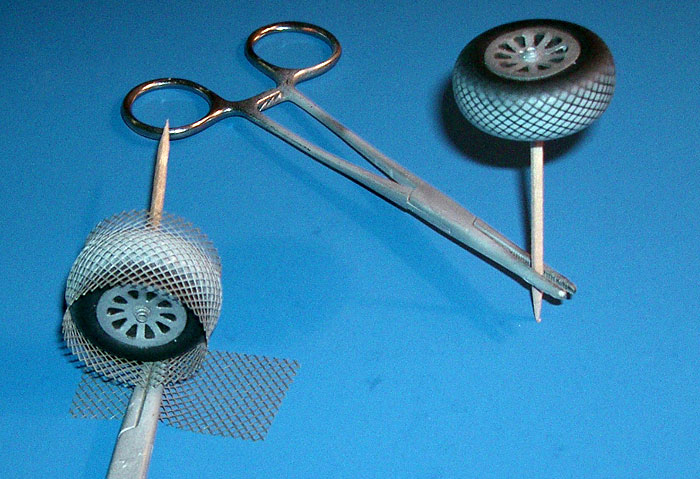
As can be seen in the photo, the strips are wrapped
and clamped around a tire that has already been painted black (or tire
black, etc.). Then, a thin coat of gray is sprayed at a 90 degree angle
to the tire. After unclamping the strips, you have very nice looking
tires. Don’t ask me anything else about the strips; I haven’t got a
clue, but I have just about used them all, so I will be calling him
again soon!
The decals are from a variety of sheets in my stash, some of which go
back 30 or more years.
Final assembly went well with no major hassles and the final touch was a
coat of Future to the canopy applied with a Q-Tip.
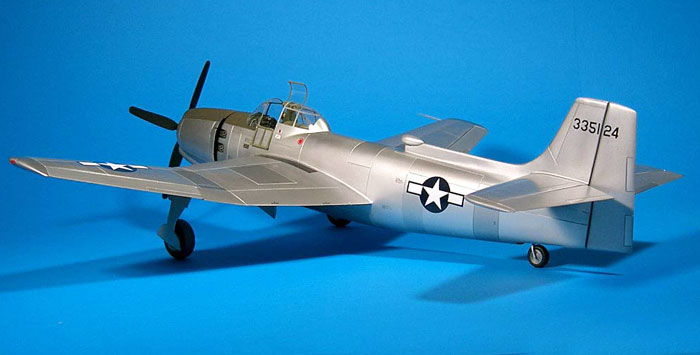
In all, another odd-ball to add to my collection; there are a few more
waiting---
Click on the thumbnails
below to view larger images:
Model, Images and Text Copyright ©
2005 by Frank Mitchell
Page Created 06 January, 2005
Last Updated
07 January, 2005
Back to
HyperScale Main Page |
Home
| What's New |
Features |
Gallery |
Reviews |
Reference |
Forum |
Search