|
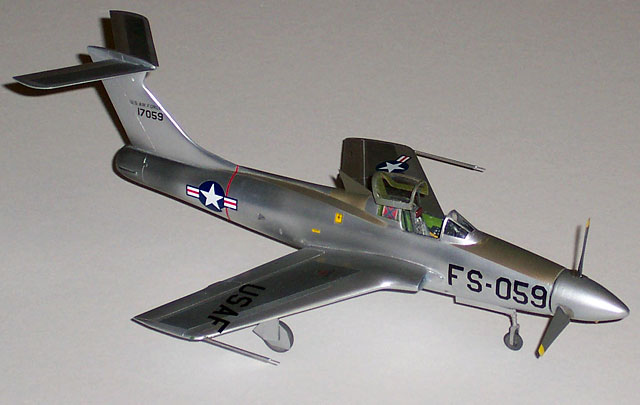
MainTrack's 1/72 scale
XF-84H
Thunderscreech
by Bill ‘C2C’ Dye*
|
 |
|
XF-84H Thunderscreech |

HyperScale is proudly supported by Squadron
If only there was a recording of the sound this thing made . . . .
No, I never heard it. From some of the, albeit little, information I’ve
read it probably is best that I never did! Stories of ground crew
getting nauseous, high number of miscarriages around Edwards around the
time this thing flew, etc. ‘Old wives tales’? Don’t know. Maybe someone
does.
This being one of the aircraft in the F-84 family had “Make Me, Build
Me” all over it for me. Several years ago I found the Execuform kit and
then a few years later the 1/72 scale MainTrack Hanger kit . . . or
maybe it was the other way around.
The kits sat in the ‘KIT BUFFER’ box. (‘Eww, I’m gonna build THIS one
NEXT’ so you put it in a special box; the KIT BUFFER BOX (KBB). Two
weeks later another cool kit arrives in the mail. ‘EWW, OK, THIS one is
next’ and The Box contents grow . . . and grow . . . ) So, anyway, I see
these ’Screech kits in the KBB along with some reference photos and
magazine references. I finally took the plunge and started sorting
through the articles and data. I also compared the two kits and decided
to build the MainTrack kit ‘Project X’?. By the way . .what ever
happened to them?
Why MainTrack? It was a gradual decision, made after looking at
references, the kits, weighing difficulty, etc. While the Execuform kit
had more detail for the nose/propeller interface, it just didn’t look
right to me. I didn’t do a dimensional check (and to be totally
objective I guess I should have) but the MainTrack blobs of white
plastic looked better to me than the Execuform blobs of white plastic .
. get my drift here?
In a moment of weakness I decided ( ♫ trumpets) the finished model would
have an open canopy. I looked at my model collection and tried to remind
myself . . ‘When was the last time you looked inside the cockpit of that
1/72nd F-100D that you spent #@&$! hours detailing?” . . . Ahhh, that
would be . . never!
But, my only excuse is that the open canopy configuration is very
unusual for most F-84 family members, so, I took the plunge.
I studied the plans (from the Execuform kit, nice plans btw) and then
studied the white blobs. Pretty straight forward. The big decision is
what you use as the reference for the wing and tailplane alignment. I
chose looking straight on at the nose that the intakes and wing/fuselage
joints were the roll reference. Looking from the top, the wing root
leading edge was the longitudinal reference.
The former was difficult. The wing/fuselage joint and intakes were close
but no cigar. I had to reshape one of the intakes to get a more
symmetrical appearance. I looked at the Execuform kit and I think a
similar predicament might exist (no I didn’t build it, but the
engineering looks similar).
I worked on the cockpit more than I should have. Even with the canopy
up, again, when was the last time I looked inside. But it looks OK. The
kit has all the necessary bulkheads and panel/seats, etc.
I made a wing spar out of brass rod and with the wings shaped, trailing
edges scraped and sanded, I put the fuselage on a drawing board with
clay aligning the vertical tail with a plastic triangle sighting from
the aft as well as from the forward view. I inserted the wings and glued
them with 24 hour epoxy (gives you lots of time to fiddle with it). This
alignment was the most challenging thing. Anhedral, wing incidence and
looking from the top, wing root fore/aft position and same sweep back
angle (are the tips of the wing at the same fore/aft station?) all had
to be checked and rechecked.
(Did I mention this was a vacuform kit . . .Oh, sorry, it’s a vacuform
kit.)
Add tiny brass rods to tail planes, drill holes, glue, align, wait 24
hours. Looks like an airplane. Make airplane noises with ‘rough airplane
in hand, “Swwwwiiiishhhhhh” - wait . . . . . 55 years old . . not
supposed to do that anymore.
Da nose: The Execuform nose diameter was way off, or, the MainTrack
fuselage diameter at the nose was off. The MainTrack nose was 2 plastic
halves, sort-a round, but too small. So I got a hunk of balsa and glued
a brass tube in it with the matching next size up glued in the fuselage.
(Hint: slide another tube inside the tube to be glued in the fuselage.
The extra length is used as the alignment tool. When happy and 5 min
Epoxy glue sets, remove tube. If you inadvertently glued BOTH tubes in .
. you’re hosed! So don’t do that!) I sliced off the corners of the balsa
block and then chucked it up on the Black and Decker held in a vice
(wear goggles) and used the drill like a mini lathe. Several times
starting and stopping to check the base diameter and length with a
vernier caliber. This took about an hour or so from start to finish. I
coated the balsa nose with several coats of primer and hosed on some
Metelizer. Found mistakes, fixed them and repeated. Better.
After many hours of filling wing/fuselage joints etc. I coated the
plane with a grey auto primer. Sanded with 2000 wet and hosed on the
Testors metalizer (Alclad test aircraft in work now . .so I may switch
to Alclad. What brand of ‘Lacquer, Lacquer, lacquer’ paint Phil?).
I made the wing tip tapered pitot probes (say that 5 times fast) by
chucking up some brass rod in a Dremel tool and rolled it over a file
(wear goggles!). Don’t drop it on (through) your calf . . that would
really hurt! . . NO, I didn’t do that!) Each took about 20 minutes to
shape. I glued them in with 5 minute epoxy, a dab of white glue and then
metalizer.
This is interesting: I noticed on the photographs an ‘X’ on the right
rear window. Strange place for a camera placard. But, after looking at a
few more pictures, one in particular, I discovered that it was a
confederate flag! So, I went to the internet, downloaded a file, made it
really tiny, printed it and Future Floor waxed it to the inside of the
canopy. Neat touch! Maybe someone knows the story behind that!?
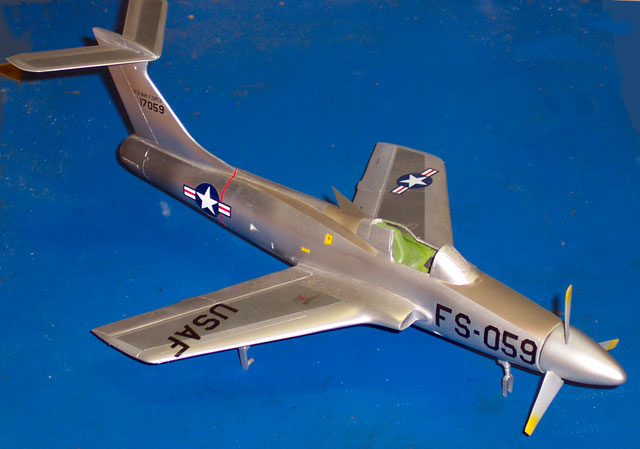
I stuck the propellers into little holes that I located using a piece of
cardboard with 120deg angles marked for alignment. The nose still didn’t
look right. I looked at the photos and the XF-84H had the props mounted
to what looked like swiveling disks (I’m sure to produce a minimal drag
interface at optimal pitch). Did I mention that the propeller tips were
spun at supersonic speeds? Hence the screeeeeech!. I grabbed some black
electrical tape. Took out my trusty paper punch and punched out several
black tape disks that the diameter just happened to be exactly the width
of the propellers at the base. I got a very sharp (new) Xacto knife and
cut the disks into halves such that they would fit around the propeller
blades and look round after both halves were placed with the propeller
sandwiched in between. I rubbed on some ‘Rub & Buff’ silver and stuck
them on the nose. It gives the ‘sense’ of these disks. Not exact, I
admit, but, looks OK to meeeee.
I finally painted the antiglare surfaces, put on the gears, doors,
decals, little thingies and finally the canopy (dipped in Future).
Done.
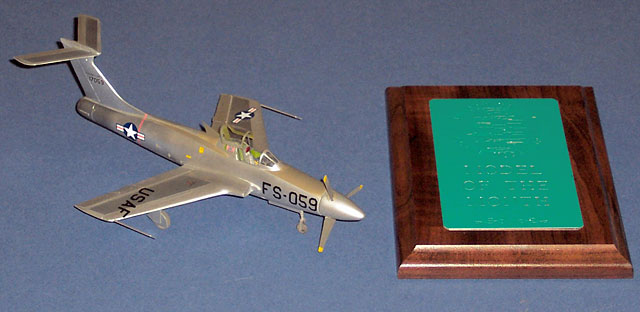
*C2C: Crap To Cake, a la Roy Sutherland at a Fremont
Hornets meeting several years ago: “Leave it to Bill to turn crap [bad
kit] to cake.” (Or words to that effect.)
Model, Images and Text by Copyright ©
2005 by Bill Dye
Page Created 26 October, 2005
Last Updated
26 October, 2005
Back to
HyperScale Main Page |
 Home
| What's New |
Features |
Gallery |
Reviews |
Reference |
Forum |
Search
Home
| What's New |
Features |
Gallery |
Reviews |
Reference |
Forum |
Search