|
1/32 scale Scratchbuilt
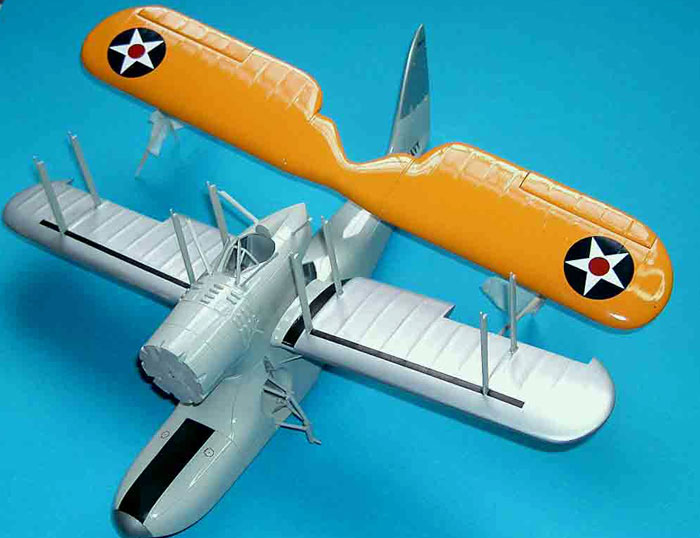
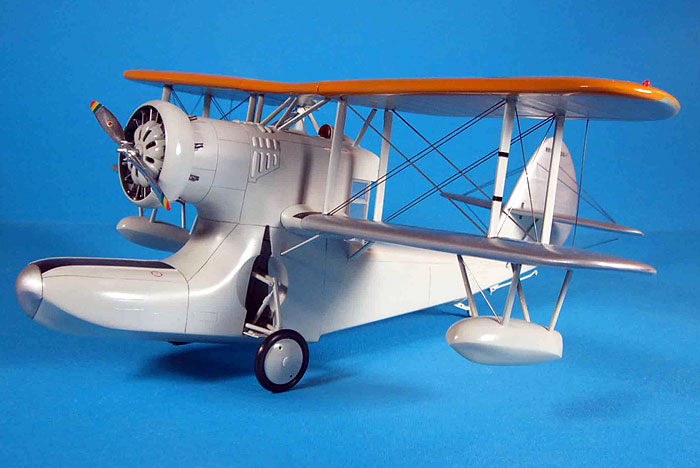
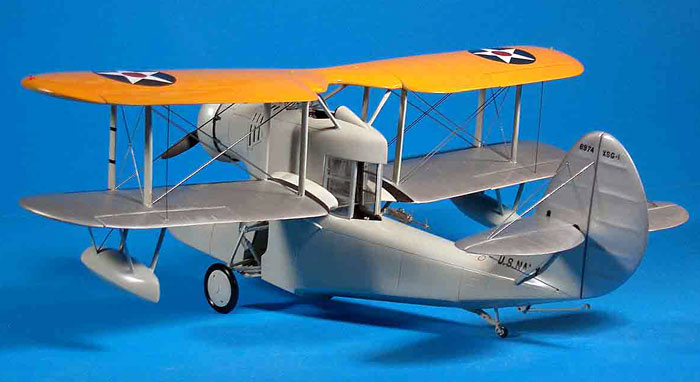
Great Lakes XSG-1
by Frank Mitchell
|
 |
|
Great Lakes XSG-1 |

HyperScale is proudly supported by Squadron.com
I have built a lot of strange airplanes in my
time, but this may be one of the stranger and one of the most complex
and frustrating.
The XSG-1 was one of a trio of prototypes built in the early Thirties to
respond to a Navy requirement for a “Scout” to be used for gun spotting
from cruisers and battleships. The one-and-only XSG-1 prototype was
delivered to the Navy in December, 1932.
The Navy test pilots were not thrilled with the XSG-1. For example, the
high cockpit gave good visibility but it was extremely difficult for the
pilot to get out of in a hurry, since he was trapped by cabane struts, a
headrest, and a high vertical tail. It also had heavy, sluggish
controls, and was unstable around all axes. The aircraft was (under)powered
by a 413 hp Pratt & Whitney Wasp Jr., and therefore had a top speed of
124 mph. The gunner's position in the awkward rear greenhouse was
practically useless with very limited field of fire. Further,
communications between the gunner and the pilot was nearly impossible,
and the operation of the gunner’s machine gun was awkward and stiff; he
actually had to reach outside the airplane (while hoping not to drop it
overboard), lift the gun from stowage, and mount it on a track post
inside his cockpit.
As icing on the cake, water-handling tests were a fiasco; among other
problems, the spray blinded the pilot and entered the gunner's
compartment, which nearly drowned him. It also had a tendency to kill
the engine.
It is hardly necessary to add that the XSG-1 was not accepted for
production.
All-in-all, my kind of airplane.
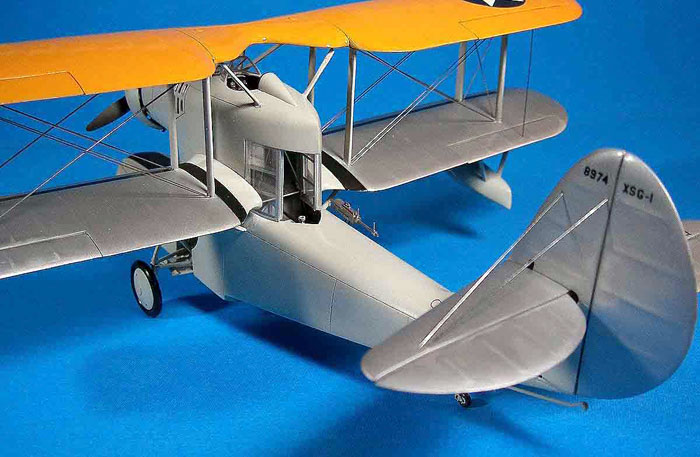
In general, the model was built in pretty much the
same way as all my scratchbuilts, but with several specific problems,
among them the fact that the landing gear had to be built very early in
construction, meaning that the rest of the airplane had to be built
around it, and the number and complexity of the struts on this bird;
there are 26 of the bloody things (not counting the tail and float
rigging). That resulted in very tight quarters around the cockpit. No
wonder the pilots didn’t like the thing. Add to all this some goofs on
my part, and you will understand why I was glad to get this thing
finished.
As usual, the pictures tell the story, I will just lead the procession.
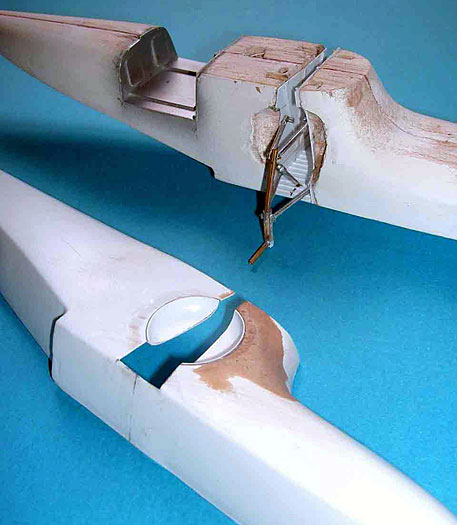
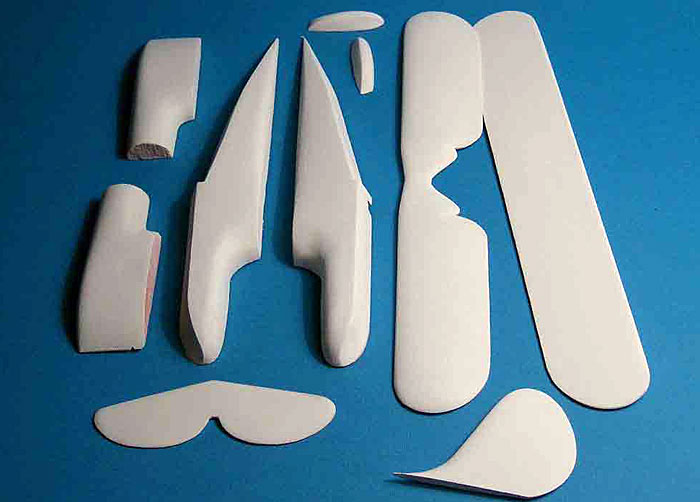
Balsa molds were carved for all the major parts. I chose to make the
fuselage (hull?) in two pieces because I was pretty sure that was the
only way I could get decent copies of the shapes.
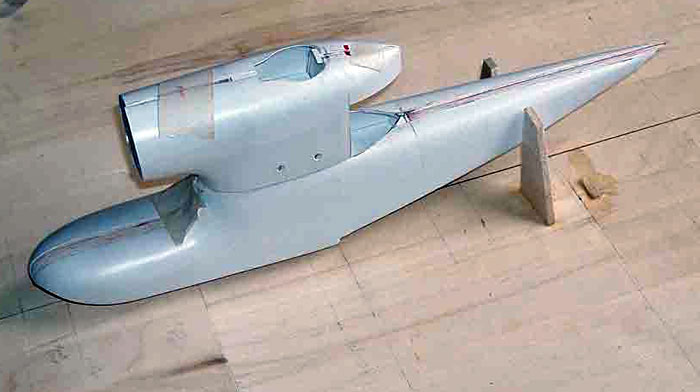
So, that meant four parts for the fuselage, plus
two for the vertical tail, but it still seemed the best way to go. The
molds were vacuum-formed and the pieces were ten cut out and fitted to
the wood—a lot of which would remain in the mold. Makes it much easier
to attach struts, etc.
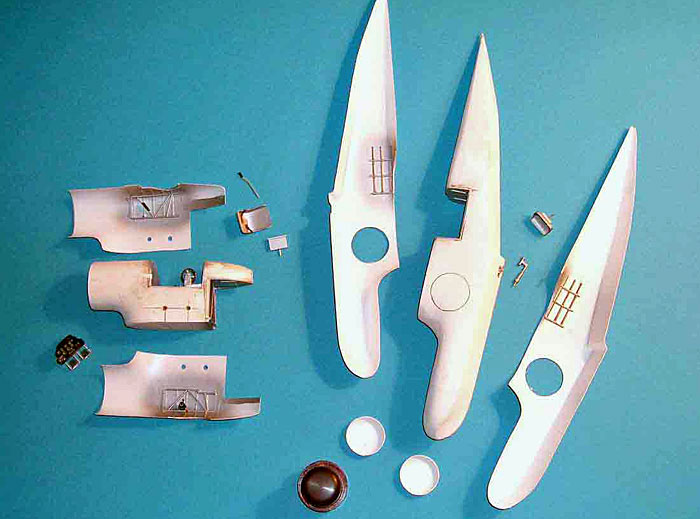
I had assumed (hoped) that I would be able to use
some landing gear pieces from either or either the F4F or the Curtiss
SB2C kits, but no such luck. Therefore, the gear was built from lots of
pieces of brass and aluminum tubing. Assembling it was a bit like
three-dimensional chess. Next, the interiors of both cockpits were built
up and glued into the balsa fuselage before the outer vacuum-formed
sides were attached. The vertical tail was then added to the fuselage.
The louvers in the fuselage were made by using short pieces of small
aftermarket quarter-round strips with a little hollowed out on the
“down” side.
The wings were fairly straightforward. I have tried a number of ways to
do fabric-covered wings, but keep coming back to the
styrene-strips-heavily-coated-with-auto-primer-and-lots-of-hand-sanding
method. Same applies to those on the tail surfaces.
The engine, cowl, prop, tailhook, and parts of the tailwheel were stolen
from an F4B-4 kit bought at a flea market for $5. The windscreen was
formed over a balsa mold as was the headrest.
Click on the thumbnails
below to view larger images:
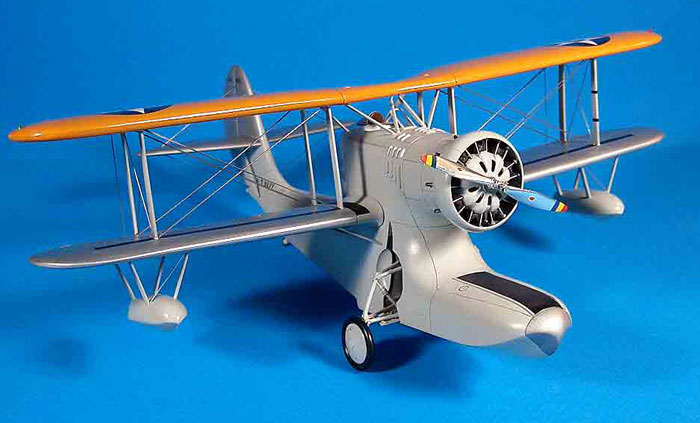
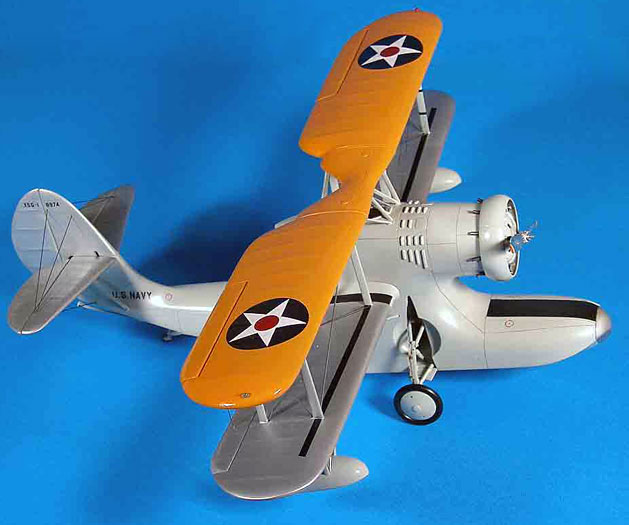
The wheels were turned from some scrap Corian© and
O-rings were used for tires.
Once all the basic work was done, jigs were made up from scrap balsa
and, with the model mounted on the building board, the tedious task of
making all those struts began.
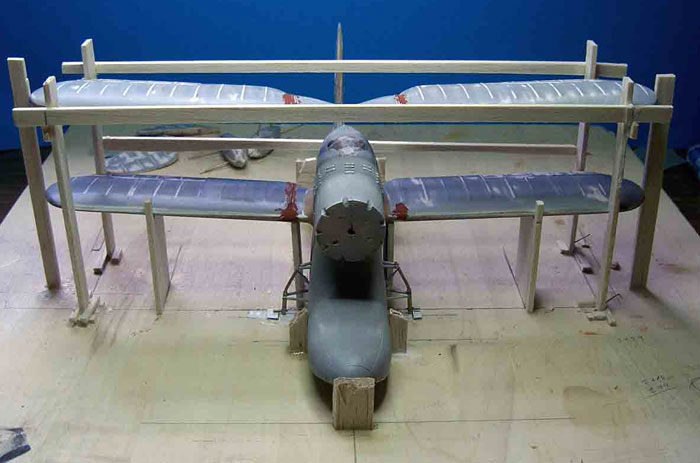
Just assume that it was highly aggravating and
never-ending, and leave it at that.
 Paint
was Gunze, but after the painting and “Futuring” was complete, and some
of the decals already in place, the entire surface cracked. Paint
was Gunze, but after the painting and “Futuring” was complete, and some
of the decals already in place, the entire surface cracked.
Although I had heard about this happening, I had
never had it happen to me. I used the same brands as always, waited the
same time between coats, and sprayed the same way, but it happened, big
time. After the battle with the struts, and now this, it was either
bounce the model off the wall or put it away for a while. Using great
restraint, I chose the latter.
After several weeks, the whole thing was sanded
back to the plastic and the entire process was repeated. Except, that
is, for the Future part. I was taking no chances this time and used
Floquil Flat Finish (thinned) as a top coat.
Once that was done, the decals (Yellow Wings
stars, computer small lettering) were applied (again), and the rigging
glued in place.
Bottom line is that this was a trial of a model,
to say the least. About all I can say is that it finished, for better or
worse.
Click on the thumbnails
below to view larger images:
Model, Images and Text Copyright ©
2006 by Frank Mitchell
Page Created 26 December, 2006
Last Updated
21 February, 2007
Back to
HyperScale Main Page |
 Home
| What's New |
Features |
Gallery |
Reviews |
Reference |
Forum |
Search
Home
| What's New |
Features |
Gallery |
Reviews |
Reference |
Forum |
Search