|
Fine Molds' 1/72 scale
X-Wing Fighter
by John Hoffman
|
 |
|
X-Wing Fighter |

HyperScale is proudly supported by Squadron.com
A long time ago, in a small town, far, far, away, a little kid
wondered out of a movie theater stunned by what he had just witnessed.
Witnessed twice, actually. When the first show ended I refused to leave,
so my Father let me stay and watch it again. And with that a new shape
and been burned into my brain, alongside all my other favorites. The
X-Wing Fighter...
Construction and Painting
|
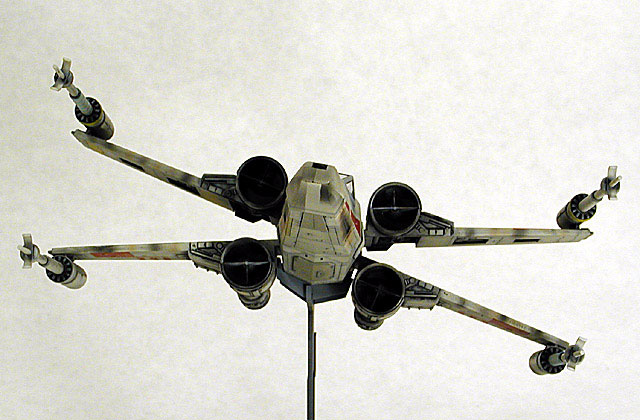
Fine Molds has produced a very nice little kit of this iconic Sci-Fi
space fighter, and no real problems were encountered during it’s
construction. The kit was built straight from the box, with the
exception of shortening the Targeting Scope arm. I did alter the
assemble sequence slightly so that I could paint and decal the model in
subassemblies.
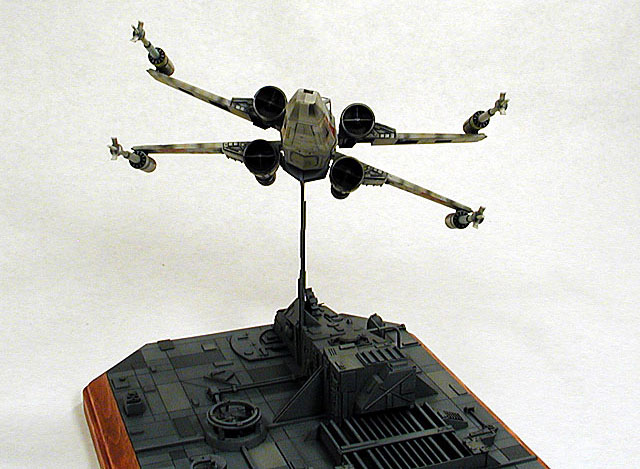
My one complaint about any of the Fine Molds Star Wars kits is that the
bases are not very interesting. Maybe if they were transparent?
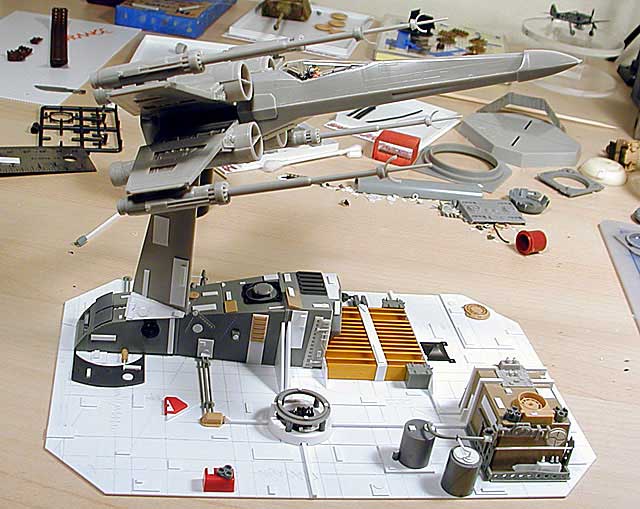
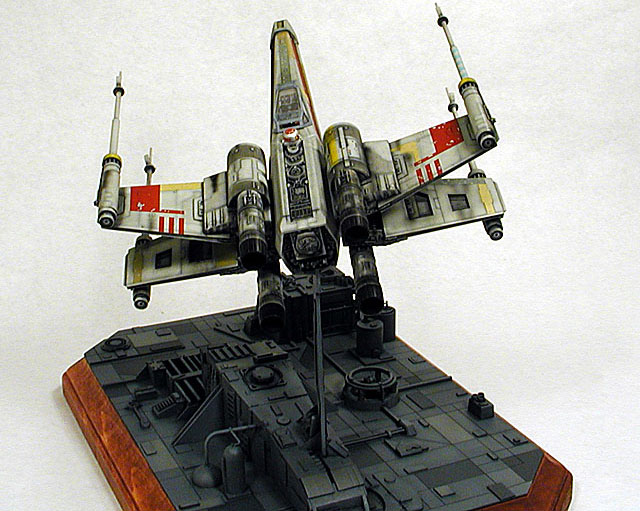
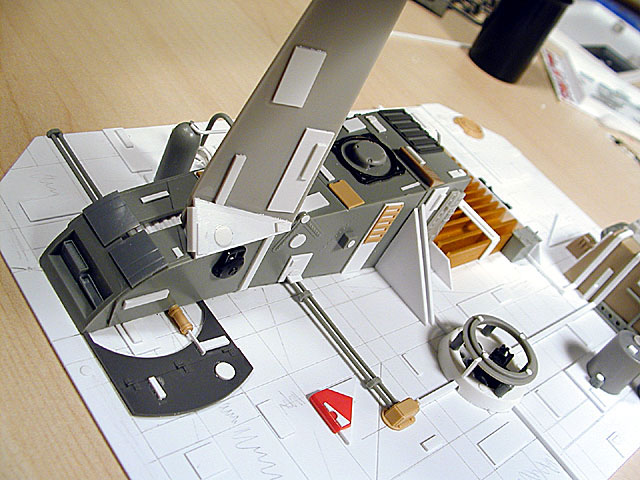
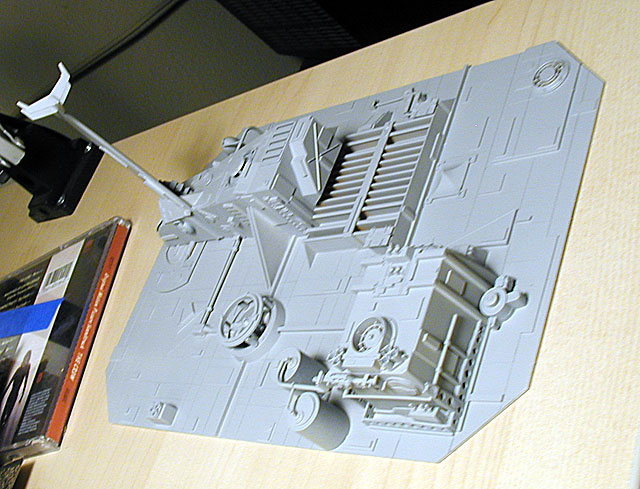
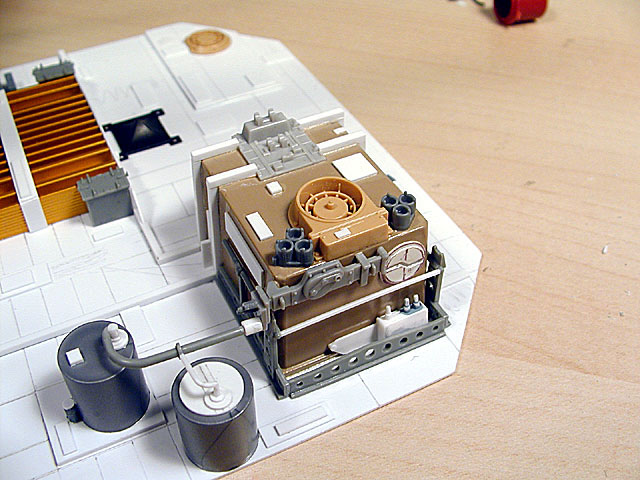
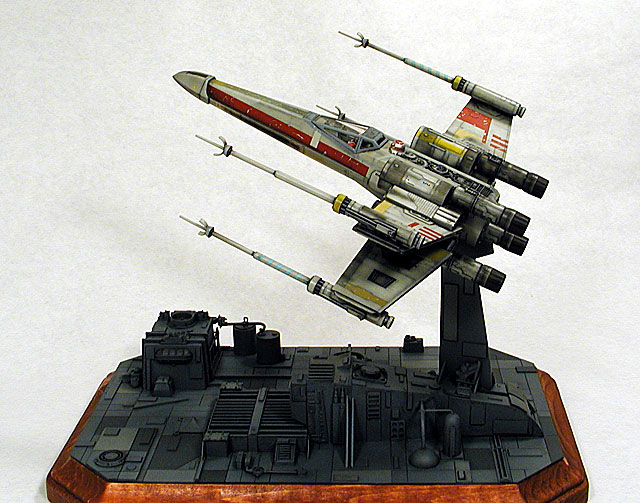
In any case, I decided to scratch build/Kit bash a new base for mine.
I started with a piece of .040 Styrene cut to follow the top edge of a
cheap pine base purchased at Michael’s. this was the scribed, at various
distances for panel lines. To this different size and thickness Styrene
bits were added to give some variation. The rest came from my bits box,
including the Heat Sink. Just like the Studio models. I did use the
upper part of the Fine Molds base, the cradle holds the model very
well....I just wish it had been clear....... I positioned it so that the
X-Wing Would appear to be climbing out of an attack run.
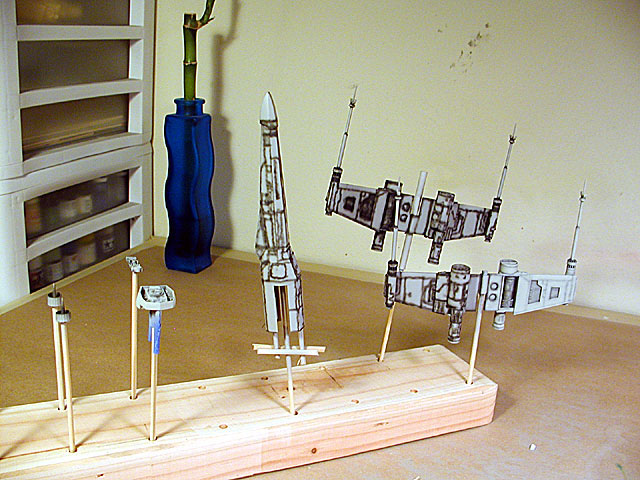
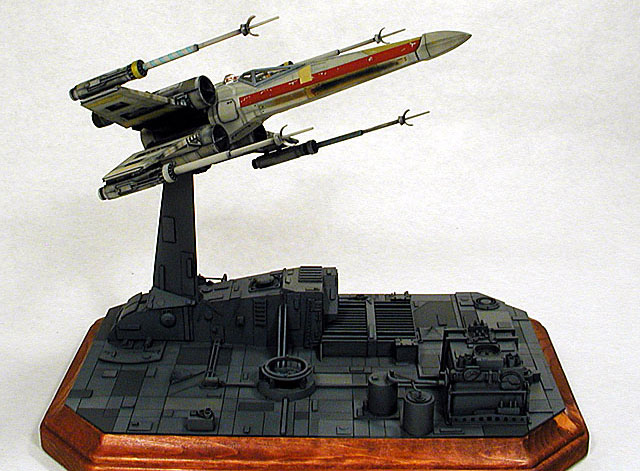
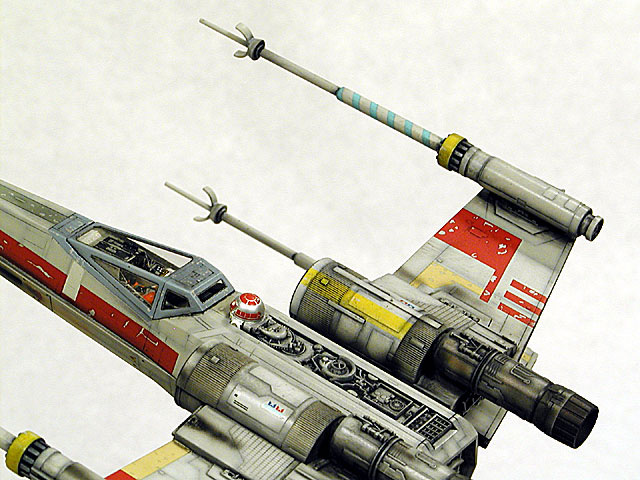
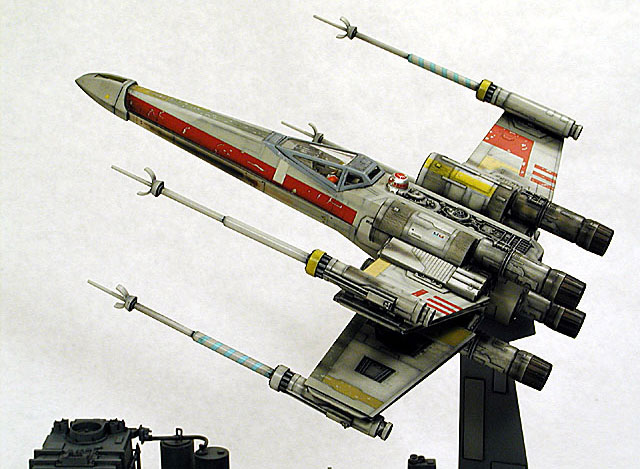
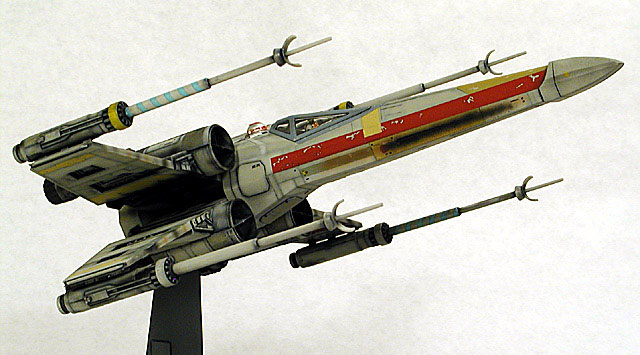
I chose “Red 3” because it is the most beat up of the four options. As
with some of Fine Molds 1/72 aircraft, all of the markings are provided
as decals.
These are “Pre weathered” but only so far as chips and scratches.
Some of the colors seemed very bright, the green in particular. After
reviewing my references, I decided to lose the green decals and mix a
color that matched the photos. An extra incentive was that “Red 3” has a
shorter Afterburner can on the upper right engine, according to Fine
Molds. I could not find any reference to support this, but it looked
cool and gave me an idea.......But first things first.
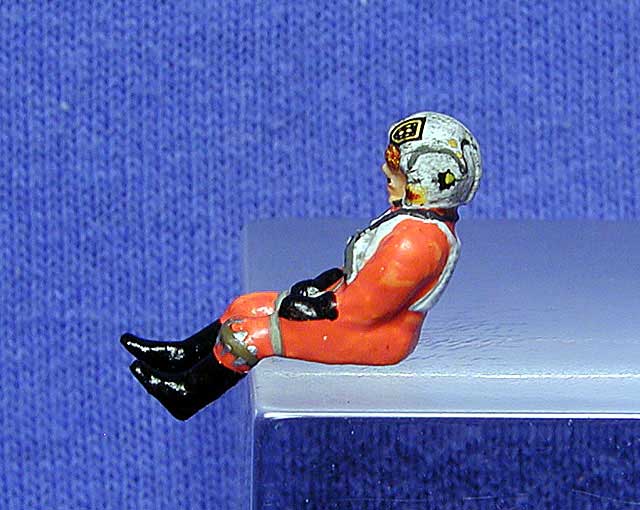
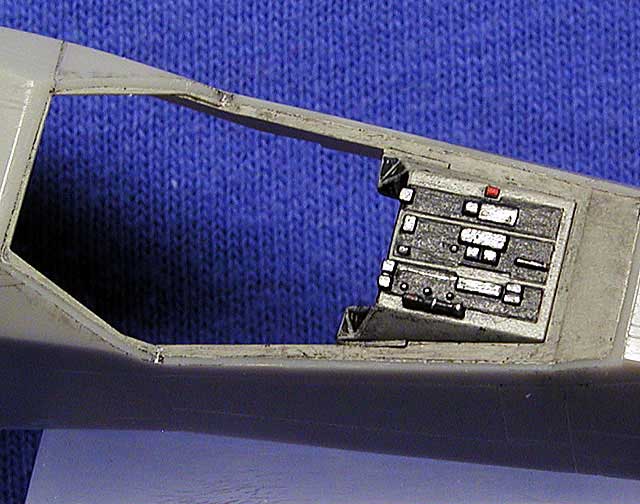
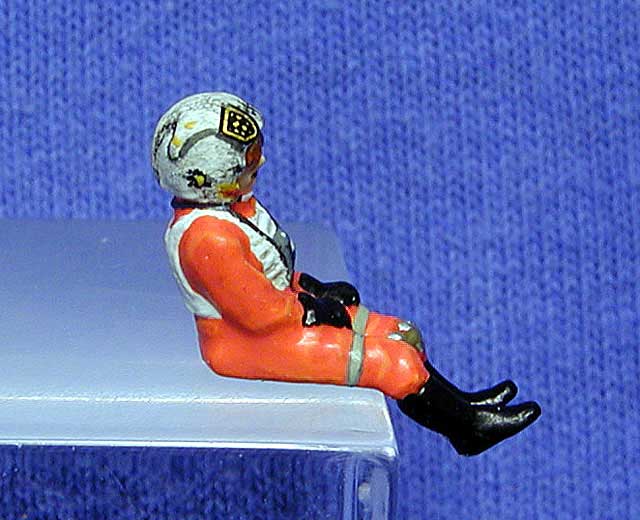
Painting the Pilot and Cockpit kicks off the build. The kit decals
provide the main helmet markings for each of the different choices, but
I wanted to go a little further, so I loaded the DVD and watched the
various shots of Bigg’s Helmet and mustache..... You have to have that!
Once I was satisfied I had seen the dogfight above the Death Star enough
times I freeze framed a good shot showing the markings and copied them
with Citadel acrylics. Citadel was also used for the bright orange
flight suit.
Click on the thumbnails
below to view larger images:
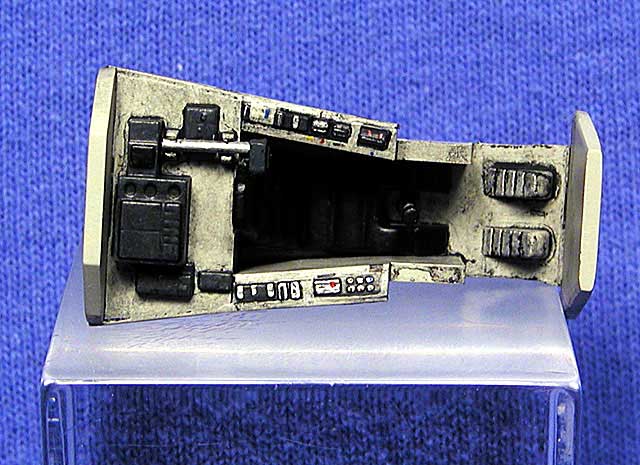
Now for the cockpit color. No color is listed. I found an English
translation of the instructions, but it just says to use “Fuselage
color.” Not much help. There is however a color equivalents chart which
listed Gunze and Tamiya colors to use. I went with Tamiya. The Fuselage
color is a mix of X-2 +XF-20, 1 to 1. This produced a medium grey, but
still to dark in my opinion so I added more white until It looked right.
Most X-Wings I have seen finished end up to dark, so I wanted to avoid
that.
After a quick spray of “Fuselage” color I painted in the details and
added the Instrument decals. Everything was sealed with Future and a
wash was applied with lamp black oil paint to dirty things up. A little
weathering was applied to the helmet as well.
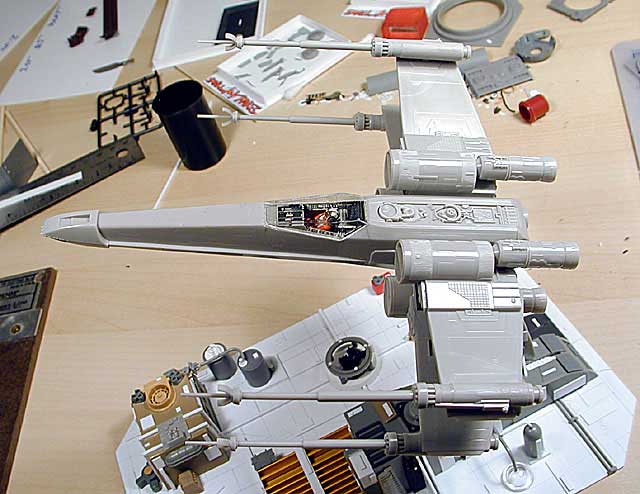
 After
a coat of Mr. Surfacer 1000, painting began, I used Testors' Interior
black for presiding. Then applied my “Fuselage” color, leaving a little
black peeking through here and there. After
a coat of Mr. Surfacer 1000, painting began, I used Testors' Interior
black for presiding. Then applied my “Fuselage” color, leaving a little
black peeking through here and there.
After the base color was on, I masked off areas to be lightened or
darkened, to add some depth.
All of this was done using the base color, slightly tinted, so as not
to be to stark. The entire model was sealed with future for decaling.
Click on the thumbnails
below to view larger images:
The decals are very high quality and laid down very well with the
help of Micro Set and Sol. I did not use all of the kit decals. There
are some very tiny black “dots” that were just too much for me so I
skipped them. The Canopy frames are also supplied as decals. I was not
sure about the color, though, and the idea of masking around the decals
later for the flat coat was not appealing....
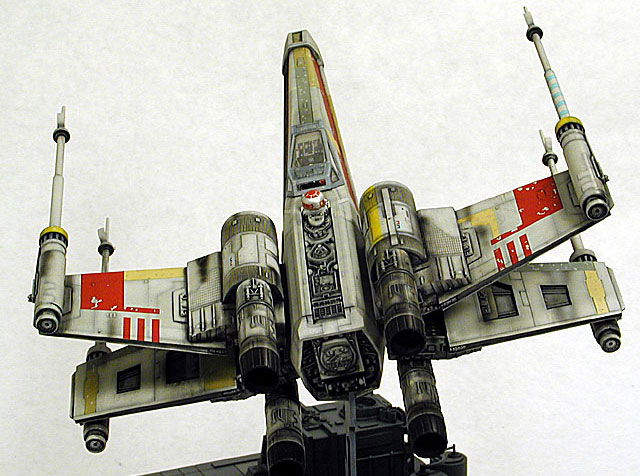
As mentioned, Fine Molds provides decals for all the markings, plus
additional color panels. These may represent replacement panels or
repairs. My reference for “Red 3” showed that this was incomplete or, in
the case of the lurid green, just wrong. I mixed Tamiya colors to match
the decals, or photos as the case may be, and added these additional
panels. Chipping was then added using the base color.
Once again every thing got a coat of Future in preparation for
weathering. I used lamp black oil mixed with Turpenoid, applied in a
fairly heavy wash.
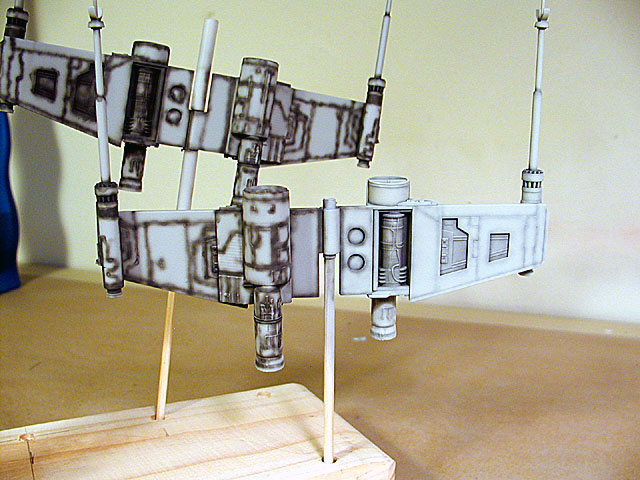
This was then wiped off after a few minutes. Back to that Short AB
engine. I decided that this would be a good opportunity to make my
X-Wing a little different. The Yellow stripe on that nacelle is correct,
so the whole thing may be meant to be a replacement. Maybe from an
earlier Airframe? Thoughts of Pacific Corsair's, and Russian front
190’s...... Well, OK, I did not go that far but I did dirty it up a bit
more. After all the washes, I went in with the air brush and added all
the scorching and some subtle discoloration. The Afterburners were
painted with Testers Burnt Iron. Once I was done “noodling” everything,
Testers Flat lacquer was used to give it a nice uniform satin sheen.
The base was painted using the same techniques and materials as the
X-Wing.

The greys are all variations of XF-63 German Grey. The color is
intentionally dark, so that the X-Wing would stand out from it.
The photos were taken using an Olympus C-2100 UZ set to Aperture
priority.
Now I need to build a Tie Fighter chasing it...
Click on the thumbnails
below to view larger images:
Model, Images and Text Copyright ©
2006 by John Hoffman
Page Created 07 October, 2006
Last Updated
21 February, 2007
Back to
HyperScale Main Page |
 Home
| What's New |
Features |
Gallery |
Reviews |
Reference |
Forum |
Search
Home
| What's New |
Features |
Gallery |
Reviews |
Reference |
Forum |
Search