|
Hobbycraft's
1/48 Scale
Bell YP-59 Airacomet
by John
Valo
|
 |
|
Bell YP-59 Airacomet |

Hobbycraft's
1/48 scale YP-59 Airacobra is available online from
Squadron
Once again, a nice little niche has been filled in
1/48 scale by Hobbycraft with the release of two
variations on the Airacomet theme.
In typical Hobbycraft style, the kits are basic
detail-wise, but of very nice quality with beautiful
scribed panel lines and good fit. Cutting Edge addresses
the most fundamental shortcoming of the kit with a
gorgeous resin cockpit set, so off we go!
The Airacomet has always been one of my favorites, so I
decided to embellish the model with a few extras. In
addition to the CE cockpit set, I spent a bit of time
refining the intakes, adding visible engine fronts,
dropping the flaps, and detailing the landing gear.
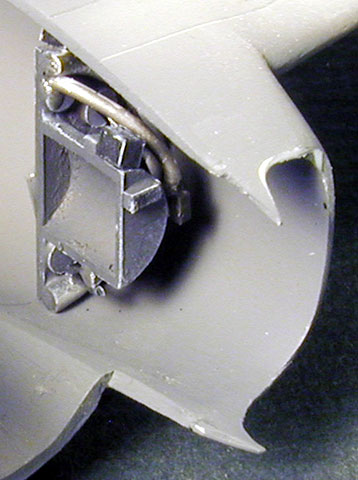
Intakes and Engine Fronts
The kit intakes are engineered to facilitate the
molding process rather than strictly represent the
prototype. As such, the intakes are a bit 'boxy' and
lack the distinctive fillets at the top and bottom.
These were corrected with a bit of sheet styrene and
filler, followed by sanding the intake lips to create a
more rounded appearance.
I scratchbuilt two engine fronts from bits of styrene
sheet, tube and rod; just enough to avoid the see-though
effect when looking down the intakes.
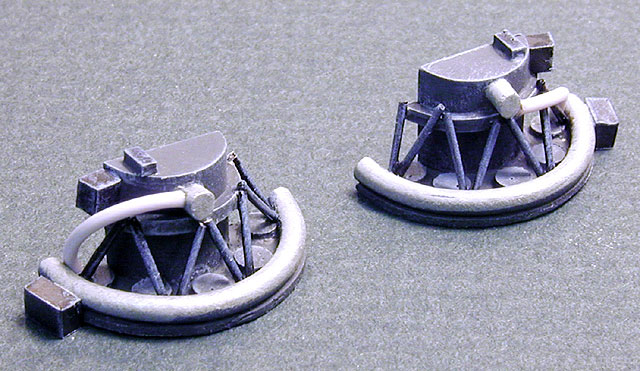
While these are not strictly 'to-scale', they add a
bit of visual interest, and effectively enough represent
the design of the actual engines.
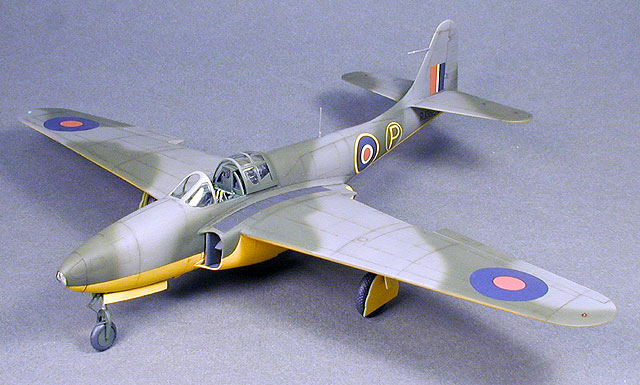
Flaps
Hobbycraft engineered the flaps as separate pieces to
accomodate both the fabric-covered early versions and
the metal-covered late (production) design with their
two releases. While the flaps are not intended to be
dropped, the way the parts are molded certainly makes
things easier for the modeler to do so. I removed the
locating pins, glued the flaps in the lowered position,
and added small strips of styrene at the underside hinge
points.
Once again, maybe not strictly accurate, but
effective enough. Can you see I'm a recovering AMS
sufferer?
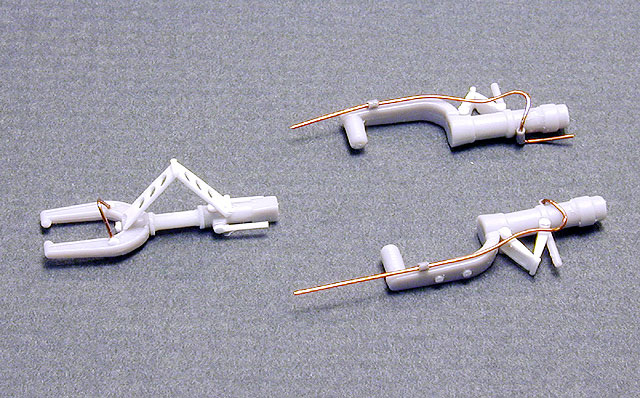
Undercarriage
After reading Tom Cleaver's P-59 review on Modeling
Madness, I took his advice and shortened the main
landing gear struts, and slightly lengthened the nose
strut. This really helped the 'sit' of the model. I also
added brake lines and scratchbuilt oleo scissors to all
three struts.
The vinyl tires were painted first, then given a nice
glazing of Future before attaching them to the plastic
wheels. I have found that the barrier provided by the
Future generally prevents the type of self-destructive
behavior shown by vinyl against plastic -- so far
anyway!
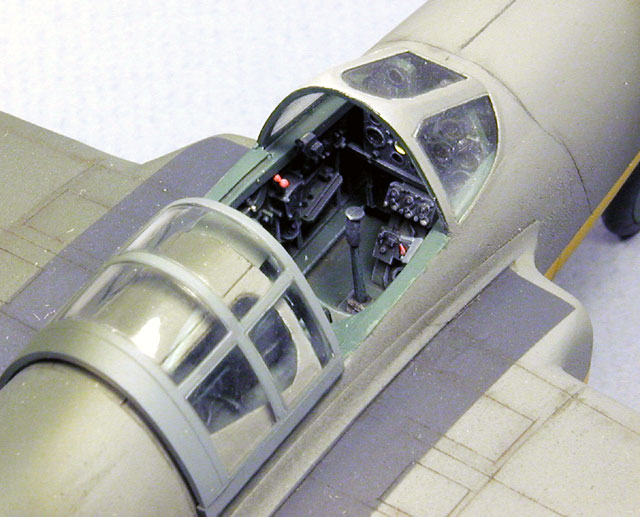
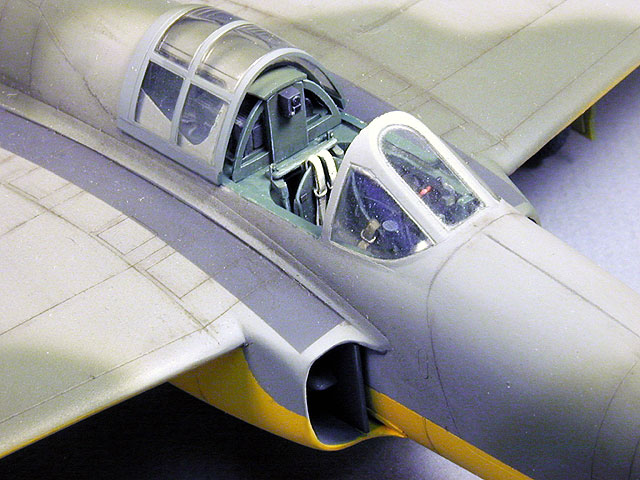
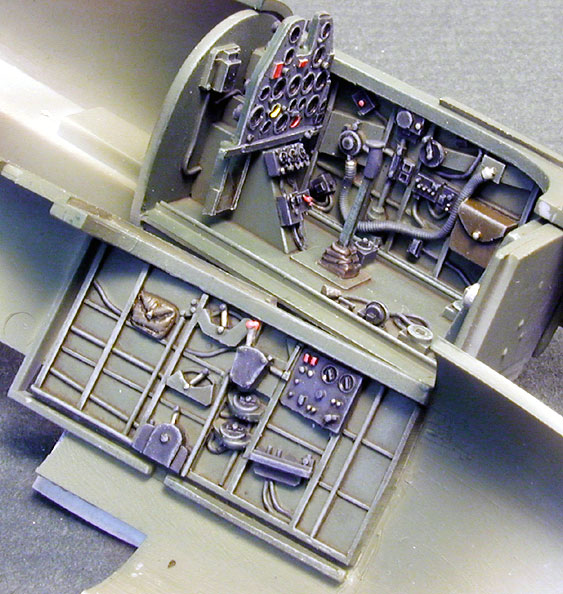
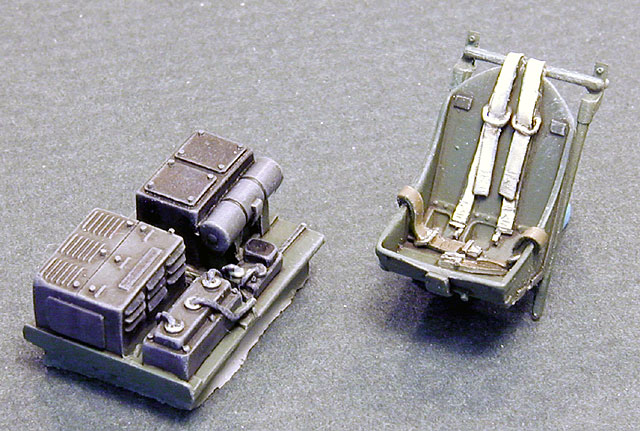
Cockpit
The cockpit set by Cutting Edge is simply beautiful,
and well worth the price. The detail is outstanding, and
it fits perfectly.
The kit provides the windscreen, canopy and rear
windows as separate pieces, however the canopy isn't
intended to be opened - it's just a bit undersized for
that. I rectified this by adding two small strips of
styrene on the bottom edge of the canopy, just enough to
give it clearance to be posed open.
The rest of the overall assembly is essentially
trouble-free. The kit fits together nicely, even with
the various optional parts to accomodate the early and
late versions. My only other addition was a small MV
lens in the clear nose to represent the landing light.
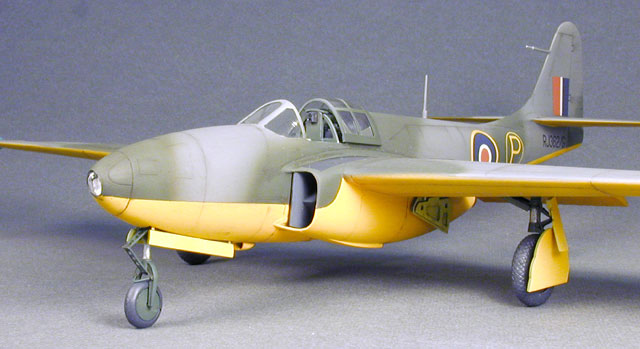
Although the Olive Drab and Gray prototypes are so
starkly attractive, I couldn't resist the British test
aircraft that is one of the options in the kit. Try as I
might, I couldn't find definitive proof whether the
particular aircraft I chose to model was armed, so I
elected to use the nose cap without the guns. I reasoned
it would be easier to add guns than to remove them, if
any evidence of armament eventually surfaces.
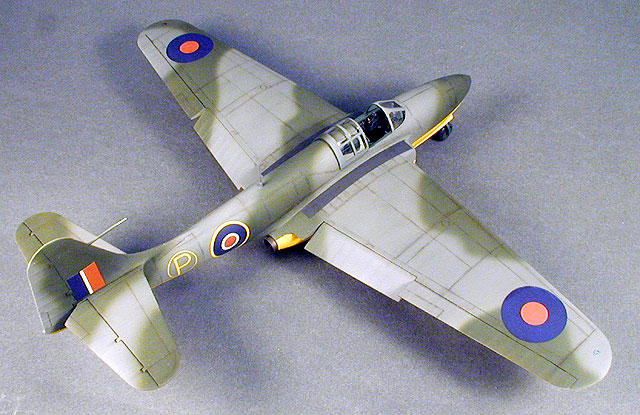
 The
model was painted with PollyScale paints, then clear
coated with Future. I felt that the colors of the kit
decals looked a little bright on the kit sheet, so I
substituted some spare Aeromaster roundels and 'circle
P' markings. The
model was painted with PollyScale paints, then clear
coated with Future. I felt that the colors of the kit
decals looked a little bright on the kit sheet, so I
substituted some spare Aeromaster roundels and 'circle
P' markings.
I had a few black and white photos of the landing
gear from the NASM restored aircraft, and they show the
struts as a dark color, while the bay and door interiors
are a lighter color. After much hemming and hawing, I
painted the struts 'Bell Green' and the inside of the
bays and doors in yellow chromate.
The Hobbycraft P-59 is a competent and
well-engineered effort, and builds into a quite
attractive model. The two releases provide a great
selection of marking choices, from OD and Gray to
Natural Metal to a three-tone-blue US Navy test bird.
The kit is somewhat basic in some areas, most notably
the cockpit, but the addition of the CE cockpit set and
a little work makes this kit a very worthwhile addition
to one's collection.
Recommended!
Click on
the thumbnails below to view larger images:
|
 Home
| What's New |
Features |
Gallery |
Reviews |
Reference |
Forum |
Search
Home
| What's New |
Features |
Gallery |
Reviews |
Reference |
Forum |
Search