|
Sd.Kfz. 184 "Ferdinand"
by
Ian Robertson
|

|
|
Sd.Kfz. 184 "Ferdinand" |

HyperScale is proudly sponsored by Squadron.com
What do the German Tiger tank and Ferdinand tank
destroyer have in common?
Both vehicles had their origins in a competition to
become Germany's premier heavy battle tank of WWII. Two designs were
submitted for Hitler's consideration in April 1942, one by Henschel and
one by Porsche. The Henschel design won the competition and soon gained
infamy as the Tiger I tank. The Porsche design, on the other hand, was
produced in limited numbers and modified into a tank destroyer (named
the "Ferdinand" in honor of its creator, Ferdinand Porsche) that by most
accounts was a bitter disappointment.
Ferdinands first saw action in Russia during the Battle of Kursk in July
1943. Although the Ferdinand was a successful tank destroyer when
engaging targets at long range, its complete lack of defensive armament
made it extremely vulnerable to close-in infantry attacks. According to
Squadron's "Tiger in Action", Ferdinand crews sometimes resorted to
firing an MG 42 machine gun down the barrel of the main gun to counter
infantry attacks!

Following the German defeat at Kursk, surviving
Ferdinands were returned to Germany and retrofitted with a commander's
cupola and a bow mounted MG 34 machine gun for protection. These
vehicles were redesignated as "Elefants" for service in Italy during
1944. Once again, however, the Sd.Kfz. 184 Ferdinand/Elefant was not up
to the task and suffered heavy losses.
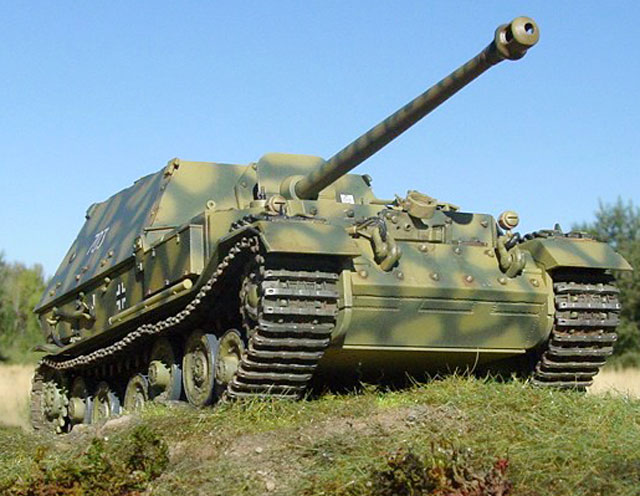
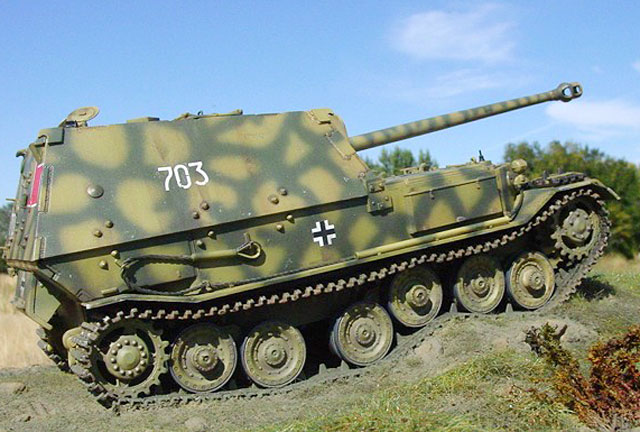
Dragon recently released both the Sd.Kfz. 184
"Ferdinand" and "Elefant" (kits 6133 and 6126, respectively) in 1/35
scale. While my experience is limited to the Ferdinand, my praise for
the kit should apply equally well to the Elefant since it is the same
kit with minor modifications.
The only significant criticism I have of the Ferdinand kit was the poor
quality of the decals (very thick, with clear parts that were not very
clear). Luckily, "Trakz" makes a beautiful set of decals for the
Ferdinand/Elefant, including many different number codes and unit badges
(however, there are no instructions for camouflage or decal placement).
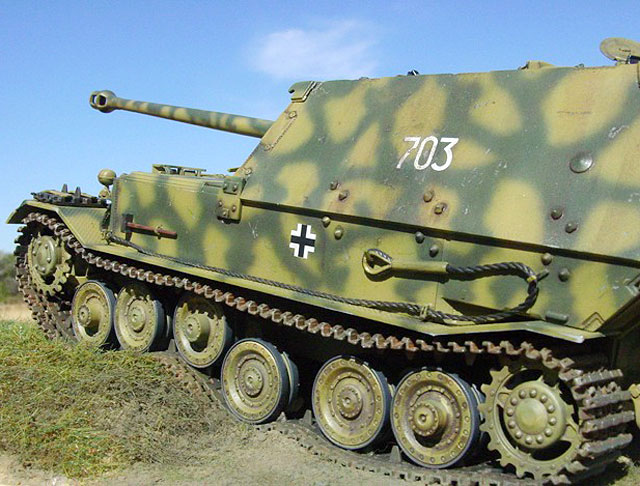
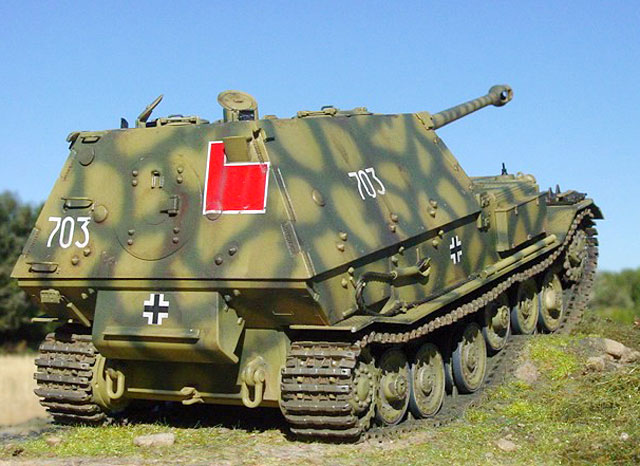
The following modifications were made to my model: (1) tow cables were
made from nylon string and parts from a Tamiya kit, and (2) replacement
steps and hand holds on rear and upper hull made from wire.
The Dragon Ferdinand is straightforward to build,
particularly if no modifications are made. I opted to reposition the
road wheels, a modification that required nothing more than cutting a
few small alignment pins on the suspension. However, this simple
modification made life difficult when it came to assembling the
individual track links that come with the kit. To assemble the tracks,
my first step was to attach the drive sprockets, idler wheels and road
wheels temporarily to the chassis using Uhu tac (which is similar to
blu-tac). Then, small stretches of track, approximately 15-20 links at a
time, were assembled with Tenax liquid glue and fitted around the
repositioned wheels. Once the glue set sufficiently to maintain the
track's shape, I would add the next stretch of track until eventually
the entire track was complete.

Care was needed to ensure proper sag of the upper
regions of the track before the glue set completely. Once the tracks had
dried completely they were removed along with the wheel assemblies and
set aside for painting. [Note - This procedure is well illustrated for
the Dragon Ferdinand in the November 2001 issue of "Military in Scale"
magazine].
I began by preshading the model's panel lines,
angles, and recesses with black and dark reddish-brown. I then sprayed a
base coat of dark yellow (Tamiya XF-60). The green lines were sprayed
freehand using a mixture of Tamiya XF-58 (field gray) and XF-61 (dark
green) using photographs as a guide for the general camouflage pattern.
Once the paint had dried I applied several washes of burnt umber and raw
sienna (Model Master enamels). Minor battle damage was simulated by
scratching the hull in places with the tip of a #11 exacto blade,
coloring the scratches with silver pencil, and then applying a wash of
burnt umber and raw sienna to the affected areas to tone down the shine
of the pencil marks.
The tracks were painted a mixture of Polly Scale dark brown and black,
followed by several washes of light brown and black until the desired
look was achieved. As a final touch, a very light (emphasis on VERY
LIGHT) dusting of SnJ metallizer polishing powder was rubbed with a
cloth on the tracks to give a metallic sheen to exposed areas.

Prior to the addition of decals, the entire model was given a clear
gloss coat of Future floor wax. Once the decals had dried, a wash of
burnt umber and raw sienna was applied to the decals to tone down their
bright appearance. The model was then given a final coat of Polly Scale
clear flat acrylic.
The groundwork consists of a base layer of
celluclay covered in fine sand, moss, and simulated grass. For the grass
I used Heki "Wild Grass Matt", product #1574. The Heki line of diorama
supplies can be purchased through European and Australian mailorder
companies, and perhaps others - use a search engine and enter the word "heki
wild grass" or something similar.
I fixed the model permanently to the groundwork to enhance the illusion
of the vehicle's weight.
Images of the completed model were taken outdoors
with a SONY digital camera set at its highest picture resolution (2048 x
1536 pixels). Other camera settings were as follows: 200 ISO film speed
(it's an option on my digital camera), 800-1000th/sec shutter speed,
F-stop 8.0, and fixed focus distance of either 20 or 30 cm. Images were
cleaned up using Adobe Photoshop 6.0 for the Macintosh. Specifically,
the resolution of some photographs was enhanced using the "sharpen
edges" tool. Sharpening images in such a way helps to restore some of
the clarity lost during image compression.
-
Cornish, N. 2002. Images
of Kursk. Brassey's, Inc.
-
Culver, B. 1989. Tiger In
Action. Squadron/Signal Publications.
-
Healy, M. 1993. Osprey
Campaign Series #16 - Kursk 1943. Osprey Publishing.
-
Pollard, S. 2001.
Military in Scale, November issue. pp 22-27.
Click on the thumbnails
below to view larger images:
Model, Images and Text Copyright ©
2003 by Ian Robertson
Page Created 29 October, 2003
Last Updated 17 March, 2004
Back to HyperScale
Main Page
|
Home |
What's New |
Features |
Gallery |
Reviews |
Reference |
Forum |
Search