|
McDonnell FH-1 Phantom
by
Fotios Rouch
|
|
|
McDonnell FH-1 Phantom |

HyperScale is proudly supported by
Squadron.com
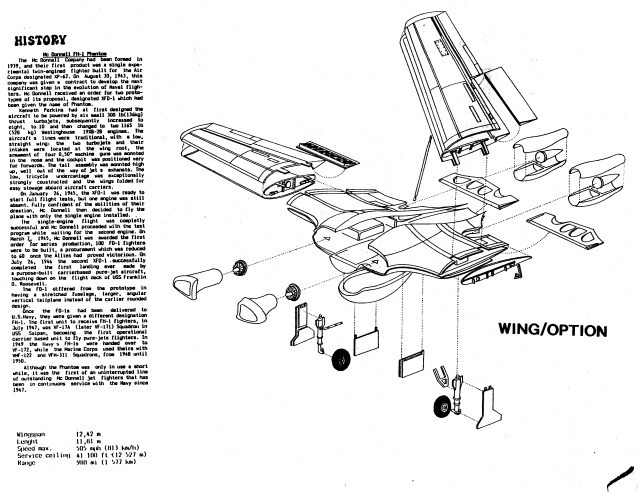
The McDonnell FH-1 Phantom was the first U.S. jet for the Navy and is
important in the role it played in the migration from piston-engine
power to jet propulsion.
It all started in August 1943 when McDonnell and Westinghouse were
commissioned to begin development of a carrier-based fighter jet. The
prototype XFD-1 Phantom first flew on January 1945 (The first XFJ-1 Fury
had its maiden flight on September 1946).
You have to remember that jet engines back then neither produced much
thrust nor would they spool up very fast. So take offs from the short
length of the carrier decks and wave-off situations were very much a
concern! The Phantom made its first takeoff and landing from the USS
Franklin D. Roosevelt in July of 1946. The Navy liked it and deliveries
to fleet squadrons began in July 1947. With the newly acquired Phantom
Fighter Squadron VF-17A became the first carrier based jet fighter
squadron in the world. The first Marine Corps unit that got the FH-1
Phantom was VMF122.
The Phantom served actively until mid 1950. Sixty units were built.
Some Phantoms continued with the reserves until the mid 50s.
McDonnell seemed to have gotten the recipe right because they
continued on with the F2H Banshee, the F3H Demon and the F-4 Phantom II!
Collect-Aire's
1/48 scale FH-1 Phantom
|
I could not have a good US Navy jet collection without the first
operational Navy Jet!
True to form the mainstream injection molding companies have totally
ignored this historically important jet. Collect-Aire came to my rescue
with their full resin kit one more time. The kit comes with a higher
than usual number of parts for such a small jet. This is because the
maker included options such as open gun bay with machine gun assemblies,
top/bottom hollow wings with folding option and deployed flaps.
Click on the thumbnails
below to view larger images:
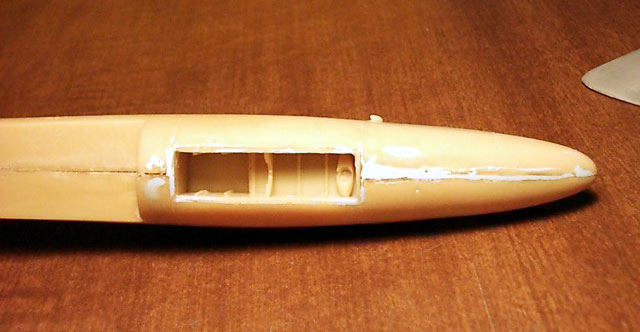
I was surprised upon opening the box to see so many parts especially
since this Eastern European maker (in the interest of expediency)
usually favors heavy solid resin wings with no flaps down options. All
those parts looked great in the box but what is important to those that
build and do not collect is how all that stuff goes together.
The first thing to do is always wash the resin parts with warm water
and a strong dishwashing or housecleaning detergent. I have been using
409 and a toothbrush with good results. If you do not clean your resin
from the mold release agent your paint will never stick to the model
properly .
Next is the prepping and planning phase.
My kit had plenty of pits and pinholes in its resin. I decided to
complete all the major subassemblies first and then do the resin
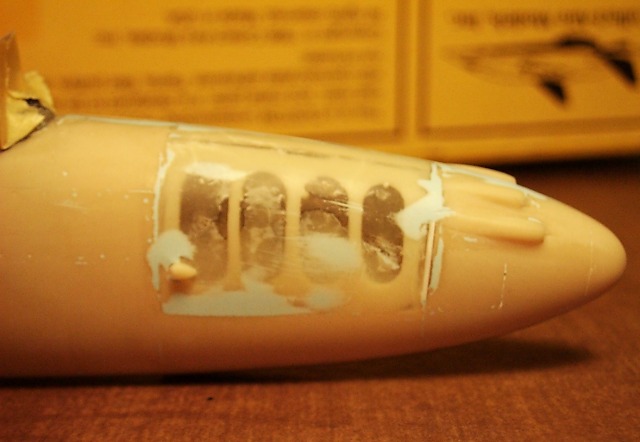
corrections. I also decided to pose the kit with its gun bays closed.
This is when I realized that the gun bay covers are quite a bit smaller
that the openings they are supposed to cover.
Click on the thumbnails
below to view larger images:
Once closed they were not conforming to the fuselage curves either. I
was certain that the very thin gun bay covers would not survive the
amount of sanding and filling that would be required. After I glued the
resin covers on the respective fuselage halves I decided to use 2 part
epoxy glue and pour it generously on the inside of the fuselage parts.
This way I reinforced the parts and did not care if I was going to sand
through the gun bay covers as I was trying to re-contour them to be
flush with the fuselage surface. When that was done, I completed the
cockpit and closed up the fuselage. The kit is a tail sitter, you need a
lot of weight up front. I then worked on the wings which I wanted posed
in the open position. Once I had the main surfaces assembled I felt it
was time to address the resin imperfections.
I used again my automotive primer (lacquer based only) and its
thinner. I sprayed the fuselage and wing surfaces with a good thick coat
of this primer. It dries fast. I could then see the potmarks easily
against the dark primer. Additionally the surface got a bit rough due to
the unsanded primer. I took out the 3M Acryl Blue and started applying
thin coats over the potmarks with my trusty tool (my finger). Acryl Blue
sticks great to the dry and rough primer. 3M does not stick as well
straight on the resin.
Mr. Surfacer will not fill the resin pinholes and potmarks unless you
poor it on and then there will still be a sink mark after it dries up. I
wet sanded the Acryl Blue with my Micromark polishing cloths and
polishing sponges. I tried not to go through the primer and reveal the
resin surface underneath. When I would see the Acryl Blue slowly
disappearing under sanding I would get more cautious and slow down. In
the end I ended up with gray primed fuselage full of nice little blue
dots where the resin imperfections were. When all looked good I sprayed
a nice coat of nicely thinned primer and polished it good.
Assembly continued with the usual delays that take place in full
resin kit construction. Some panel lines had to be recreated, some had
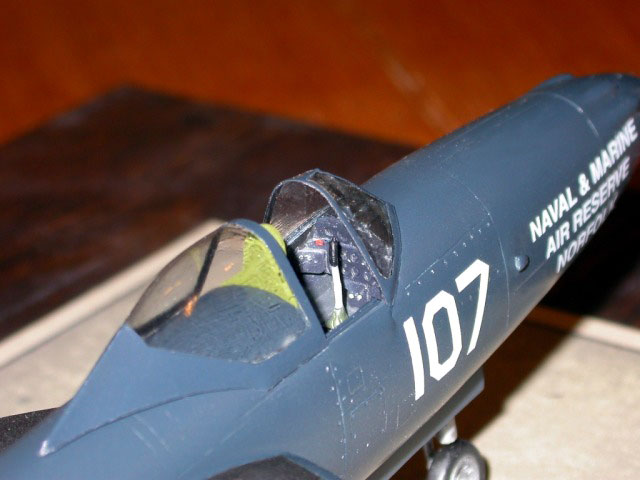
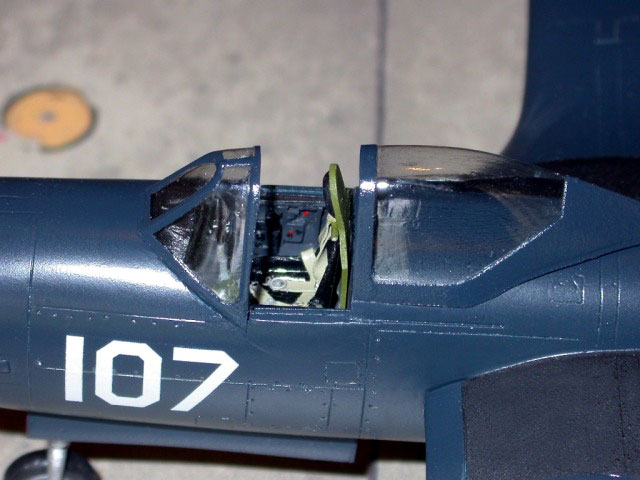
to be corrected or added per photos, etc. The cockpit is reasonably good
and close enough to the pictures in the Ginter book. I added only
seatbelts to the seat. The vac canopy really needs a couple of
submersions in Future.
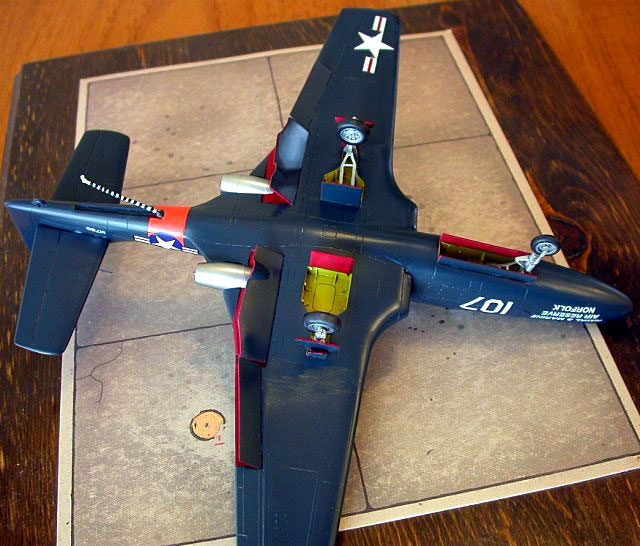
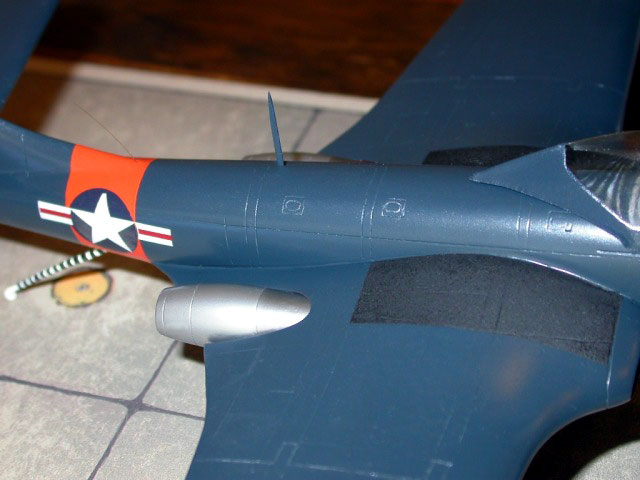
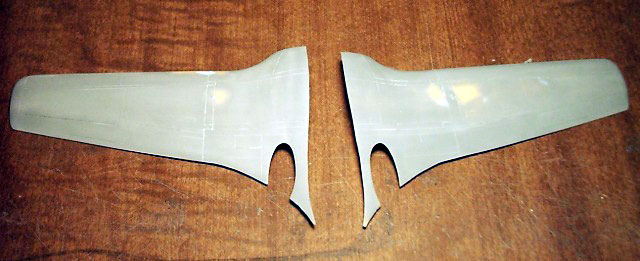
The biggest difficulty is merging the wings with the fuselage. Take
all the time you need to study how the middle portion of the wing
structure mates with the fuselage bottom. Also pay close attention and
do the best job you can on merging the top portion of the wings to the
fuselage. I do not think there is a way in the world to do it so no
putty will be used. I took a detail shot to show that it can be done
reasonably well and have the wing meet the fuselage in a clean and sharp
way.
The jet exhausts will need some trimming and the receiving portion of
the wing cavity will need some grinding so they can fit good.
When the airframe was all together I used Mr. Primer 1000 because it
polishes so good and it is so tough. With very fine polishing it is a
great primer for metal finishes too (like Alclad II).
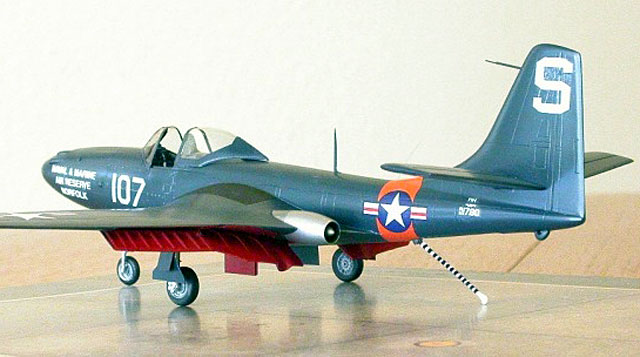
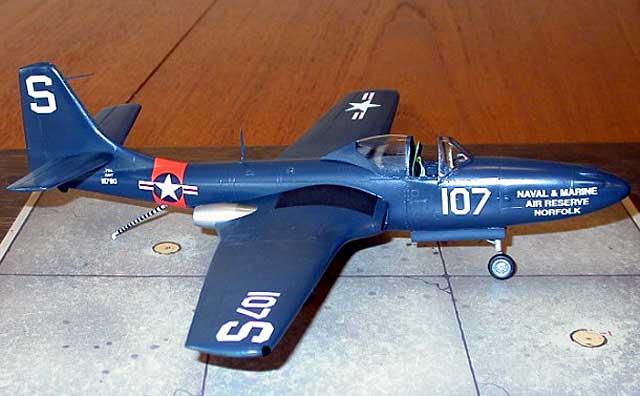
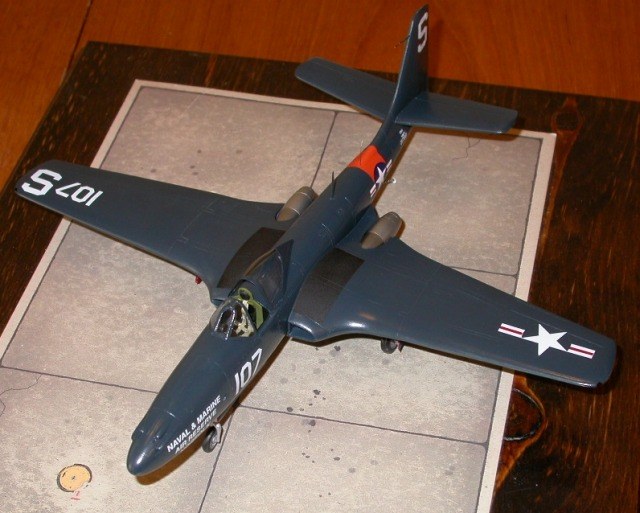
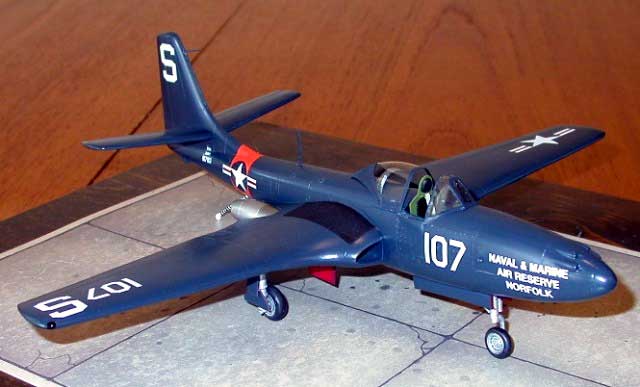
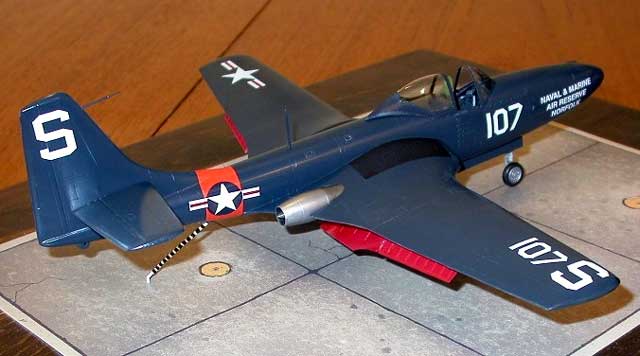
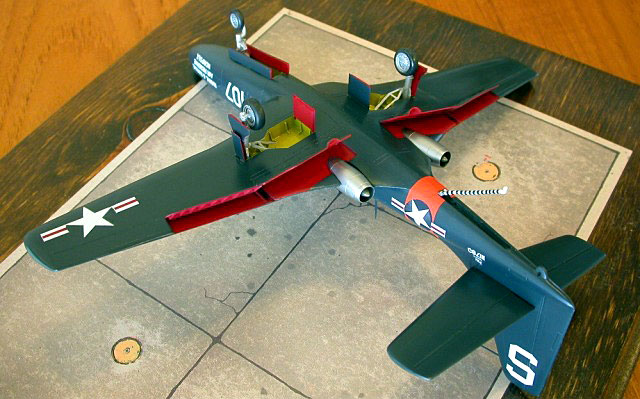
I wanted to make the Reserves FH-1 that was included in the decal
choices provided in the kit. I used Testor's Gloss Sea Blue and
International Orange. I used Alclad II for the jet engines and Xtracolor
Interior Yellow for the wheel wells.
The decals are thin and you need to be very careful with them. Do not
touch them or try to move them until they practically fall of the
backing paper.
They are that sensitive.
I used as a reference Phil Juvet's walkaround and some plans I got
from a Russian site. The completed model looks like an FH-1 but the
canopy area is a bit short when viewed from the side. The Ginter book on
the FH-1 is a great reference with a lot of pictures showing the canopy
issue as well as another small item. It is the way the tail blends into
the fuselage. It should be a smooth transition without any tail vertical
surfaces attaching at almost right angles to the fuselage (the maker
made the tail to fuselage joint much like the one of the Banshee). None
of these two issues take too much away from the overall look of the
plane, in my eyes at least.

Now I am eagerly awaiting the release of the newly mastered F2H-3/4.
Done by the expert hands of my favorite maker who makes no shape
mistakes and knows how to correct plans and understands how to interpret
photos. It will also be molded in Medina MN where QA does have some
meaning. Am I excited?
You bet! I already ordered two of the Big Banjos sight unseen!
Click on the thumbnails
below to view larger images:
Model, Images and Text Copyright © 2003 by
Fotios Rouch
Page Created 25 August, 2003
Last Updated 17 March, 2004
Back to HyperScale
Main Page
|
 Home |
What's New |
Features |
Gallery |
Reviews |
Reference |
Forum |
Search
Home |
What's New |
Features |
Gallery |
Reviews |
Reference |
Forum |
Search