|
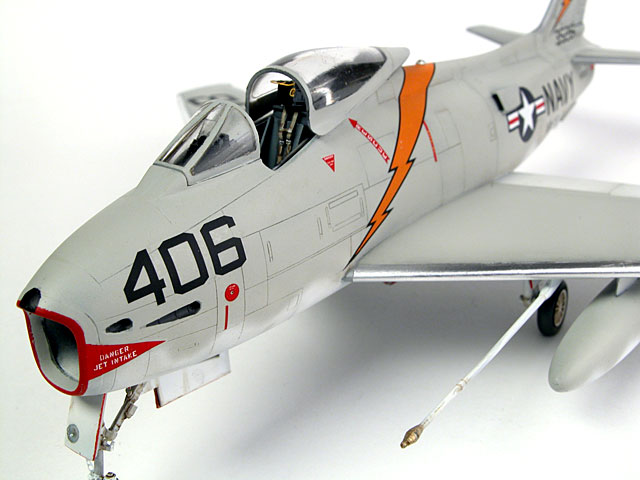
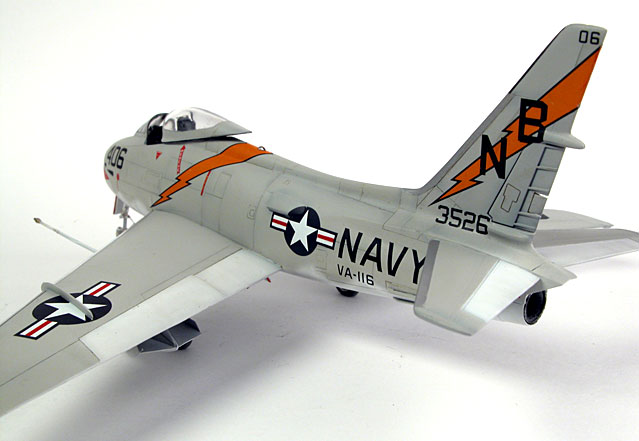
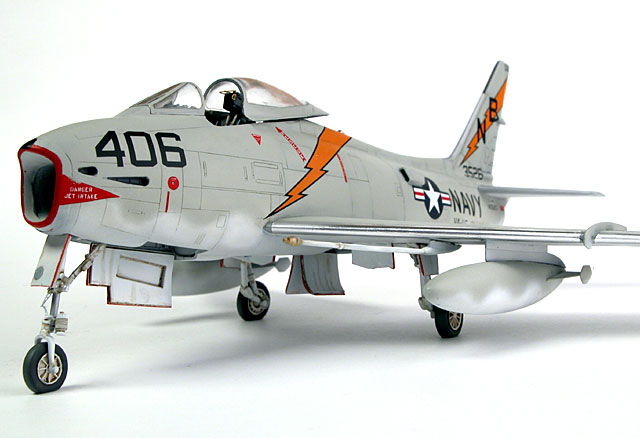
FJ-4B Fury
by Brett Green
|
|
|
FJ-4B Fury |

Grand Phoenix's 1/48 scale FJ-4B Fury is available online from Squadron
As soon as I saw the advance
promotion last year for the 1/48 scale Grand Phoenix FJ-4B Fury, I knew
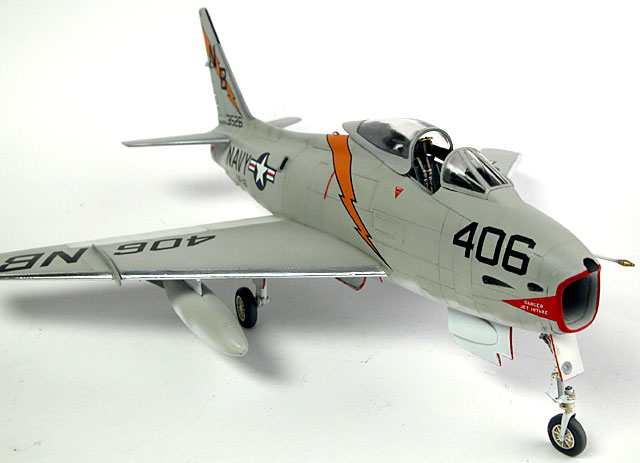
that I had to build it. What's more, I even knew how I would finish the
model - using the brilliant orange markings supplied in the kit of VA-166,
USS Hancock in 1958.
This would be my very first
Gull Grey and White US Naval subject.
Grand
Phoenix's 1/48 Scale Fury In the Box
|
|
Highpoints |
- Excellent detail on
resin and photo-etched parts (cockpit, wheels and wheel wells).
- Fine, crisp surface
detail including engraved panel lines.
- Plastic parts fit
well.
- Three colourful
marking options
- Drop tanks included
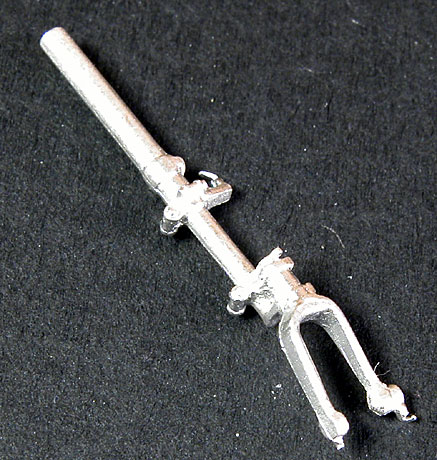
- Nice white metal
nose gear.
|
|
Nit Picks |
- Serious preparation
required before installation of resin.
- Something strange
happening around mid-fuselage panel lines and intakes.
- Thick, slightly
distorted clear parts.
- Some detail on rear
cockpit deck missing.
|
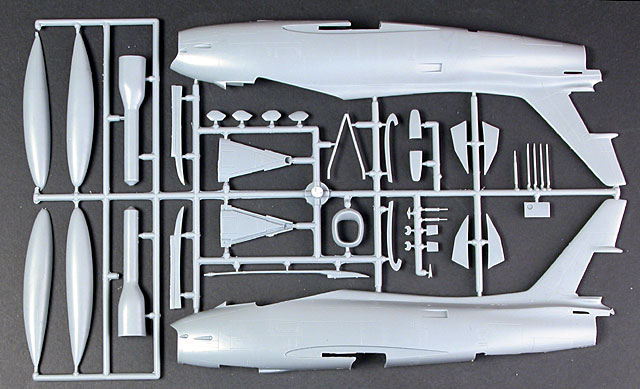
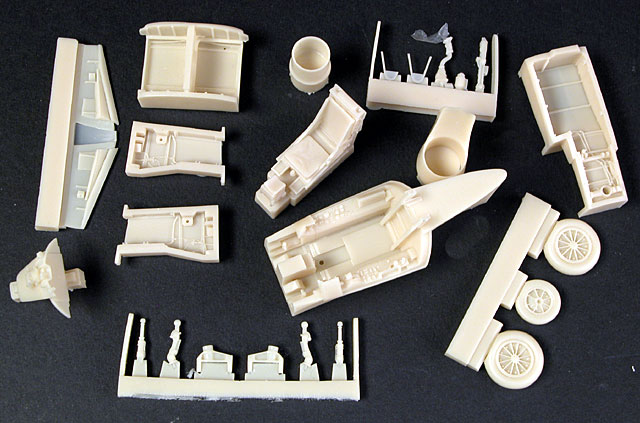
The Grand Phoenix Fury looks terrific in the box.
The kit comprises 66 parts in injection moulded plastic, 25 resin
pieces, 1 white metal front undercarriage leg and a phtoo-etched fret.
Markings for three aircraft are supplied on the decal sheet produced (not
surprisingly) by Aeromaster.
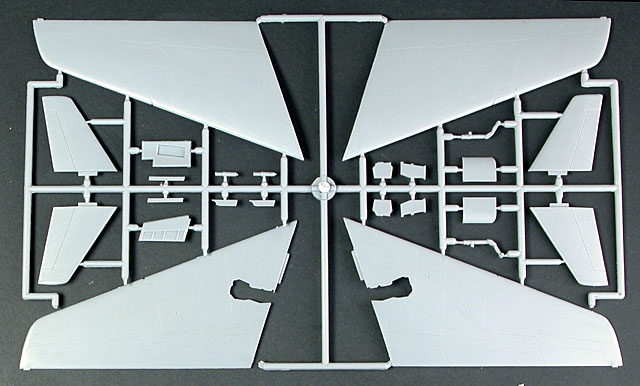
The plastic parts are smooth with very finely engraved panel lines. The
plastic is fairly soft and easy to work with. There are no imperfections
on the outer surfaces of the kit parts, but some prominent ejector pics
will need to be sliced off prior to assembling the wings.
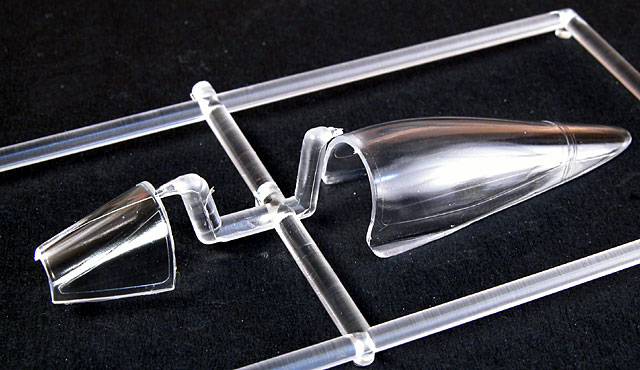
The clear plastic parts are okay. They are quite clear, but the sliding
section of the canopy is thick and distorted - a problem if you are
planning to button up your Fury.
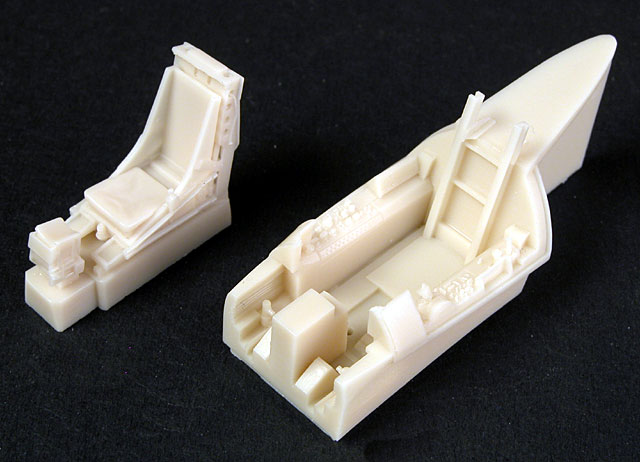
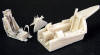
Resin parts are produced by Aires. The seat and cockpit are especially
worthy of mention. They are beautifully detailed and are further
supplemented with photo-etched parts for elements including the harness
and instrument panel. This is a very effective use of multi media.
Click the thumbnails below
to view larger images:
Drop tanks and the in-flight refuelling probe are included.
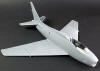
The issue of accuracy is vexed. The profile and plan of the kit shape
looks good, but I could not find definitive reference for the overall
length of the fuselage. Several sources quote different dimensions. The
kit dimensions seem to match the figures quoted on the official Boeing
website, but are at odds with some other references. The jury is out, but
it certainly looks like an FJ-4B.
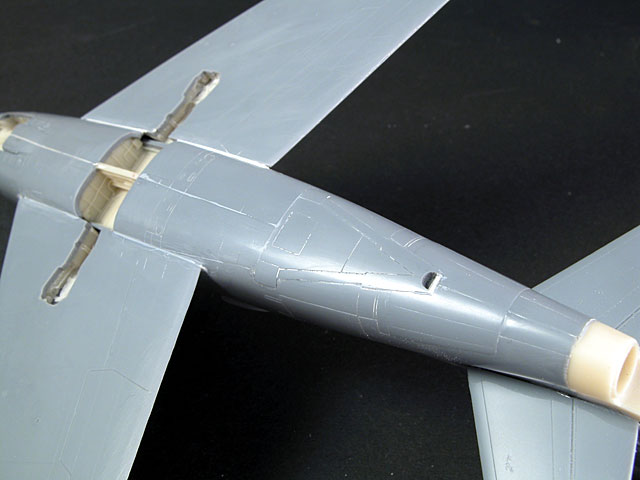
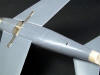
Even so, there do seem to be a couple of problems with the placement of
panels and the intake scoops on the rear fuselage.
There is no doubt that Grand Phoenix's Fury is beautiful to behold in
the box, with its smooth plastic and fine resin detail. However, beautiful
contents do not necessarily indicate an easy journey through construction.
Building this model presented a few challenges. Fortunately, all of the
challenges were fairly straightforward. Proper preparation of the parts
was the remedy for most of the problems.
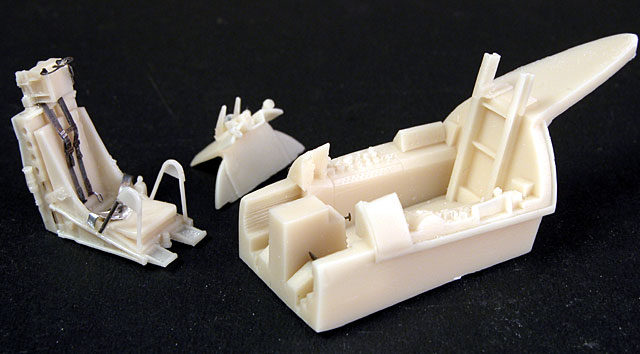
Cockpit
Casting blocks were carefully cut off the cockpit parts
using a Tamiya razor saw. The block on the seat required extra caution.
Assembly of the cockpit components was fast and
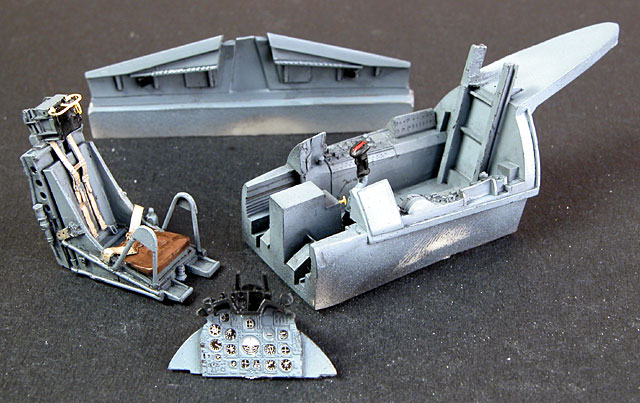
straightforward. I was delighted with the results after the parts were
painted, but I later discovered that I had incorrectly painted the
instrument panel grey when it should have been black.
The sequence of painting is described in the images below.
Click the thumbnails below
to view larger images:
|
|
|
|
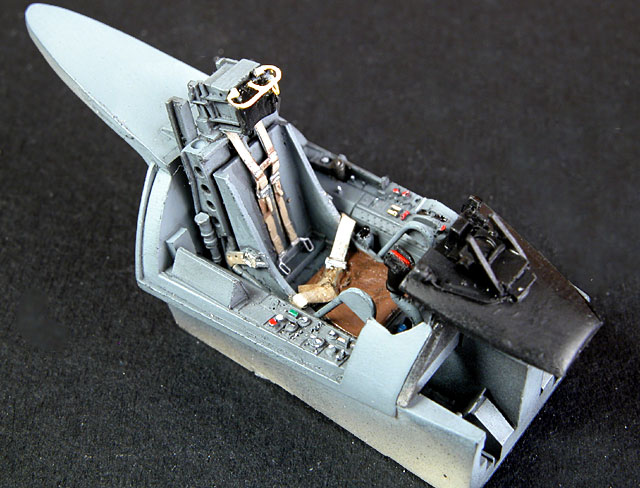
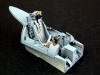
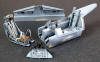
The resin and photo-etched parts combine to create a very detailed cockpit
|
|
|
|
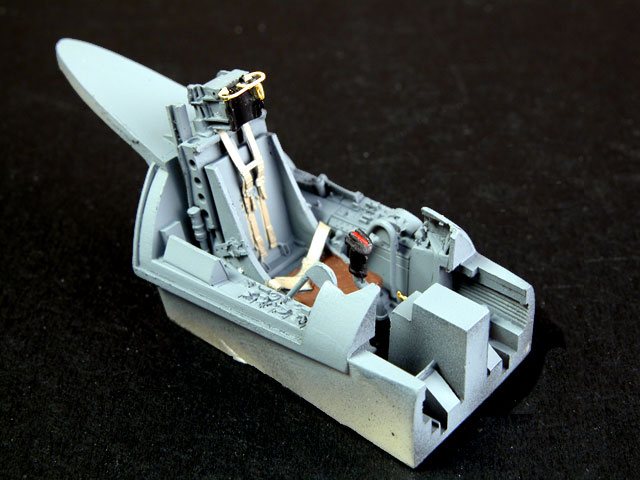
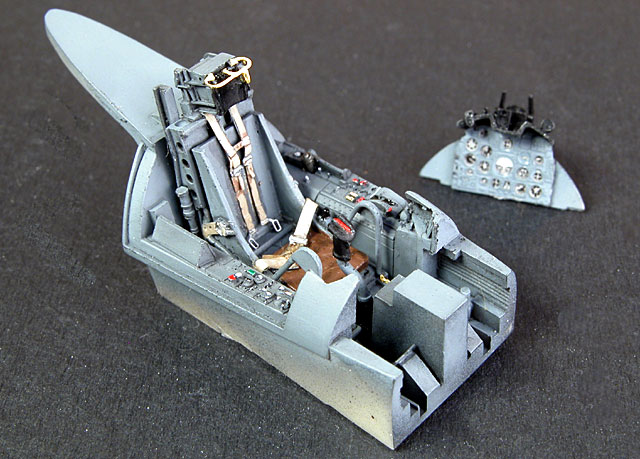
After assembly, the cockpit components were painted.
|
|
|
|
Details were picked out with a fine brush using acrylic paints.
|
|

|
|
A thin wash of oil paint helped highlight the cockpit details even further.
|
|
|
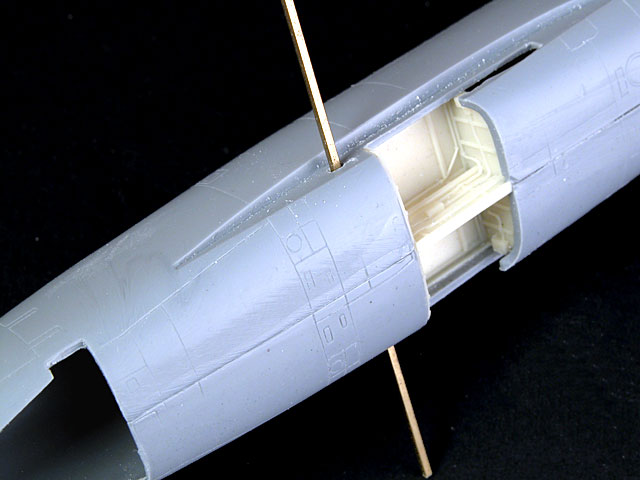
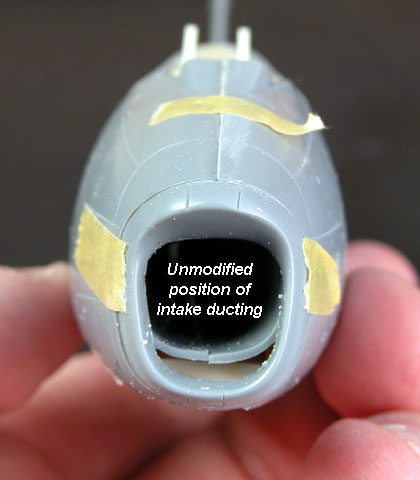
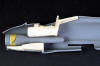
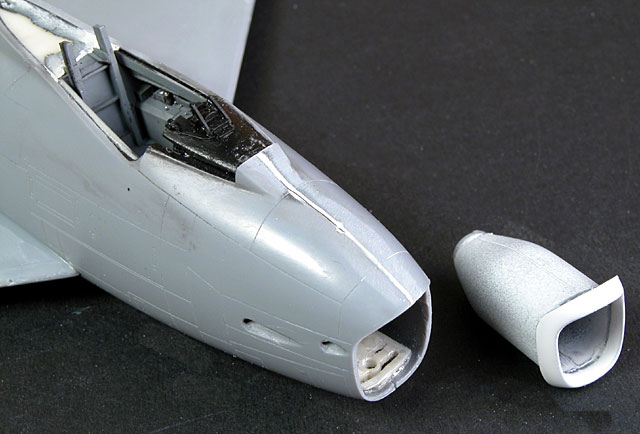
Fitting it all in...
Grand Phoenix supplies plenty of detail at the front end
of their Fury. Intake ducting extends into the fuselage for a few inches.
In theory, this ducting fits between the bottom of the cockpit and the top
of the front wheel well.
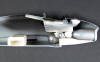
I ground down the resin cockpit bottom and top of the
wheel well until they were almost transparent, then test-fitted the
ducting. The good news? The ducting fitted between the parts.
The bad news? The front of the ducting did not even come
close to lining up with the intake mouth.
There are a number of possible solutions to this problem.
The simplest is to leave the ducting out of the fuselage and add a
blanking plate to the intake. Alternatively, the front wheel well could be
omitted and the big gear door glued shut.
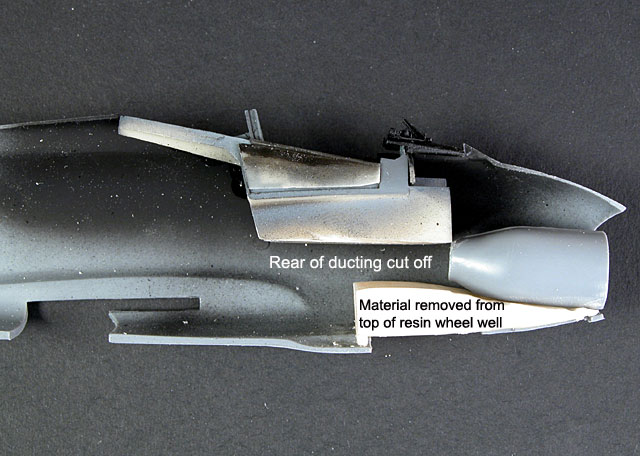
However, I wanted to take advantage of all the kit
parts, I therefore decided to cut off the back of the ducting piece, block
off the new shortened back of the part, and to modify the angle of the
front of the ducting to match up with the intake.
Not only does this simple solution permit all the kit
parts to be installed, it still leaves plenty of room for nose weight.
Click the thumbnails below
to view larger images:
|
|
|
|
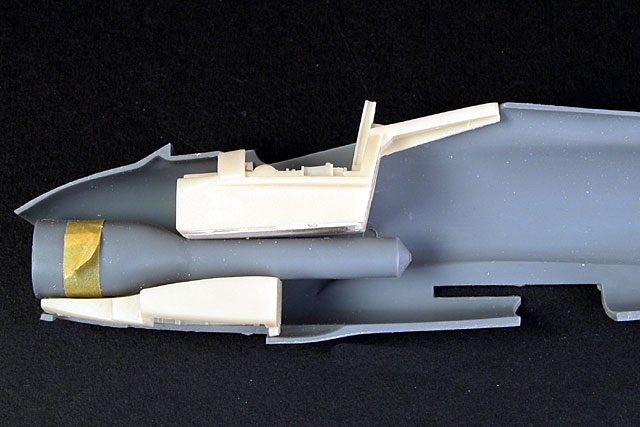
The parts inside the forward fuselage need to be modified for all the components to fit.
|
|
|
|
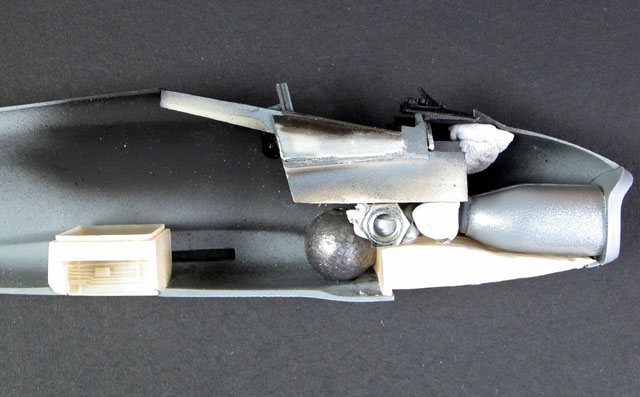
With the front top of the wheel well thinned and the rear of the intake ducting cut short, the part will fit and there is still room for nosewieight
|
|
|
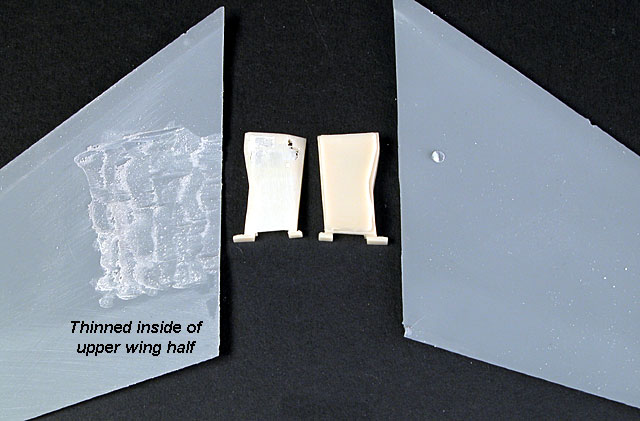
Wing and Wheel Wells
The second challenge is the installation of the resin
wheel wells inside the wings.
The inside of the wings are fairly slab-like with very
little space between the top and bottom halves. The resin wheel wells are
destined to be installed in this unfriendly environment, so it is out with
the Dremel tool with grinding attachment and a coarse sanding stick.
The answer here is nothing more complex than time and test
fitting. If the upper wing half and the top of the resin wheel wells are
thinned sufficiently, they will eventually fit. It is s close thing
though - I actually broke through the top of one wheel well part while
sanding. Fortunately this was not obvious after the part was painted.
Click the thumbnails below
to view larger images:
|
|

|
|
The thick plastic wings must be thinned before the resin parts can be installed. I used a Dremel motor tool to thin the inside of the wings
|
|
|
|
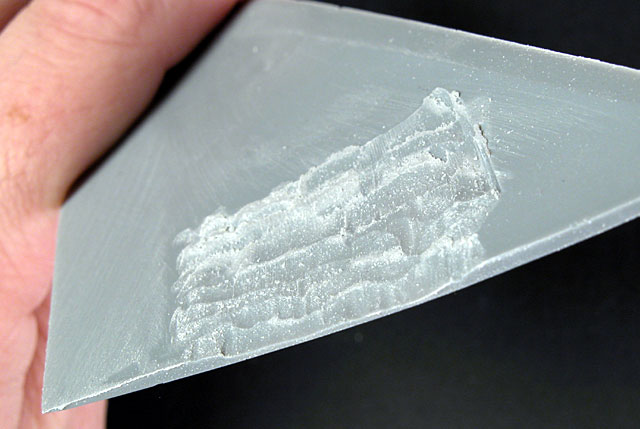
The top of the resin wheel wells must also be thinned until the material is almost translucent. A wet coarse sanding stick is the tool for this job.
|
|
|
Assembling Fuselage and Wings
The installation of the resin centre section of the wheel well
presented no such problem. The fit between the fuselage halves was almost
perfect.
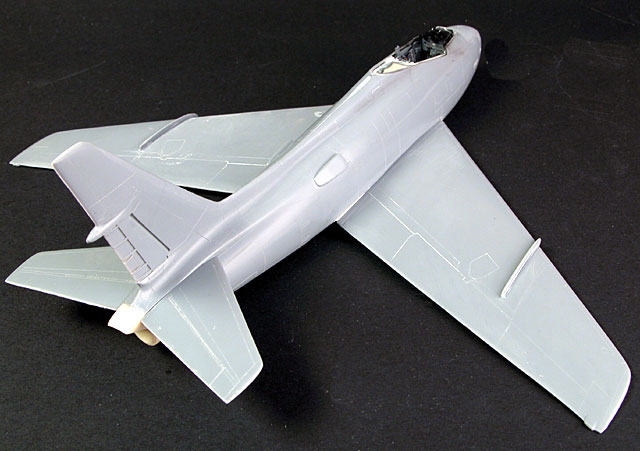
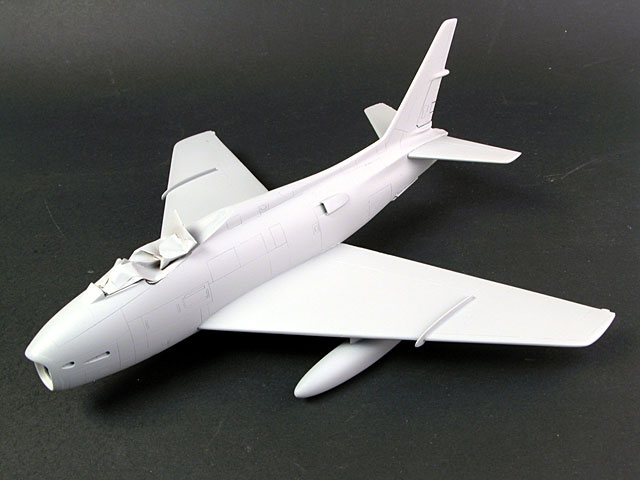
The fuselage halves were brought together and secured with liquid
cement. The resulting join was gap free. The plastic parts all fitted very
well indeed. I did not install the intake ducting at this point.
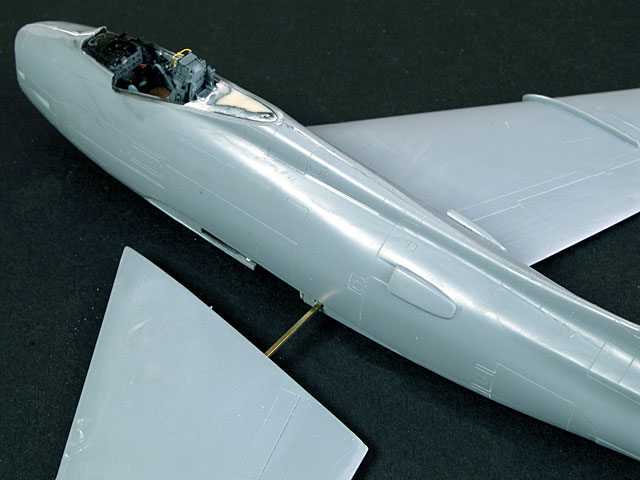
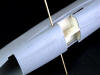
The wings each have a tiny locating slot to mate with the fuselage, but
I wanted to provide a stronger bond for these relatively heavy components.
I cut a slot in each side of the wing root, being careful to make sure
the height was the same on both sides. A length of square brass rod was
used as a wing spar. This was fed through the holes, and the wings were
slid over both ends of the spar. The wings were "tacked" in place with
super glue, and reinforced using liquid cement. In addition to providing a
strong bond with the fuselage, the spar also sets the correct zero
dihedral.

Click the thumbnails below
to view larger images:
|
|
|
|
Although the kit wings have locating tabs, I wanted to add extra strength. I cut slots in the fuselage sides and used square brass rod for the spar
|
|
|
|
The wings simply slid over the brass spar, adding strength and helping keep the wings flat.
|
|
|
|
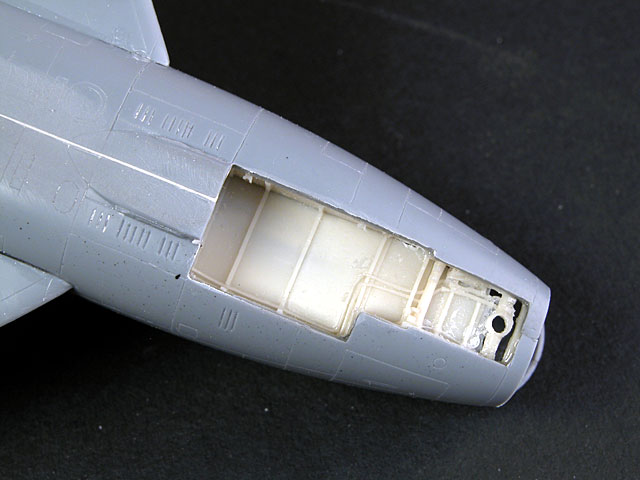
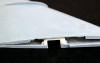
Finishing Construction
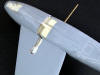
The intake ducting was glued to the intake lip. Test fitting showed
that this assembly would slot in without problems when the time was right.
The gun ports are moulded as simple indentations in the side of the
nose. I drilled these out with a pin vise.
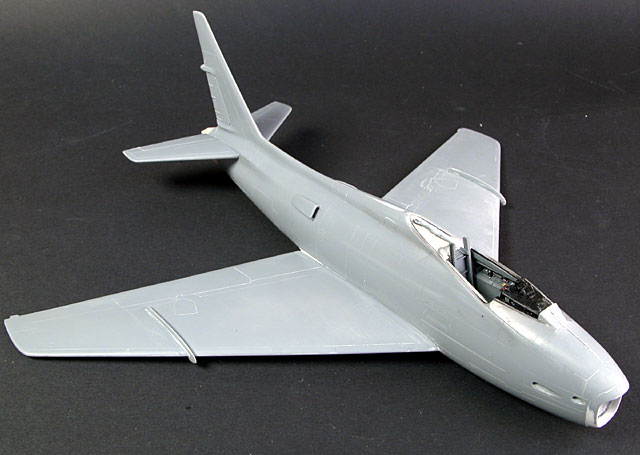
The remaining construction was hassle free. The insert for
the tail hook delivered a trouble-free fit. Some gaps were present at the
lower wings, plus a seam line on top of the nose. These were filled with
Milliput and sanded smooth.
Click the thumbnails below
to view larger images:
|
|

|
|
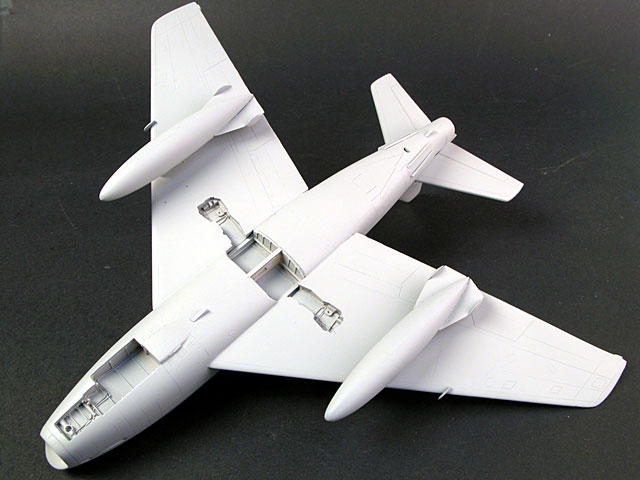
The degree of thinning of the forward wheel well may be seen here. There is still enough resin to secure the nose gear leg though!
|
|
|
|
Overall fit of the plastic parts is very good after the installation of the resin
|
|
|
|
|
Aspects including the tail hook also fitted without problems. Minimal filler was used
|
|
|
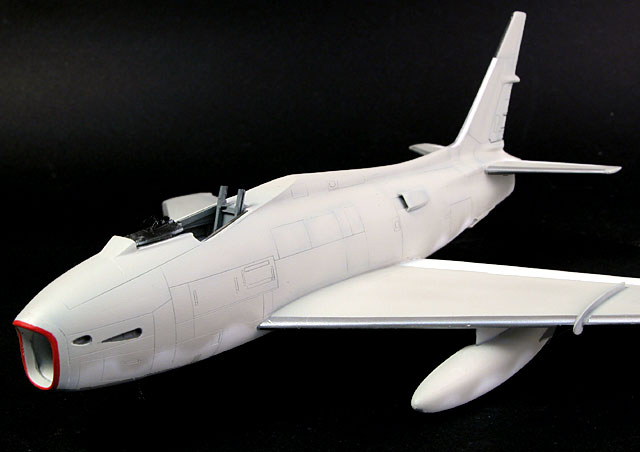
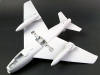
The entire model was sprayed with Tamiya Grey Primer,
straight from the can, to check for any imperfections prior to the
camouflage colours being applied. The slightly rough finish of the flat
grey primer was lightly sanded and polished before continuing.
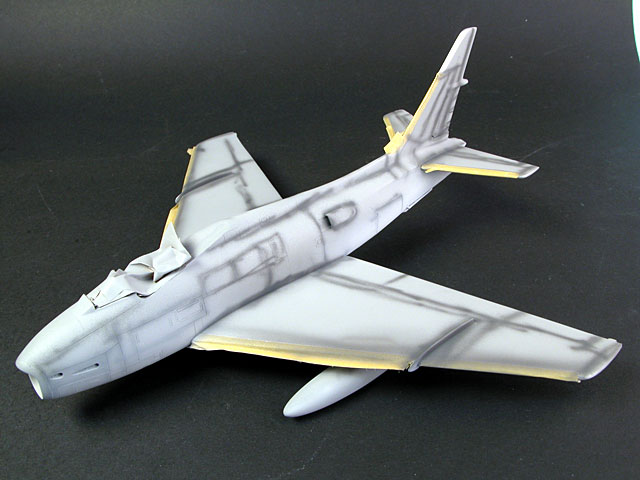
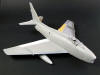
The wing leading edges were painted Metalizer Buffable
Aluminum, then masked before panel lines were "pre-shaded" in dark grey.
I decanted Tamiya Insignia White from the spray can into a
jar, then poured some in my Aztek airbrush to paint the lower surface of
the model. I find that, when applied straight from the can, Tamiya Spray
can deliver a slight "orange peel" finish. The lack of control over paint
flow and air pressure is limiting too. Decanting the paint into a jar then
using the airbrush overcomes these problems.
 The
top surface was painted Polly Scale Light Gull Grey. Polly Scale acrylic
paints are fast drying and terrificly tough compared to some other
acrylics. This means that there is less potential to leave organic
evidence (eg fingerprints!) on the final paintwork. The
top surface was painted Polly Scale Light Gull Grey. Polly Scale acrylic
paints are fast drying and terrificly tough compared to some other
acrylics. This means that there is less potential to leave organic
evidence (eg fingerprints!) on the final paintwork.
Some photos showed the gun troughs were painted a dark
colour. I masked around each gun trough and painted them dark grey.
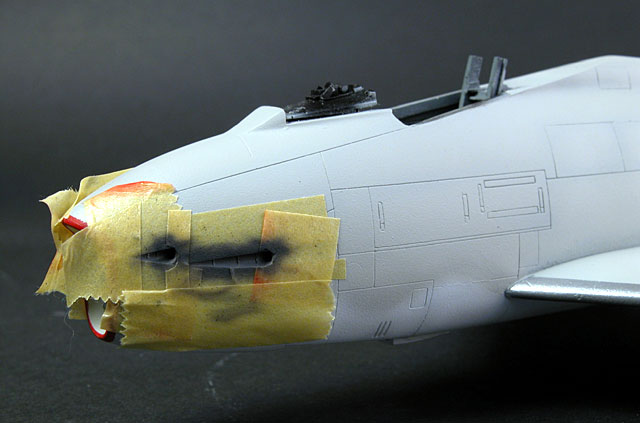
Grand Phoenix supplies a decal for the intake lip but it
looks a little too wide to me. I masked a narrower warning mark around the
edge of the lip and sprayed the area red, being careful not to get
overspray inside the trunking. I finished off the inside of the red
marking with a fine paintbrush.
Click the thumbnails below
to view larger images:
|
|
|
|
The airframe was primed with Tamiya grey primer from the spray can to check for seams and imperfections
|
|

|
|
Leading edges were painted silver then masked before panel lines were "pre-shaded" with dark grey paint
|
|
|
|
Tamiya Insignia White from the spray can was decanted into a jar and applied to the lower surfaces. Polly Scale Light Gull Gray was used for the top
|
|

|
|
I noted that some photos of Furies show that the gun troughs are painted a dark colour. I masked the cannon troughs and sprayed them dark grey,
|
|

|
|
The red intake lip was masked and sprayed. This job needed some brush-applied paint to acheive an even finish on the inside of the intake
|
|
|
Decals, Weathering and Finishing
Touches
The decals generally performed very well, although I did
suffer some silvering on the big "NAVY" markings and the Bu.No. This was
improved after applications of MicroSol, a gloss coat and a final flat
coat.
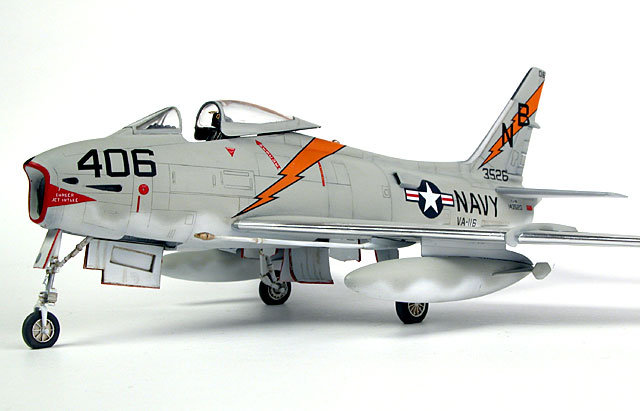
Most photos of late Furies show them to be fairy clean, so
I kept weathering to a minimum. A very thin wash of Raw Umber oil paint
was applied to the panel lines, although it was almost invisible by the
time it had dried.
A heavier was painted onto the undercarriage parts, and
stains were selectively applied to the inside of undercarriage doors.
I decided to display the gear doors open, so I painted the
edges red with a fine brush before gluing them in place.
The canopy parts were dipped in Future floor polish. This
certainly improved the appearance of the sliding canopy section.
By this time I was aware that the kit was missing some
detail in the rear of the canopy sliding section. However, I resisted the
temptation to add this detail as I had built the model completely "Out of
the Box" at this stage, and decided to leave it that way.
After handling the aircraft during painting I had rubbed
off large sections of the metallic leading edges of the wings. I replaced
the paint with self-adhesive foil, burnished in place with a blunt stick
then polished to a high shine.
However, I did need to glue a piece of flat styrene to the
bottom of the sliding section of the canopy in order to secure it to the
rear canopy deck.
I was looking forward to building the Grand Phoenix 1/48
scale FJ-4B Fury, and I was very pleased with the result.
If I was to offer one piece of advise to impending
builders of this kit, it would be this:
"Forewarned is forearmed".
This is not a "shake and bake" kit. It requires commitment
and some experience to complete.
However, if you approach the Fury with the expectation
that it is a limited run, multi-media kit that will involve extra time for
the preparation and test fitting of parts, you will more than likely enjoy
the experience of working through this model as much as I did.
Recommended to experienced modellers.
Click the
thumbnails below to view larger images:
Model, Images and Text
Copyright © 2003 by
Brett Green
Page Created 24 August, 2003
Last Updated
17 March, 2004
Back to
HyperScale Main Page |
 Home |
What's New |
Features |
Gallery |
Reviews |
Reference |
Forum |
Search
Home |
What's New |
Features |
Gallery |
Reviews |
Reference |
Forum |
Search