|
Fokker D.VIII
by Matthew Burchette
|
 |
|
Fokker D.VIII |

Eduard's
1/72 scale Fokker D.VIII is available online from Squadron
In a fit of madness a few years back I built the Eduard Strip Down E.III.
I added some details, a few wires, etc. and I had a tiny see-through plane
that was really cool to show off. Fast forward to 2002…
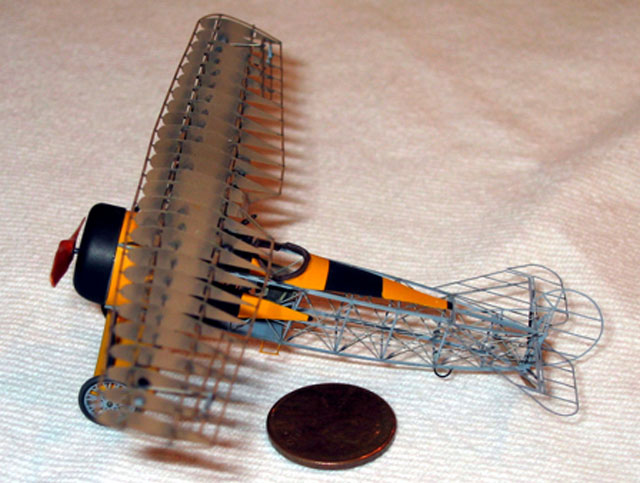
In another fit of madness (see a theme?) I purchased Eduard’s D.VIII. I
really like the way this plane looks and I thought it would be nifty to
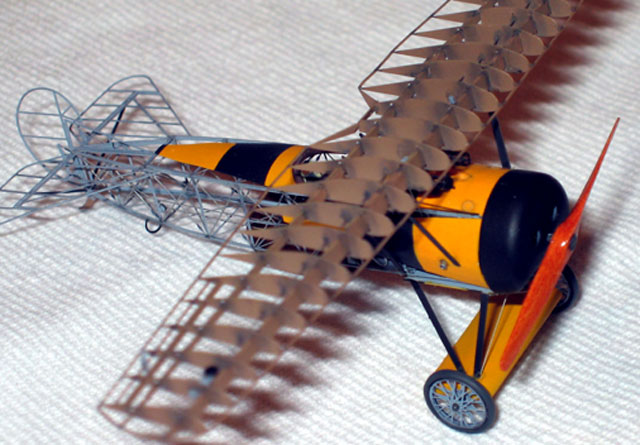
show the “solid” pieces of the aircraft painted in an operational scheme.
It would appear that the fabric areas of the plane had been stripped off,
leaving just those areas that were wood or metal. You get just a hint of
the colours that had been applied to the whole aircraft.
With this plan in mind I began to build. I quickly found out that the
instruction’s illustrations were not quite in line with how the model
should be built. Make sure that you check the box a top photograph for the
correct way to assemble the wings, specifically the wing tips. I inserted
the spars in wrong – but correctly according to the directions – and had
it all glued up before I realized that not everything lined up. Out came
the debonder and I started over. This was really the only major problem
that I encountered, but be sure and keep looking at those box photos
BEFORE you bend or glue.
I decided to fill out the cockpit area with some plastic strip and rod to
give the etched pieces more dimension.
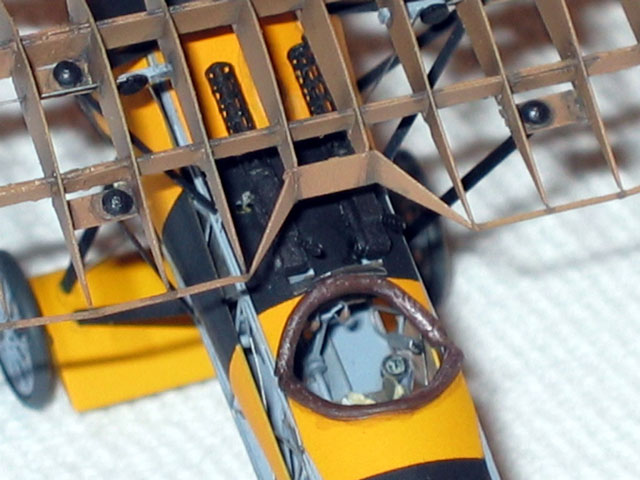
The rudder bar was the first area to be improved. I kept the etched bar,
but added the central rod out of wire and some very small plastic disks
punched with the trust Waldron punch and die set. I also added a small
piece of half round rod to the compass mount to fill it out, and added an
instrument decal to give it an authentic face. I then fabricated the
priming pump out of rod and added the tiny etched T-handle from the kit
piece. I fleshed out the flat cockpit coaming with insulation stripped
from small diameter wire, a drop or two of super glue to round out some
knobs, and I was done.
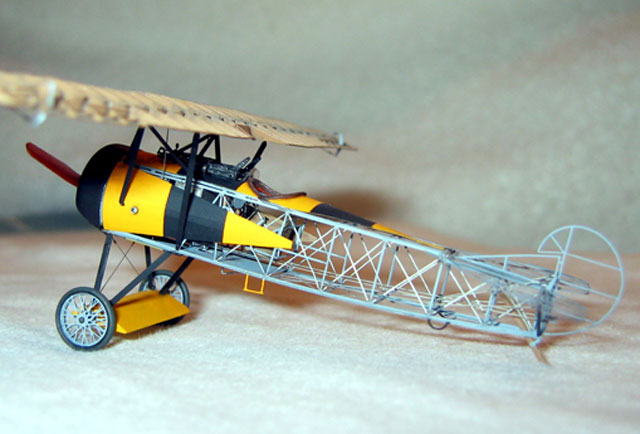
Then AMS really hit. I decided that I HAD to add the control wires and
pulleys. The kit supplies etched control horns, but the rest was going to
be up to me. I had already glued the fuselage together, so I was going to
have to fish the wire through the rigging and cross members. Not a really
big deal, I had done the same thing on the Eduard E.III Strip Down. What
was a pain was adding the pulleys to the tail area. I also had to fake the
set up because I could not find any pictures with that kind of detail.
Shep Paine calls it “creative gizmology,” it looks busy, but it ain’t
real.
Out came the punch and die again. More disks, more pulleys. After many
words that shall go unmentioned, I was able to have two pulleys that
looked the part. I then began fishing surgical steel suture wire into
position. After more words, I had all the wires glued in place and trimmed
to fit. On to the wing…
More words… lots of words. I realized that the control wires for the
ailerons went THROUGH the wing ribs! That meant that I had to cut small
(miniscule) pieces of wire to fit between each rib from the center of the
wing to the aileron. Man! What a chore. There were numerous times that I
really considered my sanity, but in the end I did manage to get the wire
run. A few more pulleys at each end of the wing and I was done with that
exercise in frustration. It is a small detail, but when you realize it’s
there it really looks cool.
Painting,
Markings and Finishing
|
Now was the time to put it all together. After the many words of previous
days I expected more blue air, but this final phase of the project went
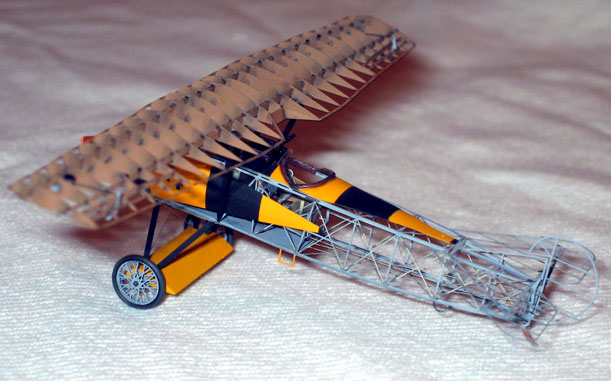
smoothly. I masked off the stripes for Theo Osterkamp’s “bumble bee”
scheme, and after painting added the side panels to the fuselage. After
adding flying wires, guns, and a small windscreen from thin plastic, I was
done.
I am in the midst of stripping paint from the Dr. 1 kit. Tamiya white
primer does not stick to metal… now I know this. As soon as the madness
strikes again I will get back on that kit.

Until then, it’s 1/32nd scale 109s for me!
Click the
thumbnails below to view larger images:
Model, Images and Text Copyright © 2003
by Matthew Burchette
Page Created 02 March, 2003
Last Updated
17 March, 2004
Back to
HyperScale Main Page |
 Home |
What's New |
Features |
Gallery |
Reviews |
Reference |
Forum |
Search
Home |
What's New |
Features |
Gallery |
Reviews |
Reference |
Forum |
Search