|
Focke-Wulf Fw 190A-3
by Tim Both
|
|
|
Focke-Wulf Fw 190A-3 |

Tamiya's 1/48 scale Fw 190A-3
is
available online from Squadron
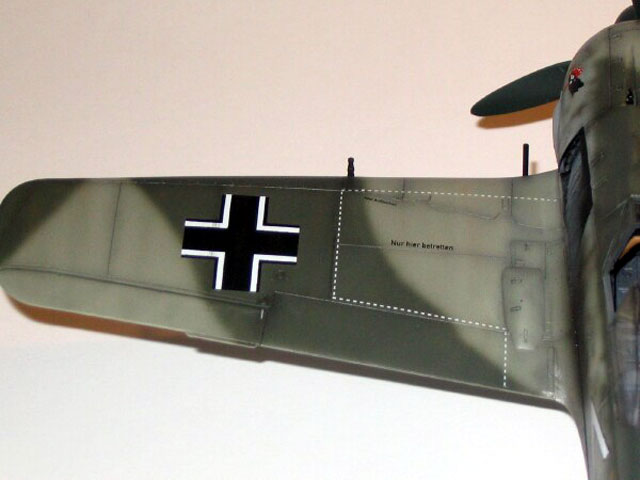
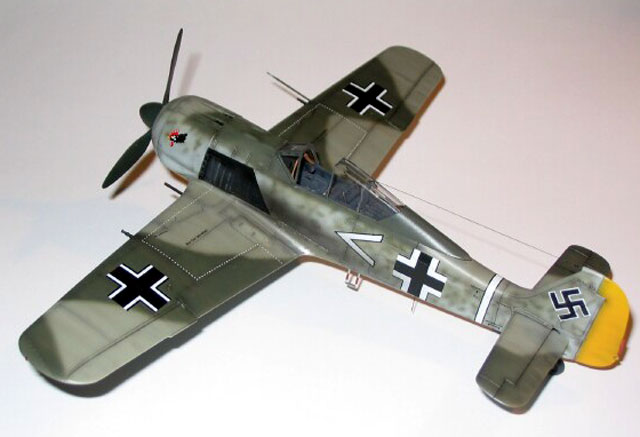
Here is my 1/48 scale Tamiya Focke-Wulf Fw
190A-3 marked as the aircraft flown by Oblt. Armin Faber when he landed by
mistake in England on the 23rd of June 1942.
I based my colour scheme on that provided in Volume Section Four of the
Classic Publication "Jagdwaffe, Holding the West". On pages 38 and 39
there are several views of the plane in its original Luftwaffe scheme. The
text goes on to describe that there were two reports of the colours found
on this plane. The authors based their colour profile on the one from an
RAF Intelligence Report that being of RLM 02/71/76.
This is how I chose to represent my model.
Aftermarket items used:
-
Aeromaster 48-139 Early Butcher Birds.
-
True Details Fw190 Early pattern wheels.
-
CMK 4028 Fw190A3/4 cockpit set.
I wont dwell on the construction suffice to
say everything went smoothly and the CMK cockpit fit well after removing
the locating lugs in the kit fuselage halves.
Paint
I began painting the yellow ID markings with a
base coat of white followed by Gunze yellow with a drop of red to make it
more accurate for RLM04.
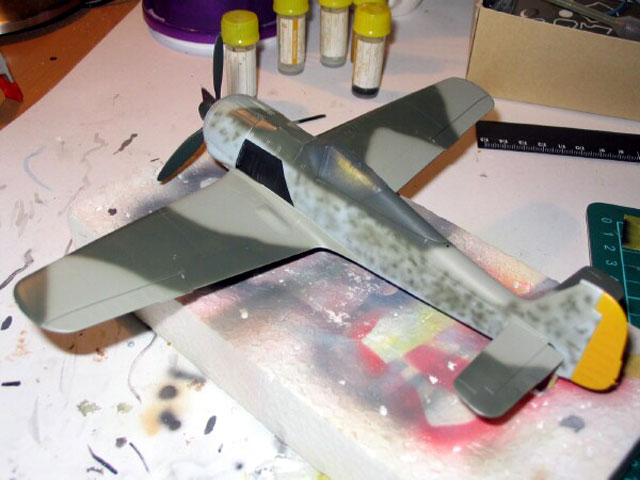
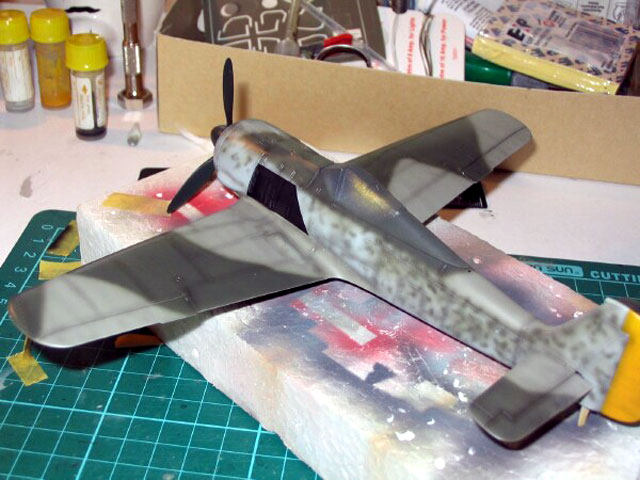
I then painted the lower and then the top two
camouflage colours with my Tamiya Sprayworks airbrush. I carefully applied
the mottling along the fuselage sides constantly referring to the colour
profile I had.
I then post shaded the panel lines with
heavily thinned gloss black and Gunze smoke.
Once done I sprayed Testor's Lacquer gloss
coat and waited for it to dry ready for decaling.
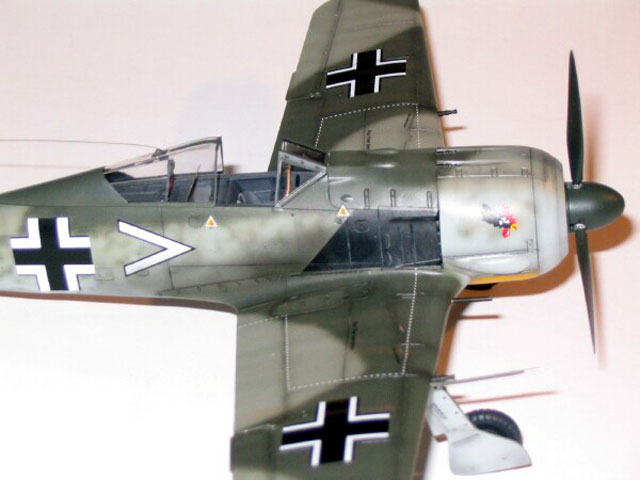
Decals
As stated above I used Aeromaster’s excellent
sheet. They call for the colours to be RLM 74/75 which is understandable
at that stage of the war but nevertheless I used RLM 02/71. The decals
went on flawlessly. I used Aeromaster Fw190 stencils as the main sheet had
only a few of these markings.
Finishing Touches and Weathering
I sprayed another light coat of gloss to seal
the decals. I ran a very thin gloss black along the panels lines being
careful not to overdo it and wiped of any excess. I tried two new
processes for weathering my paint scheme. The first was to spray very,
very quickly and close to the surface of the model a thinned black mix in
the direction of the airflow over the wings to create a subtle wear
pattern. Secondly I lightly dusted on some dark brown pastel to create
further wear along the wings and fuselage. I kept this pretty light so not
to spoil it. I also used gray pastel on the black fuselage exhaust panel
to show up the exhaust stains.
I assembled all the little bits and pieces and finished off with several
light coats of Testor's Flat. I applied some more pastel afterwards which
makes handing difficult. I left a fingerprint in one photo but fixed it
later for others.
Can you spot it?
This was a great little project and I was very happy about how the paint
scheme looks. It makes a change from RLM74/75 Fockes which is what I am
about to build next.
Thanks for reading and hope you enjoy my Fw190A-3.
Click the
thumbnails below to view larger images:
Focke-Wulf Fw 190
Production Line to Frontline 5 |
|
|
|
|
Author: Malcolm Lowe
US Price: $21.95
UK Price: £14.99
Publisher:
Osprey Publishing
Publish Date: February 19, 2003
Details: 144 pages; ISBN: 1841764388 |
|
|
|
Model, Images and Text
Copyright © 2004 by
Tim Both
Page Created 06 February, 2004
Last Updated
17 March, 2004
Back to
HyperScale Main Page |
 Home |
What's New |
Features |
Gallery |
Reviews |
Reference |
Forum |
Search
Home |
What's New |
Features |
Gallery |
Reviews |
Reference |
Forum |
Search