|
Focke-Wulf Fw 190D-11
by Tim Both
|
|
|
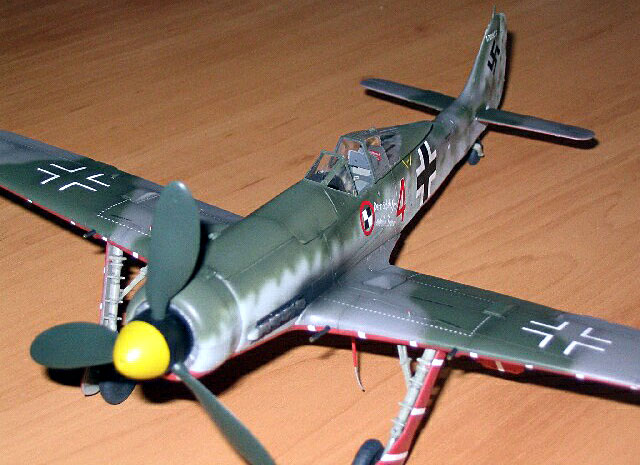
Focke-Wulf Fw 190D-11 |

Revell-Monogram's 1/48 scale Fw 190D-11 is
available online from Squadron
Every Luftwaffe nut needs a
JV44 plane in their collection, right?
Well here is mine!
This is Revell’s Fw190D-11 which, as you might know, was once in DML’s and
Trimaster’s range. Now after more than 10 years, the moulds are showing a great deal
of degradation. The surface of mine was covered in what can only be described as
little pips or lumps of plastic. These covered panel lines and generally
got in the way.
Below is a list of extras I used on this model:
The Part-R-Parts engine plug
was a simple one-piece affair to which I added some plumbing and wirework
with fuse wire and some small sections of brass tubing. The wheel well I
cut using a small saw and cleaned up with files and wet and dry sandpaper.
I am sure that the CMK set is designed for the Tamiya 190 as the gun
access covers have little resemblance to the shape of the Revell ones
although technically they should be the same. I made the cutouts in the
Revell wings and through sanding and test fitting super glued the cannons
in. These had great detail and looked great painted black and dry brushed
but they are all but hidden on the final model.
Onto the cockpit. For a mere $10Aust you get from Extratech a sheet chock
full of brass details a seat, harness, instrument panels, side panels, gun
sight, instrument coaming, pilot armour and complete sidewall detail. Each
sidewall has 4 parts and more including levers etc, etc. I installed all
of this not really expecting it all to fit but it did. I cannot recommend
this set highly enough. There is a separate door for the pilots stowage
compartment so I scratchbuilt the ‘bin’ using sheet plastic and painted in
RLM02 on the inside and glued it on. The cockpit was painted RLM 66 and
washed with diluted black and installed.
It was here that I ran into my first problem. I had decided to use the
Extratech instrument coaming and removed the kit’s plastic one. The etched
one requires some tricky bending to fit. I got close but not really close
enough and ended up having canopy problems down the track. Also the etched
coaming is too thin and doesn’t represent the leather-padded front at all
well. Next time I wont use this part.
The flaps caused me the next nightmare as they fouled against the resin
cannon details already installed. Through coercion and trimming they were
glued in with super glue and I had won that battle. Again, I don’t think
that I would bother with the flaps again as from what I know most 190s had
their flaps raised on the ground and the amount of work involved didn’t
really pay off in the final result.
The rest of the construction was fairly easy. I bridged the gap between
fuselage and wings with sprue as a spreader and this took care of most of
the problems. I made a big effort to remove all the seams here as none
existed on the real craft. I restored any panel lines with a needle and
sharp blade.
I used 5 minute epoxy to glue on the front windshield but this was not a
great fit due to that coaming coming back to haunt me. The canopy rode
about 1mm too high which isn’t much but it looked awful so I used a mix of
putty and super glue to blend it carefully in.
Cannons barrels were made from fine brass tubing.
I have a Tamiya Sprayworks
airbrush which is very basic but I have taught myself to use it properly
so I can now do those intricate Luftwaffe schemes. You have to thin the
paint just right to get those fine lines. I use Gunze mainly with a Tamiya
colour now and then.
Painting
I started by spraying the
fuselage sides RLM76 and letting it dry. At this time I applied the ‘<58’
decal to both sides as my idea was to spray the rest of the camouflage
over the top to make it appear faded and old.
Next was RLM75 being careful to take my time with the tail mottles. Then
came the RML83 on top of that again thinned greatly and applied slowly.
There is no pressure regulator with the Sprayworks so you have to use what
you get. The Eaglecals suggest that there was possibly RLM81 on the tail
as a mottle but that means that there possibly wasn’t RLM81 so I didn’t
use that colour.
After letting the top colours dry I masked them off with Tamiya tape and
sprayed the lower surfaces with RLM23 from Gunze. This covered really well
and the model was starting to look good.
A few details like the prop and exhaust areas were sprayed and left to
dry.
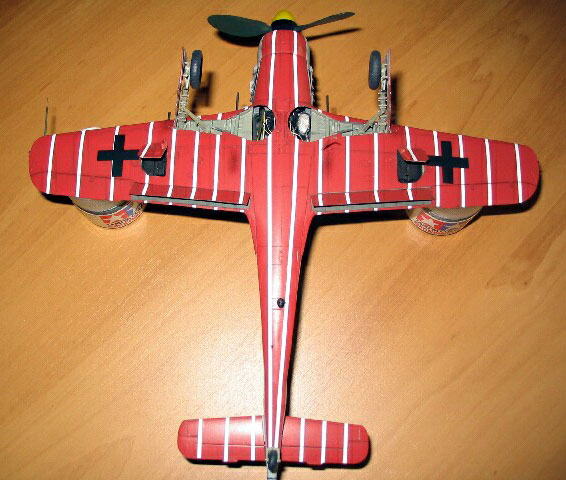
Decals
These are Eaglecals so
therefore they were outstanding. I found the red 4 to be lighter than the
Gunze RLM23 but maybe that was because it was placed on the white
background because it looks fine on the sheet. I used Aeromaster stencils
for this craft saving the Eaglecals stencils for another time. All decals
went on well with no problems.
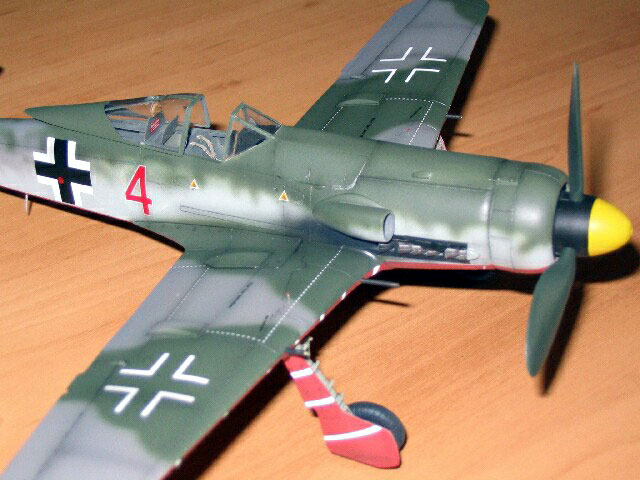
Weathering and Finishing
After the decals had dried I
gloss coated them and started with the weathering. I ran highly thinned
Gunze black into the panel lines and when dry used Gunze ‘smoke’ to
postshade the panels. This is the first time I have used this technique
until now and think that it looks okay. Using a silver pen I scribbled on
some Tamiya tape and then used a toothpick dipped in the silver to apply
some wear and tear around where the pilot enters and a few other panels. I
didn’t want to overdo this so I went carefully.
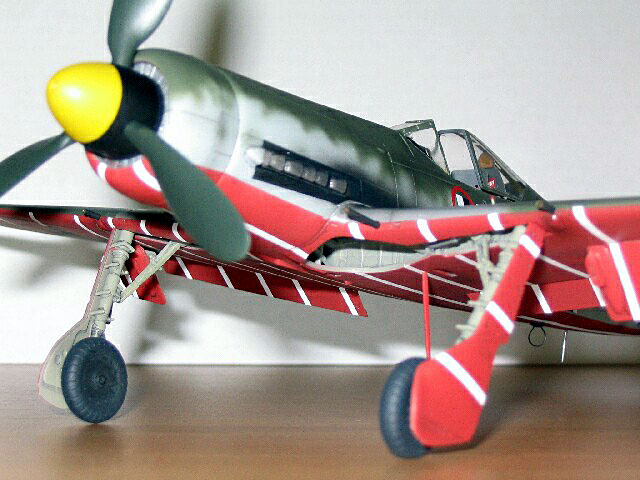
Thanks to the articles on HyperScale I was able to correct the gear legs
so they had the correct stance. Knowing that the bottom of the gear door
should be parallel to the ground made it easier. I used 5-minute epoxy to
glue on the legs with the doors already attached and left the model
overnight with it resting ‘wheeless’ in the correct stance. I could tell
if it was right or not as the model HAD to rest flat on the bottom of the
gear doors. Making sure of the correct toe-in was also done.
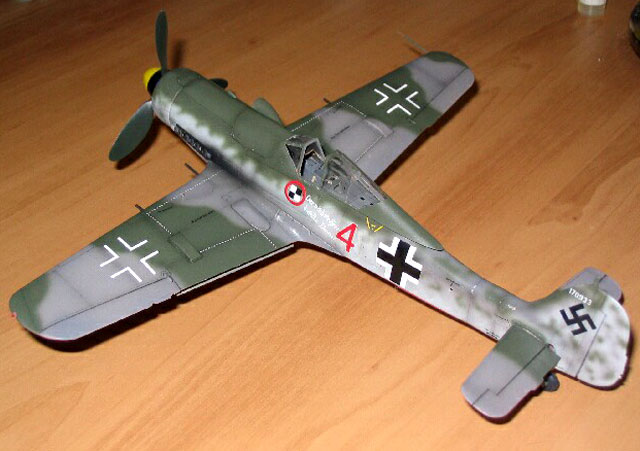
All the smaller bits and pieces were now added and the model was coated
lightly with Gunze flat a number of times. The canopy masking was removed,
pilot armour was installed and it was done. There’s no antenna wire just
yet as I have run out of black sprue to make it.
I am happy with the result.
By far the most realistic model I have built so far.
That was the one and only Revell 190D-11 that I am going to build not due
to the difficulty but because the surface of the plastic is so poor. The
next one might be a Tamiya and a conversion kit.
Thanks to my fiancé Stephanie for letting me work for so long on my
models.
Hope you enjoyed this one.
Click the
thumbnails below to view larger images:
Model, Images and Text Copyright ©
2003 by Tim Both
Page Created 07 September, 2003
Last Updated
17 March, 2004
Back to
HyperScale Main Page |
 Home |
What's New |
Features |
Gallery |
Reviews |
Reference |
Forum |
Search
Home |
What's New |
Features |
Gallery |
Reviews |
Reference |
Forum |
Search