|
Focke-Wulf Fw 190D-9
by Doowan Lee
|
|
|
Focke-Wulf Fw 190D-9 |

HyperScale
is proudly supported by Squadron
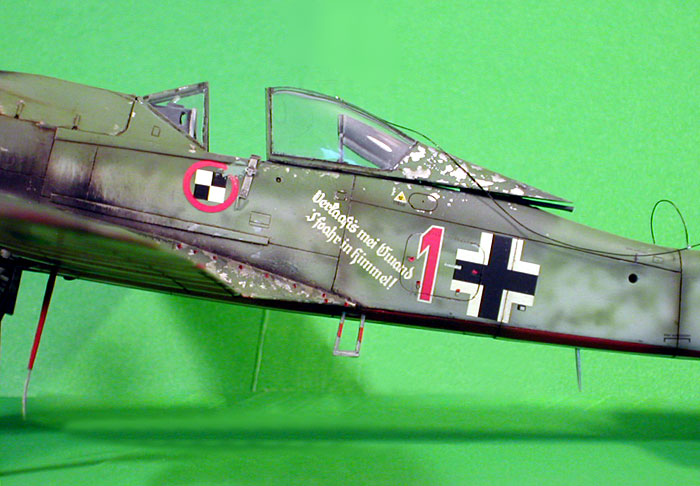
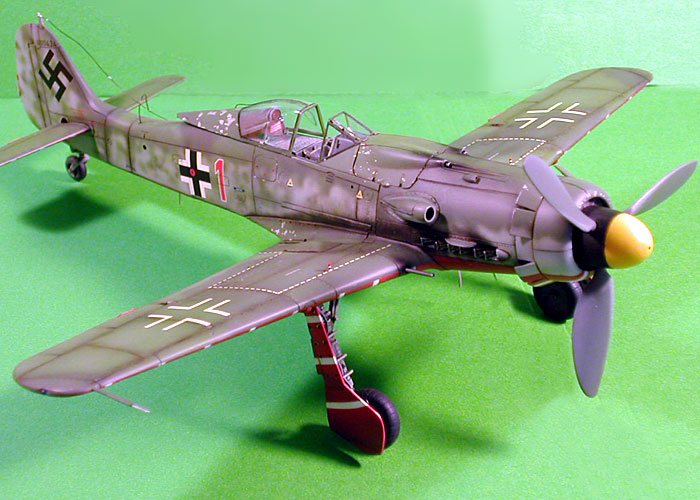
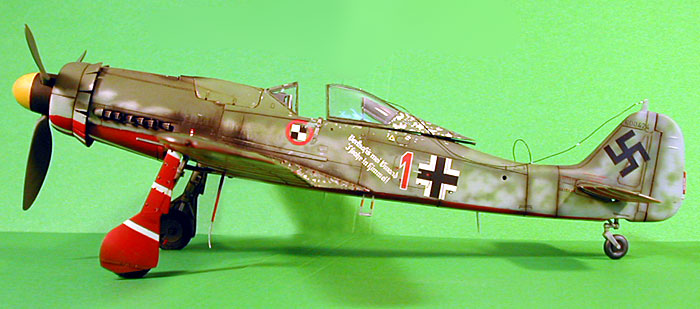
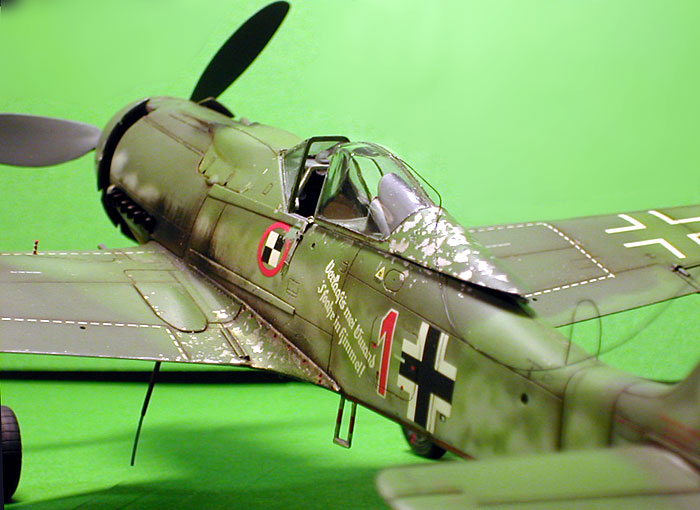
This is “Red 1” , a
Focke-Wulf Fw 190D-9 of JV-44. This is perhaps one of the most widely
known and well-documented Doras.
Having said that, I will
jump right to the construction of the model
This is the 1/48 Fw 190D-9 kit is from Italeri. As is probably well known,
this is a repackaging of the legendary Trimater Fw 190D-9. My copy had
numerous blemishes, injection marks, and warpage. Just getting the kit
ready for assembly took a few days of sanding the surface and rescribing
panel lines.
Compared to the other
Italeri’s Doras I had, I realized this copy was particularly bad. I guess
it was just bad luck.
I think Italeri’s Fw
190D-9 has a better profile than Tamiya’s counterpart.
For one thing, it has the
right wing span whereas Tamiya’s wing span is almost 1mm shorter. It may
seem marginal in 1/48. However, if you multiply it by 48, that’s almost 5
cm! Plus, Trimaster/Dragon/Italeri Doras somehow look “more like it” when
completed. It’s a very intangible aspect of models.
I think models are like an
interpretation. It takes certain simplification and exaggeration which
combine to either lead to the ‘right’ look of the subject or a ‘toy-like’
look. I can kind of see why so many Dora lovers still build Trimaster/Dragon/Italeri
versions.
However, despite its more
accurate profile, Trimaster/Dragon/Italeri’s Doras suffer from the same
incorrect wheel well as the Tamiya kits.
I used MDC’s wheel well
set to correct this inaccuracy. MDC’s replacement wheel well set is a
thing of beauty. It is originally designed for the Tamiya Dora but with a
little bit of sanding and dry-fitting, it can be easily used for Trimaster/Dragon/Italeri
Doras. When properly washed and dry-brushed, the details of the wheel well
are really eye-pleasing.
Next, I increased the length of the retraction arms to the main
landing-gear struts. I think this correction gives the landing struts the
correct angle.
I added brake lines and
used Eagle Edition’s wheels and tires. Eagle Editions’ wheels and tires
looked better to me than most other aftermarket parts. The cast and
details are absolutely first class.
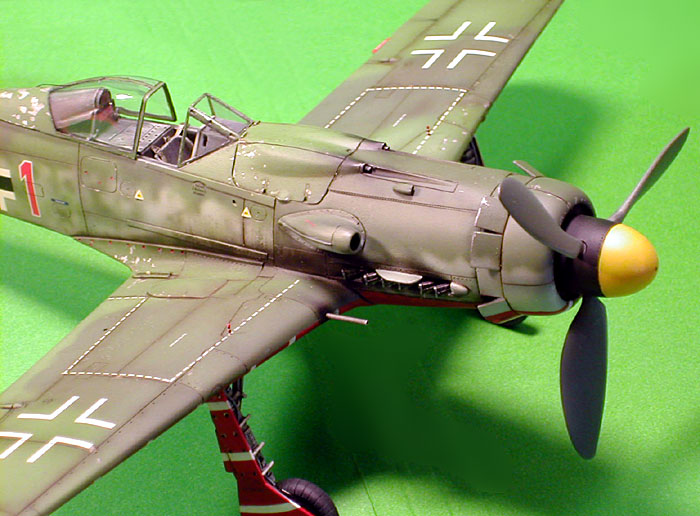
The cockpit also received a few modifications. The instrument panels are
from MDC. Unfortunately, they don’t come with decals for instrument dials.
I carefully cut out the dials from the Tamiya Fw 190d-9 JV-44’s decal
sheet and put them on the MDC instrument panels. Using the combination of
MDC’s instrument panels, Tamiya’s decals, and Future drops on the dials
looked much better and more three-dimensional than using printed film and
PE instrument panels from FM details or Aires.
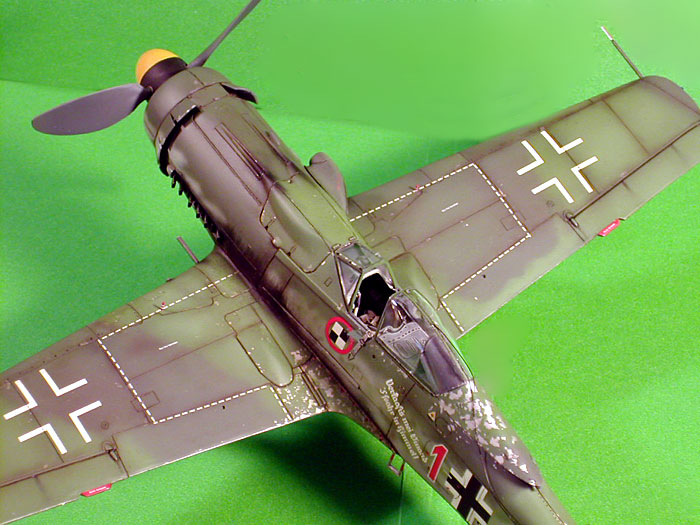
The canopy was dipped in
Future to remove irregularities on the surface. Given the bad shape of my
copy and lack of transparency in the canopy, this proved to be more than
just cosmetic.
The cockpit tub and control panels were from the kit. Frankly, I think
they look pretty good despite their inaccuracies. I just added a
scratch-built throttle control and Eduard Accessories’ painted Luftwaffe
seatbelts.
Normally, I don’t like PE seatbelts that much because they are often too
two-dimensional. However, Eduard’s seatbelts are great. They have enough
volume for the scale and a great deal of detail. With a little bit of
weathering, they looked great on the stock seat.
The exhaust pipes are from
Ultracast. They are designed for the Tamiya Fw 190D-9, but they can be
used for Trimaster/Dragon/Italeri Doras with a bit of trimming and
sanding.
One interesting I noticed
was that Tamiya’s slots for exhaust pipes were a little longer than those
of Trimaster/Dragon/Italeri Doras. At the point of construction, I
couldn’t find out which one was really more correct.
I experimented with
several techniques to simulate chipped paint looks for this project.
First, I spayed the Dora
with natural metal and a coat of Future. Once everything was dry, I used
water to stick salt grains on the areas that were supposed to show chipped
paints. The idea was to remove these grains once the actual painting was
completely dry. Alas, nothing remained ‘stuck’ to the Future coat, and
removing the grains resulted in a lot more chipping than I hoped for.
Moreover, it was really difficult to control the chipping especially when
I had to mask the Dora for the camouflage patterns. The result was not
quite disastrous, but I really didn’t like the effects. I just didn’t look
right. I ended up repainting almost the entire airplane. I think I will
just ‘stick’ to my trusty silver pencil for future chipping effects.
The fuselage and upper wings were painted in a scheme of RLM 76, RLM 82,
and RLM 83. The spinner was first painted with black, and a white spiral
was hand-painted to simulate the ‘overpaint’ looks. Then I carefully
applied black and yellow gradually to make sure the white spiral was
barely visible.
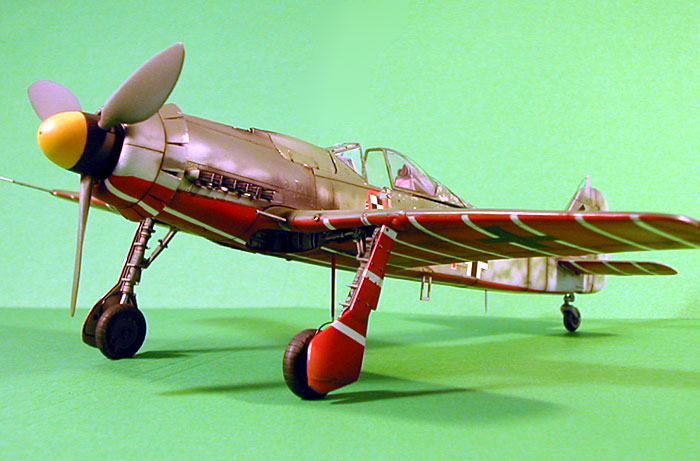
The underside was first
preshaded with flat black. Then I airbrushed white strips. After masking,
it was again preshaded to darken the areas that became brighter with the
white strips. Lastly, I sprayed red. I was trying to keep panel lines
quite visible under this high-contrast color scheme. The end result was
quite satisfying. I used the decal sheet from the Tamiya Fw 190D-9 JV-44
kit. Although they tend to be a little thick, I like their opacity and
sharpness. I had a copy of Eagle Cal’s Doras of JV-44, but decided to save
it for another Dora later. The thickness of the Tamiya decals was almost
diminished after a several coats of Future and dull lacquer. I washed the
Dora with oil paint and pastel, which was followed by a couple of
additional flat coats.
Overall, this was a good training ground for the chipping effects. Other
than that near disaster, it was an enjoyable project mostly due to the
replacement wheel well set and update parts.
Click the thumbnails below to view larger
images:
Model, Images and Text
Copyright © 2003 by
Doowan Lee
Page Created 11 October, 2003
Last Updated
17 March, 2004
Back to
HyperScale Main Page |
 Home |
What's New |
Features |
Gallery |
Reviews |
Reference |
Forum |
Search
Home |
What's New |
Features |
Gallery |
Reviews |
Reference |
Forum |
Search