|
Focke-Wulf Fw 190D-9
Superdetailing the Big Tail
Dora
by Doowan Lee
|
|
|
Focke-Wulf Fw 190D-9 |
Part Two
landing gear, cockpit,
painting, markings and weathering

HyperScale
is proudly supported by Squadron
Part Two - Construction
Continues
|
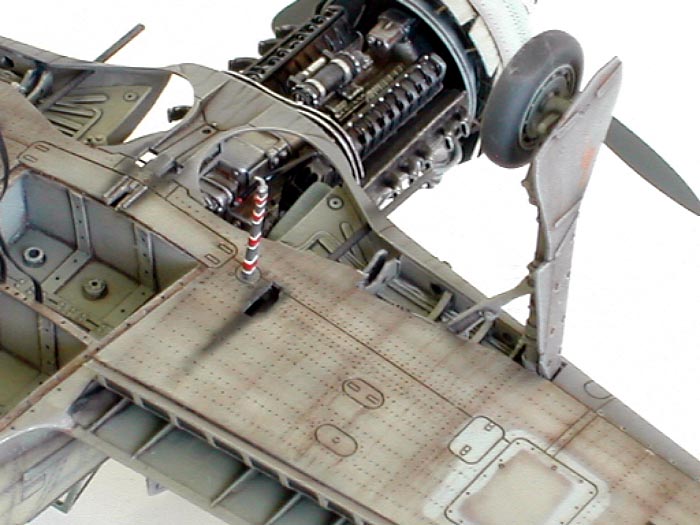
Landing Gears and Wheel Well
Inspired by Robert Stephenson and E. Brown Ryle’s article on Fw 190
landing gear in HyperScale at
http://www.clubhyper.com/reference/fw190landinggear_2.htm
and http://www.clubhyper.com/reference/fw190landinggear_1.htm , I decided
to build a correct wheel well and landing gears.
After looking at the
schematics in the Mechanics of BF-109 and Fw 190, I realized that both
Tamiya and Italeri had not only inaccurate, but also simplified wheel well
parts. For instance, the inner walls of the well have several circular
holes, which are completely absent in both of the kits. My solution was to
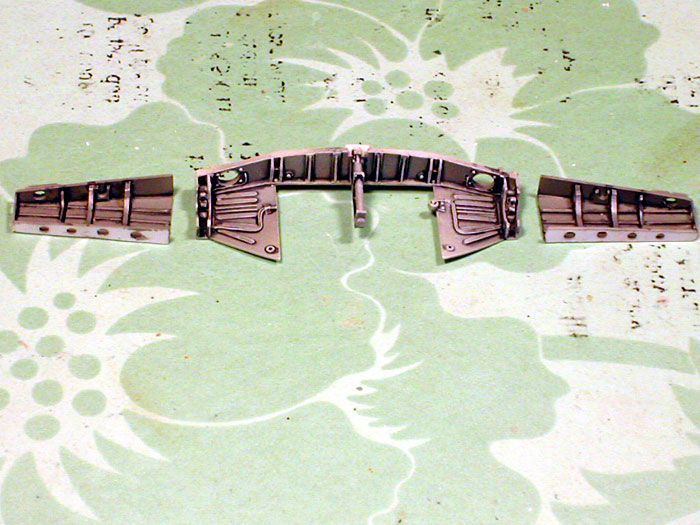
use MDC’s update set for the middle part of the wheel well and
scratch-built the rest. After many hours of drawing, planning, cutting and
dry fitting, the result was quite satisfying.
Landing gears are inserted vertically (well almost vertically) in both
Tamiya’s and Italeri’s kits. Although this is perhaps the right way to
engineer the landing gears to give them enough structural stability, it is
not accurate. I decided to look at the schematics and correct this
inaccuracy. That entailed lengthening the landing gears, adding connector
rods, reducing the size of the square blocks, adding break wires etc.
Getting the right angle of the connector rods (the bend) was a bit tricky.
But the effort paid off when the landing gears were finally attached to
the wheel well.
Click the thumbnails below to view larger
images:
[photogallery/photo26694/real.htm]
I also added springs and wires to the retraction arms. I had to lengthen
the retraction arms both for the appearance and structural reasons. Since
my corrected main landing gears are now inserted horizontally, I needed
the precise length of the retraction struts to get the right angle and to
give the landing gears enough structural rigidity. Having done all these
corrections and modifications, it’s sort of disappointing since the
results are not that visible. I take comfort in that at least they are
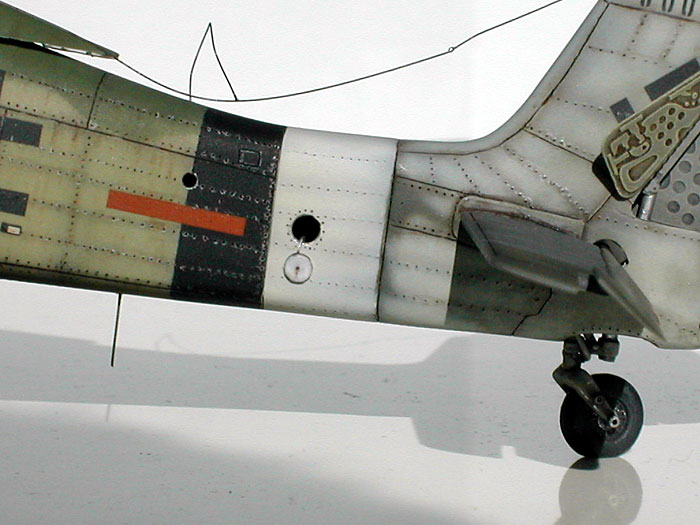
mechanically correct. I also added 6 gear door attachment struts to each
main landing gear. The tail landing gear is from the DML/Italeri FW
190D-9. Frankly, Tamiya’s counterpart is over simplified. I added towing
tubes to the sides of the tail landing gear. I used MDC’s beautifully cast
tires. What can I say? These are not only beautiful, but also designed to
look absolutely correct and to help the modeler paint them. Just beautiful
stuff no matter how many times I have used them.
Click the thumbnails below to view larger
images:
[photogallery/photo11051/real.htm]
I compared the morane antennas that came with the kit and the FM detail
set.
I was not satisfied with
either since Tamiya’s antenna was too tick especially at the bottom tip,
and FM’s one was too thin at the top. My solution was to combine the two.
I slightly thinned the upper part from the kit and cut the bottom part.
The same part was cut off from the FM PE set and added to the slightly
thinned Tamiya part.
Cockpit
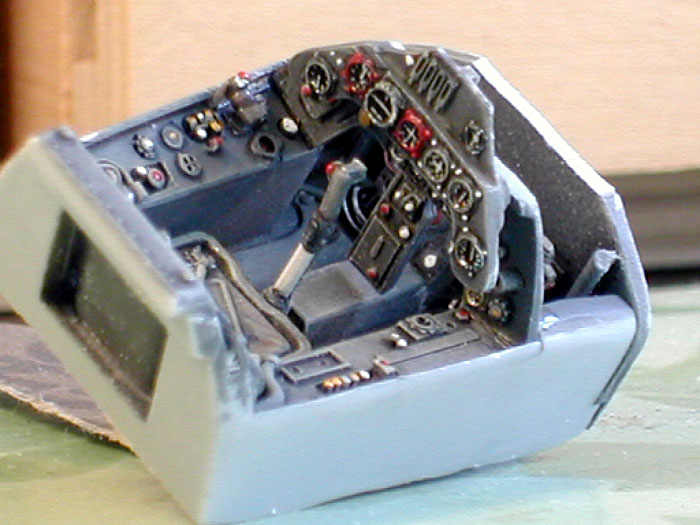
For the cockpit, I compared several kit parts and aftermarket update sets.
Having tried several permutations of all the cockpit parts I gathered, I
concluded that the best combination is to use MDC’s tub, control stick,
seat, and instrument panels, and instrument decals from the Tamiya
Fw 190D-9 JV-44. Using the combination of MDC”s panel, Tamiya’s decals,
and Future drops on the dials looked much better and more
three-dimensional than using
films and PE instrument panels from FM details or Aires.
Click the thumbnails below to view larger
images:
[photogallery/photo14193/real.htm]
I thought about using
Eduardo Accessories’ painted Luftwaffe PE seatbelts, but the seat from MDC
had such beautifully cast seatbelts. FM Detail’s and Aires’ PE seatbelts
are also adequate, but that they are quite oversized. I also scribed
canopy rails on the fuselage around the cockpit area.
I had to think about how to paint the Dora for a few days since I wanted
to find a way to make the rivets just visible yet subtle. I tried several
permutations of washing, preshading, postshading, and painting. After
several tests, I concluded the best solution was to prewash the whole
airplane to darken all rivet marks, preshade, paint, and postshade. I was
tempted to wash it again to make the rivet marks a bit darker and visible,
but I managed to refrain. The whole logic was to make the rivets just
visible enough and subtle, but never exaggerated. In overall, I am pretty
happy with the results, although I really had to fight the temptation to
wash the rivets over and over again.
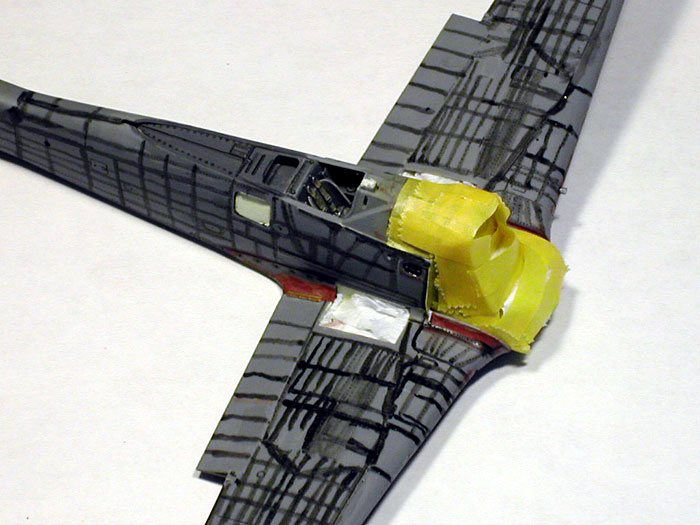
Click the thumbnails below to view larger
images:
The camouflage pattern was pretty difficult. After a great deal of
research and speculation, I decided to go with Mark Tucker’s
interpretation on HyperScale at
http://204.50.25.179/features00/fw190d9brown4mt_1.htm . I frankly
believe nobody can be absolutely correct on the camouflage patterns and
colors of Brown 4. I think Tucker’s interpretation is logical and
intuitive. Why waste time when someone has done all the research already?
Like his article, my interpretation is a combination of several sources,
including Exterpen’s decal sheet, Eagle Cal’s decal sheet, and Green
Hearts: First in Combat with the
Dora 9.
I followed Mark Tucker’s interpretation except the tail. I agree
with Mark Tucker that it is quite difficult to see visible mottling
pattern from the pictures in Green Hearts: First in Combat with the Dora
9. However, I did think there were some overpainted patterns on the tail
and definitely some mottling around the joint of fuselage and the tail.
This led me to apply subtle mottling to the tail.
The underside is painted
to represent natural metal, Green-Blue, and RLM 76.
The natural metal finish was
simulated by painting the whole area with a mix of silver and flat aluminum
followed a heavy coat of flat base and heavily thinned rust. After this
process, I followed the regular steps.
After a coat of Future, I applied
the decals supplied by EagleCal. As usual, I used the Gunze softener for
tricky surfaces and the micro set solution for flatter areas. After a
couple of days, I applied another coat of Future to the Dora. When it was
completely dried, I did more post shading with individual colors thinned a
little with flat white to given the entire aircraft a worn-out and faded
look. After another coat of Future, I weathered the Dora with various
shades of burned umber oil paint.
Reflecting this Doras’ field conditions, I
applied heavy weathering. If it is too clean, it just doesn’t look like a
fighting machine to me.
Everything was sealed with a couple of thin coats
of Testors’ flat finish. Then, I used a silver pencil to steadily simulate
scratches and chipped paints. The rationale of the whole painting process
is to achieve a ‘subtle, subtle and subtle’ mix of wear and detail.
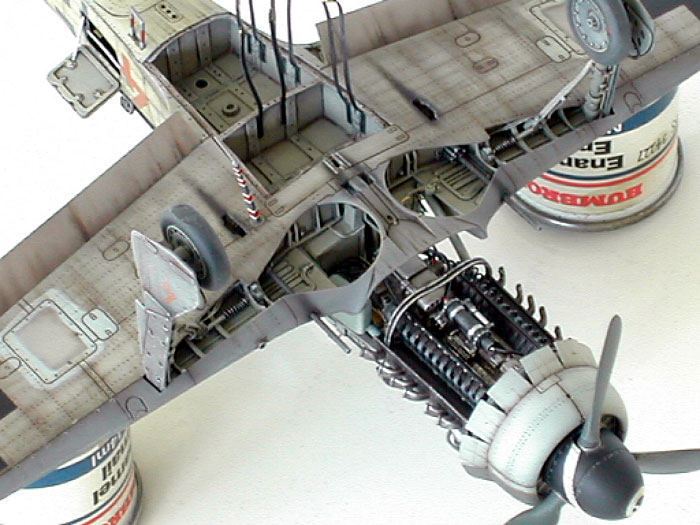
Click the thumbnails below to view larger
images:
I didn't really log my
hours for this project, but it seems to have taken forever to finish.
As usual, disasters always
accompanied the entire process of building and painting the aircraft.
There were a couple of times when I thought I got myself into something
impossible to finish, especially when the left fuselage got ripped because
it was thinned so much.
Of course, I dropped the
model a few times breaking the landing gears and flaps. I don’t know, they
just happen before I finish any model.
The last minute disaster
was to realize that some of the decals got chipped off while I was taking
pictures for this article. Reluctantly, I had to pick up my airbrush,
paint, silver pencil, and flat finish again…
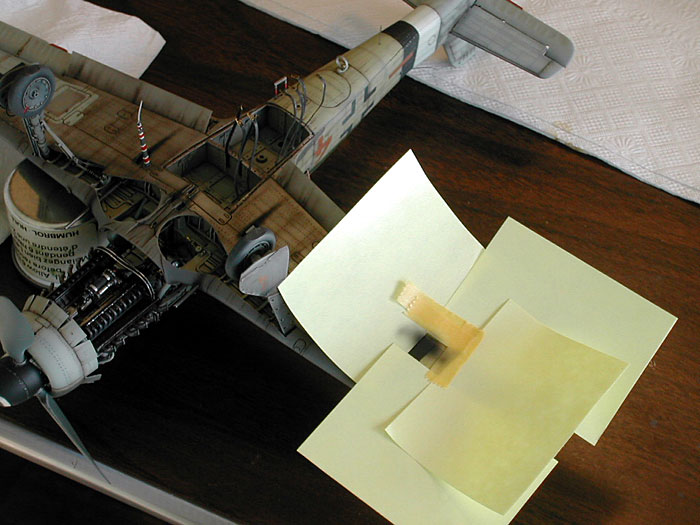
The completed model is my only consolation.
Would I superdetail
another Dora after such agony and pain? Well, a couple of more ripped
Doras in the pipeline already…
Focke-Wulf 190
Modelling Manuals 20 |
|
|
|
|
US Price: $17.95
UK Price: £12.99
Publisher:
Osprey Publishing
Publish Date: May 25, 2002
Details: 64 pages; ISBN: 1841762687
|
|
|
Model, Images and Text
Copyright © 2004 by
Doowan Lee
Page Created 23 February, 2004
Last Updated
17 March, 2004
Back to
HyperScale Main Page |
Home |
What's New |
Features |
Gallery |
Reviews |
Reference |
Forum |
Search