|
Gloster Gladiator Mk.I
by
Peter Nebulung
|
 |
|
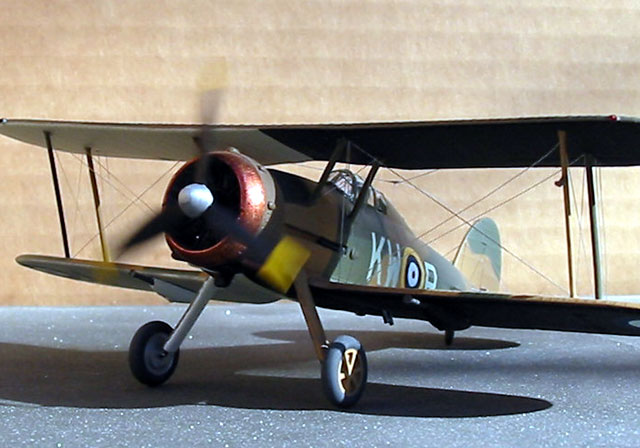
Gloster Gladiator
(with judicious use of the hair dryer...) |

HyperScale is proudly supported by
Squadron
The Gladiator was
the last operational biplane fighter to be used by the RAF. Brought
into service a few years prior to the start of WWII (early 1937 for
the Mk I, mid 1938 for the Mk II), it saw action with 607 and 617
squadrons in France as well as limited use during the Battle of
Britain as a point defense fighter with 247 squadron at Rodborough.
In addition, Gladiators served in Norway, Malta, and the Middle East
before being replaced with more advanced aircraft. The Sea
Gladiators used in the Defense of Malta won a special place in the
hearts of the Maltese, being ever outnumbered, but never running
from the fight. Named Faith, Hope and Charity, these three were
constantly in the thick of it, until the RAF could get Hurricanes on
the island to take over the defences.
Eventually replaced by Hurricanes and Spitfires, the remaining
Gladiators went on to auxiliary squadrons and weather duties.
The Heller kit is
very detailed for its age, with fine raised panel lines, and nicely
rendered fabric surfaces. It provides parts to do the Mk 1 and II,
as well as skis for a Finnish aircraft. In order to simplify the
construction process, the interplane struts are molded onto the
fuselage. This allows the builder to glue the upper wing on square
without too much difficulty.

Once that is done
the outer struts are more or less a drop in place deal. Hellers’
instructions give a detailed sequence for rigging the model and
holes are predrilled in the various parts. My only problem here was
that the holes were much too large for the 2 lb test monofilament I
used. Each hole needed to be filled with white glue and touched up.
Detail in the cockpit consists of a floor with rudder pedals molded
on, joystick, a seat, and instrument panel. Also included is a gun
sight. Addition of masking tape seatbelts adds a bit to the
interior, but since the 3 part canopy is too thick to pose open,
there really isn’t much to see through the tiny opening. The engine
looks ok, especially if painted, washed and dry brushed. For some
who really wants to go to town, plug wires could be added, improving
the look even more.
I painted this model
with Gunze Sangyo paints, in the “Shadow”scheme as noted in Scale
Aircraft Monographs, Camoflage and Markings No 2. This is an
interesting scheme of Dark Earth/Dark Green on the upper wing,
taiplanes and fuselage upper area. The lower wing, lower fuselage
and vertical fin are painted in Light Earth/Light Green.
|
|
|
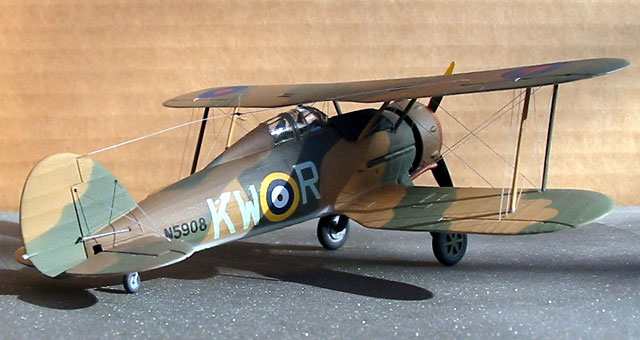
Rear quarter view.
Note that the aircraft number is not accurate, as I couldn’t
find the proper decals so used the ones from the heller kit.
Proper number should be N2304 |
The idea here was to
lighten the areas in shadow to better blend in the the camouflage
pattern. The model was painted with the upper wing separate, and in
the order of darkest to lightest. Masking was done with blue tac,
rolled out to about 1/16 and pressed in place as close to the
drawings as possible. Larger areas were then masked with Maskol.
This allows a nice tight pattern, yet with a visible soft edge.
Believe me, it took some doing to get it right.
The bottom was
painted black/white, and then the model was gloss coated, decaled,
sealed and flat coated.
Final assembly was
the last thing done, which is a departure from my usual method.
Looking at the results, it was worth the effort.
Enjoy!
Model, Images and Text
Copyright © 2003 by
Peter Nebelung
Page Created 19 June, 2003
Last Updated
17 March, 2004
Back to
HyperScale Main Page |
 Home |
What's New |
Features |
Gallery |
Reviews |
Reference |
Forum |
Search
Home |
What's New |
Features |
Gallery |
Reviews |
Reference |
Forum |
Search