|
Heinkel He 111
by Jeffrey Brundt
|
|
|
Heinkel He 111 |

HyperScale is proudly supported by
Squadron.com
The Heinkel He111 was the backbone of the German
bomber force in WWII. It served the entire war and on all fronts.
Originally designed as a commercial transport the 111 was quickly modified
for use as a bomber.
It first appeared over the countryside of Spain
during the Spanish Civil War. It would later be used to great effect
during the ‘Blitz’ over England. There were many different variants
produced throughout its lifespan; from standard day bombers to special
night fighting versions.
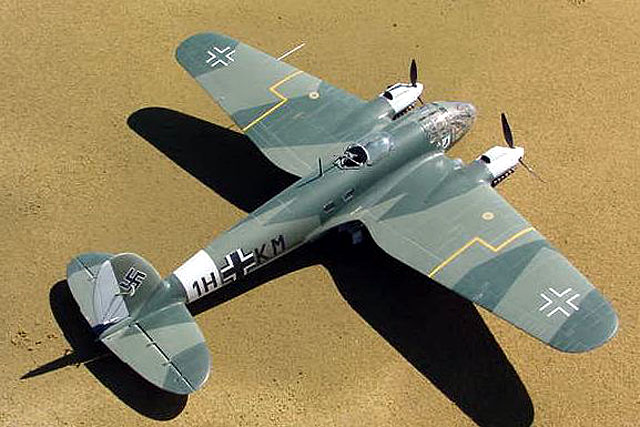
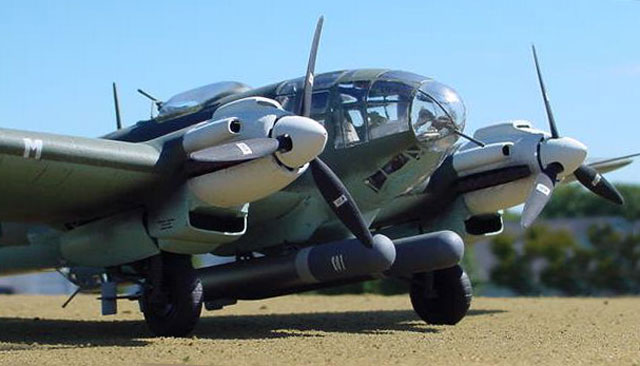
This is Monogram’s 1/48th He 111H-6. It was built OOB.
I had bought it from a gentleman after I posted a want ad on one of the
swap boards (either ARC or HS, I can’t remember which one).
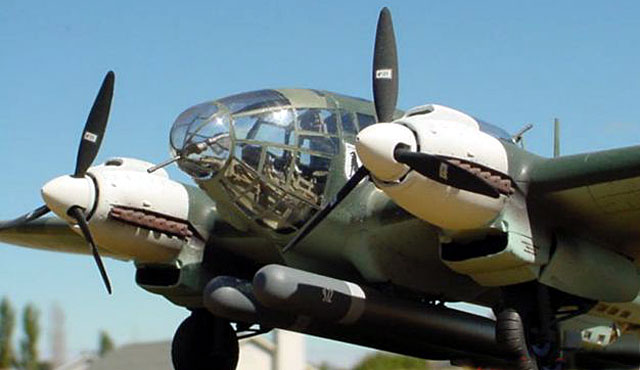
The surface detail is very finely engraved. It was
hard to believe this kit was from Monogram. The kit goes together rather
well. From what I understand there are PE sets available but I wasn’t able
to find any and my intention was to build it stock from the start anyway.
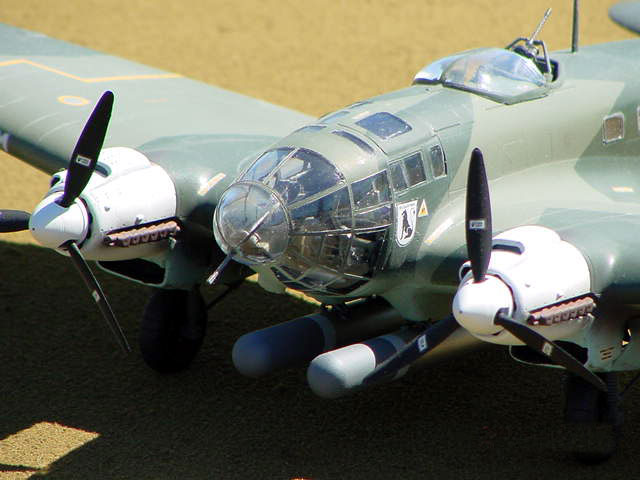
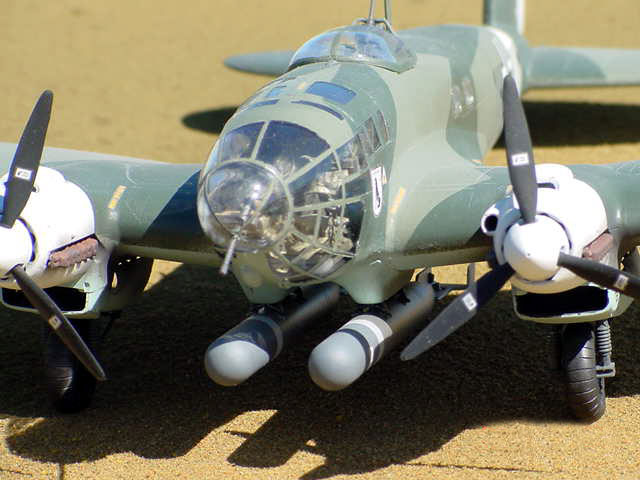
The kit detail is nicely done for the cockpit. This
is one of those models where you could get carried away detailing it out
since you’ll be able to see most of it through the nose glazing. The
interior aft of the rear bomb bay bulkhead is very basic. Detailing here,
in my opinion, would be a waste since hardly any would be visible when
you’re done and it’s all closed up.
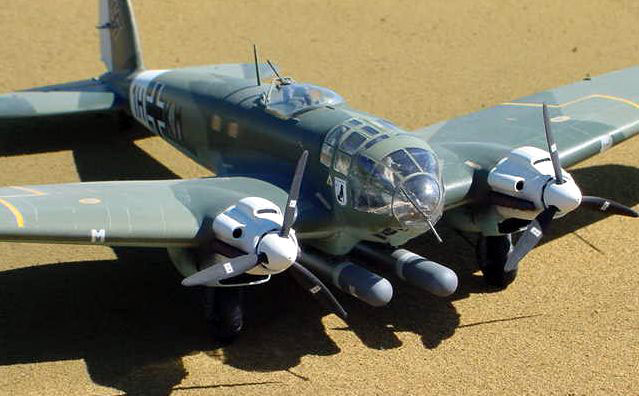
Part fit is good with only small amounts of filler
needed. The kit gives you the option to install a standard bomb bay or
mounts for (2) 250kg bombs or (2) torpedoes. I opted for the Torpedo
version based out of Sicily in the Med around 1942.
The wheels of the kit are nicely flattened to give
the appearance of weight. Installing the landing gear is a bit fiddly. You
have to spread the gear doors apart to get it in so care must be taken
when doing this installation.
The nose glazing was masked with Black Magic masks.
These worked okay. I say only okay because some of the panels with rounded
corners were masked using Ambroid’s liquid mask (the pre-cut ones were not
that accurate to fit those).
The clear parts were really nicely done and all I had
to do was wash and dip them in Future. I used a very fine brush and
Ambroid's Pro-Weld to bond the clear nose sections to the fuse. Patience
is a virtue when doing this. One slip of the brush and you could have a
real mess on your hands.
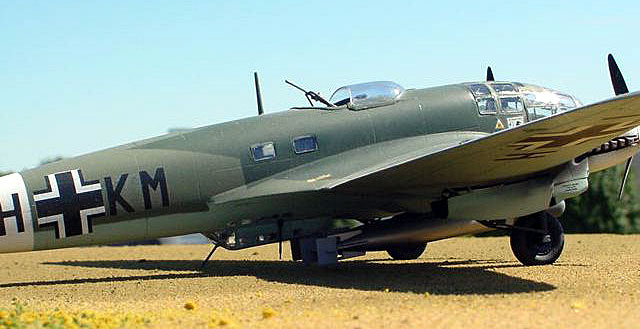
The model was painted in RLM 65/70/71 using Model
Master enamels.
I had the model all painted, clear coated and ready for decals when I
discovered the decals were unusable. When I tried to apply them they just
disintegrated after soaking in water. I guess the model sat for about a
month while I figured out what I could do. I tried to find other decals
from AeroMaster but since my paint scheme was already applied my choices
were limited.
I finally got a hold of Monogram and talked to a nice
guy there. I gave him the kit and part numbers. It was fortunate after 9
years the parts are still in stock (my thought is that they are getting to
re-release the kit again). I told them about the decals I had and how they
disintegrated. It was no problem to send off a new set free of charge. I
guess it all depends on whom you talk to.
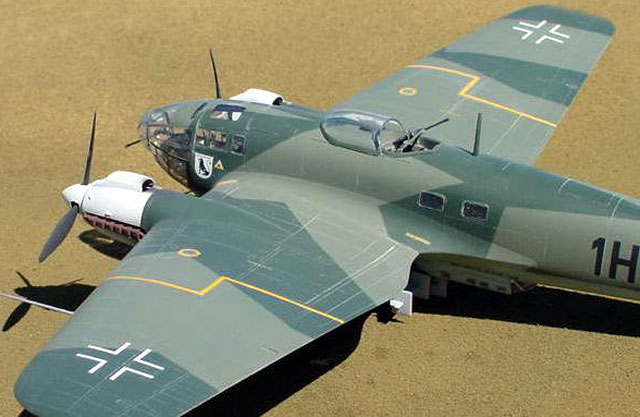
Once they arrived I started back on the kit. I had
also ordered AeroMaster's two sheets for the He 111 and it's a good thing
I did. The kit decals do not include the swastika (probably because the
decals are made in Italy by Cartograph and the kit is sold in Europe as
well as the US). I was able to get the decal I needed from one of the
AeroMaster sheets. Once the decals were applied and dry I gave the model a
'wash' with black acrylic on the bottom and grey/tan acrylic on the top to
highlight the panel lines (this kit does have some nicely engraved lines).
A final shot of flat clear lacquer and it was time to remove the masks.
Removing these was a pain. Word of advice; don't let a model sit so long
with Black Magic masks applied. They really harden up and can be a pain to
remove. There was a lot of adhesive residue left but Goo-Gone took care of
that. Then it was just attaching the fiddly bits like machine guns, pitot
tubes, etc. and final detail painting and some light weathering.
Monogram's Heinkel He 111 is a really a nice kit and
one the only He 111 H model in 1/48 scale that I know of.
The glass nose can be intimidating to some modelers
and I must admit I was a bit hesitant but it worked out very well.
If you can find one I highly recommend building this
kit.
Click the
thumbnails below to view larger images:
Model, Images and Text Copyright © 2003
by Jeffrey J. Brundt
Page Created 23 October, 2003
Last Updated
17 March, 2004
Back to
HyperScale Main Page |
 Home |
What's New |
Features |
Gallery |
Reviews |
Reference |
Forum |
Search
Home |
What's New |
Features |
Gallery |
Reviews |
Reference |
Forum |
Search