|
Heinkel He 219
by
Kay Koglin
|
 |
|
Heinkel He 219 |

Tamiya's
1/48 scale Heinkel He 219 is available online from
Squadron.com
It is not easy to report on a modeling project that extends back three
years, but I will try anyway.
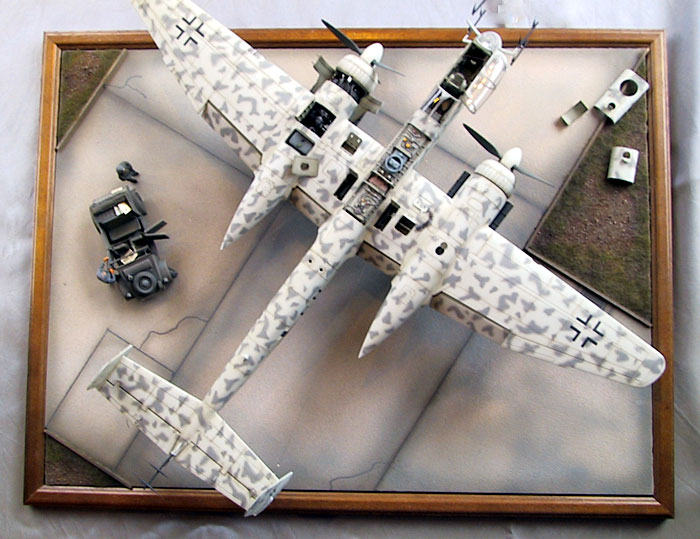
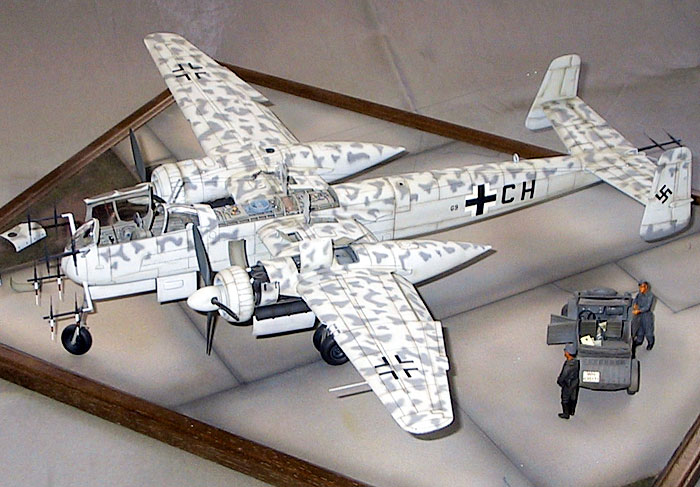
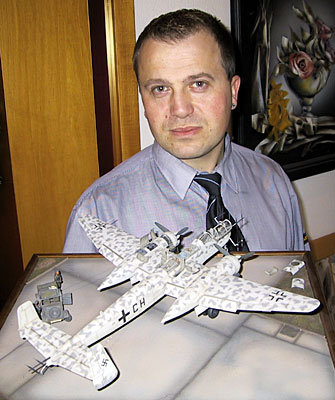
I love the Heinkel He 219 and the finished diorama looks impressive. But
unfortunately, three years ago, I wasn‘t able to take photos of the
construction work. I will therefore use this article to report problems
and the main features of construction. For me, it is very important to use
a new modelling project to help my own further development as a modeler.
I recall, just before Christmas some years ago, being overwhelmed when I
saw the contents of the box. The outstanding quality of the parts that
left nothing further wanted. When I examined the three-view-drawing for
the painting-scheme I realized that I wanted to start building the model
straight away, but in reality it was some time before I got started.
Tamiya’s Heinkel He 219 presented an irresistable invitation to modify the
basic kit to into a high-detailed model. This superdetailing project
helped to decide her nickname “The Venus of Rostock”.
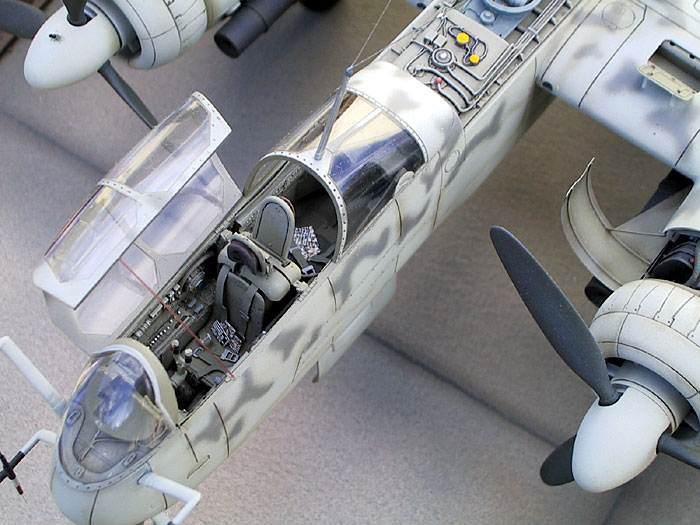
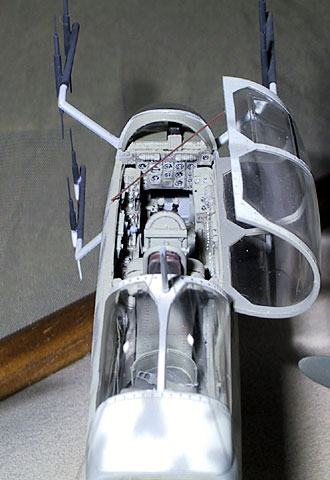
I began with researching the interior, including detail photos of the
engine, the armament and the cockpit. However, I would up in a dead end
because I could not find this information anywhere in a book. I therefore
began the long wait for a detail-set that would offer the details that I
would like to depict in the model.
Verlinden was the first with his Update kit, but unfortunately this update
did not meet the standards of the day, having only a small amount of
detail but with a high price and moreover still with some errors. The CMK
detail set was better, but with the appearance of the AIRES-Kit, the
choice was clear.
On the same day that I took deliver of the Aires set, I started with
construction. I can remember well, there was an inexhaustible quantity of
parst in a quality never before available, and this at a fair price!
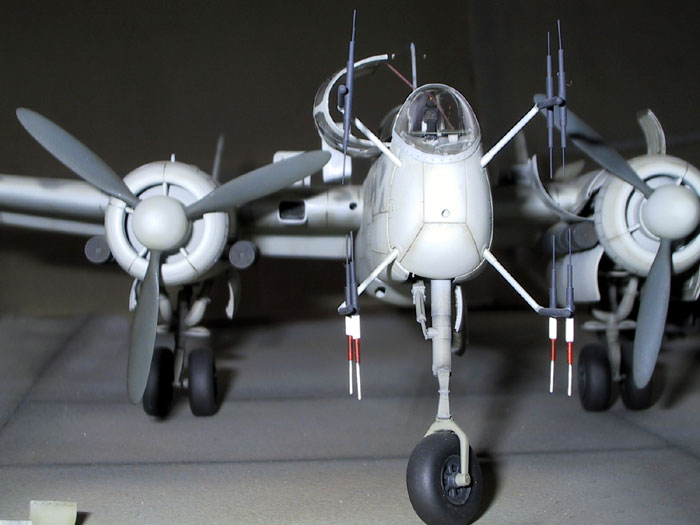
The finished model looks from the first glance, but it is nevertheless a
big project with many problems encountered before the final resu;t. During
construction I came to the point where the the desire to actually complete
the model was overtaken by the thought that I would never finish – I could
not see the light at the end of the tunnel! My recommendation is not to
put yourself under pressure to finish by setting artificial deadlines.
Just enjoy the experience.
I do not need to describe the basic construction because the Tamiya kit
does not present any nasty surprises. I will therefore focus on the detail
sets.
Installing the Aries
Update
Preparation for the
installation of the Aires detail set requires that many kit parts are
altered. First, all doors and bays that that will be displayed open must
be cut out. I used a small saw for this task. Before I cut with the saw, I
used my Dremel tool and drilled a hole in every corner of the doors. This
makes the cuts with the saw easier and acts as a guide to prevent errors.
To reproduce the thin sheet metals used at airplanes skins I again usedmy
Dremel with the cutter and milled the plastic of the kit from the inside.
The thinned plastic looks authentically thin after this process. Tak your
time with this process, however, as it is very easy to damage the plastic
parts if you rush.
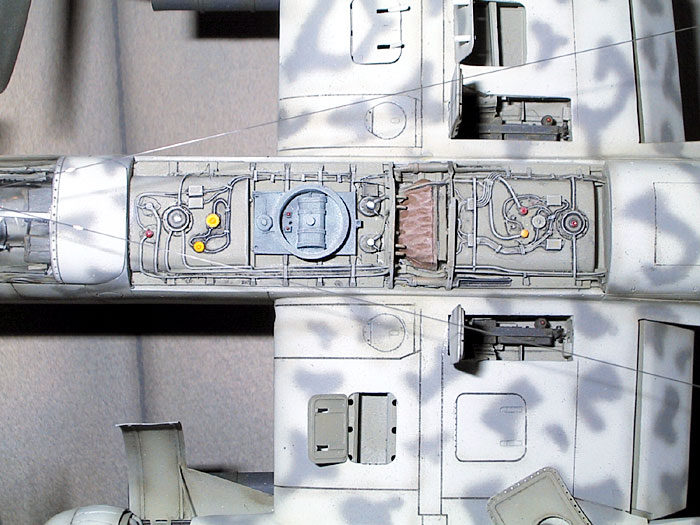
The mounting of the wheel well, the engine compartment and the engine
turned out to be the most difficult part of the assembly. This entailed
many hours of cutting, sanding and dry fitting of the parts. I repeated my
technique for representing the thin sheet metal used for the skin of an
aircraft.
Good references are required for wiring the engine, otherwise a good
imagination will be helpful. I prepared the engine for wiring by drilling
out locating holes. I used thin cooper-wire - don’t forget to anneal the
copper-wire (carefully heating over a candle) to make the parts more
flexible. The same can be done with photo-etched parts too, but be
careful. Overheating might destroy some more delicate parts!
Thick super glue was used to secure the resin parts. This is also handy
for filling gaps between the resin and plastic parts. Take care not to get
this glue on the parts though.
For gluing the plastic-parts I used liquid glue and the
“Squeeze-Technique”. The big advantage is that the parts set quickly and
there is not much risk of residue. The process is simple, it needs only a
thin brush. Hold the two parts together and with the brush, soaked with
the liquid glue, brush along the seam. Through the capillary-effect, the
liquid-glue flows into the seam by itself. Finishing the join is very
easy, it is only necessary to sand the seam slightly.
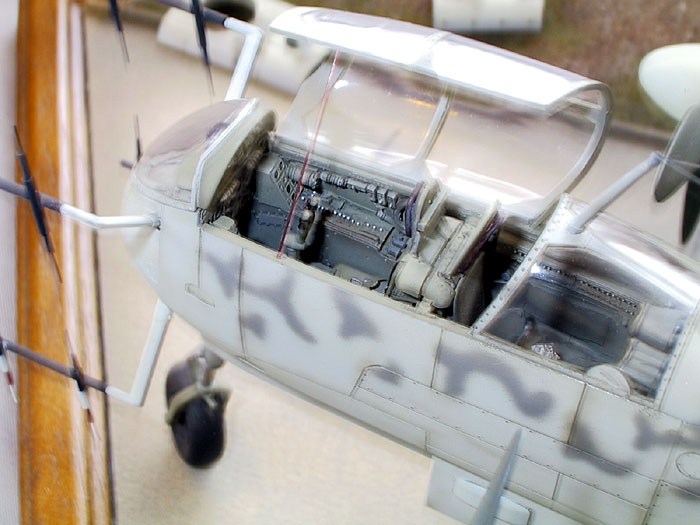
My Painting Technique
Xtra Color RLM 02 was used
to paint the interior, including the cockpit and wheel wells.. In order to
give the paintjob a three-dimensional finish, I use heavily thinned dark
color and a thin brush. I pointed the brush in corners and because of the
capillary-effect the thinned dark color flows in the corner and edges.
After a drying time of 24 hours I drybrushed details with white artist
oils. The advantage of the oil paint is that it leaves a soft transition
between the colors and, in the case that there might be too much oil paint
on the model, it can be removed by a brush that has been slightly
moistened with thinners. This technique can be applied on many other parts
of the model too.
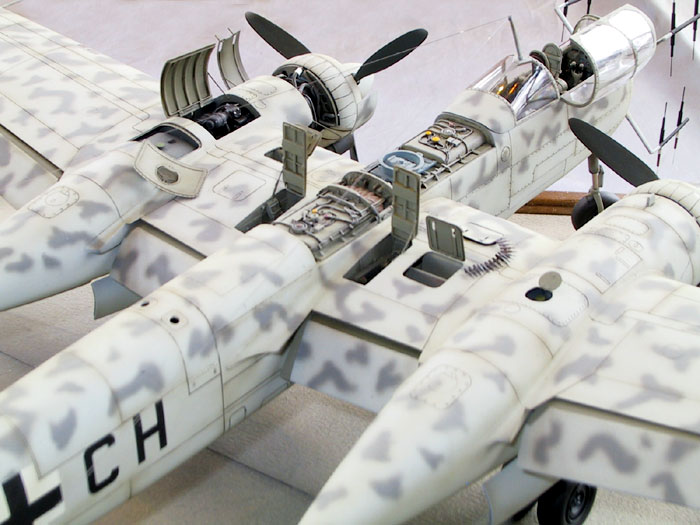
The painting of the He 219 was in accordance with the Tamiya instructions
using Xtra-Color RLM76 lightened with white. The disruptive camouflage was
RLM 75 Grey Violet. Spraying the detailed camouflage pattern proved
trying.
Decals
Application of the decals from the kit performed well with the help of my
favorite decal softener, Gunze’s Mr. Mark.
Weathering
Weathering is one of the
most controversial issues for modelers. My philosophy is, the less the
better!
For example, the He 219 represents a German high-tech weapon in the last
year of the war, therefore it is logical to assume that she was well
maintained by Luftwaffe technicians. She would have little evidence of
aging and weathering. That is the reason why I only shaded the panel lines
with heavily thinned, dark coloured oil paint applied with a fine brush
taking advantage of the capillary-effect-method. I went over the panel
lines with the tip of a cotton bud afterwards to clean up any excess wash.
After a coat of Matt varnish, I further accentuated the panels by spraying
a thin coat of a solution from Matt Lacquer and Burnt Sienna oil paint.
The advantage of this technique is that faults are less visible and it
does not exaggerate the structure too much.
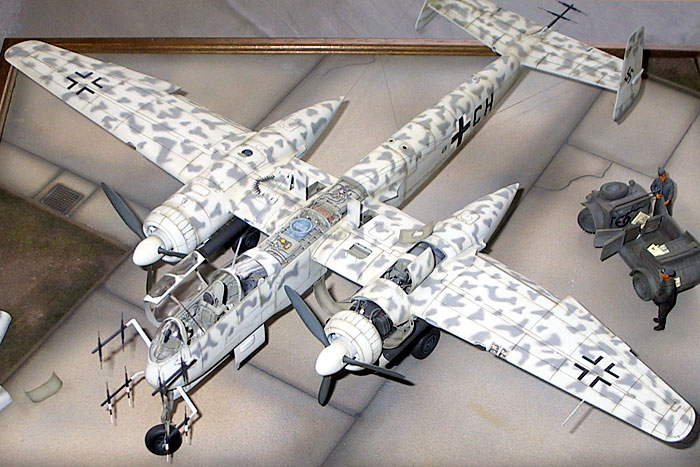
The airfield diorama is not
composed in the classic military method. Since, as already mentioned, the
He-219 was a high-tech weapon system, it is understandable that it would
not be rolled out on a dirty meadow. Wartime photos suggest that the He
219 was operated on concrete.
The base consists of a wood-picture frame. I like using these picture
frames which are inexpensive and effective. I leave the glass in the
framework and replenish the framework with corrugated cardboard. In order
to add variety to the concrete, I positioned clumps of grass and. I spread
white glue on to the cardboard and sprinkled this with the sand and grass.
I left this to dry for 24 hours. After the white glue is dry, I blow away
loose material with a hair dryer. Subsequently the entire basis-plate,
including the concrete surface, were worked over with my airbrush.
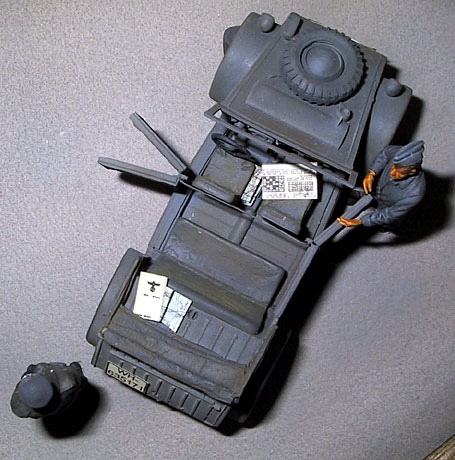
The VW Kübelwagen is a resin kit from the Hungarian manufacturer FM in
1/48 scale. Beside the usual preparation and assembly of resin parts, no
particular difficulties were encountered. The painting of this little
model took place using the same techniques that I used for the He 219.
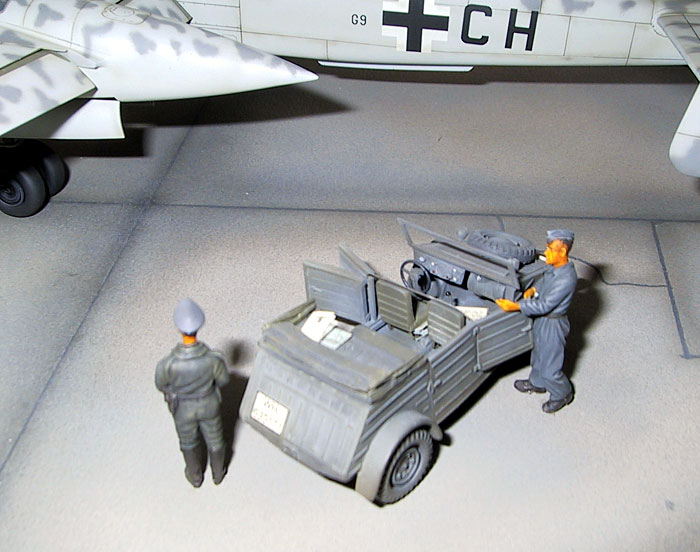
As an eye-catcher, I added a map from a Verlinden-Set in the Kübelwagen.
The figures come from Verlinden and Reheat.
I hope that I have mentioned all significantly items of the building of my
He 219 Diorama and I also hope that I have encouraged some modelers to
build their own He 219 Diorama.
|
Project Components Summary:
|
 |
Click the thumbnails below to view larger
images:
Model, Images and Text Copyright ©
2003 by Kay Koglin
Page Created 05 November, 2003
Last Updated
17 March, 2004
Back to
HyperScale Main Page |
 Home |
What's New |
Features |
Gallery |
Reviews |
Reference |
Forum |
Search
Home |
What's New |
Features |
Gallery |
Reviews |
Reference |
Forum |
Search