Squadron.com
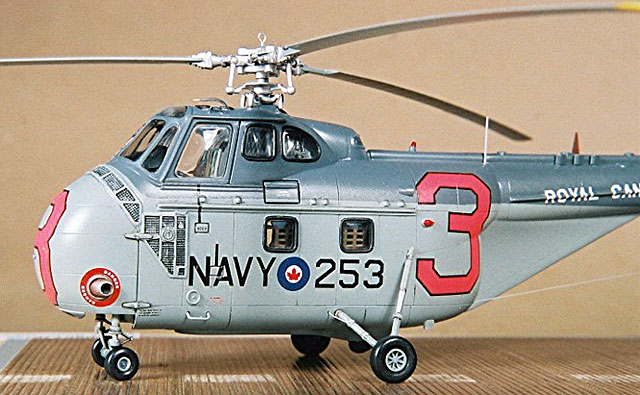
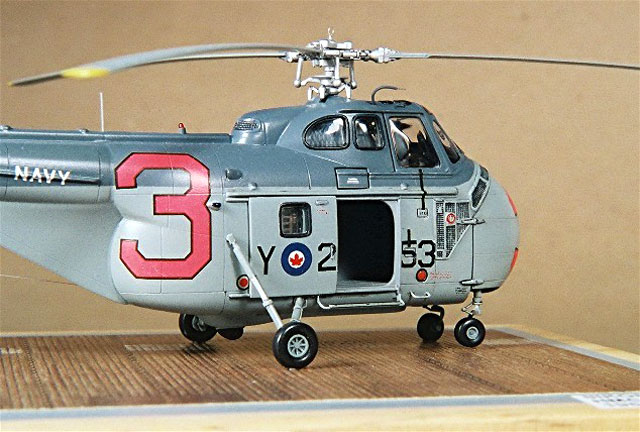
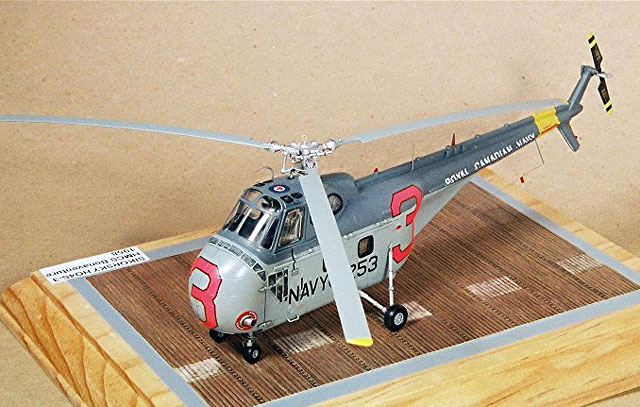
Here is Italeri's H04S Helicopter
(Sikorsky S-55) in 1/72 scale.
Having an affliction for all things Canadian, I could not resist a
“quick build” on this fine example of the Royal Canadian Navy’s
helicopter fleet. The fairly simple colour scheme and the availability
of the Belcher decals rendered this model project as a straightforward
exercise.
Some of the minor corrections required for this kit are:
-
Remove tail boom stiffeners along
upper quadrant on either side of the tail rotor shaft housing.
-
Add various antennae to suit the
particular helicopter being modeled.
-
Add large step and frame at lower
edge of main cabin door.
-
Add reverse facing air scoops at rear
upper cabin on outside of fuselage, both sides
Depending on the particular helicopter,
and time of service in the Royal Canadian Navy, there are many other
details that may need to be considered:
-
Torpedo rack on port side.
-
Winch assembly above cabin door at
starboard side of fuselage.
-
Different antenna fittings.
The interior was built up straight from
the box and detailed slightly with the addition of lead foil seat
belts and some dry brushing to show off the well molded details that
Italeri provides. Fit of all parts was great, with the exception of
the nose gear bay insert in the bottom of the nose dome. There were
gaps and a “loose” fit here, which required some filling and plugging
of gaps so paint wouldn’t get sprayed inside the model afterwards.
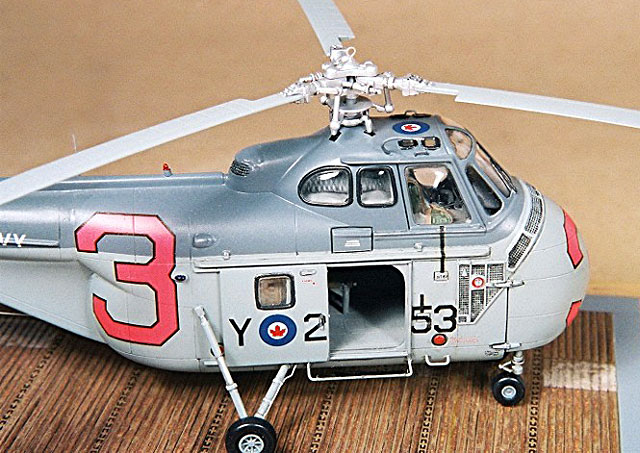
The clear parts were test fitted and with some minor trimming and
sanding they fit flush into the openings provided. I also lightly
scribed a line around the outline of the raised rims of all the
fuselage windows to allow myself a “cut line” for applying the masking
around these things. The actual aircraft had raised black rubber
frames around the windows, so these needed to be painted somehow. The
technique I used was to mask the clear parts of the windows, then
airbrush on some flat black around the windows, then once that was
dry, add more masking on top of the windows and the raised frames
using Bare Metal Foil which I cut out along those “cut lines” I’d
scribed earlier. Then the rest of the model colours were airbrushed
on, and the “over masks” were removed yielding a nice sharp black
outline around the windows.
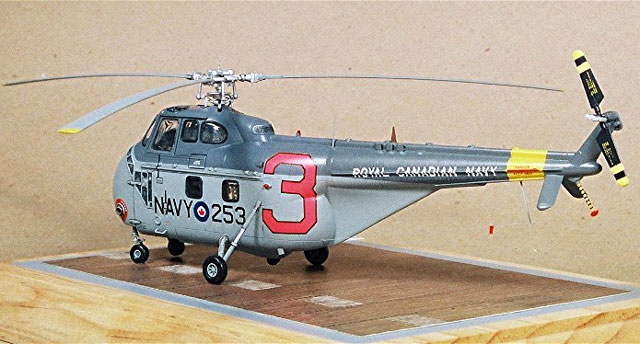
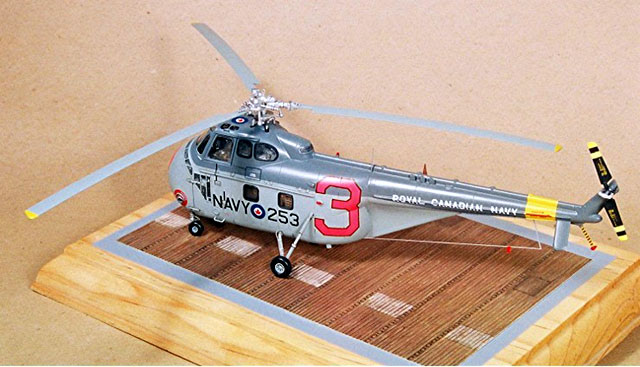
Paint
The model was painted using Xtra-Colour
paints, with Light Sea Grey used for the lighter colour, and Extra
Dark Sea Grey for the topside dark grey. Xtra-Colour Trainer Yellow
was used for the tail-band and rotor tips. This resulted in a nice
gloss finish upon which the decals could be applied easily. Small
details, like the brake lines to the main wheels, were added, as well
as a formed wire pitot tube glued onto the top corner of the cockpit.
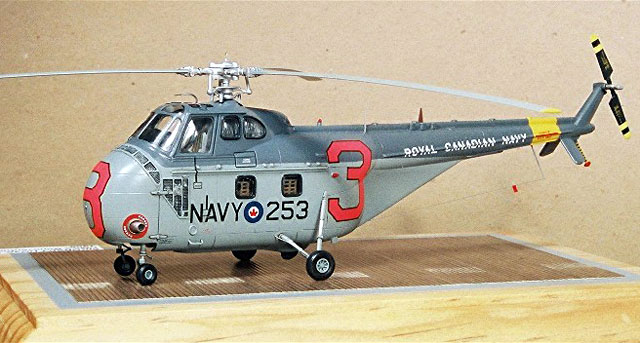
Decals
I’d purchased a couple sets of the
Belcher Bits Canadian Helicopter decals and it was a good thing I had
a spare sheet, too.
The decals appeared to be cleanly
printed with nice colour density, but lacked the fine stenciling found
on most of the aircraft depicted. The roundels and numbers were
applied to the relatively flat surfaces of the roof, sides and bottom
and seemed to go on nicely. I did find that the clear carrier film was
quite stiff and required generous applications of Solvaset to persuade
the decals to snuggle down into the recessed panel lines. The stiff
carrier film led to major problems applying the large day-glow nose
number and the “Royal Canadian Navy” lettering along the tail boom.
The first time I tried to apply the big “3” to the nose, I got nothing
but grief - it would not conform to the compound curves, would not lay
down or even soften enough with straight Solvaset to manipulate it
onto the model. I ended up using another decal from my spare Belcher
Bits sheet, cut it up into individual small sections, and managed to
apply it that way. Similar issues, but to a lesser extent, were
encountered with the large fuselage side numbers. The tail boom
lettering took three tries (thank goodness for those two decals
sheets) before I could get the decals to lay down straight, and
conform to the reinforcing strake on the tail boom. I ended up getting
the decals to settle into their spots and then applied a mixture of
white glue and Solvaset to make sure the decals stayed down.
I have to say I was disappointed in the decals. I tried soaking the
decals in very hot water to try to soften the carrier film, but to no
avail. Straight Solvaset wouldn’t even faze them. I will give Belcher
Bits high marks for an interesting, well printed set of markings, but,
whew! - not user friendly at all due to the stiff carrier film.
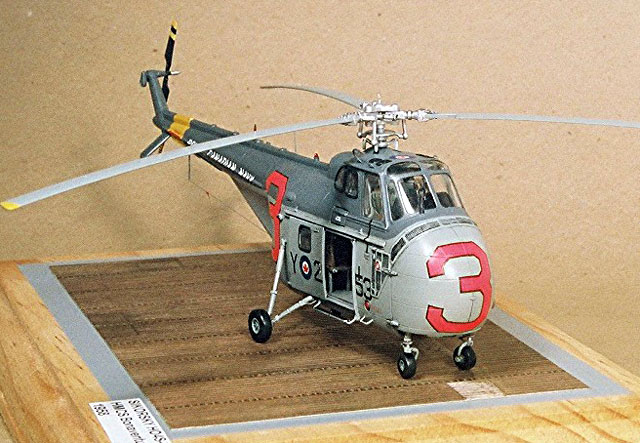
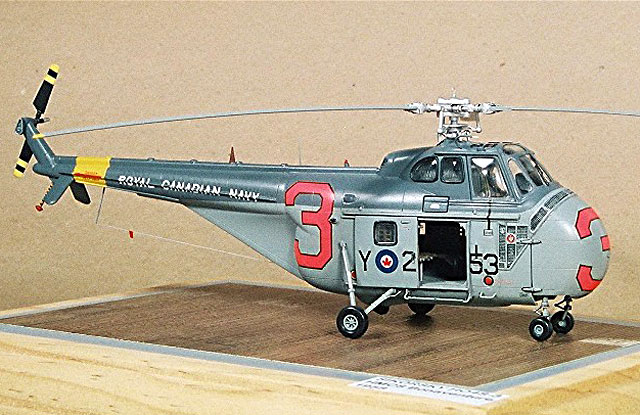
Weathering and Completion
I obtained small stenciling from
various spare decal sheets in the spares box and applied some
weathering to the model prior to an overcoat of a 50/50 mix of
Testor’s Dullcote and Glosscote to get a satin sheen. The main rotor
hub was airbrushed with Floquil’s Old Silver and assembled straight
out of the box. I did add the prominent hard-eye ring on the top with
a small bit of formed wire, though, just to dress it up a bit. Some
minor additional weathering with some brownish grey water colour was
added to highlite some of the surface detail. The last bit to be added
was the antenna wire to the underside of the tail, to which I added a
small red decal “flag”.
 Home |
What's New |
Features |
Gallery |
Reviews |
Reference |
Forum |
Search
Home |
What's New |
Features |
Gallery |
Reviews |
Reference |
Forum |
Search