|
Hornet Collection in 1/48
By Tomas Chmelik
|
 |
|
F/A-18 Hornet |

HyperScale is proudly supported by Squadron
This is my collection of
famous F-18 “Hornet” in various paint schemes.
It all began a couple of
years ago, when I found myself being somehow addicted to colorful paint
schemes on airplanes, especially on modern jets. Those of you who like
planes in tiger meet colors, variations of colorful paint work on
Starfighters, Fighting Falcons, Tornados and other jets, various
experimental camos etc. will know what I am talking about. Hornet is one
of the planes, which got attention to artists so we have a chance to see
this nice looking plane not only in uniform low visibility Navy scheme.
Surprisingly, the leading country in using artistic license for painting
the Hornet is no doubt the Canada, which gave us a large number of
eye-catching paintworks.
Luckily a number of decal firms and even mainstream manufacturers come
with possibilities to have these planes in a collection, again, led by a
decal firm which has this in its name – Leading Edge. Soon my decal
collection contained a number of colorful decals so it was time to build
the kits!
I was long thinking about
which kind of kits to use for this purpose. The Hasegawa Hornet, being the
best in the 1/48 scale, were too pricey for me. Yes, one can argue that to
invest into expensive and excellent decals makes sense only if these are
used with state-of-the-art kits and it is probably a good argument, but
again, giving the price of the Hasegawa kits, I was not convinced that
this is the way I want to go.
The solution came by sale of some Monogram kits, including the Hornet, in
one of our hobby shops. The prices were really bargain (slightly below 10
USD) which means that for a price of a Hasegawa kit I had a chance to have
almost five of Monogram kits. So, the decision was made and as I already
built the Monogram kit before, I decided to choose the cheaper option.
However, it does not mean that my collection consists only of Monogram
kits – up to now there is one Hasegawa, one Italeri and one Revell, the
rest being the Monogram.
I was long considering how to turn a Monogram Hornet into a Canadian
version and later decided to make only the most visible changes on the
fuselage and tail pipes and not to bother much about other details. The
level of detail in Hasegawa (which was called by someone as a first model
where the modelers are being concerned that model is too detailed, which I
can almost agree) and Monogram is of course incomparable, but for display
case purposes the Monogram models are not as bad.
The Monogram kit has the main problems with a relatively poor fit and with
raised details being too thin or almost lost in some areas because of the
shape of moldings. Especially the fit of upper and lower wing half is bad,
the same goes for front fuselage. If you are attaching the exhausts after
the final assembly (which is usually the case), be also ready that they
will not fit well. Well, as the main problems are hidden on undersurfaces,
some patient puttying and sanding can bring the model into a reasonable
shape. I decided not to rescribe the model, mainly because my attempts to
do so before were not satisfactory for me. As the Monogram was a subject
of reviews many times before, it makes no sense to continue in describing
other facts about this model.
Other two kits (Revell, Italeri) are shortly described later.
Decals are an important
issue – they were actually a reason why I bought the models. After my
experience I can clearly say the following. Without the strong and
reliable setting solution you can forget to use them (or at least the most
attractive ones) successfully. This was the issue I was very concerned
before I started to build and it proved very true. I had some local Czech
setting solutions but I was afraid whether they will be strong enough to
soften decals, which in many cases consist of multiple layers of colors.
Short before I started to build I purchased a new product from Agama
(paint producer) called Adhesol (goes under decal), Tensol and Hypersol
(going on top), the last one being the stronger version of Tensol. As I
did not have a practical experience with this product before I was afraid
to try it directly on the decals but I took the risk. Especially the
Hypersol proved to be valuable help for large decals, after multiple (!)
layers it made even a large decal to be very soft and to conform to all
curved surfaces and details. In a few cases the decals were almost too
soft so they were close to damage in case of not careful handling (which
happened of course). So again, if you do not have a strong and reliable
setting solution, there is no way for you with these decals.
As to the decals, they were – giving their complexity and multiple colors
– in perfect register and even the light colors were opaque enough to
cover lighter (gray) and darker (black) colors without visible difference.
I found myself lost a few times in instructions, which were covering many
things on the same list of paper, but with a little care it is not a
problem. Also helpful are the paint masks, printed on the decal
instructions (which you copy on a paper).
Be ready for the situation, when some of the paintwork to be done by
modeler has to exactly match decals. The bright colors, which make these
planes attractive, are often difficult to be represented, especially if
half is covered by the decal and non-exact match is going to be visible.
It is even more complicated that a paint looks different if in bottle, if
on a grey undersurface and if covered by a matt varnish. The way through
is to try to get as exact paints as possible, check carefully how they
look like when dry and varnished, but be also ready that when you put a
decal next to the painted area you might realize the difference. As the
repainting is in this case difficult (and might result in the same
situation), I decided to accept some differences (which are visible only
in case of a closer inspection anyway – with one exception). More about
this issue later.
Another problem to mention is decal for false canopy. This area is
difficult to be covered by decal, especially if decal is designed for use
with Hasegawa kits. Even the small difference in a shape of front gear
door means careful trimming and reshaping. Also the setting solutions
(necessary in this area as well) make things more complicated because
trimming of softened decal usually leads to its damage. After some
attempts I decided to put decal first and that use it as guide for a very
careful hand painting of the false canopy by a fine brush to cover
imperfections. After the layer of varnish the result was satisfactory for
me.
Very helpful is the decal for arresting hook, which with the help of
setting solutions brings a very nice result. No problems here. Models also
include decals for leading edges of wings, which were covered by a special
material for protection. They are made with a relatively large overlap of
a clear glossy film for better adhesion (making the decal “larger” for
easier manipulation and setting), where instruction mentions that the
clear film can be trimmed before application by a more experienced modeler.
As the whole model was to be varnished anyway I decided to leave them on
and except of necessary careful removal of air bubbles it proved to be
trouble free option. In fact, easier manipulation with a larger decal
(covering the leading edge from top and bottom in a single decal) was very
helpful.
Finally – a very nice gift from a Leading Edge is that some “problematic”
decals, such as long stripes (which are very thin and tend to damage
easily) to “divide” camouflage and anniversary color is provided twice in
case you spoil some or you need some repairs. Also some “extra” squares of
decal colors are provided for such purpose. Very helpful!!!
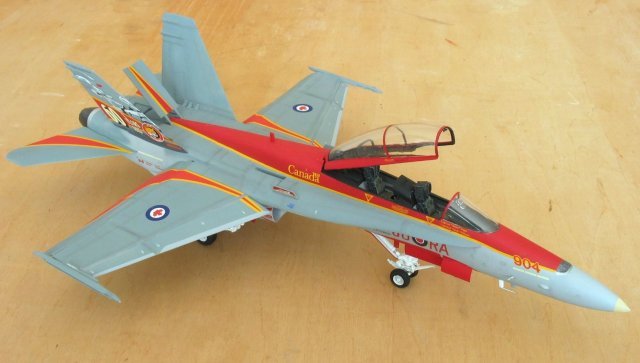
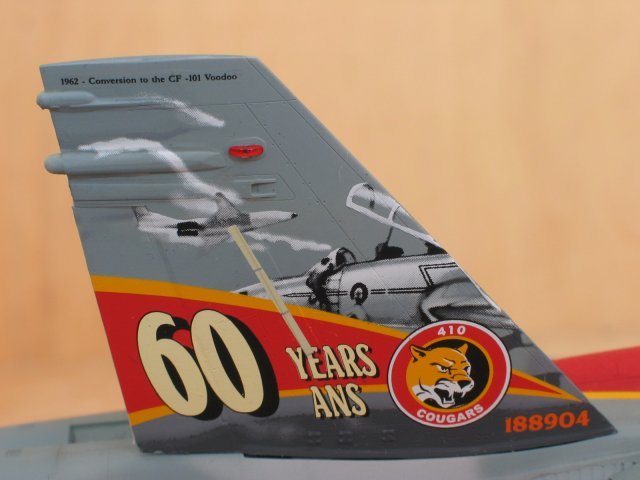
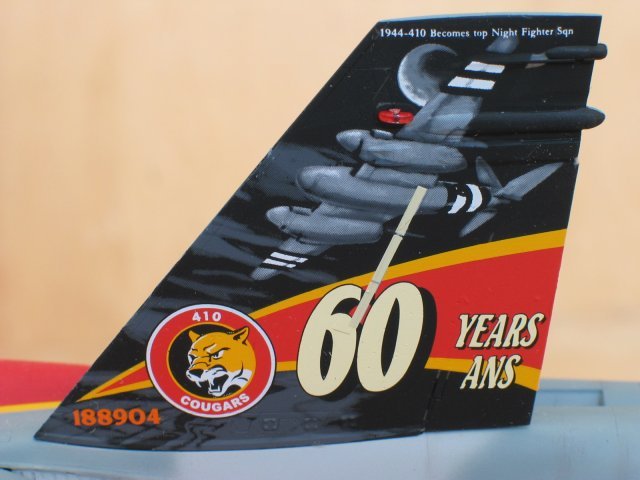
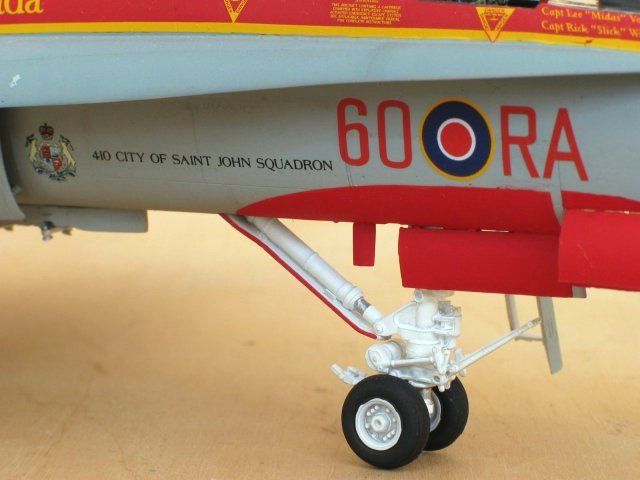
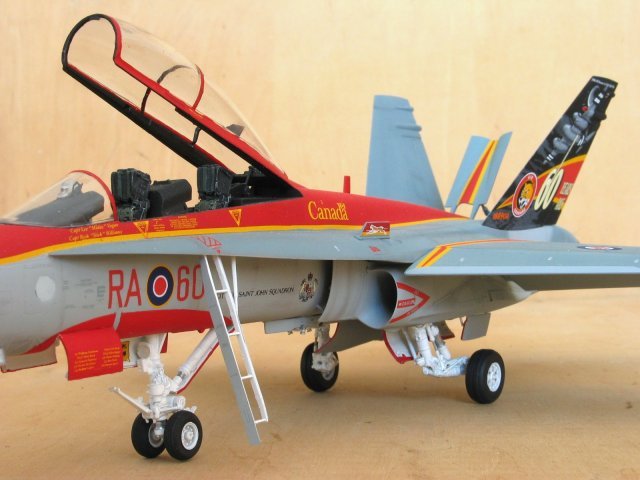
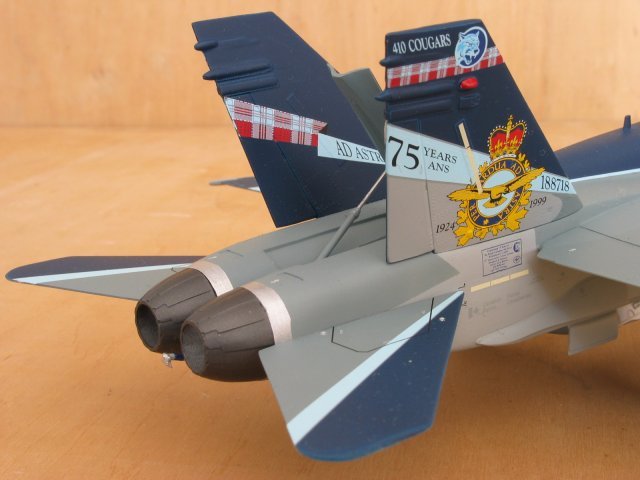
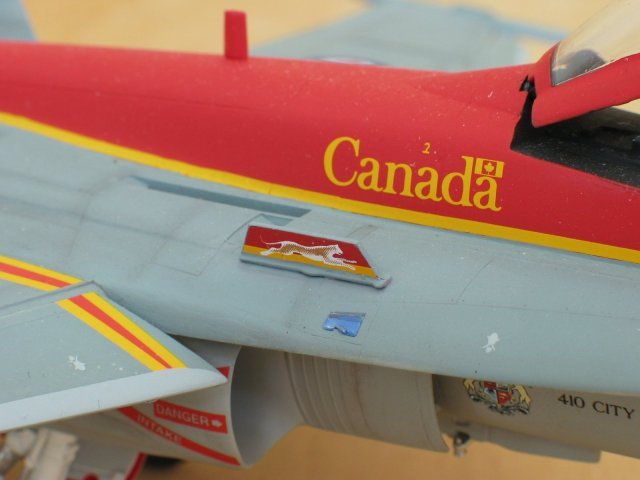
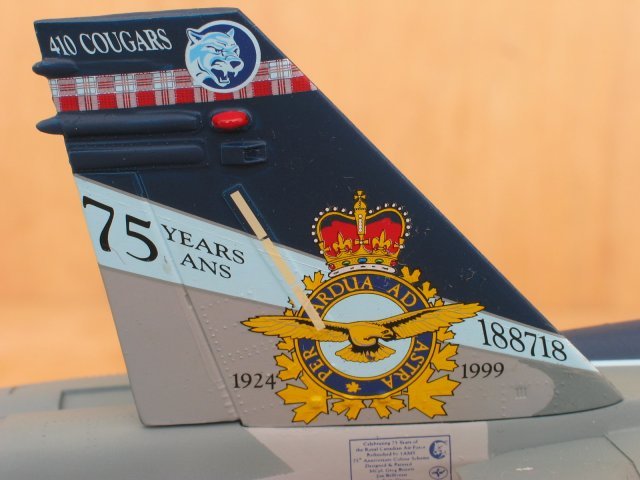
CAF 410 “COUGAR” SQUADRON
60th ANNIVERSARY
The first model is a
Hasegawa Hornet “Night Attack” which was used as a basis for F-18B CAF
“Cougar” squadron 60th Anniversary. This particular scheme is covered by
Leading Edge decal 48.28, which can be used for building of a single or
double seater version. Scheme uses (as almost all) a standard medium gray
(Model Master, FS 35237) over light gray (Humbrol, 127) scheme with bright
red/yellow details and beautiful paintworks on vertical stabilizers
(different for single and double seater version). For the red I used a
Model Master Guards Red, which is not the exact match, but very close (the
FS for the red is indicated as 31302).
Decals allow you to build model with ether flaps and slats down or up (2
sets for flaps and slats up/down). I made the model with both things down
and found that you have to be careful in decal application (also in
reading the instructions). The most difficult areas are the vertical
stabilizers, also in matching the grey going under the decal for the right
side. The instructions suggest removing all raised areas on the
stabilizers made by model manufacturer. I did not and it was a mistake –
the position lights do not line up with the ones put there by Hasegawa. As
the position lights are incorporated into a whole decal (so you cannot
reposition them separately), I found that my ones miss the raised detail.
Well, what to do? Next time…
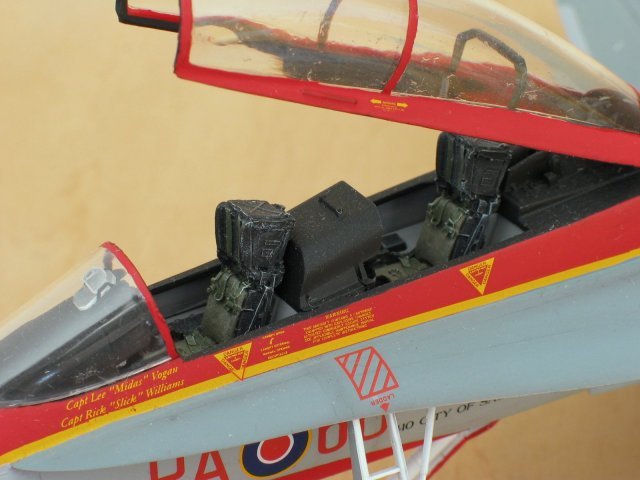
Model itself was built in a standard manner, only the seats were replaced
by the resin ones and model was made without any ordnance or even weapon
pylons. Only comment to decal is that the artwork on vertical stabilizers
could be “softer” - under a closer look a printing raster is very visible.
Overall result – outstanding colorful Hornet.
Click on the thumbnails below to view larger
images:
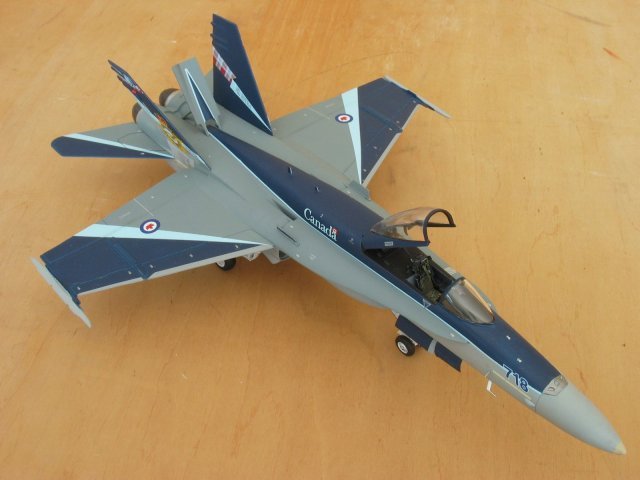
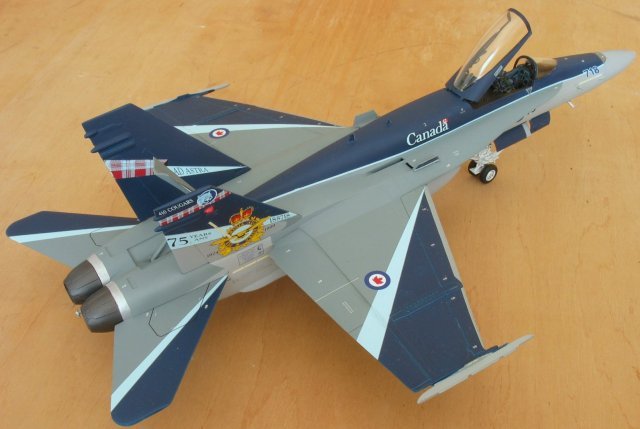
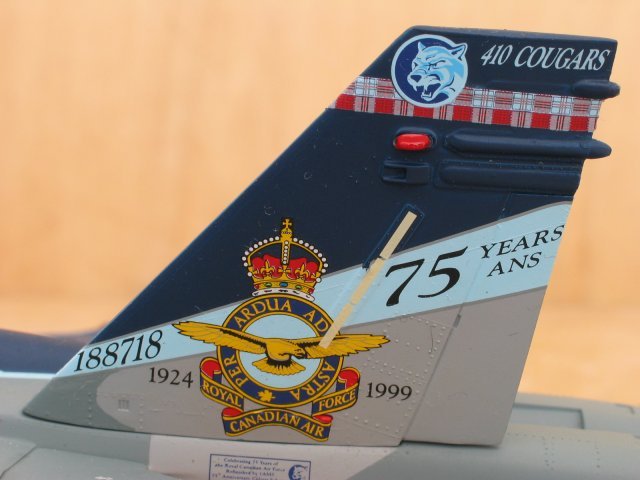
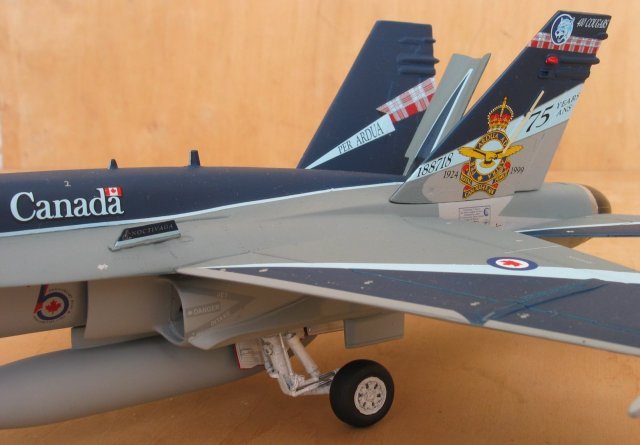
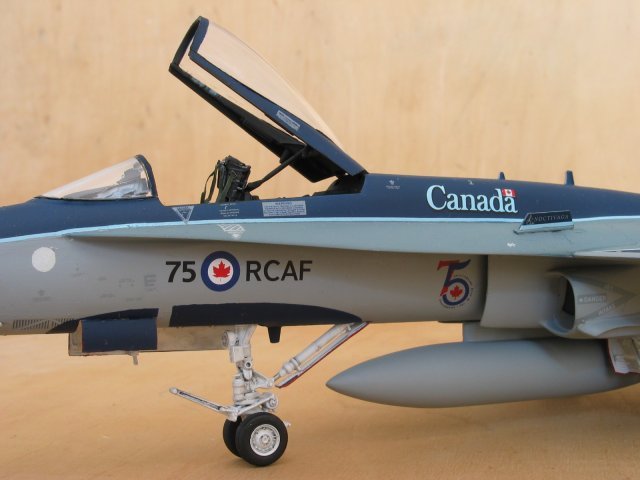
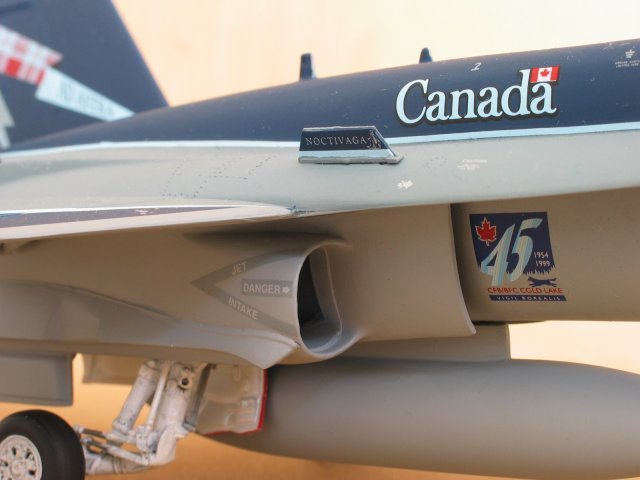
CAF 410 SQUADRON F-18
“RCAF 75th ANNIVERSARY SCHEME”
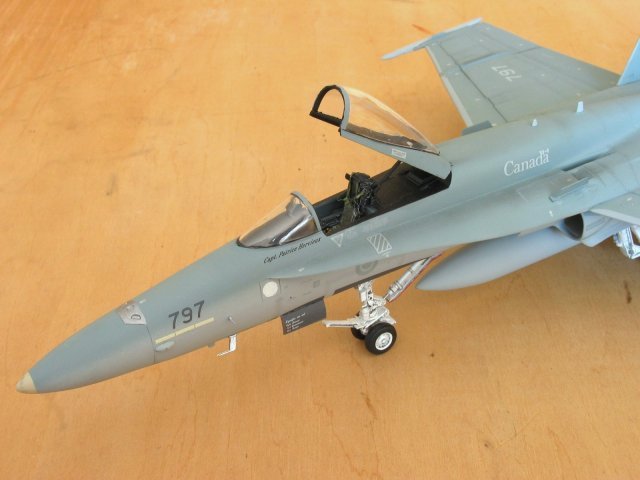
This colorful version is
covered by a decal 48.16. The kit is Monogram. The blue on this scheme
was the first problem – no FS equivalent (DARK BLUE). The one on the color
instruction looks to light – the color should be as dark as the decal for
false canopy (which is much darker that blue printed on instructions). I
found that Humbrol 15 is very close and use this one. As the paint is
originally a gloss, you have to take the lightening effect of a matt
varnish into account. I painted the undersurfaces first, then dark blue
and finally the medium gray.
Decals were without any
problems, the light blue covered the line between dark blue and grey
perfectly so do not worry here. The false canopy was first decaled and
finally painted over by dark blue. No weapons and pylons here as well.
Click on the thumbnails below to view larger
images:
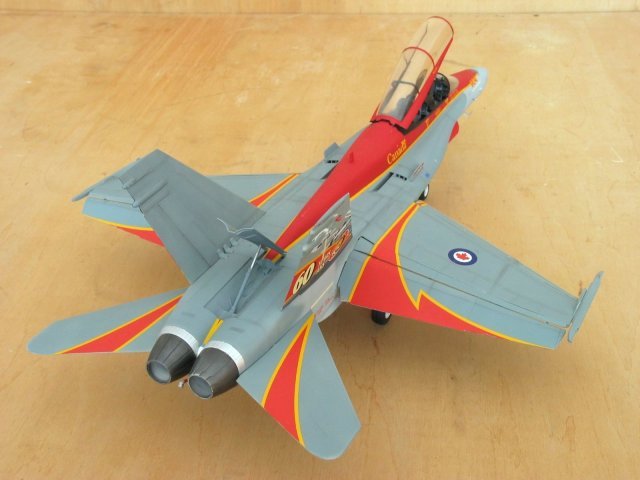
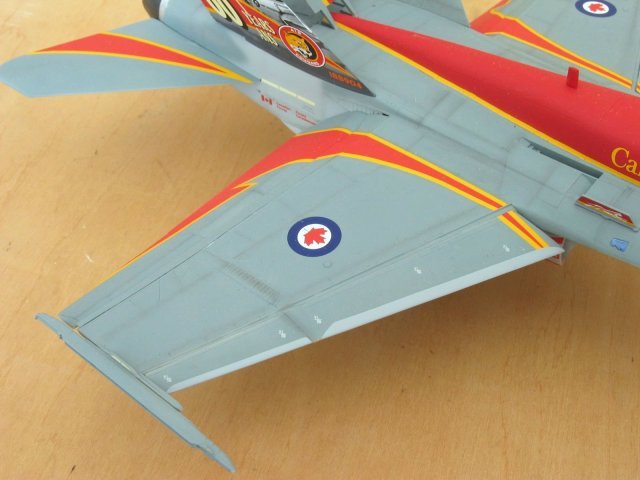
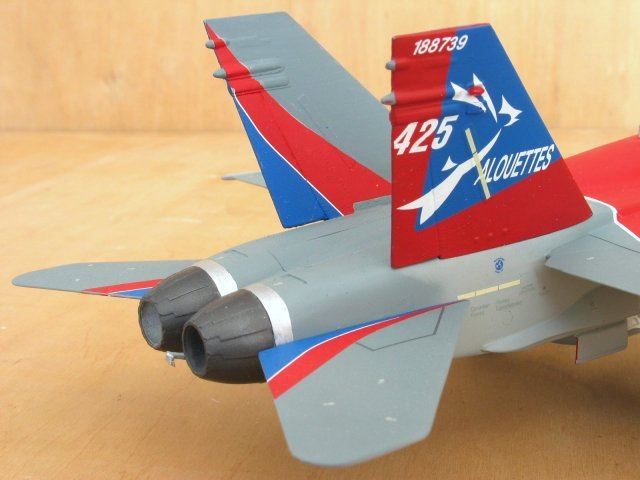
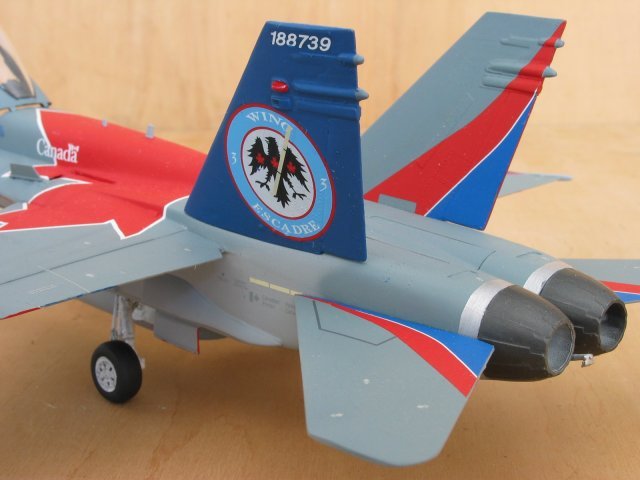
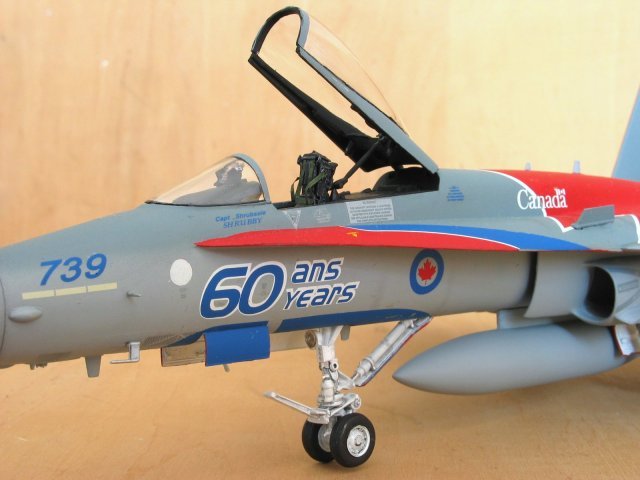
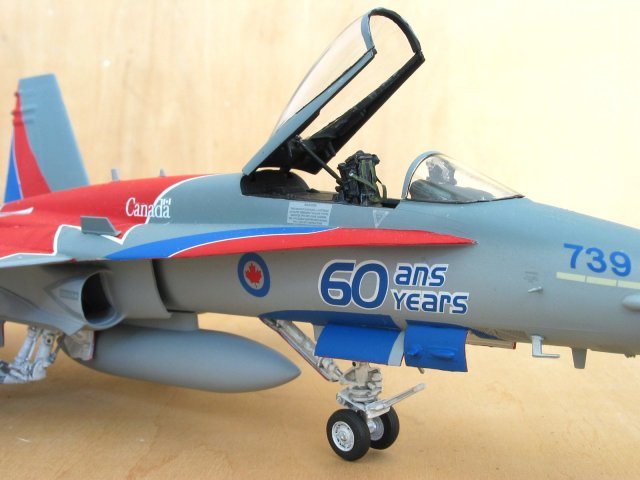
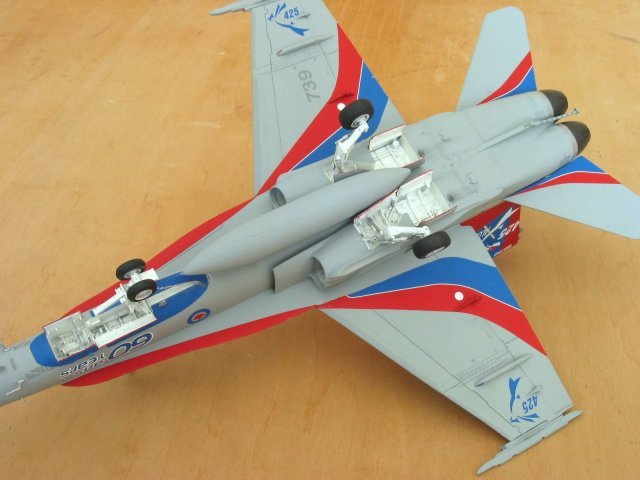
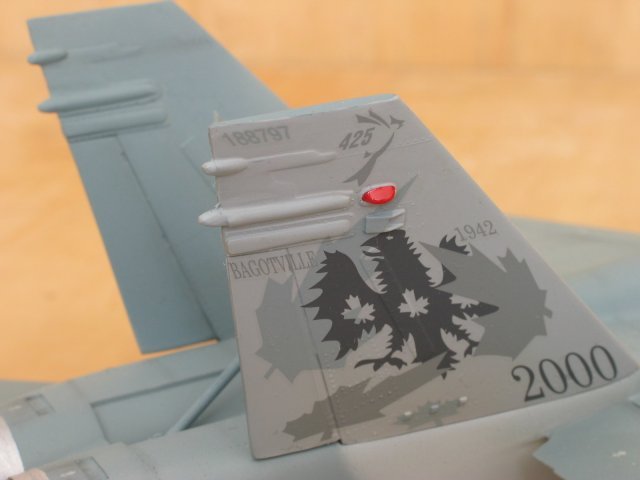
CAF CF-18 425 SQUADRON 60th SPECIAL
This bird was a real
challenge (Leading Edge #48.045). Standard built of a Monogram kit, with a
basic camouflage (light/medium gray). The artwork consist of large maple
leaf on top of the plane, yes, exactly where the curved surfaces are
almost the most complex, touching the LEX fences and covering the “holes”
going down to the undersurface. This was the first time I became really
nervous, because the majority of the maple leaf is one single decal. To
break geometric rules and place two dimensional decal over a very curved
three dimensional shape is not possible without a miracle called in this
case – Hypersol. Decision made by Leading Edge proved to be the right one
– putting the maple leaf from smaller decals would result in a visible
“matching lines”. Well, placing the decal was a martyrium lasting for
couple of hours, but finally successful. For masochist there is also an
option of painting the maple leaf (mask is included in instructions) and
using only a white line for contours. Which option is the easier one is
actually a question.
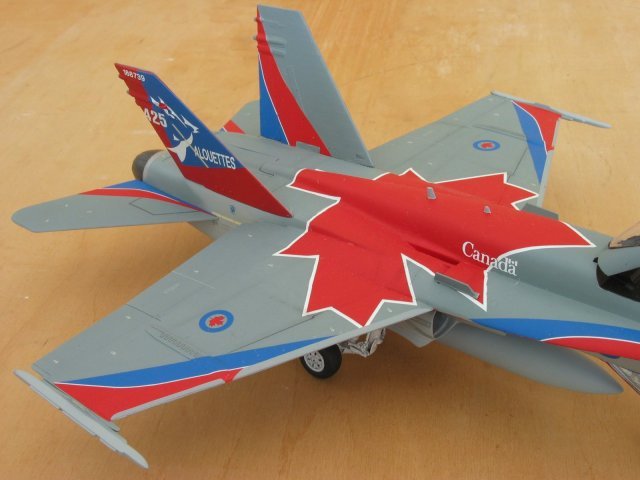
The next problems are colors used for red/blue artwork. This plane is the
case where my attempts were the least successful and resulted in a very
visible difference between the blue areas painted (actually only the
vertical stabilizers) and decaled (all other areas are covered by decals).
The blue on decals is lighter and brighter then my paint and even if I
tried, I was not able to get a satisfactory result. For red, the same red
as in the first case was used and with a relatively good match again. To
conclude, this is probably the most complex version from the decals point
of view, but final results make this very “visible” part of your
collection.
Eye catcher even for
women!!!
Click on the thumbnails below to view larger
images:
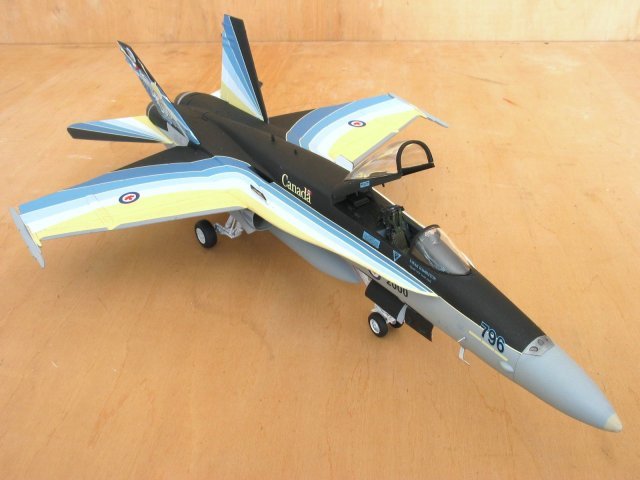
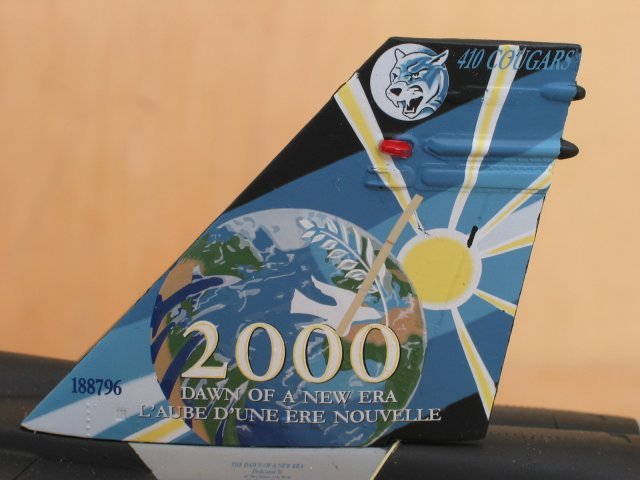
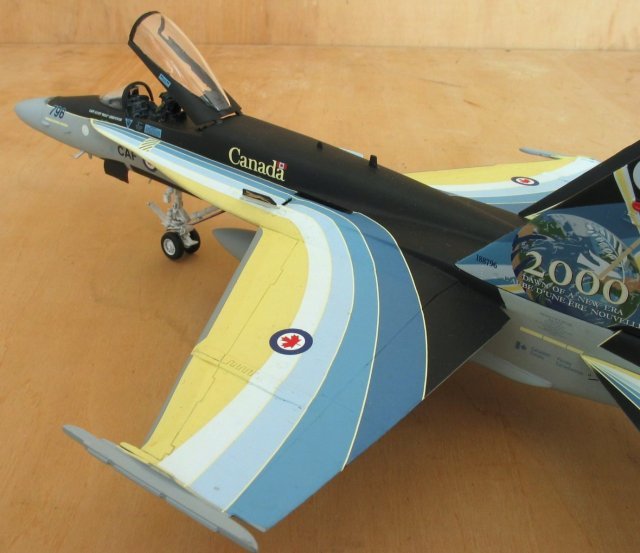
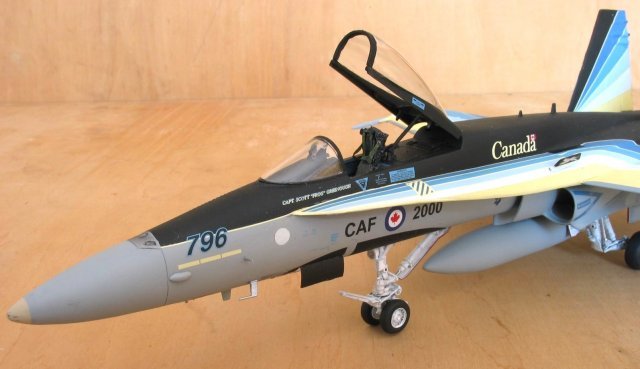
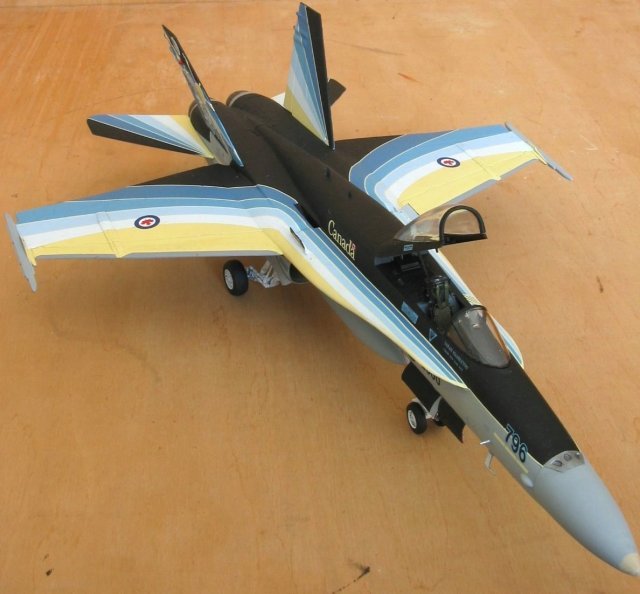
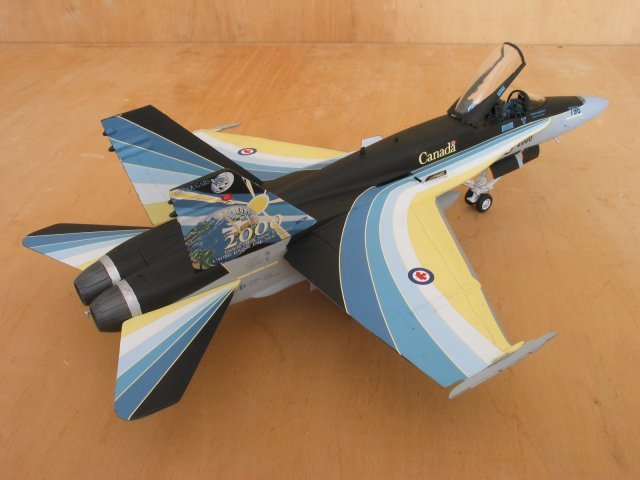
CAF F-18A “MILLENIUM HORNET”
This is probably the most
beautiful paint scheme in my collection so far (Leading Edge #48.22). It
is very sexy and non aggressive, making the “fast” shape of the Hornet
even “faster”. Kit is again Monogram. The key issue with this paint scheme
is the light yellow. Even if only a relatively minor area is to be
painted, the final result very much depends on how you are able to match
paint with the decal. Fortunately (and I mean FORTUNATELY) there is a very
easy solution. Once on a Hyperscale discussion forum someone suggested a
POLLYScale railroad paint #414146 Acheson Topeka Santa Fe (ATSF)
Catwhisker yellow from their acrylic range as a good match. Goodness, this
paint is not a good match, but a perfect match! This is absolutely a must
for anybody who wants to build this plane (unless he/she wants to become
an alchemist and mix it by his/her own). The rest of the model was
straightforward. Don’t worry about the line between yellow and black – the
decal is opaque enough to cover it without seeing through. Wing decals are
large and careful softening is necessary, the same goes for vertical
stabilizers, where some trimming was necessary.
Very nice Hornet again!
Click on the thumbnails below to view larger
images:
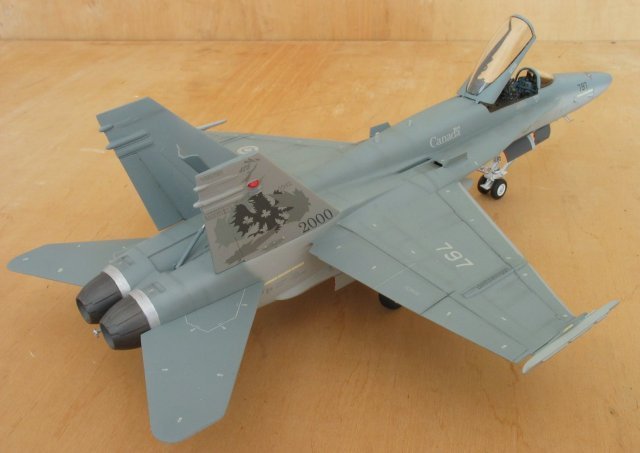
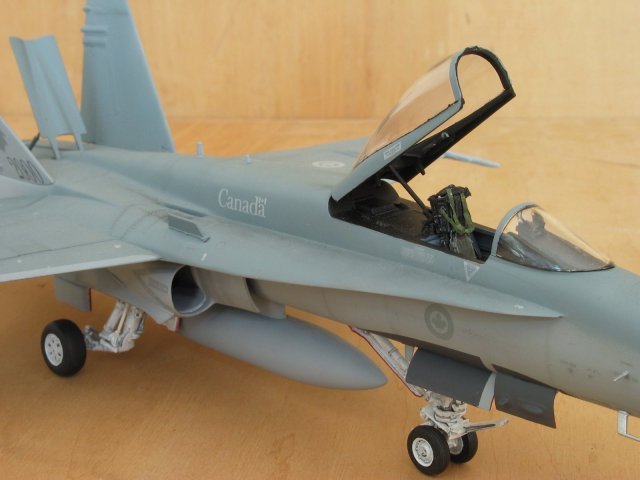
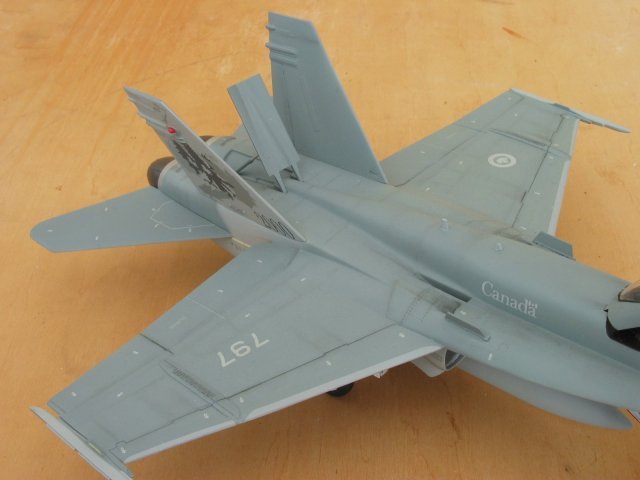
CAF CF-18 HORNET
“3 WING 2000 SPECIAL”
Another interesting,
although less colorful, Canadian scheme. Model is Monogram again, with the
same camouflage colors as in previous cases, only with bit more
weathering. All decals were thin and compared to schemes described above
were “an easy project”.
Click on the thumbnails below to view larger
images:
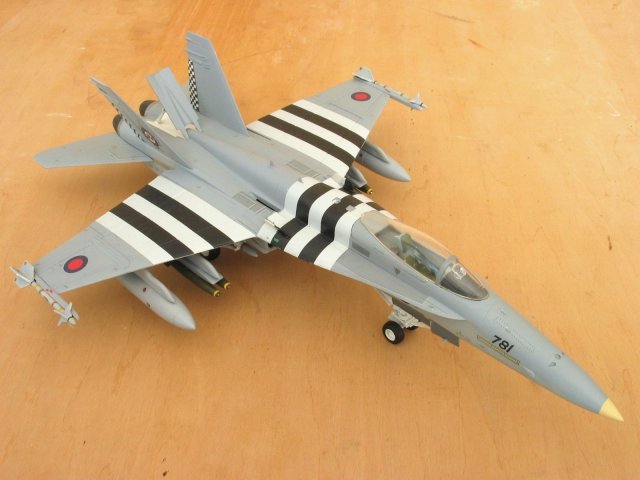
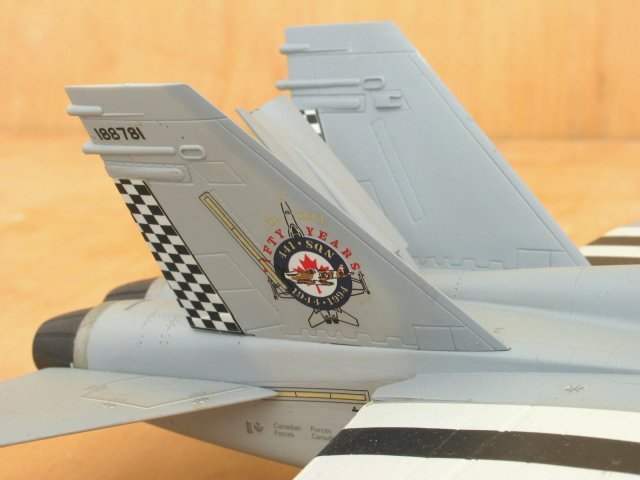
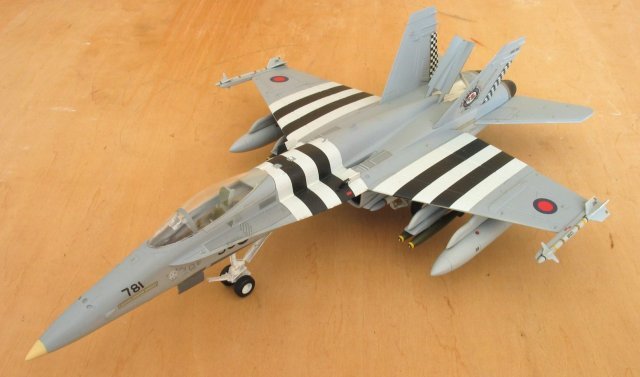
CAF F-18 441 SQUADRON
50 YEARS ANNIVERSARY
This very interesting paint
scheme was included in a Revell kit which I bought second hand many years
ago. This is the worst Hornet kit I ever sought. The panel lines are
recessed, but are very heavy (similar to old Matchbox kits), the wings
were split into a top and bottom half in a similar way like a Monogram
(leading and cutting edge being the part of the top wing half) which is
fine, but what made me angry was the fact that match was absolutely
horrible and even the matching line was not straight. This was the same
with panel lines depicting the leading and cutting edge on top of the wing
– the line was not straight, but was several times “curved”. It looked
like if you took a hot moulding from the moulding machine and the gravity
caused some “flow” of the hot styrene and damage of some lines. No other
explanation except the moulding form was made by a drunken person. Lot of
putty and sanding necessary here, together with restoration of panel
lines. The kit also included a canopy with some framing (!) on a large
part above the pilot. Frames were two, one in a middle of the canopy and
other by the end. Amazing! The frames had to be removed by careful sanding
and polishing. To add – clear parts were of a very below average quality.
Also, if you put the
finished model side by side with Monogram for example, you will notice
some differences in a shape of this one. This indicates that other problem
of the model is the overall shape. Well, no surprise after the experience
described above.
Better side of the kit were the decals, which covered even the invasion
stripes and were very complex (kit had a “Super decal” logo on a box).
Unfortunately they were not in a perfect register (which is visible
especially in grey decals, where underlayer of white is visible).
To conclude – very bad kit, where only positive part were decals (and only
partially). The time spend with the kit is the reason why I still have it
in my collection. If someone makes the new set of decals (Leading Edge, do
you hear?), the finished model will be soon replaced by a better one.
Click on the thumbnails below to view larger
images:
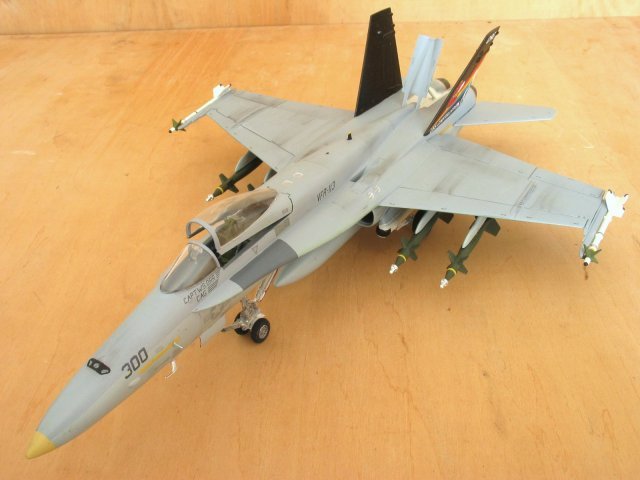
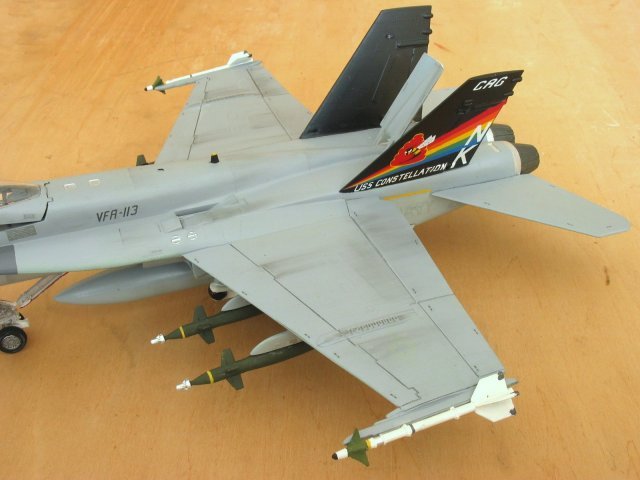
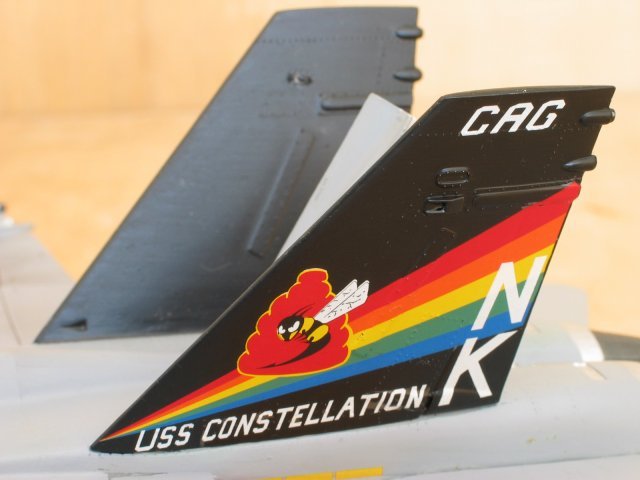
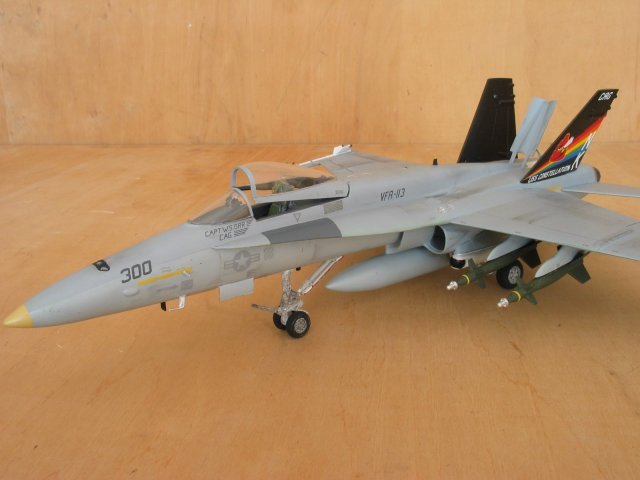
VFA-113 HORNET
from USS CONSTELLATION
This is my first Horned
built many years ago (actually even before I started to use the airbrush).
It is a standard Monogram kit with Superscale decals. They came with the
kit, which was bought on a swap meeting and I especially liked the rainbow
on vertical stabilizers. Model was built with ordnance included in the kit
and aside of some mistakes (such as silver heads on laser guided bombs – I
have to repaint them sometimes) still looks fine in the collection.
Click on the thumbnails below to view larger
images:
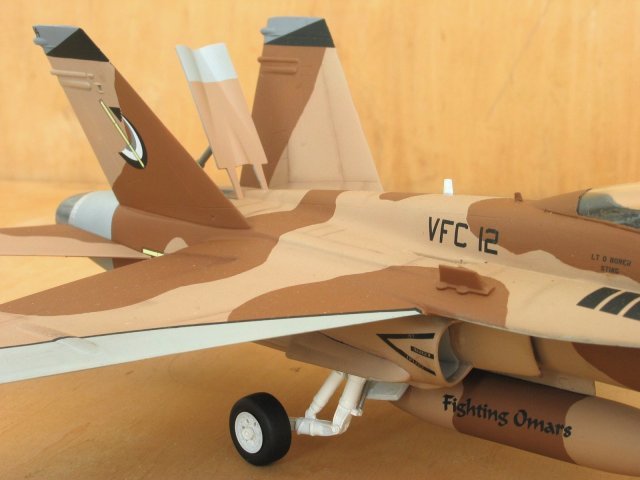
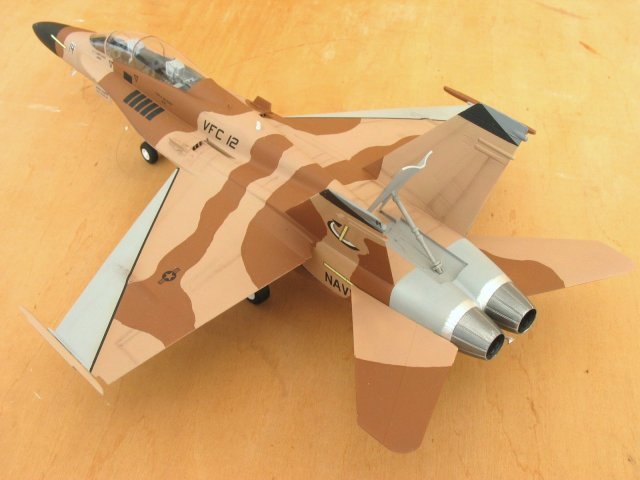
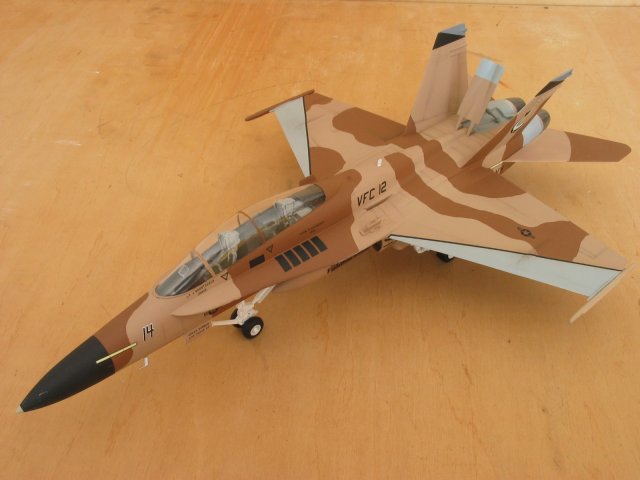
F-18B AGGRESSOR HORNET
“FIGHTING OMARS”
This is the Italeri kit made
in a double seater version with Two Bobs decals. The Italeri kit was also
a subject of some reviews and does not belong to a group of models having
a good reputation. I decided not to bother much and made the model to
bring some difference into my collection. No special problems during the
built – the model is of below average quality, but buildable. It fulfilled
my expectations – it brings a difference into my collection. Thanks Two
Bobs for such interesting scheme(s).
Click on the thumbnails below to view larger
images:
This collection of colorful
Hornets is only a good starting point. I have number of other interesting
decals waiting for other kits to be built in a near future.
The quality of the finished
model very depends on the kit and I must say that even the Hasegawa is no
doubt the best kit on the market; the Monogram represents a reasonable
price/quality ratio. It can be bring into a perfect model with some
modeling skills.
My models were built not for
competitions but for fun and are satisfactory for me, even if they have
some faults and could be improved of course. I can suggest everybody to
have some colorful paint scheme in his collection, because it brings a
very nice change to a line of boring grey low visibility schemes of modern
era NAVY jets and can raise the attention of those who are not interested
in model kits very much (such as your wife or girlfriend). What a
satisfactory feeling if your darling says “Hey, this is a nice model!” and
spends a few seconds looking at it by her own!
Pictures were taken by my new Canon PowerShot G3 digital camera.
Model,
Images and Text Copyright © 2003 by
Tomas Chmelik
Page Created 08 October, 2003
Last Updated
17 March, 2004
Back to
HyperScale Main Page |
 Home |
What's New |
Features |
Gallery |
Reviews |
Reference |
Forum |
Search
Home |
What's New |
Features |
Gallery |
Reviews |
Reference |
Forum |
Search