|
Ikarus 451M
by Aleksandar Mladenovic
|
 |
|
Ikarus 451M |

HyperScale is proudly supported by Squadron
In the early morning of 25th
October 1952 pilot Capitan Tugomir Prebeg made a flight in very first
Yugoslav jet plane Ikarus 451M. This flight together with Ikarus 451M
opened the jet era in Yugoslav aviation. Ikarus 451M was an experimental,
all metal construction aircraft designed by Major Dragoljub Beslin, built
by Ikarus aircraft factory and powered by two Turbomeca Palace 056A
turbojets.
Only one example was ever
built and it was used for test flights until 1959.
Today this interesting
aircraft rests in Yugoslav Air Force Museum’s collection Belgrade, Serbia
. It is important to note that Ikarus factory had experience in aircraft
production since early mid war period and was mostly known by its IK-2 and
IK-3 fighters.
Models of these two fighters
are also available from Aeropoxy(
http://aeropoxy.freeservers.com/ )
Aeropoxy's
1/72 Scale Ikarus 451M
|
During 2002 year Aeropoxy Resin Kits Co. commemorated the fiftieth
anniversary of the Ikarus 451M’s first flight producing resin kit of this
aircraft in 1/72 scale.
Click the thumbnails below to view larger
images:
This kit is made from
polyurethane resin featuring 21 part, one vacuum-formed canopy with die
cut canopy frame, decal sheet, easy to follow assembly instruction,
drawings of the aircraft both in 1/72 and 1/48 scale and two painting
schemes all that neatly packed in a box.
This kit is simply great for
your first full resin project ( as it was mine ) . I’m saying this because
the fuselage, wings and engine nacelles are molded together as one
part. It took me only two hours for assembling and painting preparation.
After fitting tail unit (vertical and horizontal) tail and main wheels
most of the kit was done, engines intake and exhaust holes should be
drilled from front and rear.
The vacuum formed canopy was
most challenging part of assembly it took me some time for trimming and
test fitting after I was satisfied how it fits die cut canopy frame
adhesive foil was applied (so called “Aeropoxy cool frame“). This fits
very well and only minor trimming was needed. This is where my skepticism
ended.
After the Future floor
polish had cured, the canopy was crystal clear and ready for final fit on
the model with white glue.
Some air bubbles became visible after trimming and sending some flash on
fuselage but they were fixed with Gunze Mr.Surfacer 500, after that whole
model was over-sprayed with Mr.Surfacer (diluted 50% with Ethanol 96) and
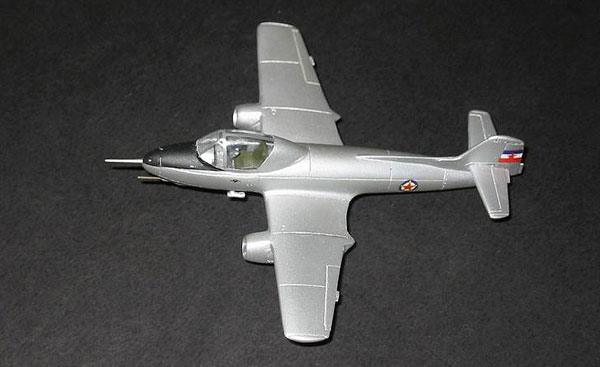
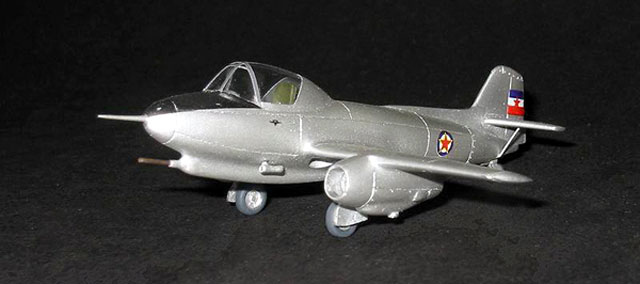
wet sanded. I’ve decided to paint model in the later but not so attractive
silver scheme with Humbrol Silver and ended with quite good results .
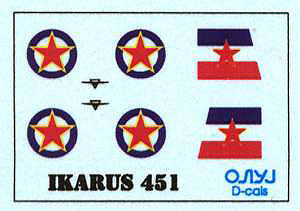
Decals were produced by Oluj D-cals and represent combination of color
laser printed roundels and flags with separate white decal for a base.
They are very thin and should be applied with special care however results
are superb. Finally decals were sealed with thin coat of Testor's
Metalizer sealer.
My first resin kit was done
!
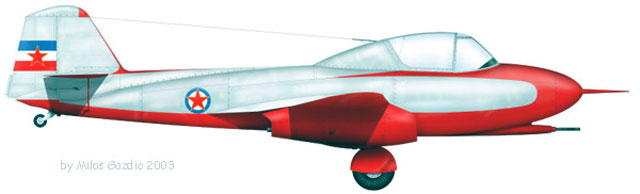
Special thanks goes to my friend Milosh Gazdic for letting me use his
profile of Ikarus 451M.
Model,
Images and Text Copyright © 2003 by
Aleksandar Mladenovic
Page Created 22 December, 2003
Last Updated
17 March, 2004
Back to
HyperScale Main Page |
 Home |
What's New |
Features |
Gallery |
Reviews |
Reference |
Forum |
Search
Home |
What's New |
Features |
Gallery |
Reviews |
Reference |
Forum |
Search