|
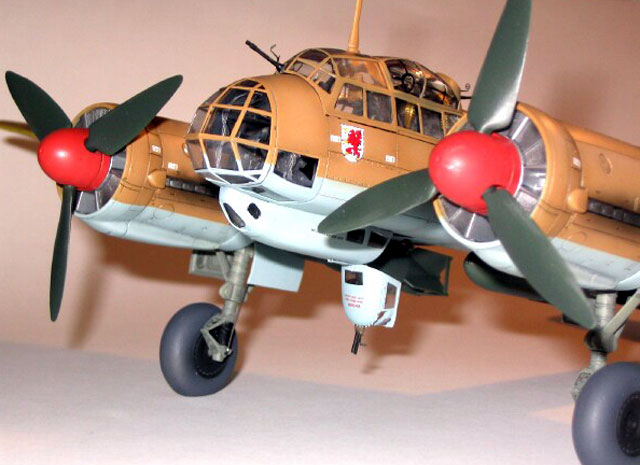
Junkers Ju 88A-4
by Tim Both
|
|
|
Junkers Ju 88A-4 |

Dragon's 1/48 scale Junkers Ju 88A-4 is available online from Squadron
Here is my Junkers Ju 88A
from Shanghai Dragon. Below is a list of the aftermarket items I used to
enhance the appearance:
-
Techmod Decals 48032
Junkers Ju88A-4
-
CMK cockpit detail set
48009
-
Extratech 1/48 brass
machine gun and cannon belts
-
E-Z masks #78 for
Promodeler Ju88A-4 (Same as Shanghai Dragon)
I started construction with the main assemblies with the idea of working
on these and then to reward myself with the CMK cockpit later.
Wings
DML have moulded the
wingtips separately so later variants can be modeled and with these tips
you have one of two choices, join the wing halves and wing tips halves
together and then mate the two or to join the two top wing pieces together
first , then the lower wing pieces together and THEN join the combined
upper and lower pieces together. I went for the latter and this way I
could ensure a very good seam where the tips join with the main wing and
then worry about the other seams later. I must mention that the wing
halves are very thick so I sanded them down to a more acceptable thickness
(or should that be thinness?) There was an awful join where the top and
bottom wing tips come together. I filled and sanded the seams with CA glue
and putty and re-scribed the lines as best I could. Several applications
were needed to make all as it should be.
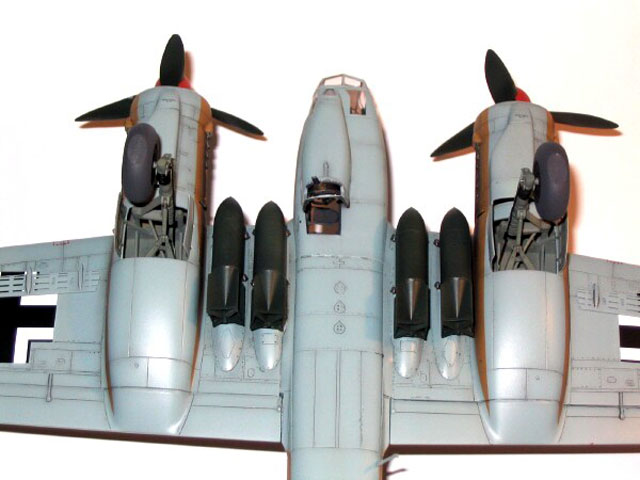
The undercarriage bays were sprayed RML02 and installed from the front of
the wings. The join here was good. Don’t mix up the bays. You’ll know you
have it right when the bays fit EXACTLY in their location recesses.
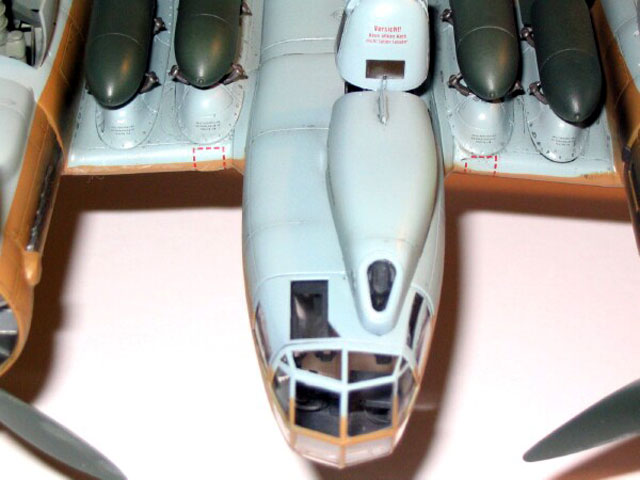
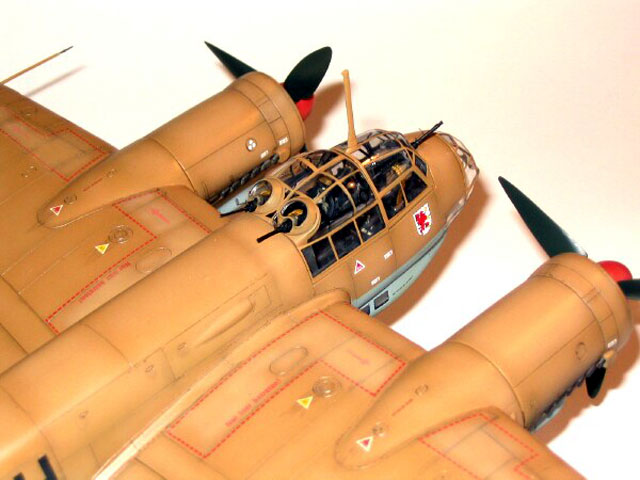
Next came the cowl rings. These rings have the honour of creating the
largest gaps I have ever had to fill and fix in any kit I have ever built
including limited run models. The chord of the wing is either too narrow
or too wide which caused a lot of headaches. The gap on the bottom where
the ring meets the wheel bay is very good but the one on the top wing left
a gap of about 2mm in width and a step of a 1mm from the wing top to cowl
top. This may not seem much but it was a considerable gap in 1/48. Again
CA and putty was used. In the end I still was not 100 percent happy with
these seams but after much time I left it as it is. I didn’t re-scribe the
panels and rivets on the top wing near the cowling as some references
showed this line and some didn’t. I chose the easy way out.
Cockpit
I chose to replace the
cockpit with the CMK set which contains resin sidewalls, seats, machine
guns and an etched fret for instrument panels and the like. The detail of
all of this is well above that of the kit. I found that the resin pieces
fit almost exactly and there wasn’t the normal cutting and sanding to get
the resin to fit. This set was a dream to put together. The instructions
left a couple of pieces unused such as a large photoetched bulkhead to be
glued to the front main canopy and another small etching which I used as a
support to raise the etched seat of the floor The box cover showed this
seat raised but there were no guidelines as to how to do that so I took a
guess.
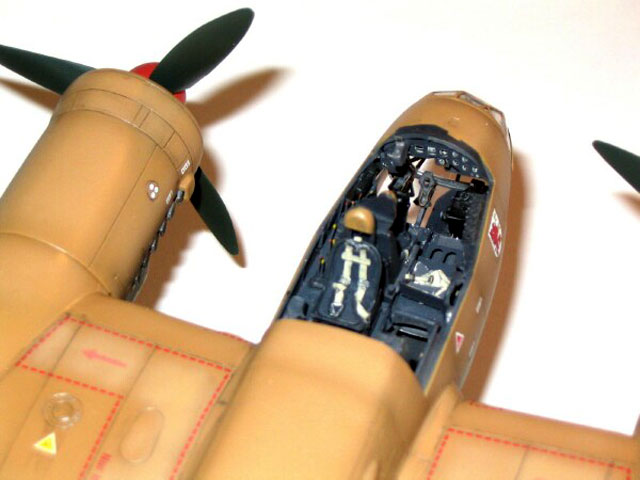
The procedure for painting
the cockpit was as follows: airbrush the RLM 66, handpaint in the correct
panels black such as radio faces and instruments, drybrush using light
grey and pencil lead, paint in the coloured details such as knobs and
switches and blend it with a thin black wash. Once this had all dried I
sprayed matt coat onto it to give the cockpit an even finish. I was very
happy with the end result.
The rest of the airframe went together quite quickly with no major
problems. I found that the tailplanes and tail needed a little putty to
blend them in but this was very quick and easy. Some blending was also
required to get the rear cockpit bulkhead to fair into the rest of the
fuselage. If you use the kit bulkhead and not the CMK one then you will
have no problems as this is a perfect fit.
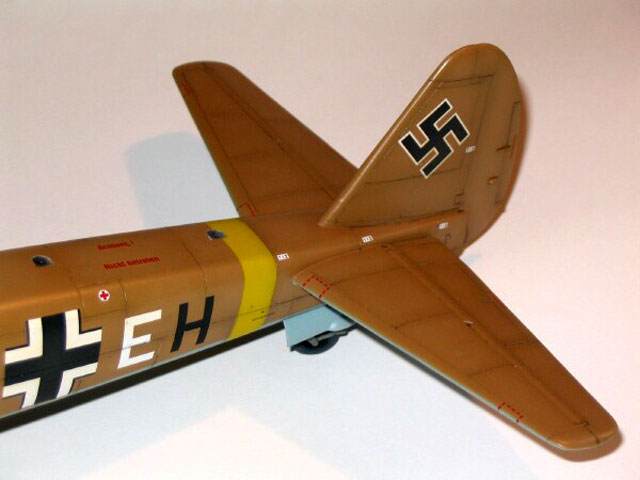
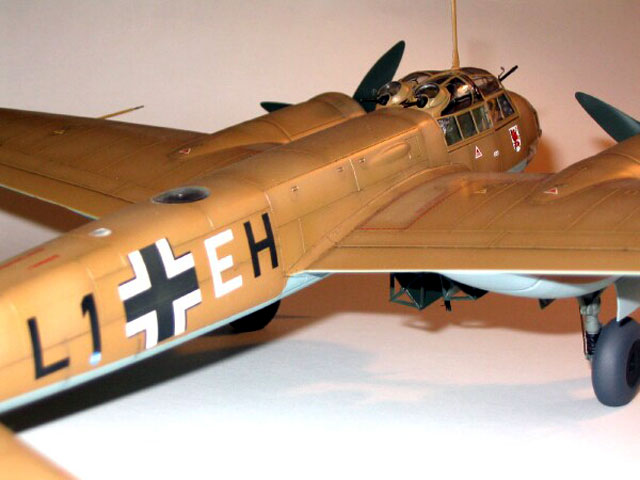
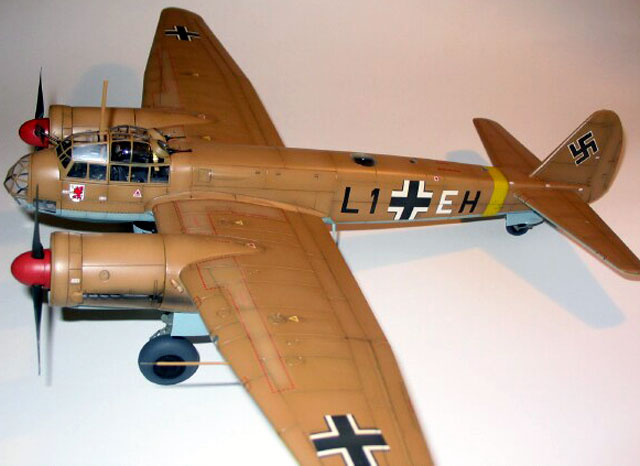
Painting
I chose to build this Ju88
in a desert scheme as the last few models I have painted were all late war
greens and I needed a change. Being only a two tone scheme I knew I needed
to add some interest to the scheme so the Ju88 wouldn’t look too boring. I
sprayed the RLM78 first, then masked and sprayed the lower wingtips
yellow. After further masking I sprayed RLM79 from Gunze and the basic
painting had been completed. To enhance the look I thinned and added some
white to the RLM79 and sprayed that lightly in the middle of panel lines
to simulate fading. I then thinned some Gunze Smoke and sprayed that
lightly over the panel lines top and bottom. I then masked and sprayed the
yellow tail band and the majority of the painting was completed. I used
Testors glosscoat to provide a base for the decals. The vast majority of
the panel shading disappeared under the gloss. I could only hope it would
magically return upon the spraying of a matt coat…
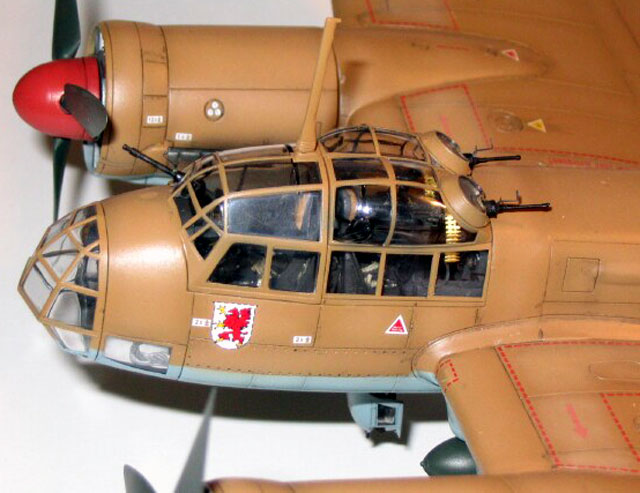
Decals
I chose Techmod decals 48032
which has markings for two Ju 88s. Mine was from LG1 in Libya 1941-42. I
have never used Techmod decals before and could only hope they would be
okay. I can now say that the decals are the best that I have ever used
including those of the big players from America. They were ultra thin and
fell into all the panel lines very well.
The set came with a full
range of stencil data as well which made the top surface of the plane much
more interesting. I should add that the Shanghai decals contain no stencil
data at all.
Further Painting
I sprayed a lightened coat
of RLM79 near the walkway stripes to simulate wear. I found the result
interesting rather that accurate. I also sprayed the prop hubs red as I
had forgotten those previously.
I also overpsrayed the major
markings with some very heavily thinned RLM79 and they looked to ‘new’ in
relation to the paint.
Weathering and Finishing
I thinned some Gunze gloss
black and ran that into the panel lines and wiped off the majority of it
and did this to the top and bottom surfaces. I added some exhaust stains
along the engine nacelles with thinned black paint and some minor paint
chipping to the props and walkway areas and some staining to the fuel and
oil fillers on the top of the wing. Finally I sprayed several light coats
of Testors Matt Coat The post shading I had added before had returned but
not in such a dramatic way. Oh well… and at last I was getting ready to
complete this big tan bird.
At this time I glued on the engine nacelles (makes painting much easier),
removed the masking from the canopies and assembled the machine guns with
etched ammo belts and sights. All pieces like gear doors and wheels
provided no problems whatsoever. The cockpit glazing fit perfectly, so
well in fact that I didn’t glue them on just so in future I can take them
off and look into the interior. For this reason I did not attach an
antenna wire but may do so later.
Well there you go. After two months and through using a whole host of
aftermarket items I have finished my Ju88. Some of the seams caused some
real nightmares but now that it is completed I am very happy with the
result especially the paint scheme which I think looks quite okay. After
building this monster I am going to reward myself with a couple of
Hasegawa 109s. Thanks for reading about my model.
Click the
thumbnails below to view larger images:
Model, Images and Text Copyright ©
2003 by Tim Both
Page Created 03 December, 2003
Last Updated
17 March, 2004
Back to
HyperScale Main Page |
 Home |
What's New |
Features |
Gallery |
Reviews |
Reference |
Forum |
Search
Home |
What's New |
Features |
Gallery |
Reviews |
Reference |
Forum |
Search