|
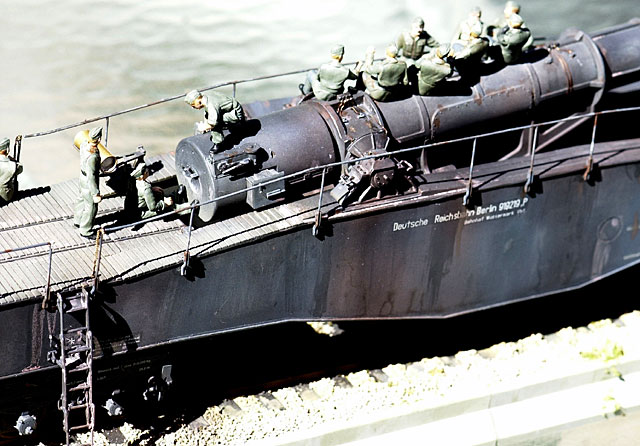
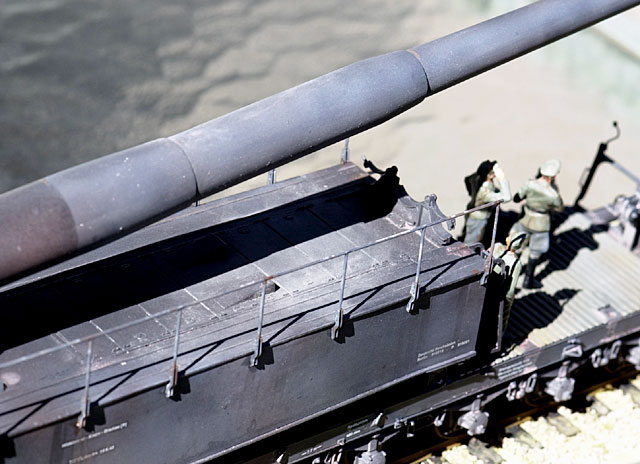
28cm K5(E) "Leopold"
by John Ellingson
|
|
|
K-5 "Leopold" |

HyperScale is proudly supported by Squadron
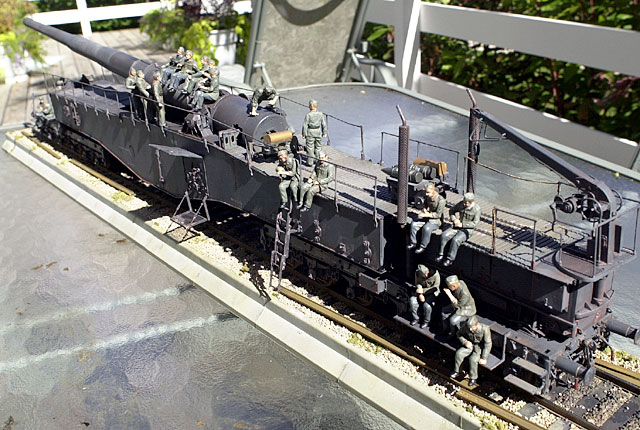
Here is Trumpeter's 1/35
scale K-5 "Leopold" railway gun. My model was obtained through Squadron
via my local hobby shop, Hobby Craft, in Madison, WI., where this model is
on display.
There are two models that will mark 2003 as a watershed year for the
plastic model industry – the Academy 1/32 FA-18 and the Trumpeter 1/35
K5-E. Both have advanced the state of the art to new levels and I believe
currently set the industry standard.
If you’ve ever wanted to know what is felt like to be the Krupp factory,
this is your chance.
As near as I could tell after about 35 hours of research, this kit is a
very accurate representation of the K5-E. While I could not find a
particular K5-E that this kit might represent, and I did see variations in
virtually all of the K5-Es (as one might expect for an object that really
was built one at a time and not on an assembly line) that could be seen in
photographs, this kit does seem to be very accurate.
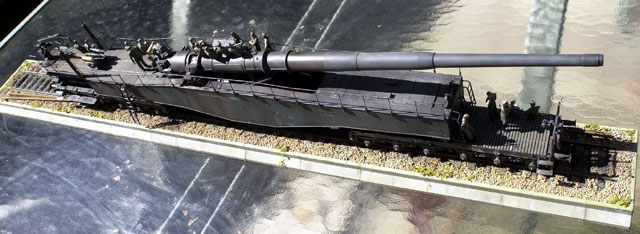
The only shortcoming that I could find was that the rounds produced for
the kit do not match the type of rifling portrayed in the barrel muzzle.
The rounds in the kit were the less common type and not the rounds with
rifled grooves that matched the barrel rifling in the kit.
The K5-E was built from 1936 onward throughout the war. They served along
the French coast, in Italy and on the Eastern front (moved from France).
In researching the model, I was inspired by the early review by Terry
Ashley that is available both at HyperScale and at the Perth Military
Modeling site. The Aussie, Terry Ashley, has turned the model review
process upside down for those of us in the right-side-up hemisphere with
his new review format, which includes images from the kit’s instructions.
Anyone considering attacking this project should be sure to access Terry’s
fine review of both the Dragon and Trumpeter kits.
I have been fortunate in my lifetime to spend considerable time around
large metal machinery and to spend twenty years living on a seacoast . I
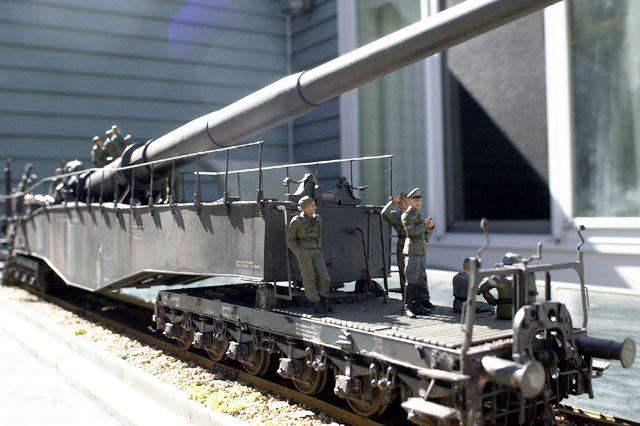
wanted to build a model that represented one of the K5-Es that was placed
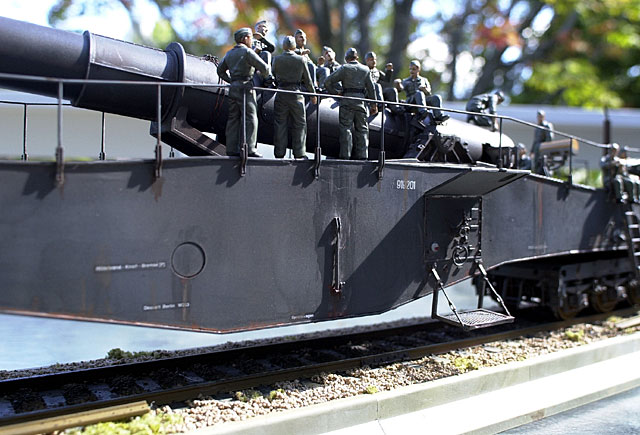
on the coast of France. I wanted to depict this behemoth late in its
lifecycle when the metal had taken on the patina and colors of an object
with years of exposure to the elements.
The K5-Es on the coast of France in 1944 could be up to eight years old
with over 4 years of exposure to salt air. Creating the impression of
metal from something plastic is part of the joy and challenge of building
armor models. I wanted this large model to visually carry the weight of
this massive piece of machinery.
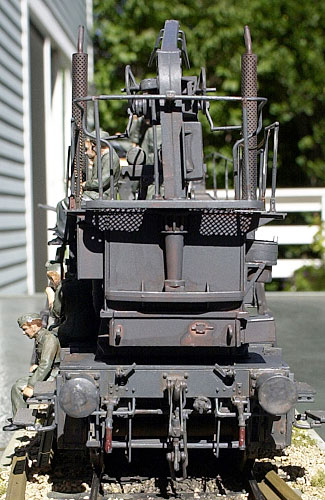
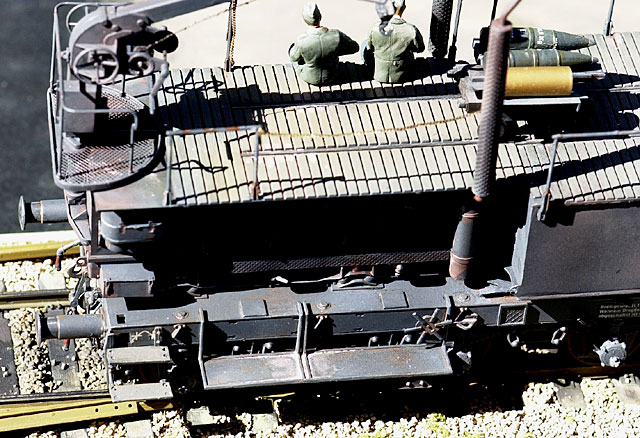
Metal machinery, like the K5-E, is built from plate, rolled and tube stock
and heavy castings and forgings. Many of the cast and forged parts have
seems. In finishing the metal parts the seems were typically lightly
grinded to remove sharp points and edges that could generate stress
points. In addition many subassemblies (such as the hoist) were assembled
from welded common metal shapes, like angles and channels. I constructing
the model I tried to preserve the seems on parts that were likely cast,
forged or made from welded stock.
This kit of over 1100
parts takes time. The parts are generally very cleanly cast and the
assembly sequence is well thought out and illustrated. However, there is a
problem I had not dealt with previously that required some backtracking.
Even though the fit is up to the highest industry standards, it does not
assure that the larger assemblies remain true and square. I had to break
and reform some joints to remove some torque in a couple of subassemblies.
The resulting torque that I had built in did not exhibit itself until I
discovered that the gun barrel was not aligned perfectly on the centerline
and the center section did not sit squarely on the for and aft truck
assemblies.
Unfortunately, the joints I had to bread were the only ones I used
cyanoacrylate on. I will build another one of these kits and will stick
with solvent type cement in the future. It will provide sufficient holding
support and provides a more flexible joint at the same time.
There are a number of small and fragile parts. No matter how careful you
are, prepare to lose and break some. I found myself scratch-building a
couple of the smaller parts that Scotty beamed up or my clumsiness broke.
I did follow the instruction sequence with no real variation and it all
worked well. However, I would caution builders to be certain with left and
right-handed parts as they are very similar and the instructions are not
always clear on differentiating these parts apart from their part number.
 I
used Floquil paints and Model Master Acrylics to paint this model. I also
used a good deal of denatured alcohol in the various washes that allowed
for rusted pigment to settle in those places gravity led them. I used four
different grays. I also layered four different colors for the wooden
duckboards. I
used Floquil paints and Model Master Acrylics to paint this model. I also
used a good deal of denatured alcohol in the various washes that allowed
for rusted pigment to settle in those places gravity led them. I used four
different grays. I also layered four different colors for the wooden
duckboards.
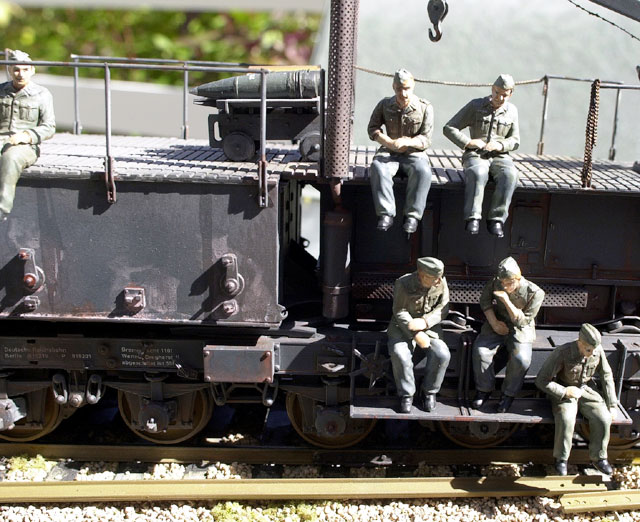
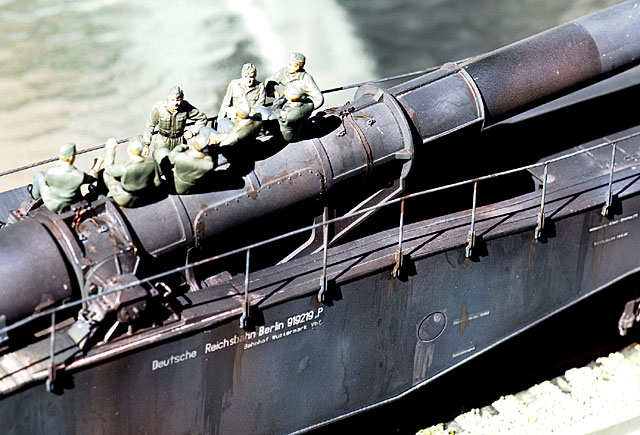
I used a ground graphite stick and a 2B soft pencil for the bare metal and
patina effect. I also used sparingly a silver colored pencil to indicate
areas of recent bare metal exposure. I used this most sparingly as salt
air tends to discolor bare metal in just a few days of exposure.

I did have some difficulty with the decals and could not get all of the
transfers to separate from the paper.
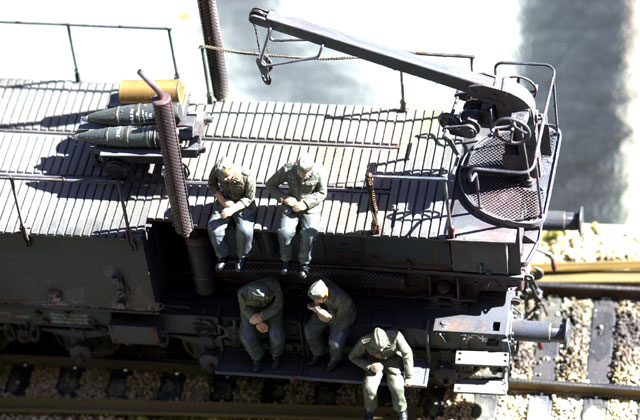
I supplemented the kit with model railroading ballast and greenery for the
base and the 23 figures are all from the Tamiya spares box.
This kit is for the
experienced and patient builder with lots of display space. I highly
recommend it as one of the most satisfying modeling experiences I have had
in over 50 years of model building. My congratulations to Trumpeter for
the courage to put such a model in the market and for producing a kit that
the average experienced modeler can build into a museum quality result.
I spent a total of 141 hours on this model and $128 USD for the model,
additional paint and supplies. This works out to $0.91 per hour for the
pleasure of building this model.
Click the
thumbnails below to view larger images:
Model, Images and Text Copyright ©
2003 by John Ellingson
Page Created 05 October, 2003
Last Updated
17 March, 2004
Back to
HyperScale Main Page |
 Home |
What's New |
Features |
Gallery |
Reviews |
Reference |
Forum |
Search
Home |
What's New |
Features |
Gallery |
Reviews |
Reference |
Forum |
Search